1. Introduction
Thank you for choosing the Gevi 12 Cup Programmable Drip Coffee Maker. This manual provides essential information for the safe operation, maintenance, and troubleshooting of your new coffee maker. Please read it thoroughly before first use and retain it for future reference.

Image: The Gevi 12 Cup Programmable Drip Coffee Maker, showcasing its sleek design and digital display, ready to brew coffee.
2. Components
Your Gevi coffee maker includes the following components:
- Main Coffee Maker Unit
- Glass Coffee Pot (Carafe)
- Coffee Scoop
- Permanent Filter
- User Manual (this document)

Image: An illustration showing the individual components of the Gevi Drip Coffee Maker, including the filter, filter basket, glass carafe, and coffee scoop, alongside the main unit.
3. Setup
- Unpacking: Carefully remove all packaging materials from the coffee maker.
- Protective Film: Remove the protective film from the control panel before use.
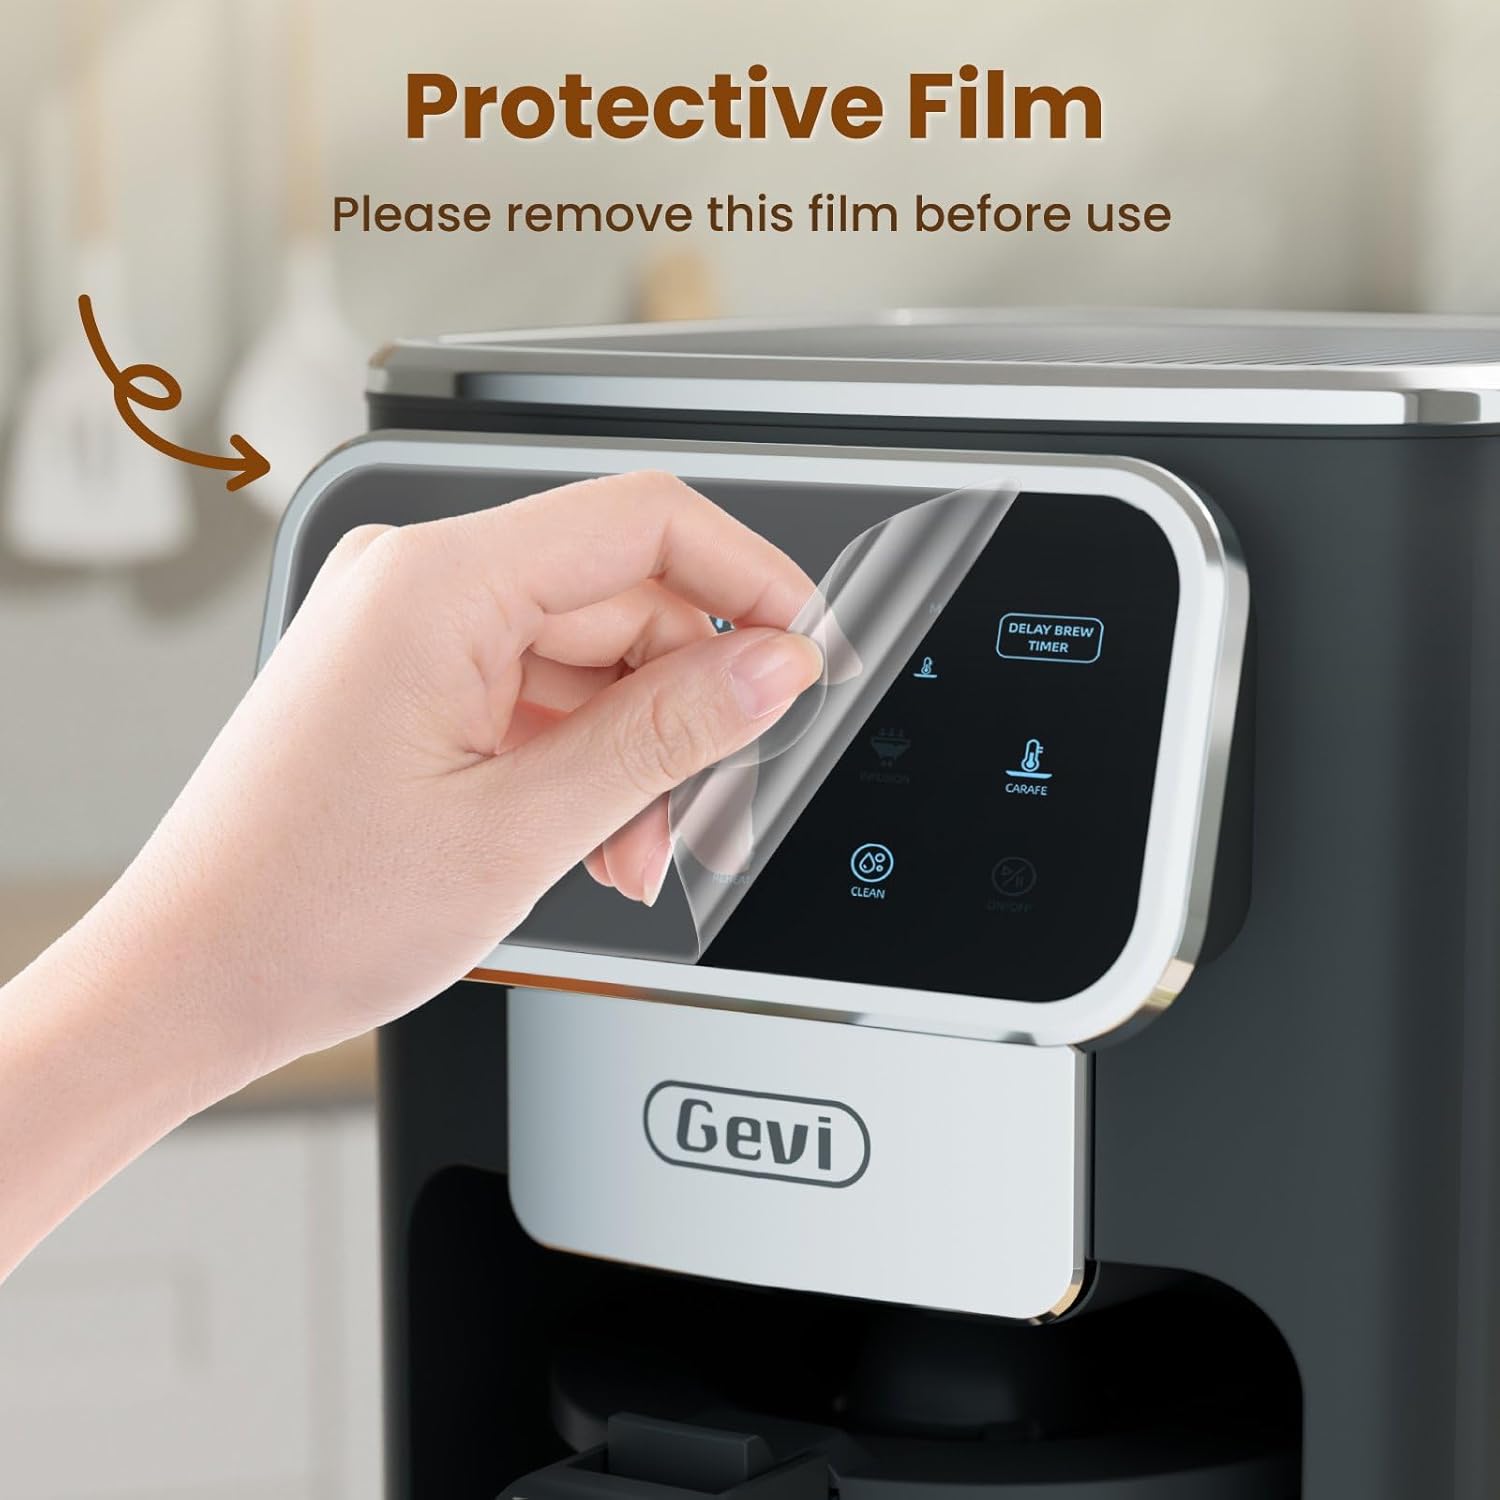
Image: A hand gently peeling off the protective film from the touchscreen control panel of the coffee maker.
- Initial Cleaning: Before first use, wash the permanent filter, glass carafe, and coffee scoop with warm, soapy water. Rinse thoroughly.
- First Brew Cycle (Cleaning): Fill the water reservoir to the maximum level with clean water. Do not add coffee grounds. Run a full brew cycle to clean the internal components. Discard the water.
4. Operating Instructions
4.1 Setting the Clock
- Press the "ON/OFF" button to turn on the coffee maker.
- When the timer display blinks, press the "Hour" and "Minute" buttons to adjust the time.
- Press the "ON/OFF" button again to confirm the clock time.
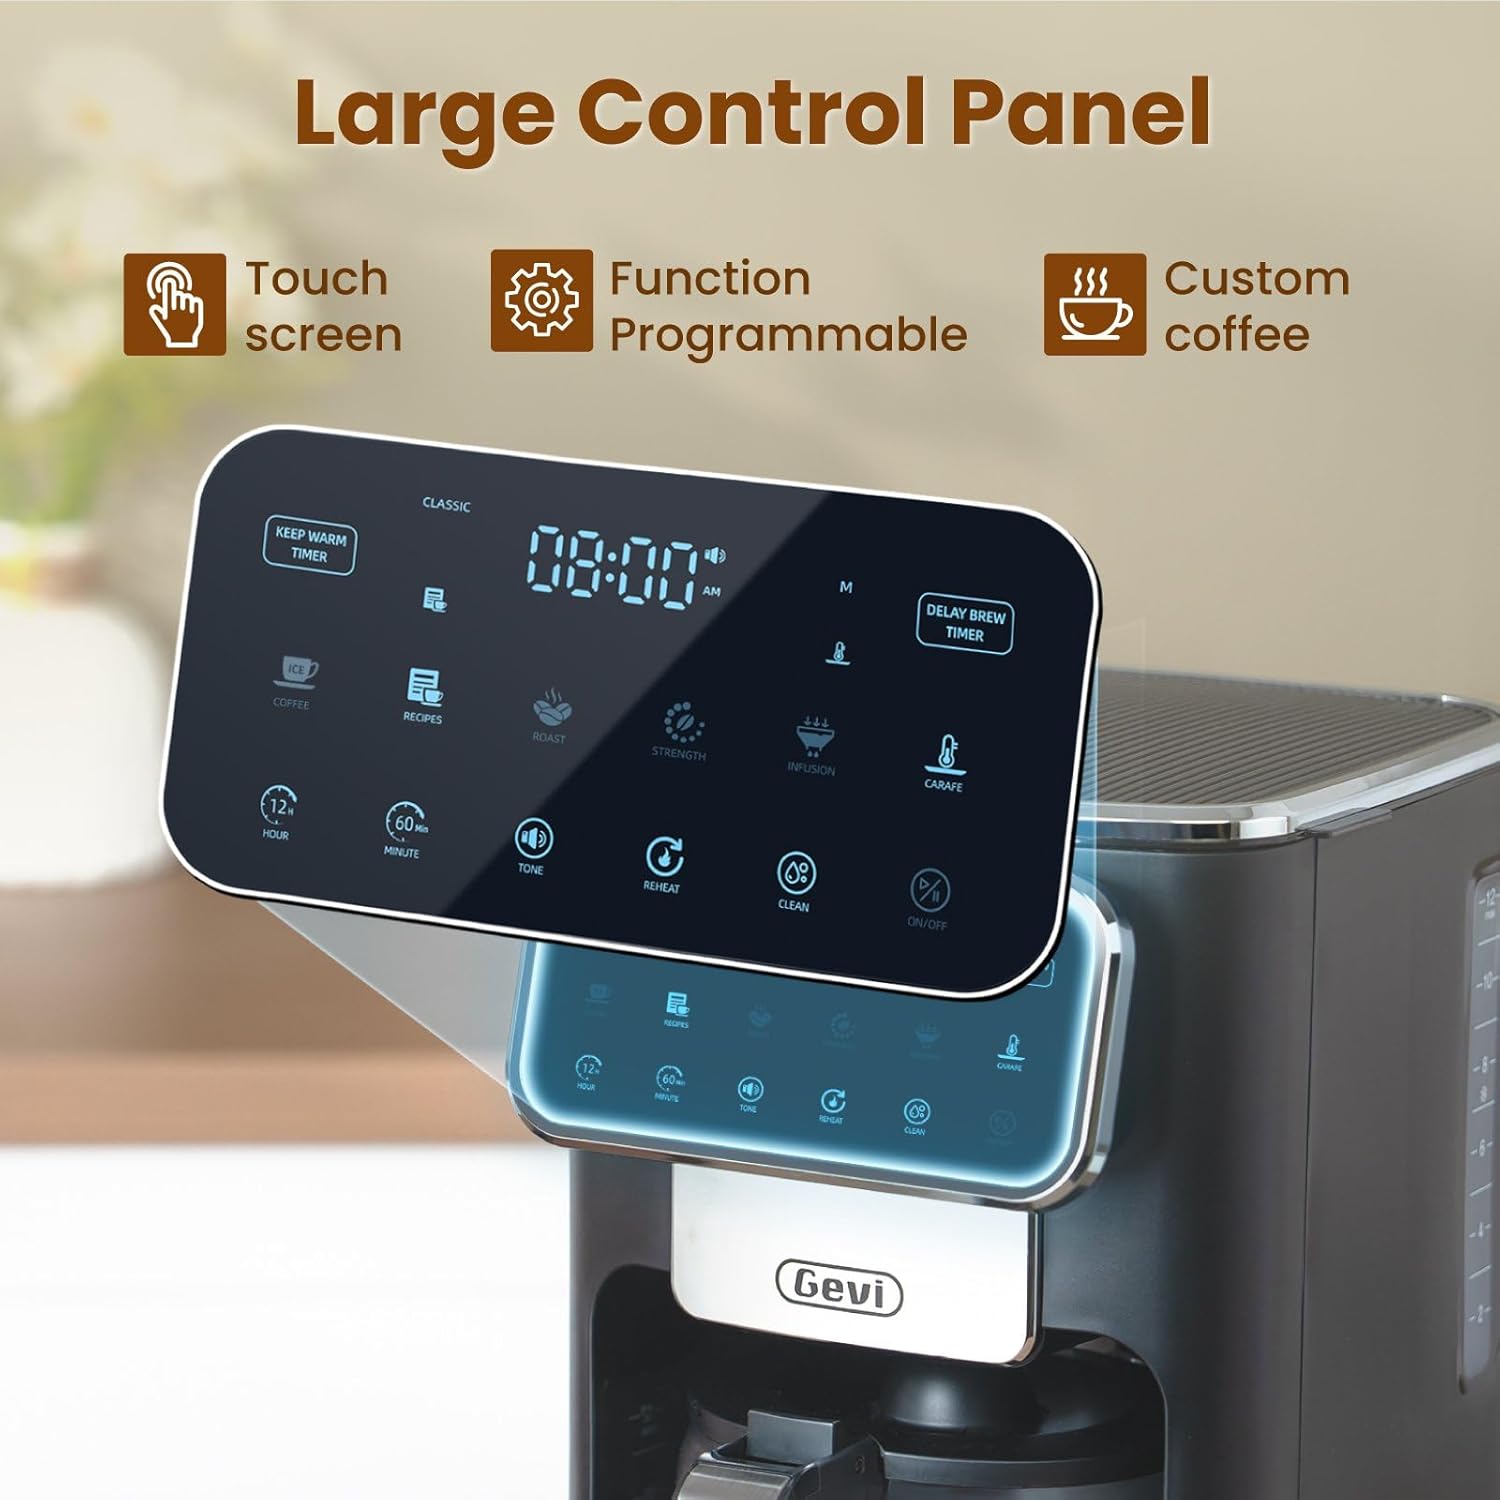
Image: A detailed view of the coffee maker's large touch control panel, showing various settings and the digital clock display.
4.2 Setting the Delay Brew Timer
- After setting the current clock time, press the "Delay Brew Timer" button.
- When the timer display blinks, use the "Hour" and "Minute" buttons to set your desired delay brewing time.
- Press the "Delay Brew Timer" button again to confirm the delay brewing time.
- Note: Pressing the "ON/OFF" button after setting the delay brew timer will cancel the delay brew setting.
- The machine will automatically begin brewing at the preset time.
4.3 Brewing Coffee
- Fill Water Reservoir: Open the top lid and pour fresh, cold water into the water reservoir. Use the water level markings on the side of the coffee maker as a guide.

Image: A hand pouring water into the transparent water tank of the coffee maker, showing the water level indicators.
- Add Coffee Grounds: Place the permanent filter (or a paper filter) into the filter basket. Add your desired amount of ground coffee using the provided scoop. Close the top lid.

Image: A hand scooping coffee grounds into the reusable filter basket, which is placed inside the coffee maker.
- Select Brew Strength: Use the touch screen to select your preferred coffee strength: Classic, Intense, or Rich.

Image: Four different coffee preparations: Classic, Intense, Rich, and Iced, demonstrating the various brewing strengths and options.
- Start Brewing: Press the "ON/OFF" button to begin the brewing process. The coffee maker features a pre-infusion system for optimal flavor extraction.

Image: A cutaway diagram showing the pre-infusion process, where water is evenly distributed over coffee grounds for deep extraction.
- Keep Warm Function: The coffee maker includes an adjustable keep-warm timer, typically ranging from 5 minutes to 3 hours and 59 minutes, to maintain coffee temperature after brewing.

Image: The coffee maker's warming plate, glowing red, indicating the keep-warm function is active, with a cup of hot coffee nearby.
4.4 Iced Coffee Function
To brew iced coffee, select the "Ice" option on the touch screen. This function is designed to provide a concentrated brew suitable for pouring over ice, ensuring a flavorful iced coffee experience.
4.5 Video Guide
For a visual demonstration of the coffee maker's features and operation, please watch the official product video below:
Video: An official product video demonstrating the Gevi 12 Cup Programmable Drip Coffee Maker's features and brewing process.
5. Maintenance and Cleaning
Regular cleaning ensures optimal performance and extends the life of your coffee maker.
- Filter and Carafe: The permanent filter and glass carafe can be easily cleaned with warm water and mild soap. Rinse thoroughly after washing.
- Exterior: Wipe the exterior of the coffee maker with a damp cloth. Do not immerse the main unit in water.
- Descaling: Periodically descale your coffee maker to remove mineral buildup. Refer to a general coffee maker descaling guide or contact customer support for specific instructions.
6. Troubleshooting
| Problem | Possible Cause | Solution |
|---|---|---|
| Coffee maker does not turn on. | Not plugged in; power outage. | Ensure the power cord is securely plugged into a working outlet. Check your home's circuit breaker. |
| Clock loses time or runs fast. | Internal clock mechanism variation. | Reset the clock periodically as needed. If the issue persists significantly, contact customer support. |
| Brewing less than expected amount of coffee. | Water reservoir not filled sufficiently; clogged filter/drip system; carafe not properly seated. | Ensure water reservoir is filled to the desired level. Clean the filter and drip system. Verify the carafe is correctly positioned on the warming plate. |
| Coffee tastes weak or too strong. | Incorrect coffee-to-water ratio; wrong grind size; incorrect strength setting. | Adjust the amount of coffee grounds. Use a medium grind for drip coffee. Select a different brew strength setting (Classic, Intense, Rich). |
7. Specifications
| Feature | Detail |
|---|---|
| Brand | Gevi |
| Model Name | DCMA0-BK0A1 |
| Capacity | 12 Cups (60 oz / 1.8 L) |
| Color | Black |
| Product Dimensions (D x W x H) | 12.1" x 8" x 13.8" |
| Weight | 7.48 Pounds |
| Special Features | Iced Coffee, Keep Warm Timer, Permanent Filter, Programmable, Touchscreen |
| Coffee Maker Type | Drip Coffee Machine |
| Operation Mode | Fully Automatic |
| Wattage | 1100 watts |
| Voltage | 120 Volts |
| Human Interface Input | Touchscreen |
| Coffee Input Type | Ground coffee |
| Power Source | AC adapter |
| Dishwasher Safe | No (for main unit) |

Image: The Gevi coffee maker with its physical dimensions (depth, width, height) clearly indicated.
8. Warranty and Support
Gevi values your satisfaction. Every Gevi product purchased via official or authorized channels includes a 12-month warranty and lifetime technical support.
If you encounter any issues with your Gevi coffee maker, please refer to the operation videos on the official Gevi store or contact customer service directly for assistance.
For further support, visit the Gevi Store on Amazon.


