
Sharper Image Planetarium Projector
Sharper Image Planetarium Projector User Manual
Model: Planetarium Projector
Introduction
Welcome to the world of astronomy with your new Sharper Image Planetarium Projector. This manual provides detailed instructions for setting up, operating, and maintaining your device to ensure optimal performance and enjoyment. Please read this manual thoroughly before use.
The Planetarium Projector is designed to project accurate star patterns on your ceiling or wall, allowing you to explore over 8,000 stars and 60 constellations. It features adjustable speeds to simulate Earth's rotation, a sleep timer, and built-in Bluetooth speakers for an immersive experience.
Important Safety Information
- Keep the device away from water or excessive moisture.
- Do not attempt to disassemble or repair the unit yourself. Refer all servicing to qualified personnel.
- Use only the specified power adapter or batteries.
- Avoid direct eye exposure to the projector lens.
- Keep out of reach of small children.
Package Contents
Please check the package contents to ensure all items are present:
- Sharper Image Planetarium Projector Unit
- Star Disks (e.g., Northern Hemisphere with stick figures, Southern Hemisphere without stick figures)
- Power Adapter
- Instruction Manual (this document)
Product Overview
Familiarize yourself with the various parts of your Planetarium Projector.
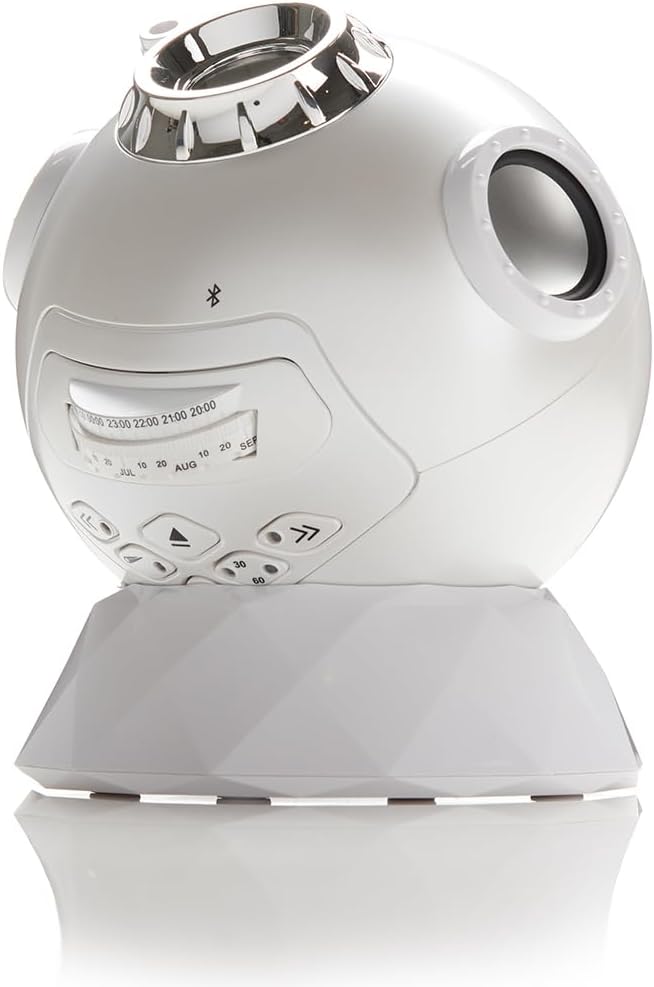
Figure 1: Front view of the Planetarium Projector, highlighting the projection lens and control buttons.

Figure 2: Side view of the projector, illustrating the focus adjustment ring and integrated speaker.
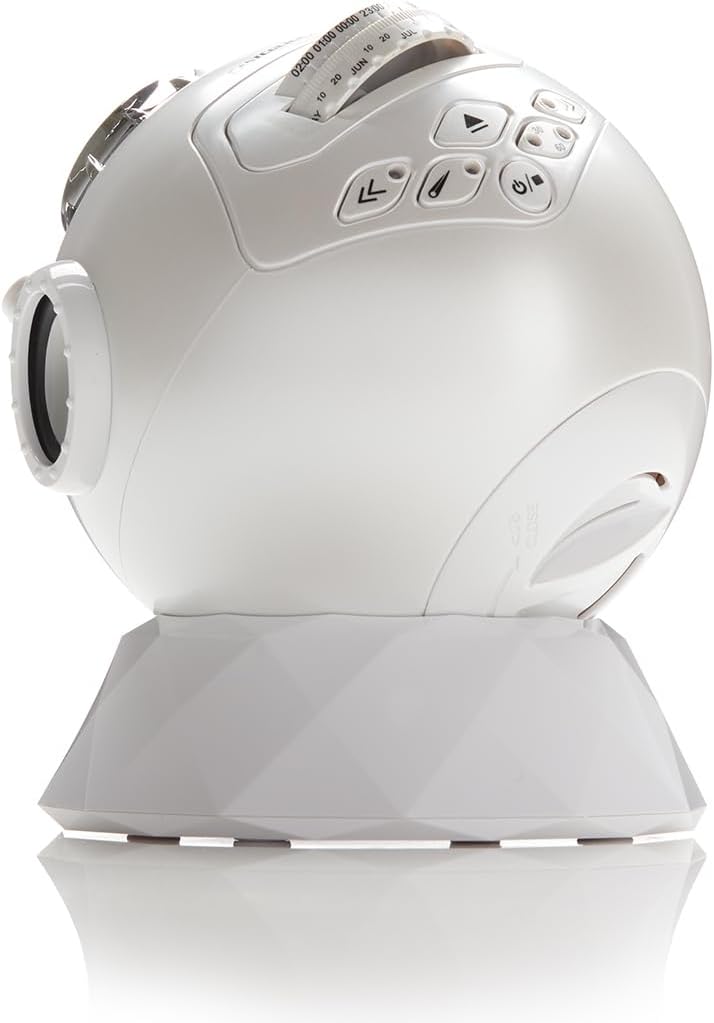
Figure 3: Rear view of the projector, indicating the slot for inserting star disks and the power input port.
Setup
- Power Connection: Connect the provided power adapter to the DC input port on the projector and plug it into a standard electrical outlet.
- Insert Star Disk: Gently slide one of the star disks into the designated disk slot on the side of the projector until it clicks into place. Ensure the disk is oriented correctly for projection.
- Placement: Place the projector on a stable, flat surface in a darkened room. For best results, position it approximately 6-8 feet from the projection surface (ceiling or wall).
Operating Instructions
Basic Operation
- Power On/Off: Press the Power button to turn the projector on or off.
- Adjust Focus: Rotate the Focus Ring around the projection lens until the stars appear sharp and clear on the projection surface.
- Change Star Disk: To change the projected constellation, gently pull out the current star disk from its slot and insert a new one.
Advanced Features
- Setting Date and Time: Use the Date/Time adjustment dials on the control panel to set the desired month, day, and hour. This will display the accurate star patterns for that specific time.
- Adjusting Rotation Speed: Press the Speed buttons to adjust the speed at which the star field rotates, simulating Earth's rotation.
- Bluetooth Speaker:
- Ensure the projector is powered on.
- Activate Bluetooth on your mobile device.
- Search for "Sharper Image Projector" (or similar name) in your device's Bluetooth settings.
- Pair and connect. You can now play audio through the projector's built-in speakers.
- Sleep Timer: Press the Timer button (e.g., 30/60 minutes) to set the projector to automatically turn off after a specified duration.
Maintenance
- Cleaning: Use a soft, dry cloth to clean the exterior of the projector. For the lens, use a lens cleaning cloth specifically designed for optics. Do not use abrasive cleaners or solvents.
- Storage: When not in use, store the projector in a cool, dry place, away from direct sunlight and extreme temperatures. Keep the star disks in their protective cases to prevent scratches.
Troubleshooting
| Problem | Possible Cause | Solution |
|---|---|---|
| Projector does not turn on. | No power connection. | Ensure power adapter is securely plugged in. |
| Image is blurry. | Focus not adjusted; Projector too far/close to surface. | Rotate the focus ring until the image is clear. Adjust the distance from the projection surface. |
| Bluetooth not connecting. | Projector not in pairing mode; Device too far; Interference. | Ensure projector is on. Move device closer. Turn off other Bluetooth devices. |
| Star disk not projecting correctly. | Disk inserted incorrectly; Disk is dirty or scratched. | Remove and re-insert the disk, ensuring correct orientation. Clean the disk with a soft cloth. |
Specifications
- Brand: Sharper Image
- Model: Planetarium Projector
- Display Type: Holographic
- Image Contrast Ratio: High
- Special Features: Built-in Bluetooth, Adjustable Star Projection Speeds, Sleep Timer
- ASIN: B0BQ5MNT1B
- UPC: 810022141878
- Manufacturer: Camelot SI, LLC
- First Available: November 20, 2020
Warranty and Support
For product support, troubleshooting assistance, or information regarding warranty coverage, please contact Sharper Image customer service or visit their official website. Keep your purchase receipt for warranty claims.
While specific warranty details are not provided in this manual, Sharper Image typically offers support for their products. You may also consider additional protection plans available at the time of purchase for extended coverage.
For more information, you can visit the Sharper Image Store on Amazon.
Related documentsPlanetarium Projector


Ask a question about this manual
Ask about setup, troubleshooting, compatibility, parts, safety, or missing instructions. Manuals+ will review the question and use this page’s manual context to help answer it.