
Product Overview
The Cooler Master TD500 Mesh V2 White Mid-Tower Case combines aesthetic design with high-performance cooling. Its distinctive polygonal mesh front panel, complemented by three pre-installed 120mm ARGB fans, offers both visual appeal and efficient airflow. This case is designed to provide a streamlined building experience with features like USB 3.2 Gen 2 Type C support and tool-free access to internal components, ensuring optimal performance and ease of use for PC enthusiasts.
Key Features:
- Polygonal FineMesh: Features a 3D contour for high airflow and effective dust filtration.
- USB 3.2 Gen 2 Type C Support: Integrated into the I/O panel for fast data transmission.
- Versatile Cooling Options: Supports up to seven 120mm fans and dual 360mm radiators for extensive cooling.
- Tool-Free Crystalline TG Side Panel: Provides quick and easy access to internal components.
- Addressable RGB Fans: Three pre-installed 120mm ARGB fans with frosted blade design for vibrant lighting effects.
Setup and Installation
This section provides instructions for setting up your Cooler Master TD500 Mesh V2 White case and installing essential components. Ensure you have all necessary tools and components before beginning.
1. Preparing the Case
Begin by carefully unboxing the case. The TD500 Mesh V2 features a tool-free crystalline tempered glass side panel for easy access. Gently pull the panel to remove it.

Figure 1: The Cooler Master TD500 Mesh V2 White Mid-Tower Case with its side panel removed, revealing the spacious interior for component installation.
The top panel is also removable for enhanced access during cooling solution assembly. It features a magnetic dust filter that can be easily lifted off.
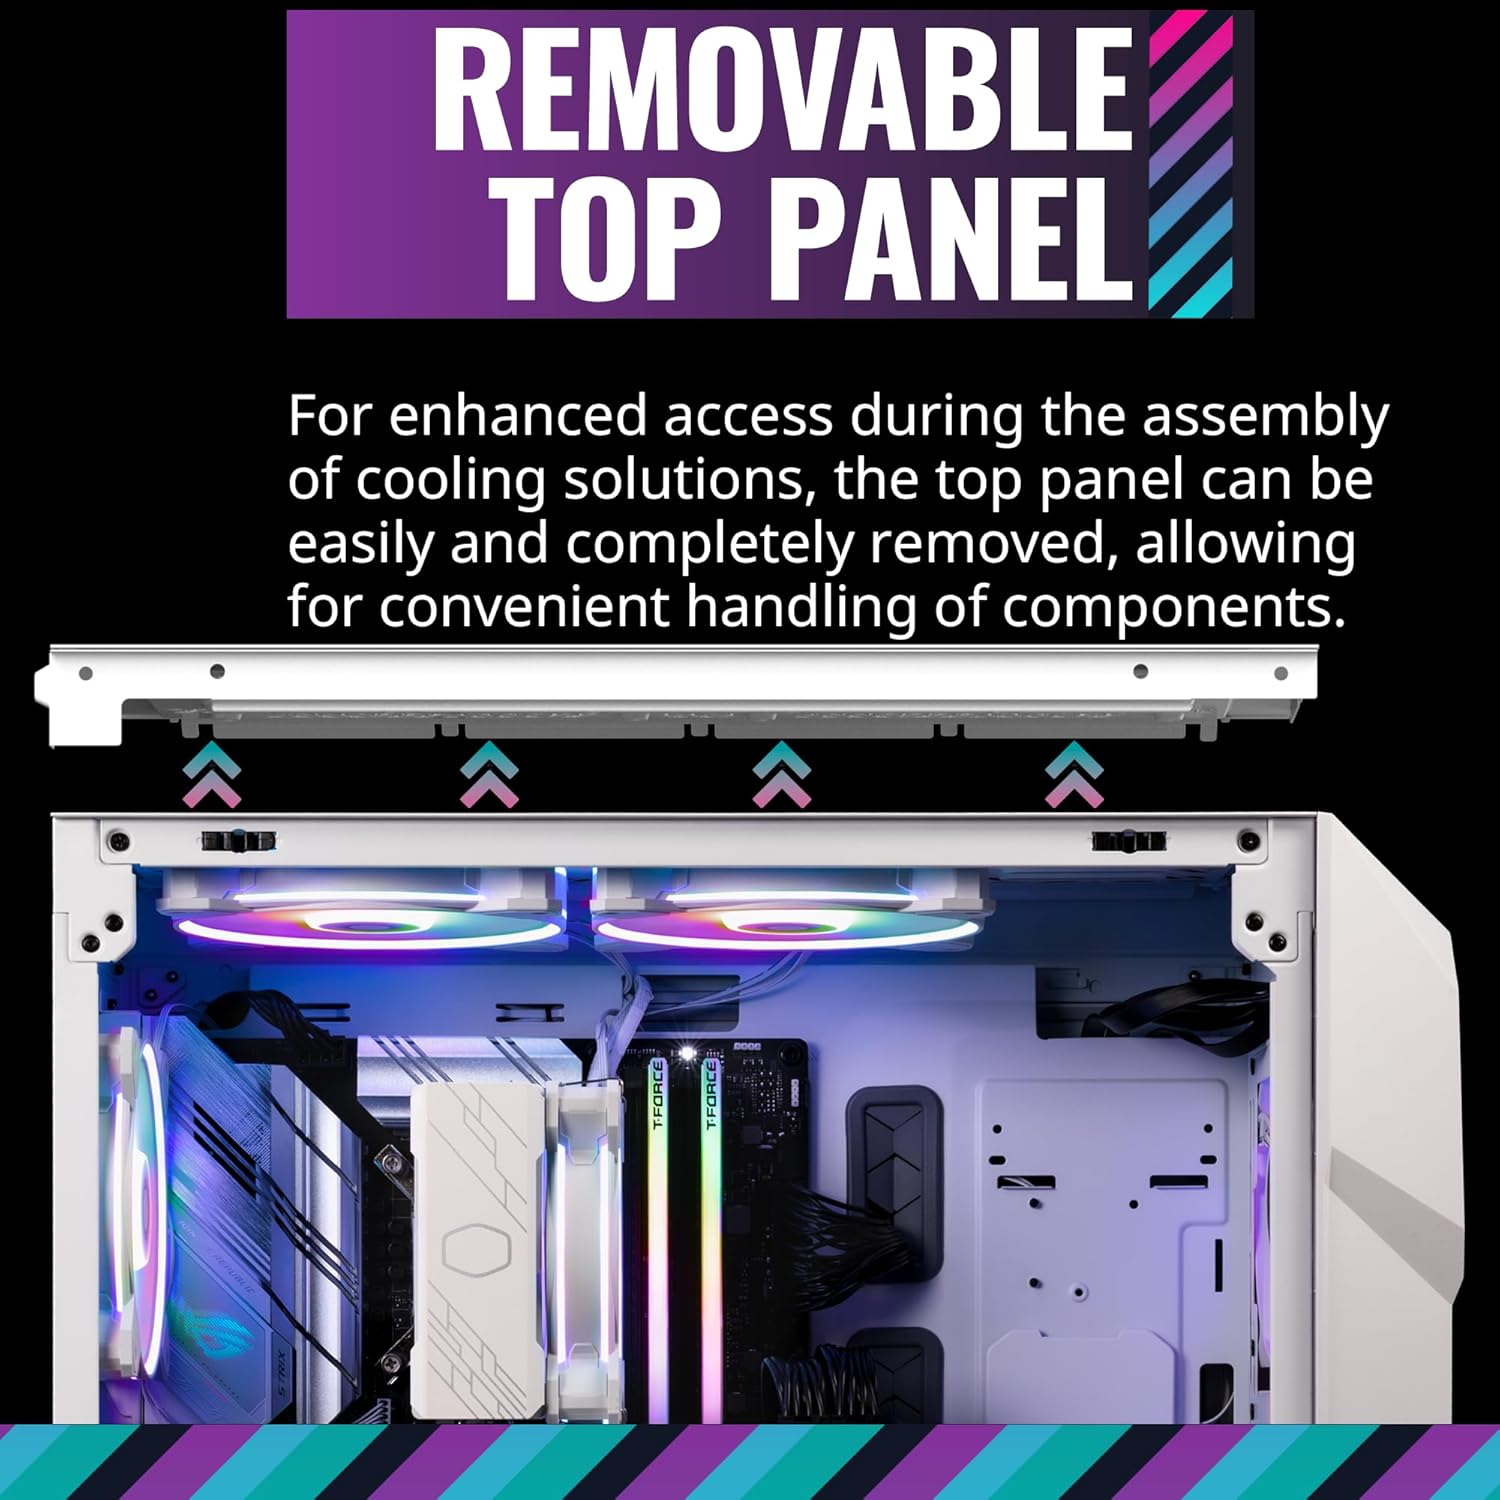
Figure 2: The removable top panel of the case, designed for convenient access to the top fan/radiator mounts.
2. Motherboard Installation
The case supports Mini ITX, Micro ATX, ATX, SSI CEB, and E-ATX motherboards. Align your motherboard with the standoffs inside the case and secure it with screws. Ensure proper cable routing through the rubber grommets for a clean build.

Figure 3: Internal view highlighting the spacious interior and compatibility with various motherboard form factors (Mini-ITX, Micro-ATX, ATX).
3. Power Supply Unit (PSU) Installation
Install your PSU into the dedicated compartment at the bottom of the case. The TD500 Mesh V2 features a removable PSU cover, allowing you to showcase or conceal your PSU as desired. Route the necessary power cables through the designated cutouts.

Figure 4: The removable PSU cover, offering flexibility for displaying or hiding the power supply unit.
4. Storage Drive Installation
The case provides options for both 2.5-inch SSDs and 3.5-inch HDDs. Utilize the dedicated mounting points behind the motherboard tray for 2.5-inch drives and the drive cages at the bottom for 3.5-inch drives.
5. Graphics Card (GPU) Installation
Install your graphics card into the appropriate PCIe slot on your motherboard. The case accommodates GPUs up to 410mm in length, providing ample clearance for most modern cards.

Figure 5: Diagram illustrating maximum component clearances, including GPU length (410mm) and CPU cooler height (165mm).
6. Cooling System Setup
The TD500 Mesh V2 comes with three pre-installed 120mm ARGB fans at the front. Additional fans and radiators can be installed at the top and rear. The case supports up to seven 120mm fans and dual 360mm radiators.

Figure 6: Overview of versatile cooling options, showing support for various fan and radiator sizes.
Connect the ARGB fans to the included ARGB/PWM hub located behind the motherboard tray. This hub simplifies cable management and allows control of fan speed and lighting effects.

Figure 7: The integrated ARGB/PWM hub for centralized control of fan lighting and speed.
7. Front I/O Panel Connections
Connect the front I/O panel cables (USB 3.2 Gen 2 Type C, USB 3.0, audio, power, reset, ARGB control) to their respective headers on your motherboard. Refer to your motherboard manual for specific header locations.

Figure 8: Close-up of the front I/O panel, featuring USB 3.2 Gen 2 Type C, USB 3.0 ports, and ARGB control button.
Operating Instructions
Once all components are installed and connected, replace the side and top panels. Ensure all screws are tightened (for the solid side panel) and the magnetic dust filter is properly seated.
- Power On: Press the illuminated power button on the front I/O panel to start your system.
- ARGB Control: Use the dedicated ARGB control button on the front I/O panel to cycle through various lighting modes and colors for the pre-installed fans. For advanced control, connect the ARGB hub to a compatible motherboard header and use the motherboard's software.
- USB Connectivity: Utilize the USB 3.0 and USB 3.2 Gen 2 Type C ports for high-speed data transfer and peripheral connectivity.
Maintenance
Regular maintenance helps ensure optimal performance and longevity of your PC components. The TD500 Mesh V2 is designed for easy cleaning.
- Dust Filters: The case features a polygonal mesh front panel and a magnetic top dust filter, both designed for easy removal and cleaning. Regularly remove and clean these filters to prevent dust buildup and maintain optimal airflow.
- Interior Cleaning: Periodically open the side panel and use compressed air to remove dust from internal components, especially fans and heatsinks.
Troubleshooting
If you encounter issues with your Cooler Master TD500 Mesh V2 case, consider the following common troubleshooting steps:
- No Power:
- Ensure the PSU is properly connected to the wall outlet and the power switch on the PSU is in the "ON" position.
- Verify all power cables (24-pin ATX, CPU, GPU) are securely connected to the motherboard and components.
- Check the front panel power switch connection to the motherboard.
- Fans Not Spinning / ARGB Not Lighting Up:
- Confirm that the fans are correctly connected to the ARGB/PWM hub and the hub is receiving power (SATA power).
- Ensure the ARGB hub is connected to a compatible ARGB header on your motherboard if you intend to control lighting via software.
- Try cycling through ARGB modes using the front panel button.
- USB Ports Not Functioning:
- Verify that the USB 3.0 and USB 3.2 Gen 2 Type C headers from the front panel are correctly connected to your motherboard.
- Overheating:
- Ensure all case fans are spinning and oriented correctly for optimal airflow (front intake, rear/top exhaust).
- Clean dust filters and internal components regularly.
- Verify CPU cooler and GPU cooler are properly installed and functioning.
For further assistance, please refer to the official Cooler Master support resources.
Specifications
| Feature | Detail |
|---|---|
| Brand | Cooler Master |
| Model Name | TD500 Mesh V2 White |
| Item Model Number | TD500V2-WGNN-S00 |
| Case Type | Mid Tower |
| Color | White |
| Material | Alloy Steel, Mesh, Plastic, Tempered Glass |
| Product Dimensions (LxWxH) | 16.65 x 8.27 x 19.68 inches |
| Item Weight | 16.94 pounds |
| Motherboard Compatibility | Mini ITX, Micro ATX, ATX, SSI CEB, E-ATX |
| Number of USB 3.0 Ports | 1 |
| Number of USB 2.0 Ports | 1 |
| Cooling Method | Air, Fan Cooler |
| Light Color | ARGB |
| Power Supply Mounting Type | Bottom Mount |
Warranty and Support
Cooler Master products are designed for reliability and performance. For detailed warranty information and support, please refer to the official Cooler Master website or the provided documentation.
- Official User Guide: For comprehensive instructions and diagrams, download the official user guide: Cooler Master TD500 Mesh V2 User Guide (PDF)
- Online Support: Visit the Cooler Master Store on Amazon or their official website for FAQs, drivers, and customer service contact information.
Always ensure you are using genuine Cooler Master parts and following recommended procedures for optimal product performance and to maintain warranty validity.


