1. Important Safety Instructions
Read all instructions carefully before using the appliance. Keep this manual for future reference.
- Always ensure the voltage on the rating label corresponds to your mains voltage.
- Do not immerse the appliance, cord, or plug in water or other liquids.
- This appliance is not intended for use by persons (including children) with reduced physical, sensory, or mental capabilities, or lack of experience and knowledge, unless they have been given supervision or instruction concerning use of the appliance by a person responsible for their safety.
- Children should be supervised to ensure that they do not play with the appliance.
- Unplug from the outlet when not in use and before cleaning. Allow to cool before putting on or taking off parts, and before cleaning the appliance.
- Do not operate any appliance with a damaged cord or plug, or after the appliance malfunctions or has been damaged in any manner.
- Do not use outdoors.
- Do not let the cord hang over the edge of a table or counter, or touch hot surfaces.
- Avoid contact with moving parts.
- Do not use attachments not recommended by the manufacturer.
- Do not place on or near a hot gas or electric burner, or in a heated oven.
- Ensure the lid is securely locked in place before operation.
- Do not store explosive substances such as aerosol cans with a flammable propellant in this appliance.
2. Product Overview
The Nedis KAIM600CWT is an automatic ice cream maker designed for home use. It features a built-in compressor, eliminating the need for pre-freezing the bowl.
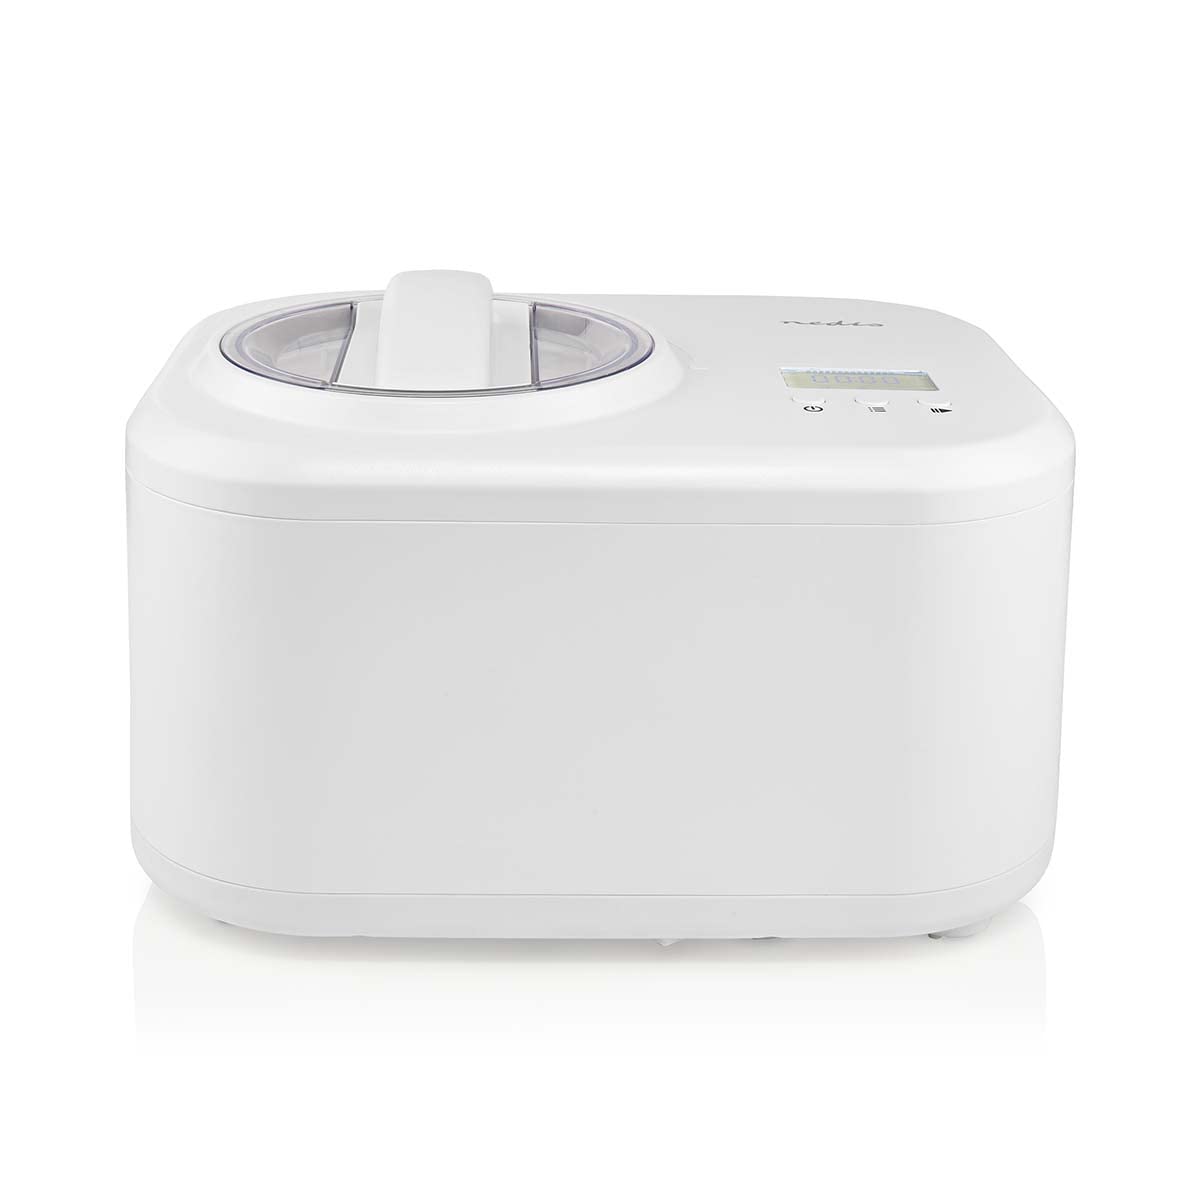
Image: Nedis KAIM600CWT Ice Cream Maker, showing the main unit with control panel and lid.
Components
- Main Unit with Compressor
- Removable Ice Cream Bowl
- Mixing Paddle
- Transparent Lid with Ingredient Opening
- Control Panel (LED display, Power button, Menu button, Time adjustment buttons)
- Measuring Cup (accessory)
- Spatula (accessory)

Image: Top view of the ice cream maker, illustrating the lid, control panel, and included accessories like the mixing paddle, measuring cup, and spatula.

Image: The removable metal ice cream bowl, designed for easy cleaning and efficient freezing.
3. Setup
- Unpack: Carefully remove all packaging materials and ensure all components are present.
- Clean: Before first use, wash the removable ice cream bowl, mixing paddle, lid, measuring cup, and spatula in warm soapy water. Rinse thoroughly and dry completely. Wipe the main unit with a damp cloth.
- Assemble: Place the clean, dry ice cream bowl into the main unit. Insert the mixing paddle into the center of the bowl, ensuring it is properly seated. Place the transparent lid onto the main unit and twist to lock it in place.
- Position: Place the appliance on a stable, flat, heat-resistant surface, ensuring adequate ventilation around the unit.
- Connect Power: Plug the power cord into a grounded electrical outlet. The display will illuminate.
4. Operating Instructions
This ice cream maker does not require pre-freezing the bowl, thanks to its built-in compressor.
- Prepare Ingredients: Prepare your ice cream mixture according to your recipe. Ensure the mixture is chilled (refrigerated) for best results, but not frozen.
- Add Ingredients: With the appliance assembled and plugged in, pour the chilled ice cream mixture through the ingredient opening in the transparent lid. Do not fill above the MAX fill line indicated on the bowl.
- Select Mode: Press the 'Menu' button to cycle through the available modes (e.g., Ice Cream, Cooling Only, Mixing Only). Select the 'Ice Cream' mode for standard ice cream preparation.
- Set Time: Use the '+' and '-' buttons to adjust the desired operating time. For most ice cream recipes, 40-60 minutes is typical. Refer to your recipe for specific timing.
- Start Operation: Press the 'Power' button to start the ice cream making process. The mixing paddle will begin to rotate, and the compressor will activate to cool the mixture.
- Monitor Progress: You can observe the ice cream being made through the transparent lid.
- Add Mix-ins: If your recipe calls for adding solid ingredients like chocolate chips, nuts, or fruit, add them during the last 5-10 minutes of the churning cycle through the ingredient opening.
- Completion: The machine will automatically stop when the set time has elapsed. A beep may sound to indicate completion.
- Keep Cool Function: After the ice cream is ready, the machine will automatically activate a 'Keep Cool' function for up to 1 hour, maintaining the ice cream's consistency.
- Serve: Unplug the appliance. Remove the lid and the mixing paddle. Use the provided spatula or a plastic/wooden spoon to scoop the ice cream from the bowl. Avoid using metal utensils to prevent scratching the bowl.
5. Cleaning and Maintenance
Regular cleaning ensures optimal performance and longevity of your ice cream maker.
- Unplug: Always unplug the appliance from the power outlet before cleaning.
- Disassemble: Remove the lid, mixing paddle, and ice cream bowl from the main unit.
- Wash Removable Parts: Wash the ice cream bowl, mixing paddle, lid, measuring cup, and spatula in warm, soapy water. Rinse thoroughly and dry completely with a soft cloth. These parts are generally not dishwasher safe unless specified otherwise in the product packaging.
- Clean Main Unit: Wipe the exterior of the main unit with a soft, damp cloth. Do not immerse the main unit in water or any other liquid. Do not use abrasive cleaners or scouring pads, as they may damage the surface.
- Storage: Ensure all parts are completely dry before reassembling or storing the appliance. Store in a cool, dry place.
6. Troubleshooting
| Problem | Possible Solution |
|---|---|
| Appliance does not turn on. | Check if the power cord is securely plugged into a working electrical outlet. Ensure the lid is correctly locked in place. |
| Mixing paddle does not rotate. | Ensure the mixing paddle is correctly inserted into the motor shaft. Check if the ice cream mixture is too thick or frozen, which can impede rotation. |
| Ice cream is not firm enough. | Ensure ingredients were chilled before adding to the machine. Increase the churning time. The ambient room temperature may be too high; operate in a cooler environment. |
| Ice cream is too hard. | This can happen if the ice cream is left in the machine for too long after completion or stored in a very cold freezer. Allow it to soften slightly before serving. |
| Loud noise during operation. | Ensure the appliance is on a stable, flat surface. Check if the mixing paddle or bowl is properly seated. If the noise persists and seems abnormal, discontinue use and contact support. |
7. Specifications
| Feature | Specification |
|---|---|
| Model Number | KAIM600CWT |
| Brand | NEDIS |
| Capacity | 1.0 Liters |
| Material | Plastic (housing), Metal (bowl) |
| Color | White |
| Operation Mode | Automatic (with built-in compressor) |
| Product Dimensions (L x W x H) | 13.78 x 10.24 x 8.66 inches |
| Item Weight | 18 pounds (approx. 8.18 kg) |
| Features | No pre-freezing, 60-minute preparation, 1-hour keep cool function, removable bowl |
8. Warranty and Support
This product is covered by a manufacturer's warranty. For specific warranty terms and conditions, please refer to the documentation provided with your purchase or contact Nedis customer support.
If you encounter any issues or require technical assistance, please contact your retailer or the official Nedis support channels. Keep your proof of purchase for warranty claims.


