
1. Introduction and Overview
The SINOTIMER TM610 is a versatile programmable digital timer switch designed for precise control of various electrical appliances and systems. It allows for automated power ON/OFF cycles based on pre-set weekly or daily schedules, enhancing convenience and energy efficiency. Its compact 18mm DIN rail design makes it suitable for integration into standard electrical panels.
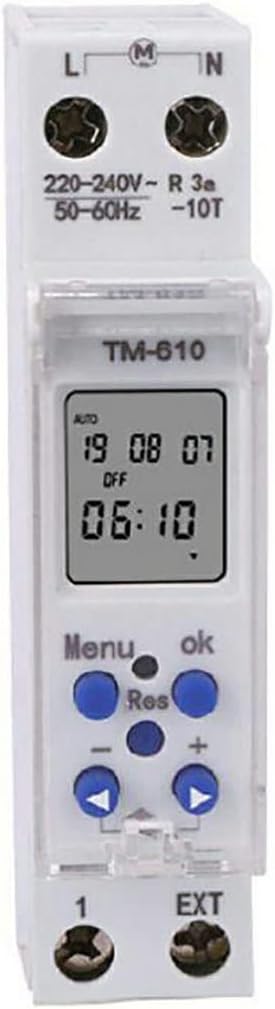
Figure 1: Front view of the TM610 Digital Timer Switch, displaying its LCD screen and control interface.
2. Key Features
- Wide Application: Ideal for controlling street lights, neon signs, lamps, water heaters, air conditioners, advertising boards, electric cookers, boosters, sprayers, bottlers, pre-heaters, agricultural facilities, and broadcasting equipment.
- Power Failure Protection: Equipped with an internal replaceable 3V CR2032 battery to maintain settings during power outages.
- Low Power Consumption: Features a high-accuracy CMOS chip with strong anti-jamming capabilities, ensuring reliable and efficient operation. Certified by IEC 60367ECEC.
- External Trigger Control: Supports an external trigger switch (external pin) with a cable length of up to 100 meters for flexible control options.
- Flexible Programming: Offers advanced pre-setting up to a week in advance, with weekly and daily cyclic operation from one minute to 168 hours.
- Compact Design: 18mm DIN rail mount for easy installation in electrical distribution boxes.
3. Setup and Installation
Installation should be performed by a qualified electrician to ensure safety and proper functionality. The TM610 is designed for DIN rail mounting.
3.1 Wiring Diagram
Refer to the markings on the device for correct wiring. Typically, 'L' is for Live input, 'N' for Neutral input, and '1' and '2' (or similar) for the load output terminals. The 'EXT' terminals are for the external trigger switch.

Figure 2: Terminal connections on the TM610 for power input, load output, and external trigger.
3.2 Initial Power-Up
Once wired, apply power. The LCD display will illuminate. If the display is blank, check the power supply and wiring. The internal battery ensures the clock and programmed settings are retained even if main power is disconnected.

Figure 3: The TM610 integrated into an electrical panel, demonstrating its application.
4. Operating Instructions
The TM610 features an intuitive interface with an LCD display and several buttons for programming.
4.1 Setting Current Time
- Press the MENU button to enter the main menu.
- Navigate to the 'Time Setting' option using the arrow buttons.
- Press OK to confirm.
- Adjust the hour, minute, and day of the week using the arrow buttons and confirm each with OK.
4.2 Programming ON/OFF Schedules
The timer supports multiple ON/OFF programs. Each program can be set for specific days of the week or daily cycles.
- From the main menu, select 'Program Setting'.
- Choose an empty program slot (e.g., '1 ON').
- Set the desired ON time (hour and minute) and the days of the week for this program to be active.
- Repeat for the corresponding OFF time (e.g., '1 OFF').
- Continue for additional programs as needed.
4.3 Manual Override
The device typically has a manual override function (often labeled 'MANUAL' or similar) to temporarily switch the output ON or OFF, irrespective of the programmed schedule. Consult the on-screen prompts or a dedicated button for this feature.
5. Maintenance
The SINOTIMER TM610 is designed for low maintenance. Regular checks include:
- Cleaning: Wipe the exterior with a dry, soft cloth. Do not use abrasive cleaners or solvents.
- Battery Replacement: The internal CR2032 battery (Figure 4) should be replaced if the display shows signs of dimming or if settings are lost frequently during brief power interruptions. Ensure power is disconnected before replacing the battery.
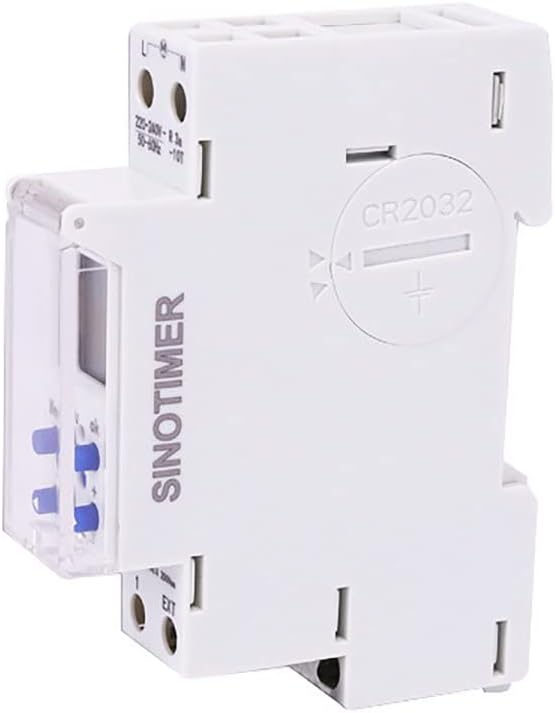
Figure 4: Rear view of the TM610, highlighting the CR2032 battery compartment.
6. Troubleshooting
| Problem | Possible Cause | Solution |
|---|---|---|
| Display is blank | No power supply; faulty wiring; dead internal battery. | Check main power supply. Verify wiring connections. Replace CR2032 battery. |
| Programmed events not executing | Incorrect time setting; program not activated; manual override engaged. | Verify current time and day. Ensure programs are enabled. Check manual override status. |
| Settings lost after power outage | Internal battery is weak or dead. | Replace the CR2032 internal battery. |
7. Specifications
| Parameter | Value |
|---|---|
| Brand | SINOTIMER |
| Model | TM610 |
| Contact Load | 3600W |
| Switching Current | 16A |
| Switching Voltage | 220V AC |
| Rated Current | 16A |
| Coil Power Source | 220V AC |
| Installation | 18mm DIN Rail Mount |
| Internal Battery | 3V CR2032 (replaceable) |
| Minimum Interval | 1 minute |
| Maximum Interval | 168 hours |
8. Safety Warnings
To ensure safe operation and prevent damage, please observe the following warnings:
- Do not place the device near high temperatures.
- Do not dispose of the device in fire.
- Do not immerse the device in water.
- Installation and maintenance should only be performed by qualified personnel.
9. Warranty and Support
Information regarding product warranty and customer support was not provided in the available product data. Please refer to the product packaging or contact the manufacturer directly for details on warranty coverage and support services.


