
1. Introduction
Thank you for purchasing the KOSUMOSU Digital LED Wall/Desk Clock, Model ACD-215B. This clock features a modern 3D LED display, remote control operation, and multiple functions including time, date, temperature display, and an alarm. Please read this manual carefully before use to ensure proper operation and to maximize the product's lifespan.
This clock is designed for indoor use and can be mounted on a wall or placed on a desk. Its adjustable brightness and large display ensure clear visibility in various lighting conditions.
2. Package Contents
- KOSUMOSU Digital LED Clock (ACD-215B)
- Remote Control
- USB Power Cable
- User Manual
- Mounting Hardware (screws, anchors)
Note: An AC adapter (5V/1A USB-A) is required for operation and is sold separately. It is not included in the package.

Image: Contents of the KOSUMOSU Digital LED Clock package.
3. Safety Information
- Use only a 5V/1A USB-A power adapter. Using an incompatible adapter may cause malfunction or damage.
- Keep the device away from water and high humidity.
- Do not attempt to disassemble or repair the device yourself. Contact customer support for assistance.
- Ensure the clock is securely mounted if wall-hanging to prevent falling.
4. Setup
4.1 Power Connection
- Connect the provided USB power cable to the clock's power input port.
- Plug the other end of the USB cable into a 5V/1A USB-A power adapter (not included).
- Plug the power adapter into a wall outlet. The clock display will illuminate.
The clock features a super capacitor for memory retention, allowing it to retain time settings for over 2 hours even if power is disconnected.
4.2 Remote Control Preparation
Before using the remote control, ensure you remove the transparent battery insulation sheet from the battery compartment at the bottom of the remote.

Image: Remote control battery insulation sheet removal.
4.3 Placement Options
The clock can be placed on a desk using its integrated stand or mounted on a wall. For wall mounting, use the hook holes on the back of the clock and the provided mounting hardware.
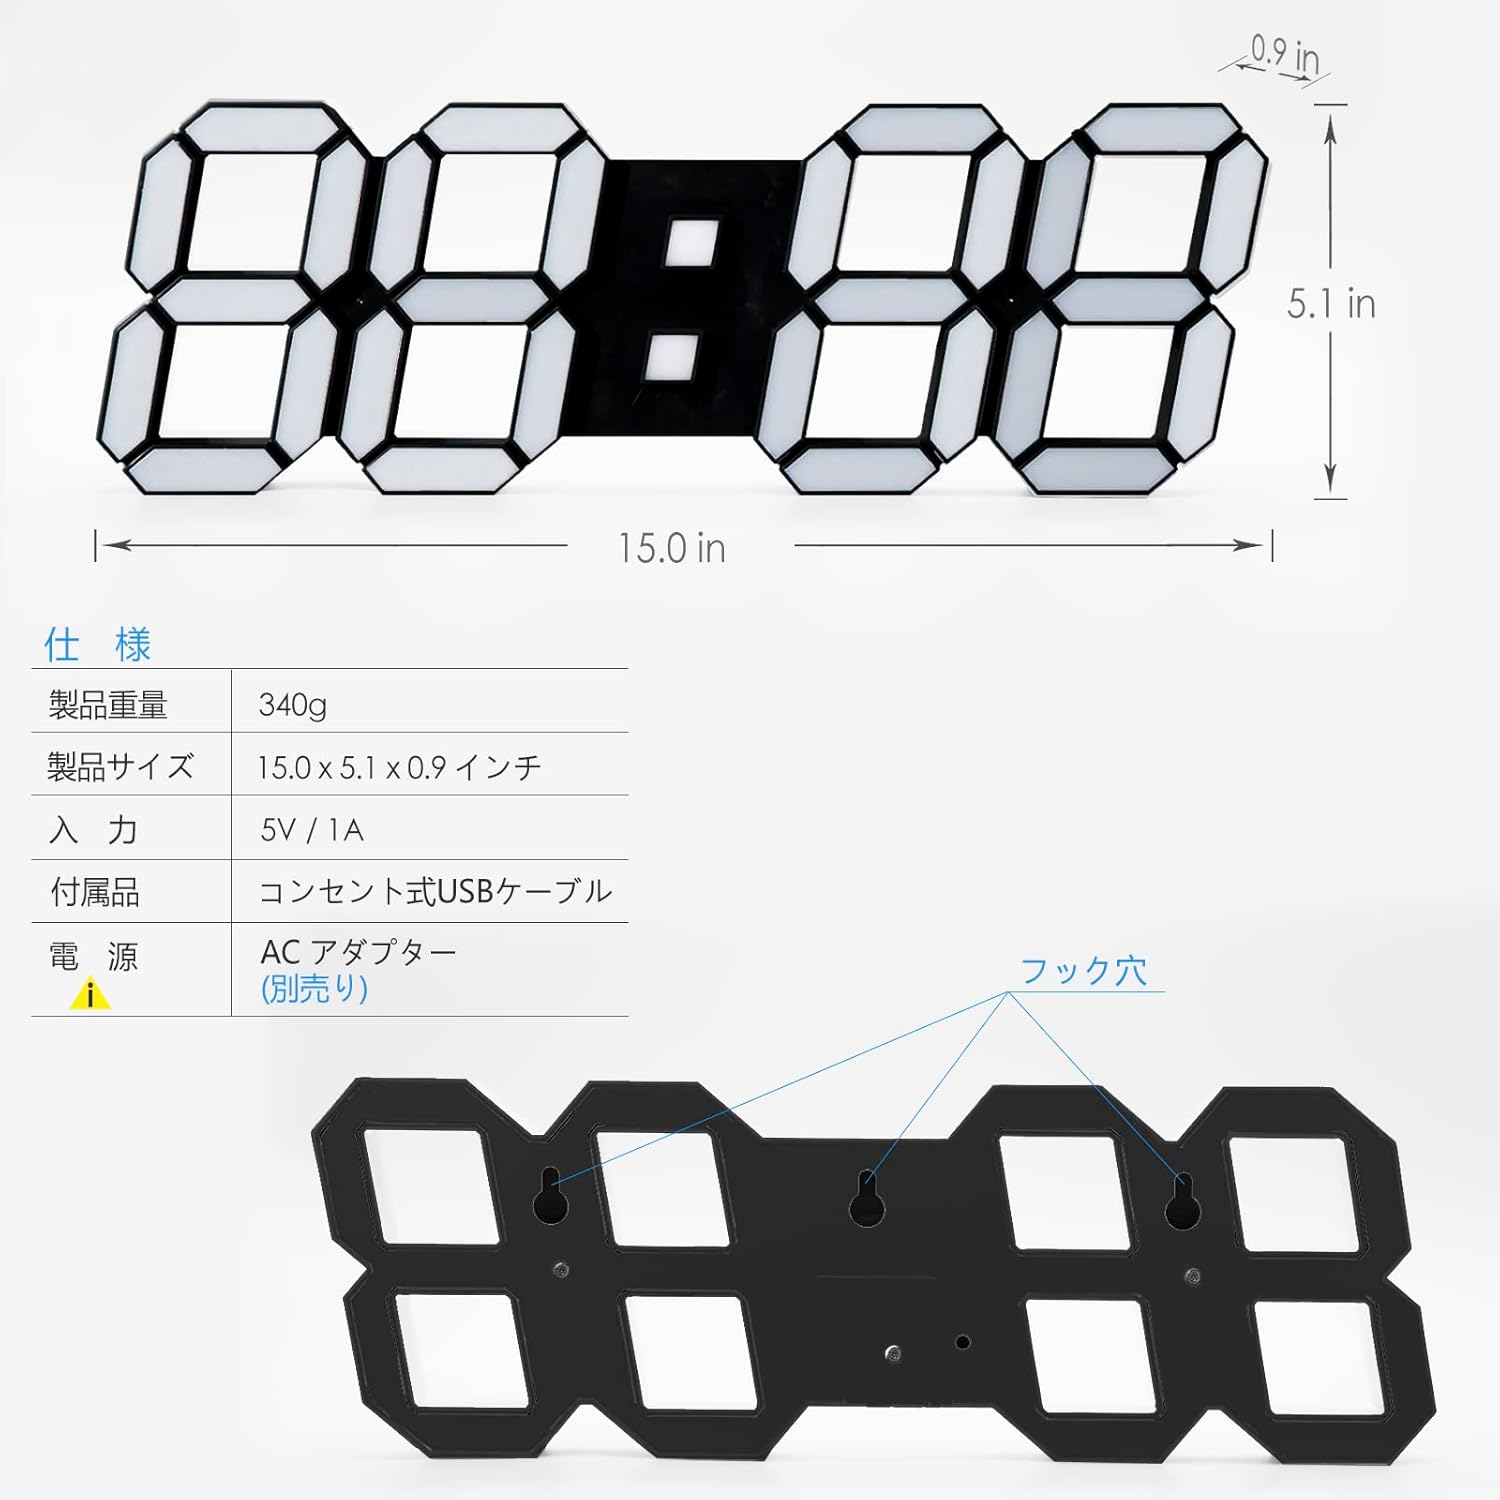
Image: Back view of the clock showing wall mounting holes and desk placement.
5. Operating Instructions
All settings are controlled via the remote control. Ensure the remote is pointed towards the infrared sensor located at the bottom of the clock for optimal response. The effective range is approximately 3.5 meters.
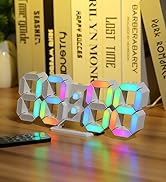
Image: Pointing the remote control at the clock's IR sensor.
5.1 Time and Date Setting
- Press the SET button on the remote control. The display will start flashing.
- Use the UP (△) and DOWN (▽) buttons to adjust the value.
- Press SET again to move to the next setting (e.g., hours, minutes, year, month, day).
- Once all settings are complete, press SET to exit the setting mode.
5.2 12/24 Hour Format
Short press the UP (△) button on the remote control to switch between 12-hour and 24-hour display formats.
5.3 Brightness Adjustment
The clock offers 5 levels of brightness adjustment: Bright, Slightly Dim, Dim, Auto-dim, and OFF.
- Press the BRIGHT button on the remote control to cycle through the manual brightness levels.
- The clock also features an automatic dimming function with 8 levels, which adjusts brightness based on ambient light detected by the built-in light sensor.
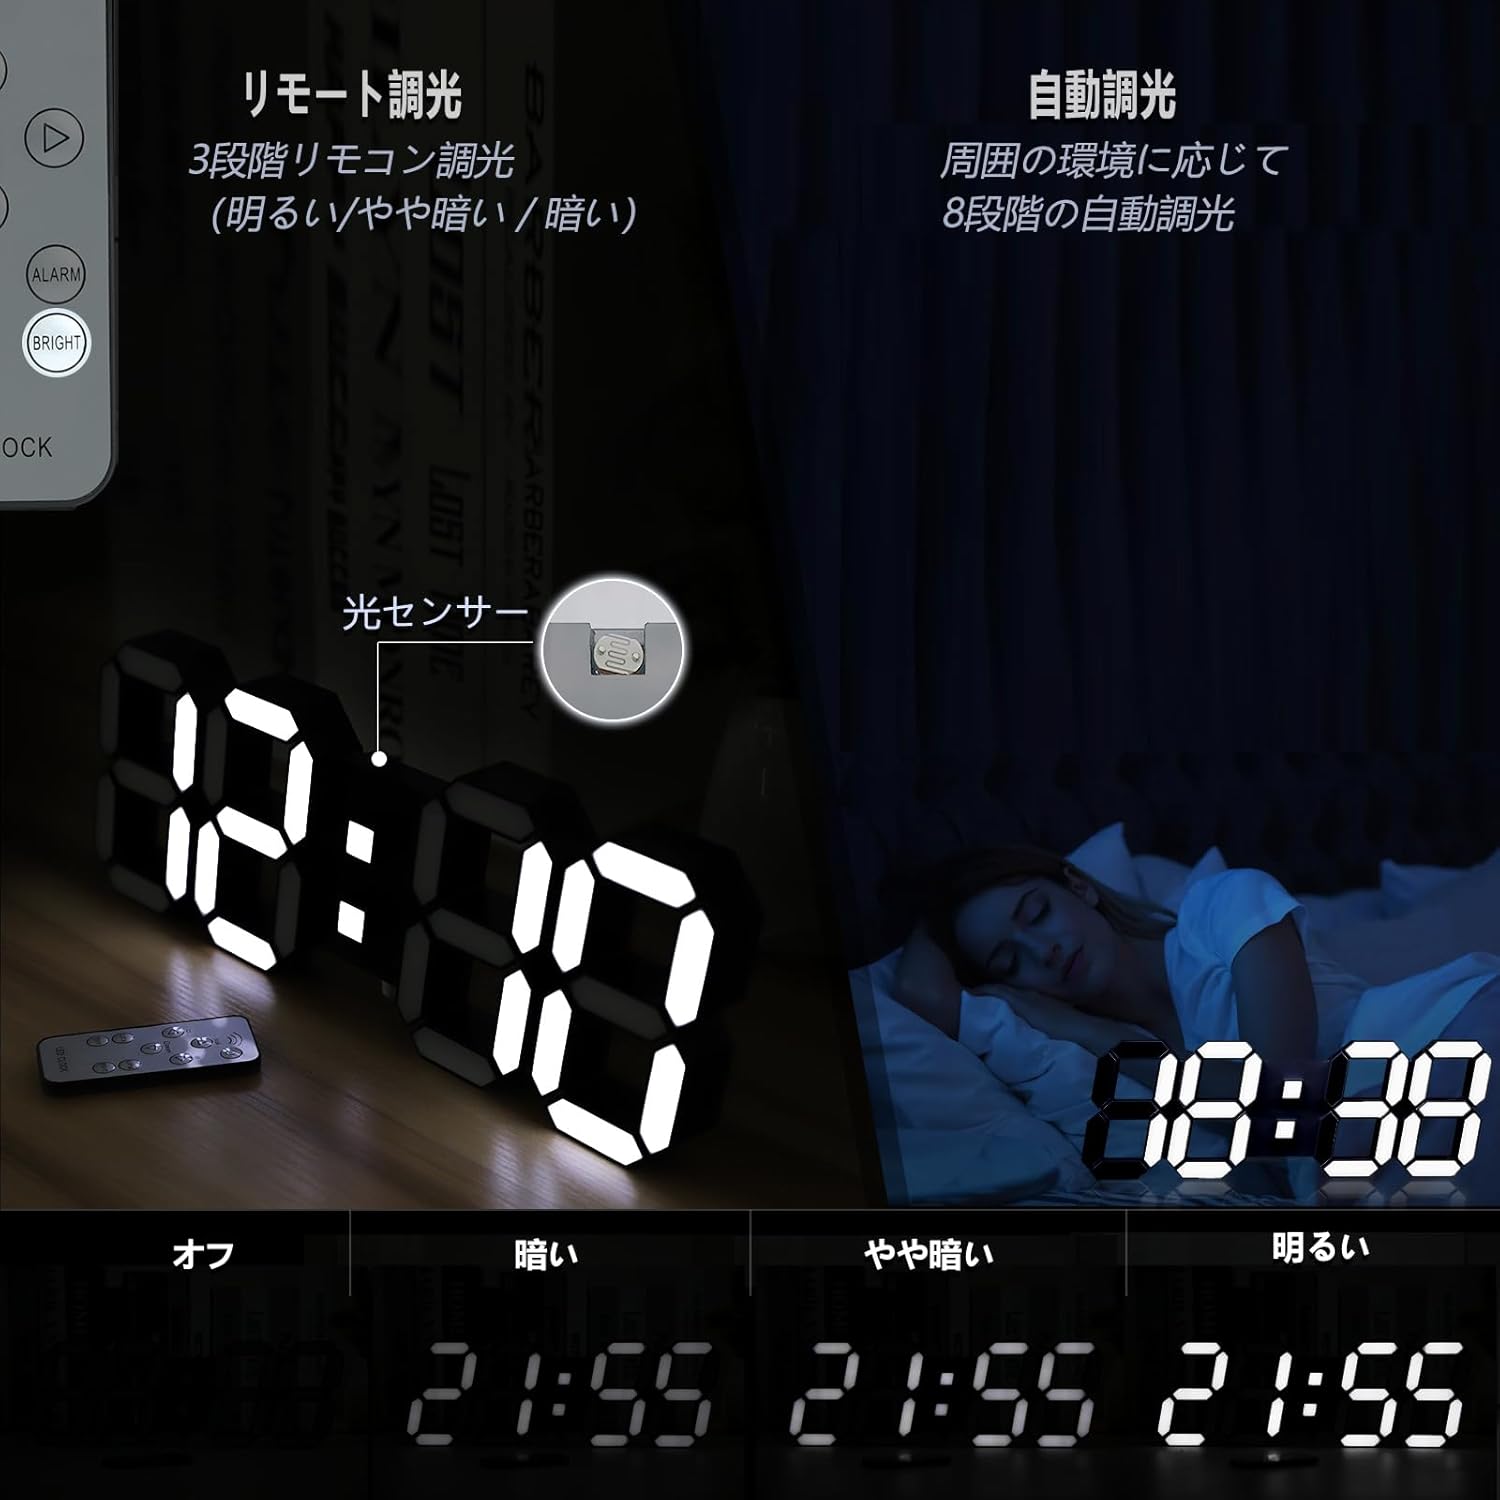
Image: Brightness adjustment levels and automatic dimming feature.
5.4 Alarm Setting
- Press the ALARM button on the remote control. The alarm time display will flash.
- Use the UP (△) and DOWN (▽) buttons to set the desired alarm time.
- Press ALARM again to confirm and activate the alarm. An alarm icon will appear on the display.
- To deactivate the alarm, press the ALARM button again until the alarm icon disappears.
5.5 Temperature Display (Fahrenheit/Celsius)
The clock can display temperature in either Fahrenheit or Celsius.
- Short press the LEFT (◀) button on the remote control to cycle through the display modes: Date, Time, and Temperature.
- When the temperature is displayed, press the TEMP button to switch between Fahrenheit (°F) and Celsius (°C).

Image: Loop display of time, date, and temperature.
5.6 Colon Blinking Control
To stop or start the blinking of the colon (time separator) on the display, press the RIGHT (▶) button on the remote control.

Image: Controlling the colon blinking with the remote.
6. Maintenance
- Clean the clock surface with a soft, dry cloth. Do not use abrasive cleaners or solvents.
- Keep the clock free from dust and debris to ensure optimal performance of the light sensor and display.
- If the remote control stops responding, check if the battery insulation sheet has been removed. If it has, consider replacing the remote control battery (CR2025 type).
7. Troubleshooting (Q&A)
- Q: Does the clock run on an internal battery?
- A: No, this LED clock requires a 5V/1A USB-A power adapter (sold separately) to operate. It is not a wireless clock. It has an internal super capacitor for memory backup, not for continuous operation.
- Q: Why does the display freeze, flicker, or hum during use or brightness changes?
- A: This usually indicates an unstable or incompatible power adapter. The clock may not be receiving sufficient current to function normally. Please replace it with a standard 5V/1A adapter manufactured by a reputable brand.
- Q: The remote control is not working. What should I do?
- A: 1. Ensure you have removed the transparent battery insulation sheet from the bottom of the remote. 2. When operating the remote, point it towards the infrared sensor at the bottom of the clock. Avoid any obstructions that might interfere with the infrared signal. The effective range is approximately 3.5 meters.
- Q: How do I stop the colon (time separator) from blinking?
- A: Simply press the RIGHT (▶) arrow button on the remote control. This will toggle the colon's blinking on or off.
- Q: Can this clock display in 24-hour format?
- A: Yes. Short press the UP (△) arrow button on the remote control to switch between 12-hour and 24-hour formats.
- Q: Why doesn't the alarm sound at the set time?
- A: Please verify both the alarm time setting and the time format setting (12-hour/24-hour). For 12-hour format: AM12-PM11. For 24-hour format: 0-23.
- Q: How do I display the temperature and switch between Fahrenheit and Celsius?
- A: Short press the LEFT (◀) arrow button to cycle through the display of date, time, or temperature. Once the temperature is displayed, press the TEMP button to switch between Fahrenheit and Celsius.
- Q: How do I contact the seller if I have an unknown product issue?
- A: If you require support for product issues, please send a message via Amazon mail (chat box). We will resolve the issue and provide a solution promptly.
8. Specifications
| Feature | Specification |
|---|---|
| Brand | KOSUMOSU |
| Model | ACD-215B |
| Display Type | Digital LED (3D) |
| Color | Black |
| Material | Plastic |
| Product Dimensions | 38.1 cm (width) x 12.8 cm (height) |
| Product Weight | 340 g |
| Input Power | 5V/1A |
| Power Source | Corded Electric (USB cable included, AC adapter sold separately) |
| Battery Type (Internal) | Lithium Metal (for memory backup) |
| Brightness Adjustment | 5 manual levels (Bright, Slightly Dim, Dim, Auto-dim, OFF) + 8-level automatic dimming |
| Functions | Time, Date, Temperature (°F/°C), Alarm, Remote Control |
| Room Type | Living Room, Bedroom, Office, etc. |
| Indoor/Outdoor Use | Indoor |
9. Warranty and Support
For any product issues or support inquiries, please contact KOSUMOSU customer service directly through the Amazon messaging system (chat box). Our team is committed to providing prompt assistance and solutions.
Please refer to this user manual for detailed instructions and troubleshooting steps before contacting support.


