Introduction
This user manual provides detailed instructions for the installation, operation, and maintenance of your WALI Dual Monitor Stand (Model GSMP002W). This adjustable gas spring arm monitor mount is designed to enhance your workspace by providing ergonomic positioning for two monitors, freeing up valuable desk space.
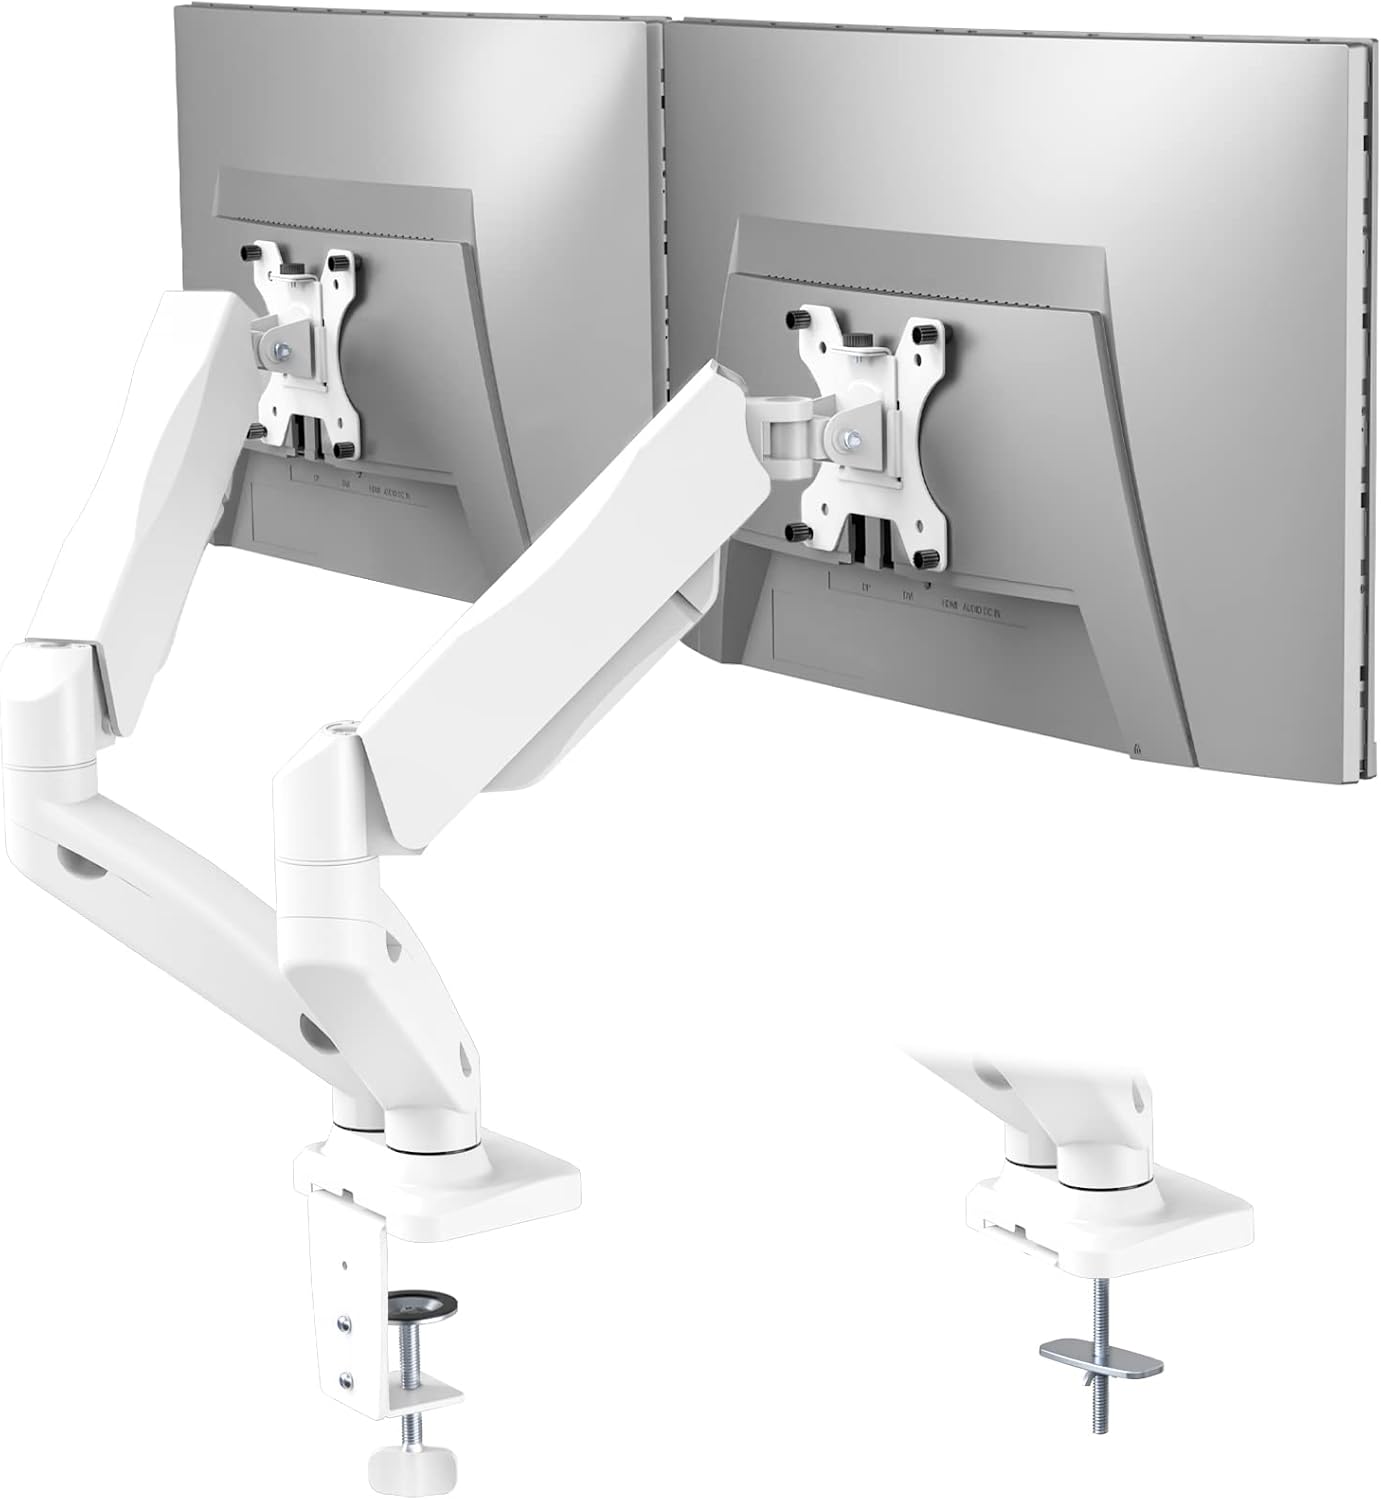
Image: The WALI Dual Monitor Stand (GSMP002W) in white, supporting two monitors on a desk.
Key Features
- Compatibility: Fits most flat or curved LCD/LED screens from 17 to 32 inches, supporting up to 19.8 lbs per arm. Compatible with 75x75mm and 100x100mm VESA mounting patterns.
- Versatile Installation: Features a two-stage locking system for C-clamp and Grommet Base installations, suitable for desks 0.4 to 3.3 inches thick.
- Full Adjustability: High-grade steel gas spring arms allow for extension, retraction, and precise positioning. Monitors can tilt +75°/-45°, swivel +90°/-90°, and rotate 360°.
- Ergonomic Design: Height adjustable to raise monitors to eye level, promoting a comfortable and correct posture to reduce neck and eye strain.
- Space Saving: Frees up valuable desk space, contributing to a more organized and efficient work area.
Package Contents
Please verify that all components are present before beginning installation.
- WALI Dual Monitor Arm Gas Spring Mount (White) x 1
- Mounting Hardware Kit
- User Manual
Specifications
| Specification | Value |
|---|---|
| Screen Size Compatibility | 17 - 32 inches |
| Weight Capacity per Arm | Up to 19.8 lbs (9 kg) |
| VESA Compatibility | 75x75mm, 100x100mm |
| Desk Thickness (C-Clamp/Grommet) | 0.4 - 3.3 inches (10-85mm) |
| Tilt Range | +75° to -45° |
| Swivel Range | +90° to -90° |
| Rotation | 360° |
| Max Height | 16.5 inches (41.9 cm) |
| Max Extension | 19.6 inches (49.8 cm) |
| Material | Alloy Steel |
| Product Dimensions | 5.83 x 11.14 x 16.46 inches |
| Item Weight | 8.18 pounds |
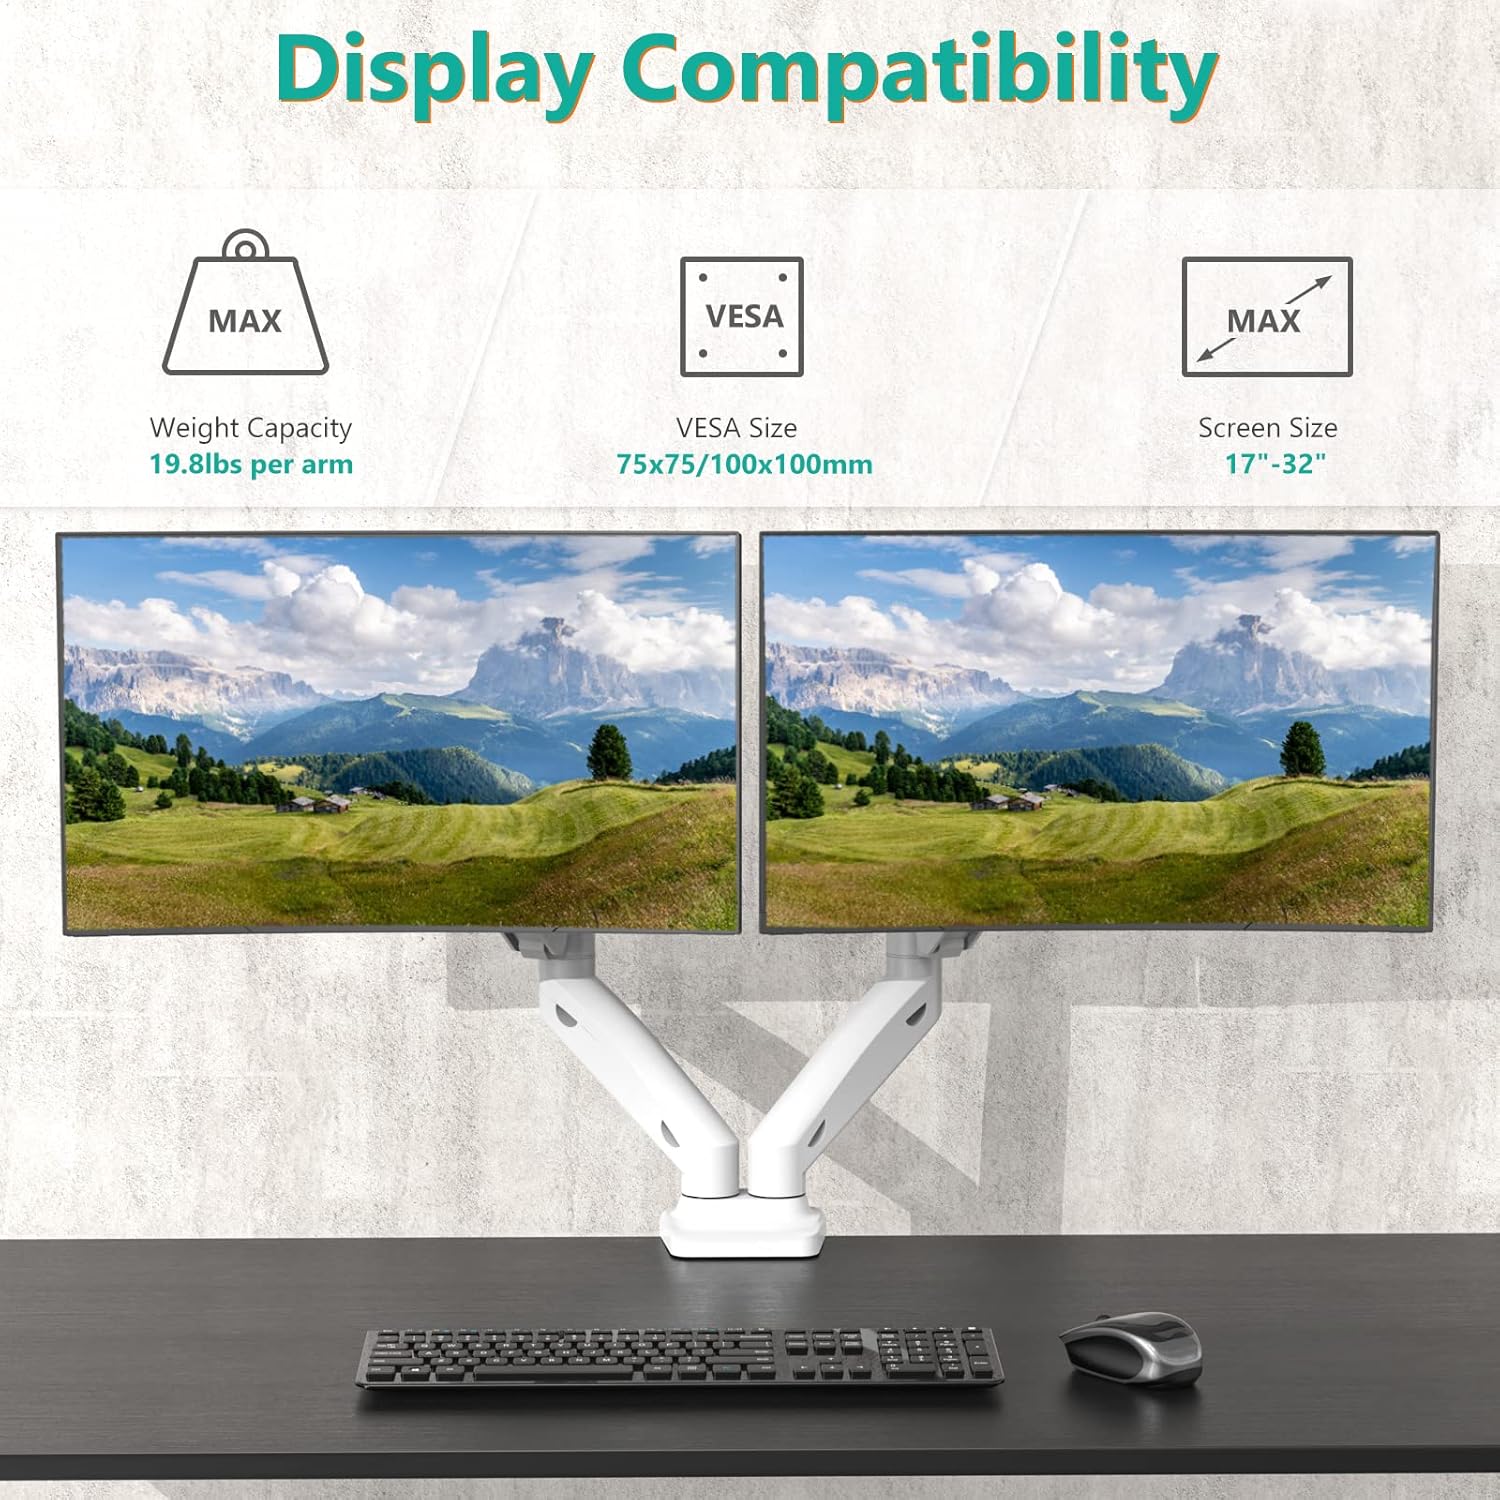
Image: Diagram illustrating the maximum height (16.5 inches) and maximum extension (19.6 inches) of the monitor arm.
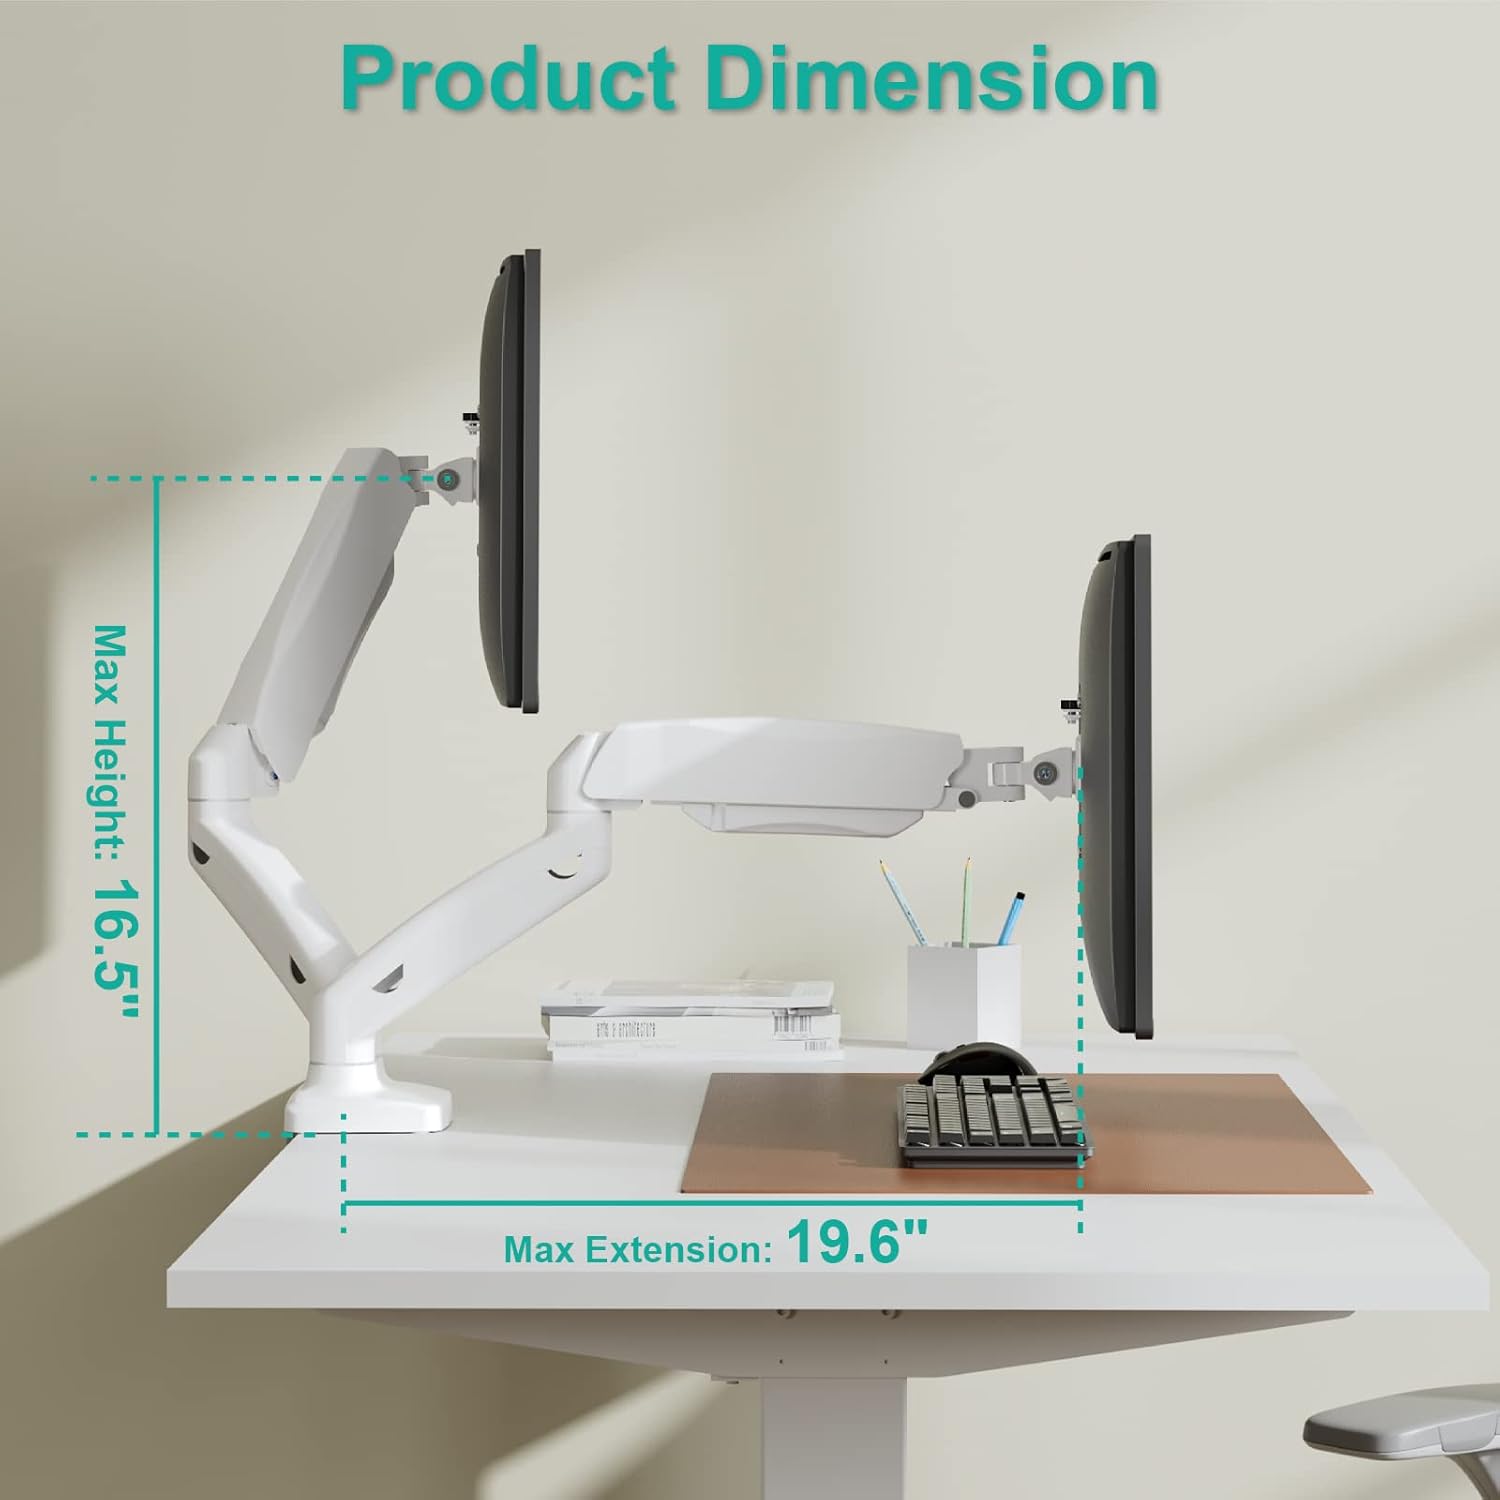
Image: Visual guide to display compatibility, indicating a maximum weight capacity of 19.8 lbs per arm, VESA sizes of 75x75mm and 100x100mm, and screen size compatibility from 17 to 32 inches.
Setup and Installation
The WALI Dual Monitor Stand offers two installation options: C-Clamp and Grommet Base. Choose the method that best suits your desk.
1. C-Clamp Installation
For desks with an edge, the C-clamp provides a secure attachment without needing to drill holes.
- Attach the C-clamp to the base of the monitor arm.
- Position the C-clamp on the edge of your desk.
- Tighten the screw until the clamp is firmly secured to the desk. Ensure the desk thickness is between 0.4 and 3.3 inches.
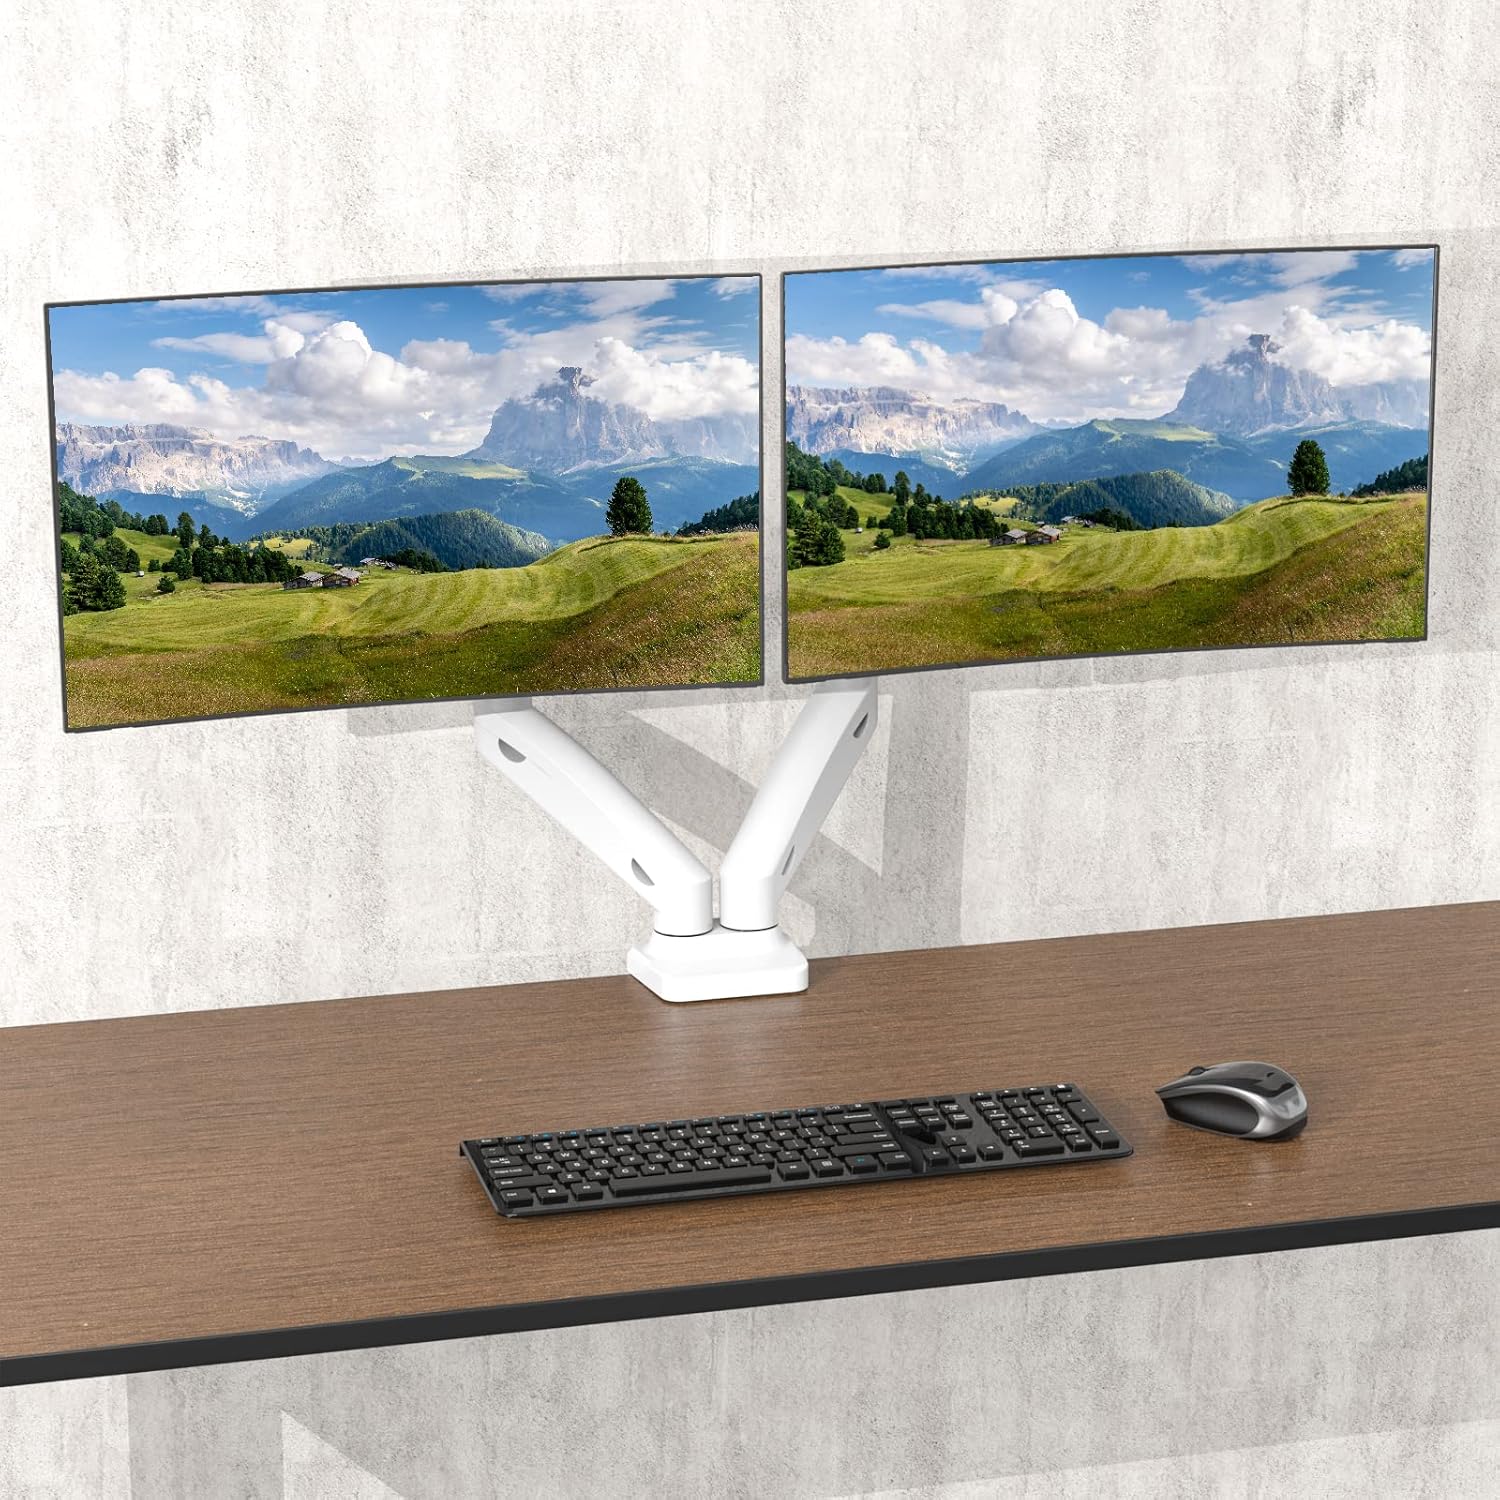
Image: Illustration of both C-clamp and grommet base installation methods for the monitor stand.
2. Grommet Base Installation
For desks with an existing grommet hole (cable management hole), this method provides a flush and stable mount.
- Disassemble the C-clamp components from the base.
- Insert the grommet bolt through the desk's grommet hole.
- Secure the grommet base plate and tighten the nut from underneath the desk. Ensure the desk thickness is between 0.4 and 3.3 inches and the hole diameter is suitable (typically up to 2.75 inches).
3. Attaching Monitors
Once the base is securely installed, attach your monitors to the VESA plates.
- Attach the VESA plates to the back of your monitors using the provided screws. Ensure the VESA pattern (75x75mm or 100x100mm) matches your monitor.
- Slide the monitor with the attached VESA plate onto the arm's mounting head until it clicks into place.
- Tighten any security screws on the VESA head to prevent accidental dislodgement.
Installation Video Guide
Video: An official WALI video demonstrating the installation process for the dual monitor stand, including both C-clamp and grommet base options, and how to attach monitors.
Operating Instructions and Adjustments
The WALI Dual Monitor Stand offers extensive adjustability to achieve your optimal viewing experience.
1. Gas Spring Tension Adjustment
Adjust the gas spring tension to match the weight of your monitors. This ensures smooth and stable height adjustments.
- Locate the tension adjustment screw on the arm joint (usually covered by a plastic cap).
- Use the provided Allen key to turn the screw: turn clockwise to increase tension (for heavier monitors) or counter-clockwise to decrease tension (for lighter monitors).
- Adjust until the monitor stays at the desired height when released.
2. Height Adjustment
Once the gas spring tension is set, you can easily raise or lower your monitors to your preferred ergonomic height.
- Gently push or pull the monitor up or down. The gas spring will assist in holding the position.
3. Tilt Adjustment (+75°/-45°)
Adjust the vertical angle of your monitors to reduce glare and optimize viewing comfort.
- Grasp the top or bottom edge of your monitor and gently tilt it forwards or backwards to the desired angle.

Image: Diagram illustrating the tilt range of the monitor, from +75 degrees upwards to -45 degrees downwards.
4. Swivel Adjustment (+90°/-90°)
Rotate your monitors horizontally to share your screen or adjust your viewing angle.
- Gently pivot the monitor left or right from its mounting point.

Image: Diagram illustrating the swivel range of the monitor, allowing rotation up to 90 degrees left or right.
5. Rotation (360°)
Change your monitor's orientation from landscape to portrait mode or vice versa.
- Carefully rotate the entire monitor screen clockwise or counter-clockwise.

Image: Diagram illustrating the 360-degree rotation capability of the monitor, allowing for easy switching between landscape and portrait orientations.
6. Cable Management
Utilize the integrated cable management clips on the arms to keep your cables organized and out of sight, contributing to a cleaner workspace.
- Route your monitor and power cables through the clips along the underside of the arms.
- Close the clips to secure the cables.
Maintenance
Regular maintenance ensures the longevity and optimal performance of your WALI Dual Monitor Stand.
- Cleaning: Wipe down the stand with a soft, damp cloth. Avoid abrasive cleaners or solvents that could damage the finish.
- Check Connections: Periodically check all screws and bolts to ensure they remain tight and secure. Re-tighten if necessary.
- Gas Spring Adjustment: If your monitors begin to sag or are difficult to adjust, re-adjust the gas spring tension as described in the "Operating Instructions" section.
Troubleshooting
If you encounter issues with your monitor stand, refer to the common problems and solutions below.
| Problem | Possible Cause / Solution |
|---|---|
| Monitor sags or does not stay at desired height. | Gas spring tension is too low for the monitor's weight. Increase tension by turning the adjustment screw clockwise. |
| Monitor is difficult to move or push down. | Gas spring tension is too high for the monitor's weight. Decrease tension by turning the adjustment screw counter-clockwise. |
| Monitor wobbles or feels unstable. | Ensure the desk clamp/grommet base is securely tightened. Check that the VESA plate screws are tight and the monitor is properly seated on the arm. |
| Cables are not neatly managed. | Ensure all cables are routed through the integrated cable management clips on the arms. |
| Monitor does not fit the VESA plate. | Verify your monitor's VESA pattern (75x75mm or 100x100mm) matches the stand's compatibility. |
Warranty and Customer Support
WALI products are designed for durability and performance. For any questions, concerns, or assistance with your product, please contact WALI customer support.
- Customer Support: Experienced and friendly US-based customer support is available to assist 7 days a week. Refer to your product packaging or the official WALI website for contact details.
- Warranty Information: Please retain your proof of purchase for warranty claims. Specific warranty terms and conditions can be found on the WALI official website or by contacting customer support.


