Introduction
This manual provides essential information for setting up, operating, and maintaining your UMIDIGI A11 Pro Max smartphone. Please read it thoroughly to ensure optimal performance and longevity of your device. The UMIDIGI A11 Pro Max is an unlocked Android 11 smartphone featuring a 6.8-inch FHD+ display, a powerful Helio G80 processor, 8GB RAM, 128GB internal storage (expandable), a 5150mAh battery, and a versatile triple camera system.
Setup
1. What's in the Box
Upon unboxing, verify that all standard components are present:
- UMIDIGI A11 Pro Max Smartphone
- Power Adapter (Charger)
- USB Type-C Cable
- SIM Ejector Tool
- Protective Case (may vary by region)
- Screen Protector (pre-applied or included)
- Quick Start Guide
2. SIM Card and SD Card Installation
The UMIDIGI A11 Pro Max supports dual Nano-SIM cards and a microSD card simultaneously for expanded storage.
- Locate the SIM tray on the side of the device.
- Insert the SIM ejector tool into the small hole on the SIM tray and press gently until the tray pops out.
- Carefully place your Nano-SIM card(s) and/or microSD card into the designated slots on the tray. Ensure the gold contacts face downwards and the cards are correctly oriented as indicated on the tray.
- Gently push the tray back into the phone until it clicks into place.

Figure 1: Proper insertion of SIM and MicroSD cards into the tray.
3. Initial Power On and Setup
To power on your device, press and hold the Power button (located on the right side) until the UMIDIGI logo appears. Follow the on-screen prompts to complete the initial setup, including language selection, Wi-Fi connection, Google account login, and security settings.

Figure 2: UMIDIGI A11 Pro Max smartphone overview.
4. Charging the Battery
Before first use, it is recommended to fully charge the device. Connect the USB Type-C cable to the phone's charging port (bottom edge) and the other end to the power adapter. Plug the adapter into a wall outlet. The phone supports 10W fast charging.

Figure 3: USB Type-C charging port and 3.5mm audio jack.
Operating Your Device
1. Basic Navigation and Interface
The UMIDIGI A11 Pro Max runs on Android 11, offering an intuitive user experience. Navigate using touch gestures on the 6.8-inch FHD+ display. The power button and volume rocker are located on the right side. A customizable shortcut key is also present for quick access to preferred functions.

Figure 4: The 6.8-inch FHD+ FullView Display.
2. Camera Functions
The device features a versatile triple camera system on the rear and a high-resolution front camera.
- Rear Cameras:
- 48MP Main Camera: For high-resolution photos.
- 16MP Ultra-Wide Angle Camera (120° FOV): Ideal for landscapes and group shots.
- 2MP Macro Camera: For detailed close-up photography.
- Front Camera: 24MP In-Screen Camera for selfies and video calls.
- Night Mode: Enhances low-light photography, capturing more detail in dark environments.
To access the camera, tap the camera icon on your home screen or lock screen. Select different modes (Photo, Video, Portrait, Night, Macro, etc.) from the camera interface.

Figure 5: Rear Triple Camera System.
3. Customizable Shortcut Key
The UMIDIGI A11 Pro Max features a programmable button on the side. You can assign various functions to this key, such as launching an app, activating the flashlight, or taking a screenshot. To customize, go to Settings > Smart Assistant > Shortcut Key and select your preferred action.
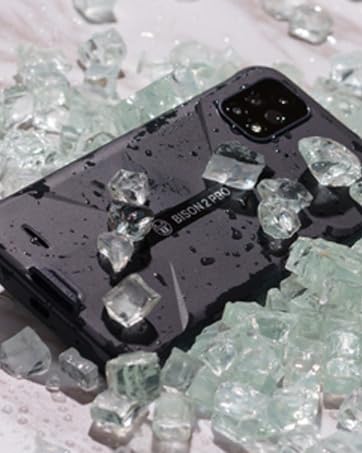
Figure 6: Side-mounted fingerprint sensor and customizable shortcut key.
4. Dual 4G VoLTE Connectivity
The device supports Dual 4G VoLTE, allowing both SIM slots to utilize 4G networks simultaneously for enhanced call quality and faster data speeds. Ensure your carrier supports VoLTE for this feature to function.
5. Performance and Gaming
Powered by the Helio G80 gaming processor and 8GB of RAM, the UMIDIGI A11 Pro Max delivers smooth performance for applications, videos, and mobile gaming. The 128GB internal storage provides ample space for your files, and it can be expanded further with a microSD card.

Figure 7: Gaming experience on the UMIDIGI A11 Pro Max.
6. Battery Management
The 5150mAh massive battery provides extended usage times. To optimize battery life:
- Adjust screen brightness.
- Close unused applications running in the background.
- Enable Battery Saver mode when needed.
- Limit background data usage for certain apps.

Figure 8: Battery capacity and estimated usage.
Maintenance
1. Cleaning the Device
To clean your UMIDIGI A11 Pro Max, use a soft, lint-free cloth. Avoid using harsh chemicals or abrasive materials, as these can damage the screen or finish. For stubborn smudges, slightly dampen the cloth with water or a screen-cleaning solution designed for electronics.
2. Software Updates
Regularly check for software updates to ensure your device has the latest features, security patches, and performance improvements. Go to Settings > System > System update to check for and install available updates. Ensure your device is connected to Wi-Fi and has sufficient battery life before initiating an update.
3. Battery Care
To prolong the lifespan of your battery:
- Avoid extreme temperatures.
- Do not let the battery completely drain frequently.
- Use the original charger and cable provided with the device.
Warranty and Support
UMIDIGI products come with a standard manufacturer's warranty. For detailed warranty information, please refer to the warranty card included in your product packaging or visit the official UMIDIGI website. For technical support, troubleshooting assistance, or service inquiries, please contact UMIDIGI customer service through their official channels. You can often find support contact information on the UMIDIGI website or within the device's settings under About phone > Legal information.
For further assistance, you may also visit the UMIDIGI Store on Amazon.


