
MCombo 4068
MCombo 3-Seat Outdoor Patio Swing Chair Instruction Manual
Model: 4068
Brand: MCombo
1. Introduction
Thank you for choosing the MCombo 3-Seat Outdoor Patio Swing Chair. This manual provides essential information for the safe assembly, operation, and maintenance of your new swing chair. Please read all instructions carefully before assembly and retain this manual for future reference.
Safety Information
- Ensure all parts are present and undamaged before assembly. Do not use if any parts are missing or broken.
- Assemble the swing chair on a flat, stable surface.
- Tighten all bolts and nuts securely. Periodically check and re-tighten as necessary.
- Do not exceed the maximum weight capacity of 750 pounds.
- Keep children and pets away from the assembly area.
- Do not stand on the swing chair.
- Avoid using the swing chair during strong winds or severe weather conditions.
2. Parts List
Please verify that all components listed below are included in your package. If any parts are missing or damaged, please contact MCombo customer support.
- Main Frame Components (Legs, Crossbars, Top Bar)
- Swing Seat Frame
- Canopy Frame and Fabric
- Cushions and Pillows
- Suspension Chains/Hooks
- Hardware Kit (Bolts, Nuts, Washers, Wrenches)
- Instruction Manual
3. Assembly Instructions
Assembly typically requires two people. Follow the steps below carefully. Refer to the included hardware diagram for specific bolt and nut identification.
- Assemble the Base Frame: Connect the leg sections and crossbars using the provided hardware. Ensure all connections are firm.
- Attach the Top Bar: Secure the top bar to the assembled leg sections.
- Assemble the Swing Seat: Construct the seat frame and attach the backrest.
- Install the Canopy Frame: Attach the canopy support arms to the main frame.
- Mount the Canopy Fabric: Slide the canopy fabric onto the canopy frame and secure it.
- Hang the Swing Seat: Carefully lift the assembled swing seat and attach it to the suspension chains/hooks on the top bar. Ensure the hooks are securely closed.
- Place Cushions and Pillows: Position the seat cushions and pillows for comfort. The cushions feature straps with Velcro on the back for secure attachment to the seat frame.


4. Operating Instructions
Adjusting the Canopy
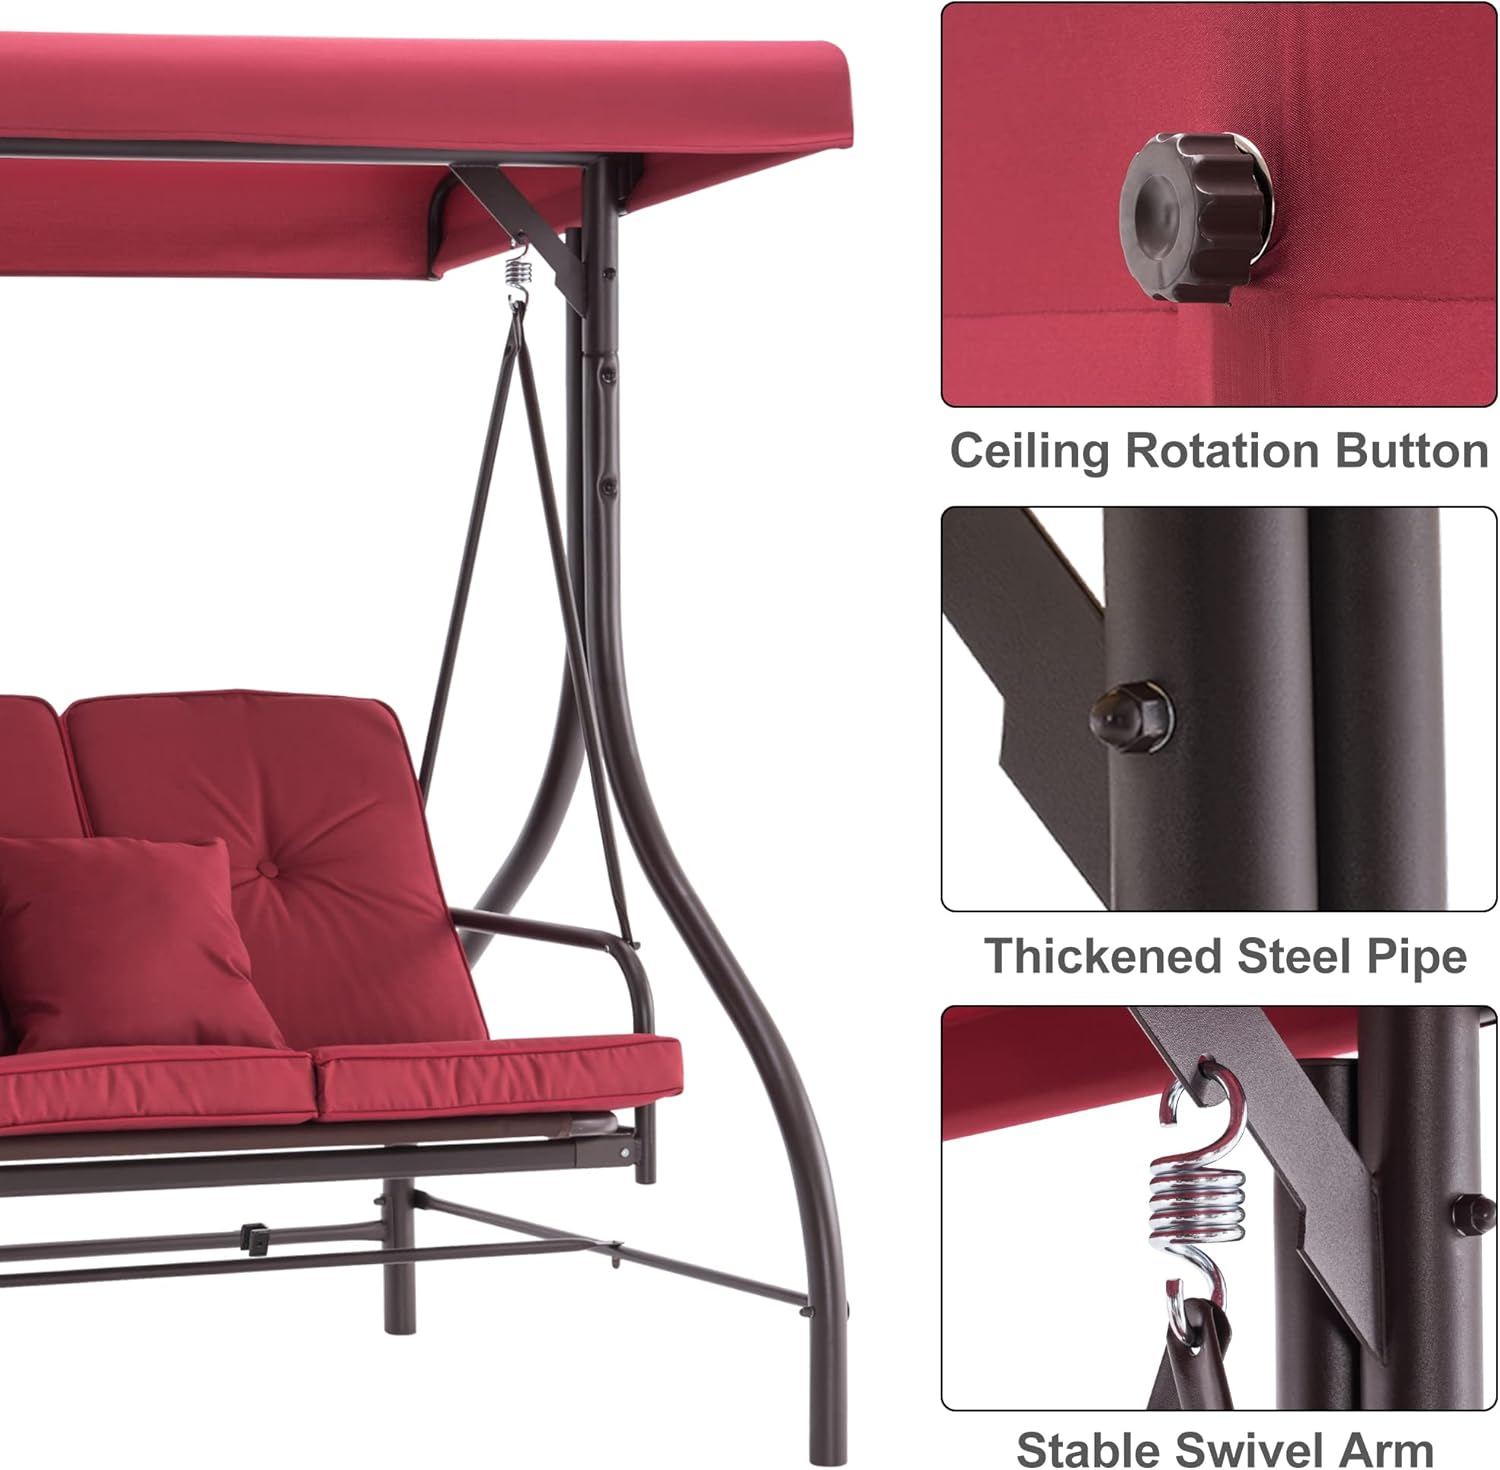
The swing canopy is designed to be adjustable within a 45-degree range to provide optimal shade from different sun angles. To adjust, loosen the rotation buttons on either side of the canopy frame, position the canopy to your desired angle, and then re-tighten the buttons to secure it.
For full sun exposure or if not needed, the canopy can be easily removed.

Converting to a Flat Backrest (2-in-1 Design)
The backrest of the swing chair can be fully reclined to create a flat bed surface. To convert:
- Locate the buckles on the side of the swing seat frame.
- Pull the buckles to release the backrest.
- Gently push the backrest down until it lies flat and locks into the lower buckle position.
To return to the upright position, reverse these steps, ensuring the backrest is securely locked.

5. Maintenance
Cleaning
- Frame: Wipe the powder-coated steel frame with a damp cloth and mild soap. Rinse thoroughly and dry completely to prevent rust.
- Fabric (Canopy, Cushions): The polyester fabric is weather-resistant. For general cleaning, wipe with a damp cloth. For deeper cleaning, use a mild soap solution and a soft brush, then rinse and air dry. Ensure fabrics are completely dry before storage to prevent mildew.
- The mesh seat is designed for easy cleaning; an occasional wipe with a rag is sufficient.
Care and Storage
- To prolong the life of your swing chair, especially the fabric components, consider using a protective cover when not in use or during prolonged periods of harsh weather.
- Store cushions and pillows indoors during inclement weather or off-season.
- Periodically check all bolts and connections to ensure they remain tight. Re-tighten as needed.

6. Troubleshooting
- Canopy does not stay in position: Ensure the ceiling rotation buttons on both sides of the canopy frame are fully tightened after adjustment. If the issue persists, check for any obstructions or damage to the adjustment mechanism.
- Swing feels unstable: Verify that all frame bolts and nuts are securely tightened. Ensure the swing chair is placed on a level surface. Uneven ground can affect stability.
- Fabric fading: While the fabric has an upgraded anti-fading function, prolonged exposure to intense sunlight, especially in harsh climates, can still cause some fading over time. Consider using a protective cover when the swing is not in use to minimize sun exposure.
- Squeaking during swinging: Apply a silicone-based lubricant to the suspension chains and hooks if any squeaking occurs. Avoid oil-based lubricants that can attract dirt.
7. Specifications
| Feature | Specification |
|---|---|
| Brand | MCombo |
| Model Number | 4068 (6055-4068) |
| Color | Burgundy |
| Product Dimensions (L x W x H) | 73"W x 44"D x 68"H |
| Seat Depth | 21.3 inches |
| Frame Material | Alloy Steel |
| Finish Type | Powder Coated |
| Item Weight | 83.8 pounds |
| Weight Capacity | Up to 750 pounds |
| Assembly Required | Yes |

8. Warranty and Support
For warranty information, product support, or to order replacement parts, please contact MCombo customer service directly. Refer to the contact information provided at the point of purchase or on the official MCombo website.
Please have your model number (4068) and purchase date available when contacting support.
Related documents4068


Ask a question about this manual
Ask about setup, troubleshooting, compatibility, parts, safety, or missing instructions. Manuals+ will review the question and use this page’s manual context to help answer it.