1. Introduction
This manual provides essential information for the proper installation, operation, and maintenance of your Lowrance Active Imaging 3-In-1 Transducer (Model: 000-14489-001). This transducer is designed to enhance your marine electronics system by providing detailed sonar imaging capabilities. Please read this manual thoroughly before installation and use.
2. Safety Information
Observe the following safety precautions to prevent injury and damage to the equipment:
- Always disconnect power to the marine electronics system before installing or servicing the transducer.
- Ensure all connections are secure and waterproof to prevent electrical shorts or corrosion.
- Mount the transducer in a location where it will not interfere with boat operation or pose a hazard to swimmers.
- Avoid exposing the transducer to extreme temperatures or harsh chemicals.
3. Package Contents
Verify that all components are present before beginning installation:
- Lowrance Active Imaging 3-In-1 Transducer
- Transom Mount Bracket
- Mounting Hardware (screws, washers, nuts)
- Installation Template (if included)
4. Setup and Installation
The Lowrance Active Imaging 3-In-1 Transducer is designed for transom mounting. Proper placement is crucial for optimal performance.
4.1 Mounting Location
Select a location on the transom that is:
- Free from obstructions (e.g., propellers, strakes, other transducers).
- In an area of smooth water flow, minimizing turbulence.
- Accessible for installation and maintenance.
4.2 Physical Installation
- Position the transom mount bracket on the selected location. Ensure the bottom of the transducer will be slightly below the hull line when deployed.
- Mark the drill holes using the bracket as a template.
- Drill pilot holes. Apply marine sealant to prevent water intrusion.
- Secure the transom mount bracket to the boat using the provided mounting hardware.
- Attach the transducer to the bracket. Adjust the angle so the transducer face is parallel to the waterline.

Figure 1: Angled view of the Lowrance Active Imaging 3-In-1 Transducer with its transom mount bracket.

Figure 2: Side view of the transducer, illustrating its profile and mounting position.
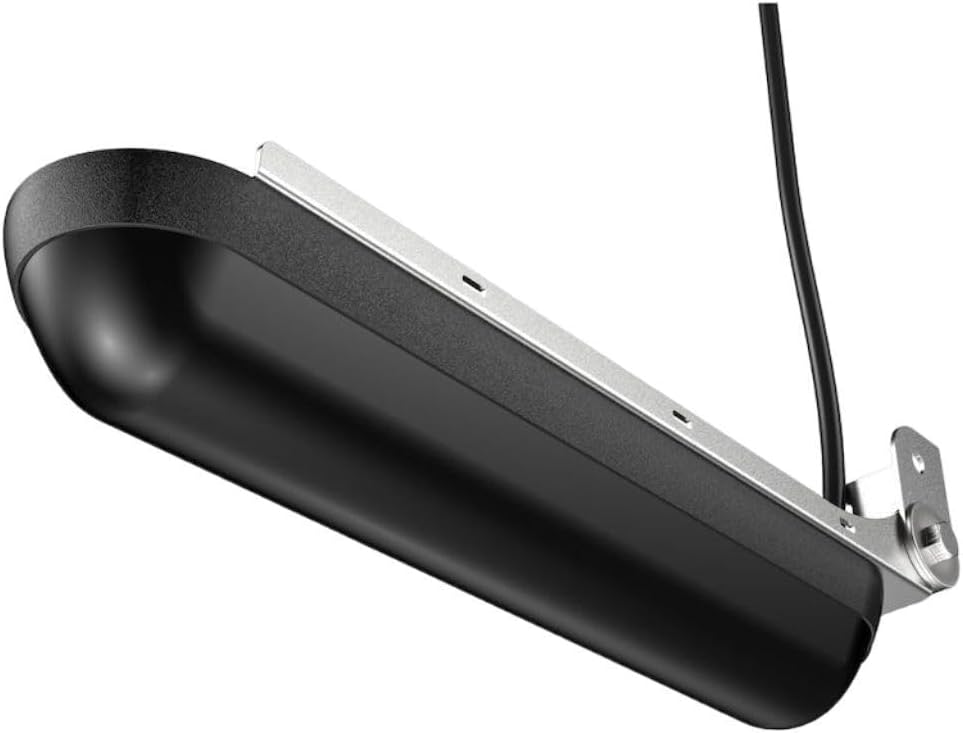
Figure 3: Bottom view of the transducer, showing the sonar elements.
4.3 Electrical Connection
Route the transducer cable to your compatible Lowrance display unit (e.g., HDS LIVE, HDS Carbon, Elite Ti2). The transducer features a 9-Pin connection. Ensure the connector is fully seated and the locking collar is tightened to create a waterproof seal.
5. Operating Instructions
The Active Imaging 3-In-1 Transducer combines multiple sonar technologies to provide a comprehensive view of the underwater environment.
5.1 Sonar Frequencies and Modes
- Med/High CHIRP: Provides traditional sonar views for fish arches and bottom tracking.
- SideScan: Offers wide, high-resolution views of structure and fish to the sides of your boat.
- DownScan: Delivers picture-like views of structure and fish directly below your boat.
Refer to your Lowrance display unit's manual for detailed instructions on selecting and optimizing these sonar modes.
6. Maintenance
Regular maintenance ensures optimal performance and longevity of your transducer.
- Cleaning: Periodically clean the transducer face with mild soap and water to remove marine growth, dirt, or oil. Avoid abrasive cleaners or solvents.
- Inspection: Regularly inspect the transducer cable for cuts, kinks, or damage. Check the mounting bracket for looseness or corrosion.
- Winterization: If operating in freezing conditions, ensure the transducer is not exposed to ice formation, which can cause damage.
7. Troubleshooting
If you experience issues with your transducer, consider the following common problems and solutions:
| Problem | Possible Cause | Solution |
|---|---|---|
| No Sonar Reading | Loose connection, power issue, transducer not submerged. | Check cable connections, verify power to display unit, ensure transducer is in water. |
| Poor or Intermittent Imaging | Air bubbles, marine growth, incorrect mounting angle, electrical interference. | Clean transducer face, adjust mounting angle, check for sources of electrical noise, reposition transducer if necessary. |
| SideScan/DownScan Not Working | Incorrect display unit settings, damaged transducer element. | Verify sonar settings on your display unit. If problem persists, contact support. |
For persistent issues, consult your Lowrance display unit's manual or contact Lowrance customer support.
8. Specifications
- Model: 000-14489-001
- Type: Active Imaging 3-In-1 Transducer
- Frequencies: Med/High CHIRP, SideScan, DownScan
- Connection: 9-Pin
- Mounting Type: Transom mount
- Dimensions: Approximately 8 x 6 x 4 inches (20.3 x 15.2 x 10.2 cm)
- Weight: Approximately 3.66 pounds (1.66 kg)
- Compatible Units: HDS LIVE, HDS Carbon, Elite Ti2 series
9. Warranty and Support
This Lowrance Active Imaging 3-In-1 Transducer (Model: 000-14489-001) is covered by a 90-day limited warranty from the date of purchase. This warranty covers defects in materials and workmanship under normal use.
For warranty claims, technical support, or further assistance, please refer to the official Lowrance website or contact their customer service department. Keep your proof of purchase for warranty validation.


