Introduction
This manual provides detailed instructions for the operation and maintenance of your Mersoco Film Digitalizer M127S. This device is designed to convert 8mm and Super 8 film reels into digital MPEG-4 (MP4) video files at 1080p resolution and 30 frames per second. Please read this manual thoroughly before using the product to ensure proper function and longevity.
Safety Information
- Always ensure the device is placed on a stable, flat surface.
- Do not expose the device to moisture or extreme temperatures.
- Use only the provided power adapter.
- Keep the device away from children.
- Do not attempt to disassemble or repair the device yourself. Contact customer support if issues arise.
- Ensure proper ventilation around the device during operation.
Setup
1. Unboxing and Components
Carefully remove all components from the packaging. Verify that all items are present:
- Mersoco Film Digitalizer M127S unit
- Power Adapter
- USB Cable
- TV Out Cable (RCA)
- 32GB SD Card
- Empty Film Reel
- Cleaning Cloth
- User Manual
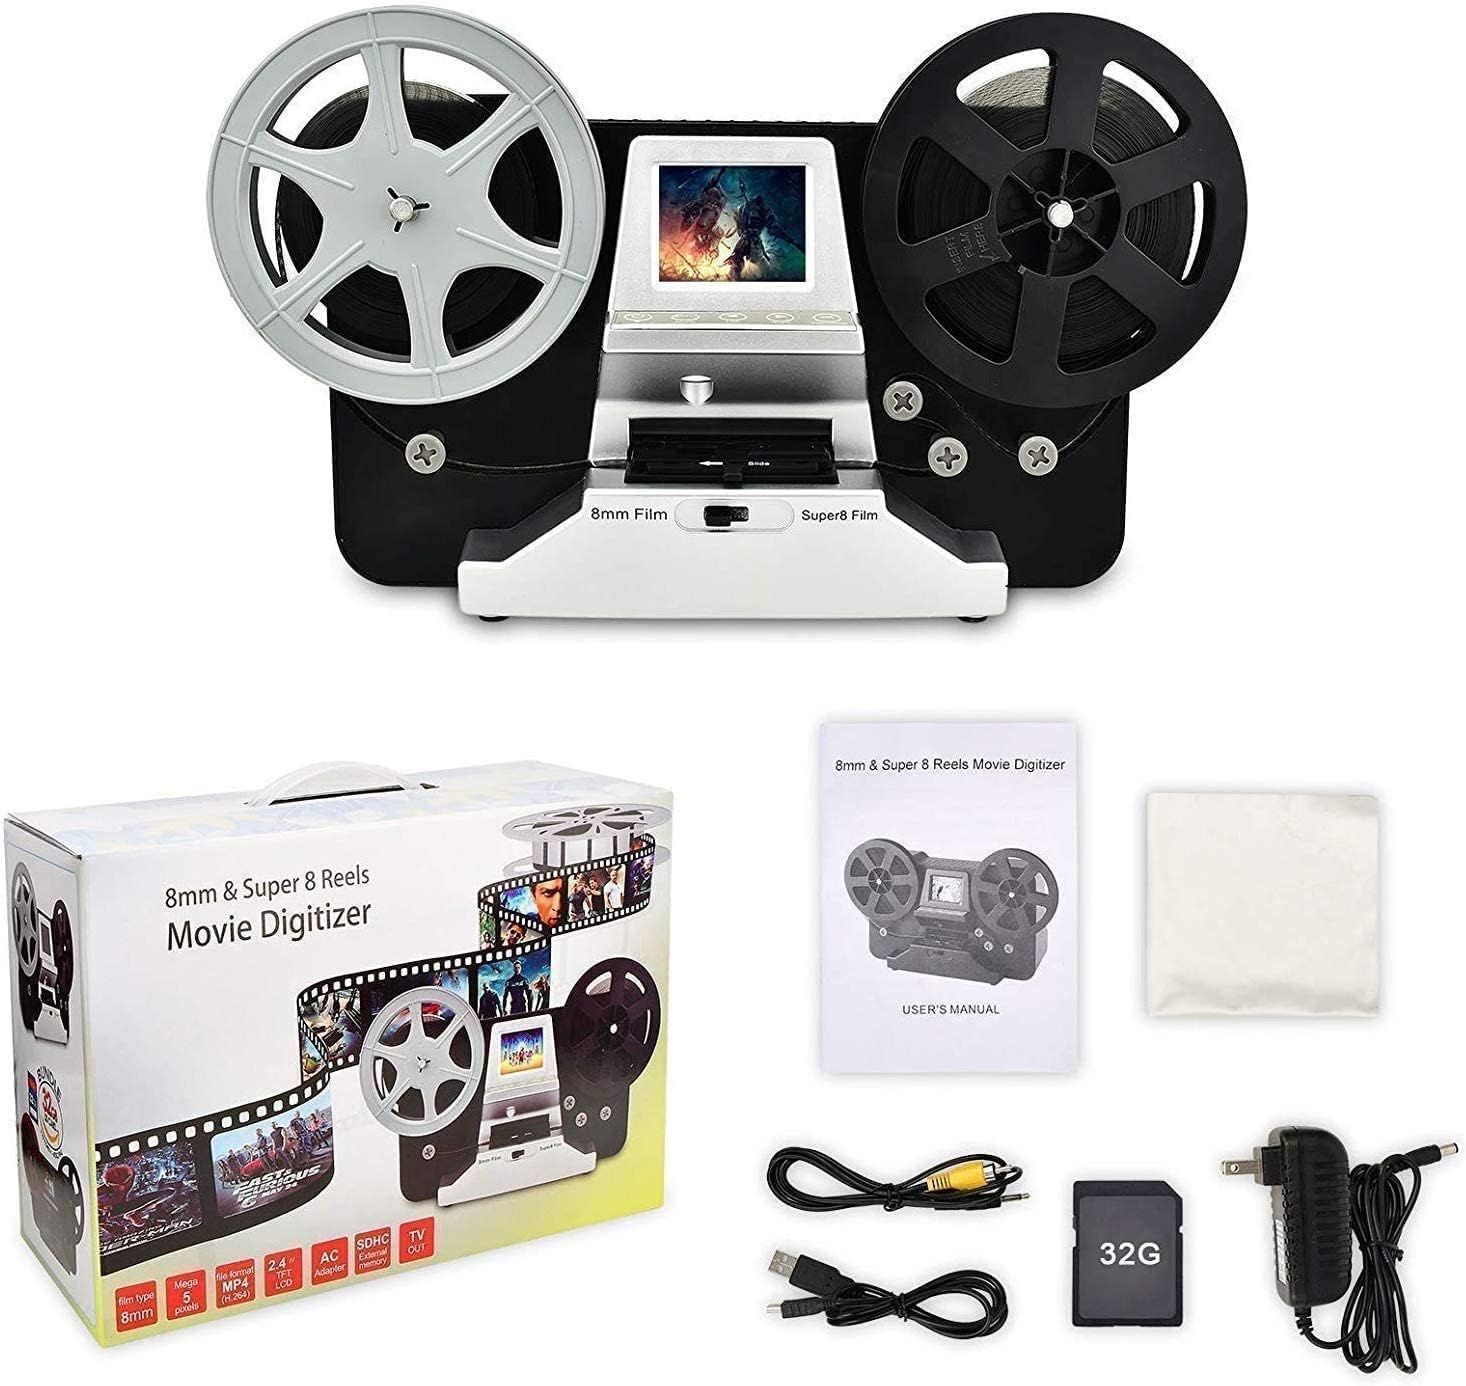
Image: The Mersoco Film Digitalizer M127S unit with all its included accessories, including cables, SD card, and cleaning cloth.
2. Connecting Power
Connect the provided power adapter to the DC 12V slot on the back of the digitalizer and plug it into a power outlet.
3. Inserting SD Card
Insert the included 32GB SD card into the SD card slot on the back of the unit. Ensure it is inserted correctly until it clicks into place. The device saves digital video files directly to this card.

Image: A detailed view of the SD card slot on the back of the digitalizer, showing an SD card being inserted.
4. Loading Film
- Place your film reel onto the left spindle and an empty take-up reel onto the right spindle.
- Carefully thread the film through the film path as indicated on the device, ensuring it passes through the scanning gate.
- Attach the end of the film to the empty take-up reel.
- Use the Super 8 / Regular 8 switch located near the film gate to select the correct film type. This adjusts the image centering for optimal scanning.

Image: A close-up view of the film loading area, showing the film path, the 8mm/Super 8 switch, and control buttons.

Image: A detailed view of the film loading mechanism, highlighting the gate where the film passes for scanning.
Operating Instructions
1. Powering On/Off
Press the Power button on the control panel to turn the device on or off. The 2.4-inch LCD screen will illuminate.
2. Selecting Film Type
Before scanning, ensure the physical switch for 8mm or Super 8 film is correctly set according to your film type. This ensures the scanner captures the correct portion of the film.
3. Scanning Process
The digitalizer converts 8mm and Super 8 films frame by frame into digital MPEG-4 (MP4) video files at 1080p resolution and 30 frames per second. Follow the on-screen prompts using the control buttons (Mode, Left, Right, OK, Start/Stop) to initiate and manage the scanning process.

Image: A close-up of the control panel with buttons for Mode, Left, Right, OK, and Start/Stop, adjacent to the film path.
4. Viewing Scanned Videos
You can view the digitized films directly on the integrated 2.4-inch color LCD screen. Alternatively, connect the device to a television using the provided TV Out cable to view the content on a larger display.

Image: The 2.4-inch LCD screen on the digitalizer displaying a clear image from a scanned film.

Image: The film digitalizer connected to a large television screen, demonstrating the TV Out function for viewing scanned films.
5. Transferring Files to PC
To transfer your digitized video files to a computer, connect the digitalizer to your PC, Mac, or laptop using the provided USB cable. The device is compatible with Windows, Mac, and Linux operating systems, allowing for easy saving and backup of your video files.

Image: The rear panel of the digitalizer, clearly labeling the USB slot for PC connection, TV OUT slot, SD card slot, and DC 12V power input.
Maintenance
- Cleaning the Film Path: Regularly use the provided cleaning cloth or a soft, lint-free cloth to gently wipe the film path and scanning gate. This prevents dust and debris from affecting scan quality.
- Cleaning the Exterior: Wipe the exterior of the device with a soft, dry cloth. Do not use liquid cleaners or abrasive materials.
- Storage: When not in use, store the digitalizer in a cool, dry place, away from direct sunlight and dust.
- Film Condition: Ensure your film reels are clean and free of dust or damage before scanning to achieve the best results and prevent damage to the scanner.
Troubleshooting
No Power
- Ensure the power adapter is securely connected to both the device and a working power outlet.
- Verify the power outlet is functional by plugging in another device.
Poor Scan Quality
- Check that the film path and scanning gate are clean. Dust or debris can cause artifacts in the scanned image.
- Ensure the 8mm/Super 8 switch is set correctly for your film type.
- Verify the film is loaded correctly and threaded smoothly through the mechanism.
- The quality of the original film significantly impacts the digital output. Severely damaged or degraded films may not produce high-quality scans.
SD Card Not Detected or Error
- Ensure the SD card is fully inserted into the slot.
- Try reinserting the SD card.
- Format the SD card using the device's menu options (refer to on-screen instructions) or on a computer. Note: Formatting will erase all data on the card.
- Try a different compatible SD card to rule out a faulty card.
Film Jams
- Immediately stop the scanning process if a jam occurs.
- Carefully remove the film from the path. Inspect the film for any damage or splices that might be catching.
- Ensure the film is threaded correctly and the reels are spinning freely.
Specifications
| Brand | Mersoco |
| Model Number | Film Digitalisierung-M127S |
| Color | Silver |
| Scanner Type | Film |
| Optical Sensor Technology | CCD |
| Resolution | 1080P |
| Connectivity Technology | HDMI |
| Connections | HDMI |
| Product Dimensions | 13D x 32W x 19.1H centimeters |
| Item Weight | 2.05 Kilograms |
| Standard Sheet Capacity | 8 (referring to 8mm film) |
| Minimum System Requirements | Linux (for PC connection, also compatible with Windows, Mac) |
| UPC | 789917698097 |
Warranty and Support
For warranty information or technical support, please refer to the documentation included with your purchase or contact Mersoco customer service. Details regarding spare parts availability and software updates are not available in this manual.


