1. Introduction
This manual provides detailed instructions for the safe and efficient operation of your Retekess TR106 Portable AM/FM Digital Tuning Radio. Please read this manual thoroughly before using the device and retain it for future reference.
2. Safety Information
- Do not expose the radio to extreme temperatures, direct sunlight, dust, or humidity.
- Avoid dropping or subjecting the radio to strong impacts.
- Keep the radio away from water and other liquids.
- Do not attempt to disassemble or modify the radio. This will void the warranty.
- Use only specified AAA batteries. Ensure correct polarity when inserting batteries.
- Remove batteries if the radio will not be used for an extended period.
3. Package Contents
Verify that all items are present in the package:
- 1 x Retekess TR106 FM AM Radio
- 1 x English User Manual
- 1 x Lanyard

4. Product Overview
The Retekess TR106 is a compact AM/FM digital tuning radio featuring an LCD display, built-in speaker, and various control buttons.

Controls and Display:
- Power Button: Turns the radio on/off.
- Band Button: Switches between FM and AM bands.
- MEM Button: Accesses memory functions.
- M-/M+ Buttons: Navigates through stored stations or adjusts settings.
- Tuning Dial/Buttons: Adjusts frequency.
- Volume +/- Buttons: Controls the audio volume (40 levels).
- LCD Display: Shows frequency, time, band, and other indicators.
- 3.5mm Earphone Jack: For private listening and can act as an external antenna for FM.
- Retractable Antenna: Improves FM reception.
5. Setup
5.1 Battery Installation
The Retekess TR106 radio requires two AAA batteries (not included).
- Locate the battery compartment cover on the back of the radio.
- Slide the cover open.
- Insert two AAA batteries, ensuring the correct polarity (+ and -) as indicated inside the compartment.
- Close the battery compartment cover securely.

6. Operating Instructions
6.1 Power On/Off
Press the Power button (usually located on the top right) to turn the radio on or off.
6.2 Adjusting Volume
Use the Volume +/- buttons to increase or decrease the sound level. The radio supports 40 levels of volume adjustment.

6.3 Selecting AM/FM Band
Press the BAND button to switch between FM (87-108MHz) and AM (520-1710KHz) frequency bands.
6.4 Tuning Stations
You can tune stations manually or use the automatic search function.
- Manual Tuning: Use the Tuning +/- buttons (often on the side) to fine-tune the frequency.
- Automatic Search: Long-press the Tuning +/- buttons to automatically scan for the next available station.

6.5 Storing Preset Stations
The radio can store up to 35 stations per band.
- Tune to your desired station.
- Press and hold the MEM button until 'P' appears on the display, indicating program mode.
- Use the M-/M+ buttons to select a memory slot (e.g., P01, P02).
- Press the MEM button again to confirm and save the station.
6.6 Recalling Preset Stations
In radio mode, briefly press the MEM button, then use the M-/M+ buttons to cycle through your stored stations.
6.7 Sleep Timer Function
The sleep timer allows the radio to automatically turn off after a set period (0-90 minutes).
- While the radio is on, press and hold the Power button.
- The display will show '90'.
- Briefly press the Power button repeatedly to cycle through the sleep timer options (90, 80, 70...0 minutes).
- Stop at your desired time. The setting will be saved automatically.

6.8 Alarm Clock Setting
The radio can be set to turn on at a specific time as an alarm.
- With the radio off, press and hold the Power button to enter time setting mode.
- Use the Tuning +/- buttons to adjust the hour, then press MEM to confirm.
- Repeat for minutes.
- To set the alarm, press the Power button again after setting the time. The alarm icon will appear.
- Adjust the alarm hour and minutes using the Tuning +/- buttons and confirm with MEM.
- To activate/deactivate the alarm, briefly press the Power button when the radio is off. The alarm icon will show/hide.
6.9 Using Earphones
Plug any 3.5mm wired earphones into the earphone jack for private listening. The earphone cable also functions as an external antenna for improved FM reception.
6.10 AM Frequency Step Adjustment (9KHz/10KHz)
The AM frequency step can be adjusted for different regions (e.g., 9KHz for Europe/Asia, 10KHz for North/South America).
- With the radio off, press and hold the MEM button for a few seconds.
- The display will show '9' or '10'.
- Press the Tuning +/- buttons to switch between 9KHz and 10KHz.
- Press the Power button to confirm and exit.
6.11 Video Tutorial: How to Operate Retekess TR106
Video: A visual guide demonstrating the basic operation of the Retekess TR106 radio, including battery installation, tuning, and setting functions.
7. Maintenance
- Clean the radio with a soft, dry cloth. Do not use abrasive cleaners or solvents.
- Keep the radio in a dry place when not in use.
- Regularly check the battery compartment for corrosion.
8. Troubleshooting
| Problem | Possible Cause | Solution |
|---|---|---|
| Radio does not turn on. | Batteries are dead or incorrectly inserted. | Replace batteries with new AAA batteries, ensuring correct polarity. |
| Poor reception (static/weak signal). | Weak signal area; antenna not extended; interference. | Extend the telescopic antenna fully. Try moving to a different location. If using FM, plug in earphones to act as an additional antenna. |
| No sound. | Volume is too low; earphones plugged in. | Increase the volume. If earphones are plugged in, sound will only come through them. Unplug earphones for speaker output. |
| Cannot store stations. | Incorrect procedure followed. | Refer to section 6.5 "Storing Preset Stations" for the correct steps. |
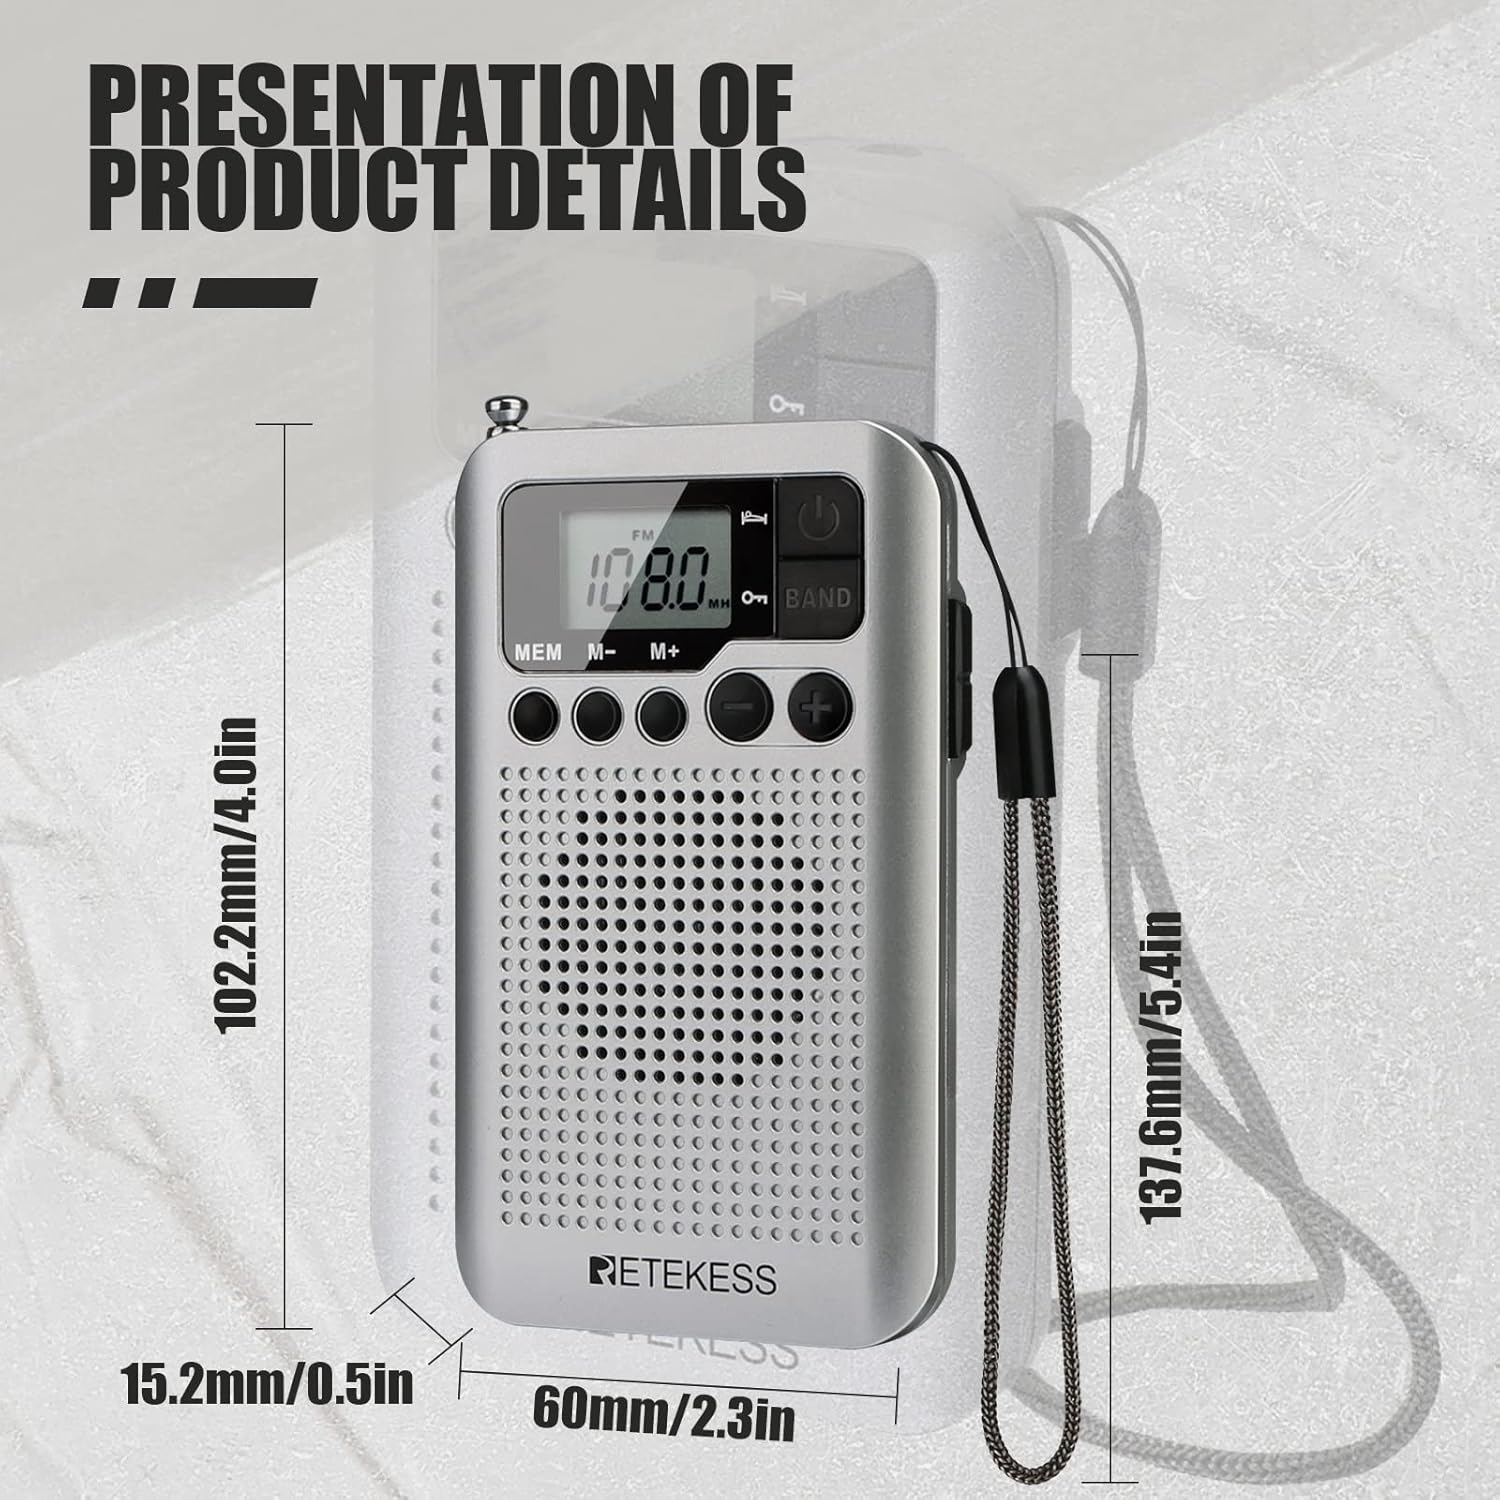
9. Specifications
- Model: TR106
- Frequency Range:
- FM: 87-108MHz
- AM: 520-1710KHz
- Power Source: 2 x AAA batteries (DC 3V)
- Speaker: Built-in
- Earphone Jack: 3.5mm
- Volume Levels: 40
- Preset Stations: Up to 35 per band
- Sleep Timer: 0-90 minutes
- Dimensions: Approximately 102.2mm (L) x 60mm (W) x 15.2mm (H) / 4.09" x 2.36" x 0.61"
- Weight: Approximately 2.72 ounces
10. Warranty and Support
Retekess products typically come with a 12-month guarantee. For warranty claims, technical support, or customer service inquiries, please refer to the contact information provided with your purchase or visit the official Retekess website.
Manufacturer: Retekess


