Introduction
The SilverStone FARA B1 is an ATX tower chassis designed to provide efficient cooling and ample space for various hardware configurations. This manual provides detailed instructions for the assembly, operation, and maintenance of your FARA B1 chassis.

Figure 1: SilverStone FARA B1 ATX Chassis
Setup and Installation
1. Unpacking and Inspection
Carefully remove the chassis from its packaging. Inspect for any damage that may have occurred during transit. Retain the packaging for future transport or storage.
2. Tempered Glass Side Panel Removal
To access the interior, unscrew the four thumb screws securing the tempered glass side panel. Gently pull the panel away from the chassis and set it aside on a soft, flat surface to prevent scratches.
3. Motherboard Installation
The FARA B1 supports ATX, Micro-ATX, and Mini-ITX motherboards. Ensure the standoffs align with your motherboard's mounting holes. Install the I/O shield into the rear opening of the chassis. Carefully place the motherboard onto the standoffs and secure it with screws.
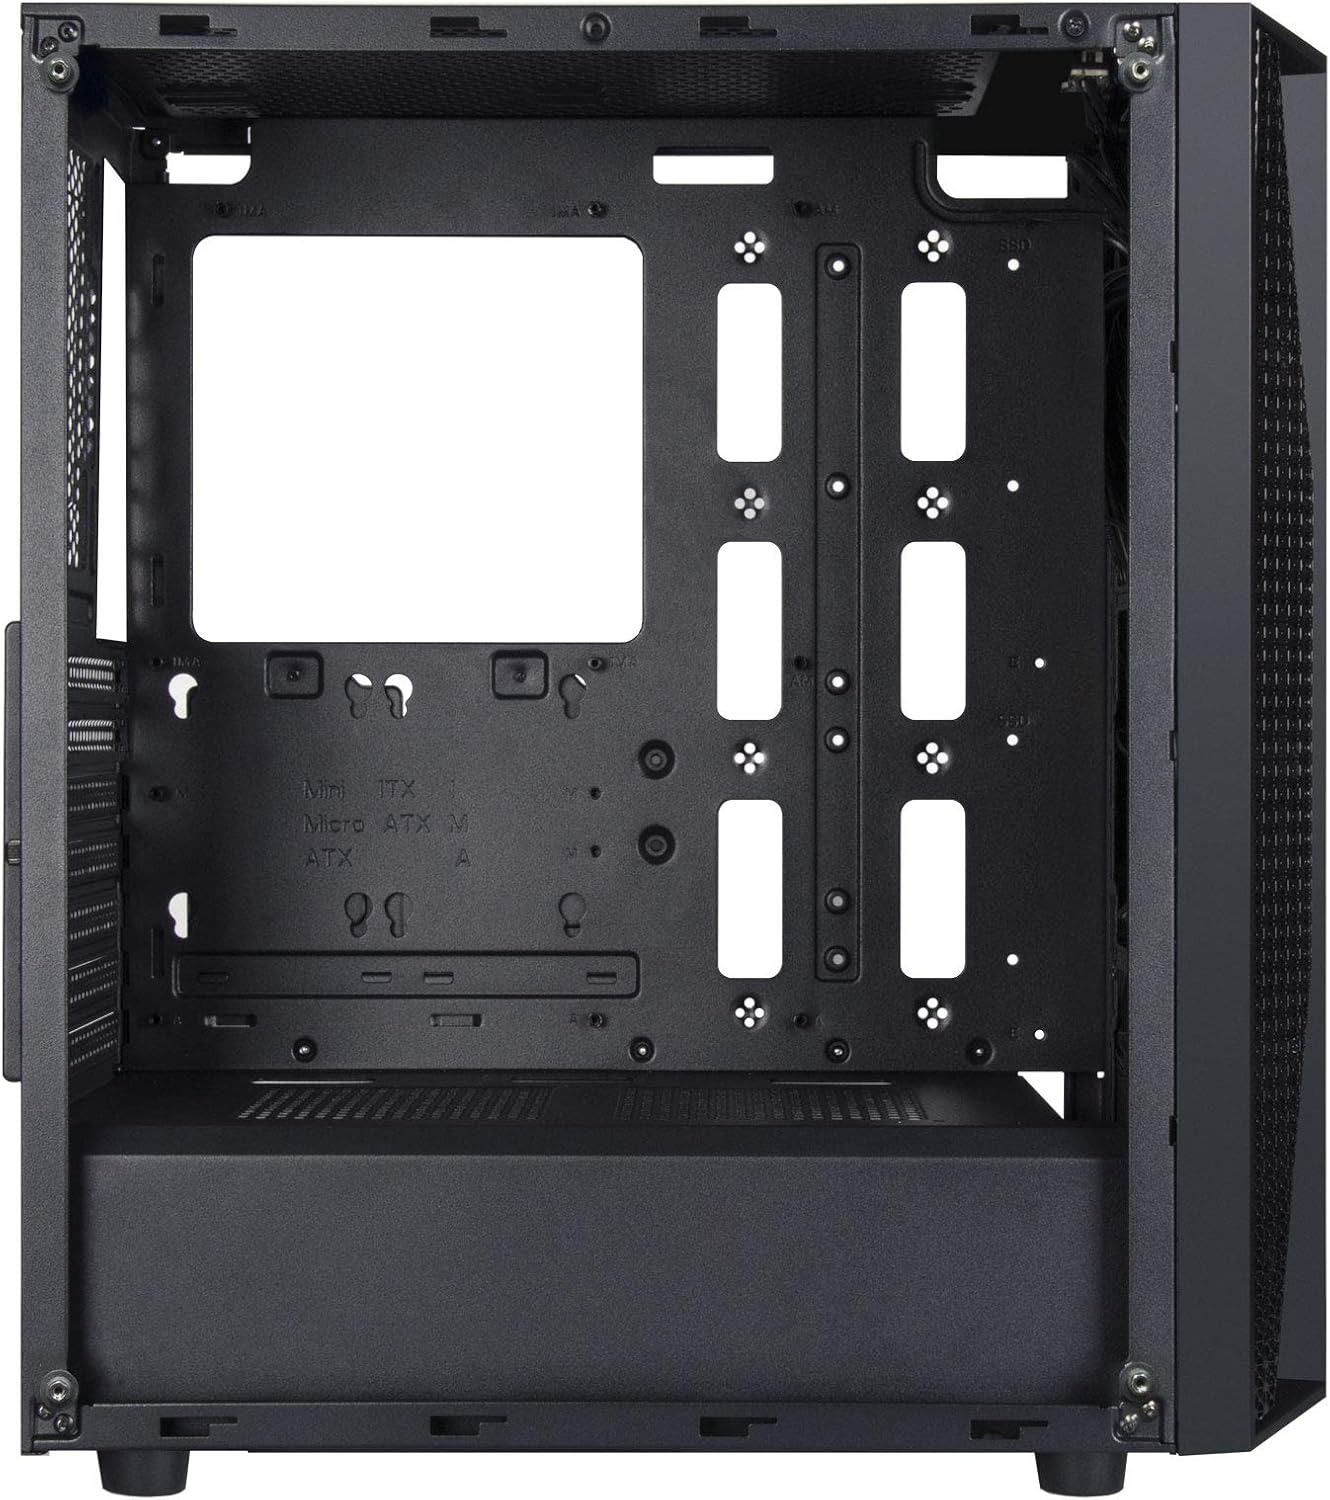
Figure 2: Chassis Interior with Motherboard Tray
4. Storage Drive Installation
The chassis supports one 3.5" drive and four 2.5" drives.
- 3.5" HDD: Locate the drive cage beneath the PSU shroud. Slide the 3.5" HDD into the drive tray and secure it with screws.
- 2.5" SSD: Mount 2.5" SSDs to the dedicated mounting points behind the motherboard tray or on top of the PSU shroud. Secure with screws.

Figure 3: 3.5" HDD Drive Cage

Figure 4: 2.5" SSD Mounting Points
5. Power Supply Installation
Install the ATX power supply into the dedicated compartment at the bottom rear of the chassis. Secure it with screws from the rear of the case.
6. Graphics Card and Expansion Card Installation
Remove the necessary PCIe slot covers from the rear of the chassis. Insert your graphics card or other expansion cards into the motherboard's PCIe slots and secure them with screws.
7. Fan and Cooling System Installation
The FARA B1 supports multiple cooling options, including up to four 140mm fans or five 120mm fans. Install fans in the front, top, and rear positions as desired. Ensure proper airflow direction for optimal cooling.
8. Cable Management
Utilize the cable routing cutouts and tie-down points behind the motherboard tray to manage cables. This improves airflow and aesthetics.
9. Front I/O Connections
Connect the front panel cables (USB 3.0, USB 2.0, HD Audio, Power, Reset, LED indicators) to the corresponding headers on your motherboard. Refer to your motherboard manual for specific header locations.

Figure 5: Top I/O Panel
Operating Instructions
1. Powering On/Off
Press the power button located on the top I/O panel to turn your system on or off. A short press typically initiates a soft shutdown, while a long press (several seconds) forces a hard shutdown.
2. Using Front Panel Ports
The front I/O panel provides convenient access to USB 3.0, USB 2.0 ports, and a combined 3.5mm audio jack for headphones or headsets with a microphone. Ensure all necessary drivers are installed for proper functionality.

Figure 6: Example of a Built System
Maintenance
1. Dust Filter Cleaning
The FARA B1 features a magnetic dust filter on the top panel and a removable filter at the bottom for the power supply intake. Regularly clean these filters to maintain optimal airflow and prevent dust buildup inside the chassis.
- Gently lift the magnetic top filter for cleaning.
- Slide out the bottom filter from the rear of the chassis.
- Use compressed air or a soft brush to remove accumulated dust.

Figure 7: Removing Top Dust Filter
2. General Cleaning
Wipe the exterior of the chassis with a soft, damp cloth. Avoid using harsh chemicals or abrasive materials that could damage the finish or tempered glass.
Troubleshooting
System Not Powering On
- Ensure the power supply is switched on and properly connected to the wall outlet.
- Verify all power cables (24-pin ATX, 8-pin CPU, PCIe power) are securely connected to the motherboard and components.
- Check that the front panel power switch cable is correctly connected to the motherboard's front panel header.
Poor Airflow or Overheating
- Clean all dust filters regularly.
- Ensure case fans are installed with the correct orientation for intake and exhaust.
- Verify that CPU cooler and GPU fans are functioning correctly.
- Improve cable management to reduce obstructions to airflow.
Front Panel Ports Not Working
- Check that the USB and audio cables from the front panel are securely connected to the corresponding headers on your motherboard.
- Ensure necessary drivers for USB and audio are installed and up to date.
Specifications
| Feature | Detail |
|---|---|
| Brand | SilverStone |
| Model Name | FARA B1 |
| Item Model Number | SST-FAB1B-G |
| Case Type | Mid Tower |
| Motherboard Compatibility | ATX, Micro-ATX, Mini-ITX |
| Material | Tempered Glass, Steel |
| Dimensions (LxWxH) | 15.79 x 8.15 x 17.56 inches (401 x 207 x 446 mm) |
| Item Weight | 13.12 pounds (5.95 kg) |
| Drive Bays | 1 x 3.5", 4 x 2.5" |
| Cooling Method | Air, Water |
| Fan Support | Up to four 140mm fans / five 120mm fans |
| Front I/O Ports | USB 3.0 x 2, USB 2.0 x 1, Audio x 1 (combined 3.5mm) |
| Power Supply Mounting Type | Bottom Mount |
Warranty and Support
For warranty information, technical support, or further assistance, please visit the official SilverStone Technology website or contact their customer service department. Keep your proof of purchase for warranty claims.
Official SilverStone Website: www.silverstonetek.com


