1. Introduction
Thank you for choosing the SV3C 5MP HD Wi-Fi Outdoor Security Camera. This manual provides detailed instructions for the installation, operation, and maintenance of your security camera. Please read this manual carefully before use and retain it for future reference.
2. Package Contents
Verify that all items listed below are included in your package. If any items are missing or damaged, please contact SV3C customer support.
- 1x SV3C 5MP HD Wi-Fi Camera
- 1x Cat5 Network Cable
- 1x Mounting Bracket and Screw Set
- 1x Power Adapter (3-meter cable)
- 1x Quick Installation Guide
- 1x Waterproof Lid for Ethernet Cable

Figure 2.1: Package Contents
3. Product Overview
The SV3C 5MP HD Wi-Fi Outdoor Security Camera is designed for robust outdoor surveillance, offering high-resolution video, advanced detection features, and reliable connectivity.
3.1 Key Features
- 5MP Ultra-HD Video: Captures clear 2560x1920 resolution footage with a 3.6mm HD lens.
- 20m Night Vision: Equipped with 36 advanced IR LEDs for clear night vision up to 20 meters.
- AI Humanoid Detection: Differentiates human movement from other objects to reduce false alarms.
- Two-Way Audio: Built-in microphone and speaker for remote communication.
- IP66 Weatherproof: Durable aluminum casing ensures protection against harsh weather conditions.
- ONVIF Compatibility: Works with most ONVIF-supported NVRs and security monitoring software.
- Remote Monitoring: Access live streams, playback, and download recordings via mobile app or PC software.
- Local Storage: Supports up to 64GB (or 256GB as per some A+ content) Micro SD card for local video storage (SD card not included).
3.2 Camera Components

Figure 3.1: Camera Component Diagram
- Black Cover: Protective casing.
- IP66 Metal Housing: Robust and weather-resistant body.
- Microphone: For audio input.
- 3.6mm HD Lens: Captures high-definition video.
- 36 LEDs: Infrared LEDs for night vision.
- Daylight Sensor: Automatically switches between day and night modes.
- SD Card Slot: For local storage (inside the camera, requires opening).
- Speaker: For audio output (two-way audio).
- Reset Button: To restore factory settings.
- LAN Cable Port: For wired Ethernet connection.
- Power Port: For connecting the power adapter.
4. Setup
4.1 Initial Connection (Wired)
- Connect Power: Plug the power adapter into the camera's power port and then into an electrical outlet.
- Connect to Router: Use the provided Cat5 Ethernet cable to connect the camera's LAN port directly to your Wi-Fi router.
- Download App: Download the recommended mobile application (e.g., CamHipro or CamHi as per reviews) from your smartphone's app store (Google Play or Apple App Store).
- Add Device: Open the app, create an account if necessary, and follow the in-app instructions to add a new device. The app should detect the camera on your local network.
4.2 Wi-Fi Configuration
Once the camera is initially connected via Ethernet and detected by the app:
- In the app, navigate to the camera's settings.
- Find the "Wi-Fi Settings" or "Wireless Settings" option.
- Select your 2.4GHz Wi-Fi network from the list and enter the password. (Note: The camera supports 2.4GHz Wi-Fi only).
- Save the settings. Once configured, you can disconnect the Ethernet cable, and the camera will connect wirelessly.
4.3 Micro SD Card Installation (Optional)
For local storage, a Micro SD card (up to 64GB/256GB, not included) can be installed:
- Power Off: Disconnect the camera from power before proceeding.
- Locate Slot: The SD card slot is typically located inside the camera housing. You may need to unscrew a cover to access it. Refer to Figure 3.1 for general location.
- Insert Card: Carefully insert the Micro SD card into the slot until it clicks into place.
- Secure Cover: Re-attach any covers, ensuring the waterproof seal is properly seated to maintain IP66 rating.
- Format Card: After powering on the camera and connecting to the app, navigate to storage settings and format the SD card within the app.
5. Operating Instructions
5.1 Live View and Remote Access
Access your camera's live feed from anywhere using the mobile app or PC software.
- Open the installed application on your smartphone or PC.
- Select your camera from the device list to view the live stream.
- Ensure your device has an active internet connection for remote viewing.

Figure 5.1: Live View on Smartphone

Figure 5.2: Remote Access via Mobile App
5.2 Two-Way Audio
Utilize the camera's built-in microphone and speaker for two-way communication.
- While in live view, locate the microphone icon in the app interface.
- Tap and hold the microphone icon to speak through the camera's speaker.
- Release the icon to listen for audio from the camera's microphone.

Figure 5.3: Two-Way Audio Functionality
5.3 Motion Detection and Alerts
Configure motion detection settings to receive alerts for activity.
- In the app, go to the camera's settings and find "Motion Detection" or "Alarm Settings".
- Enable Motion Detection: Turn on the motion detection feature.
- Customize Detection Area: Define specific areas within the camera's view where motion should be detected. This helps reduce false alarms from irrelevant areas.
- Adjust Sensitivity: Set the sensitivity level to fine-tune detection. Lower sensitivity for fewer alerts, higher for more.
- Configure Alert Methods: Choose how you want to receive alerts:
- Push Notifications: Receive instant alerts on your smartphone.
- Email Alerts: Get snapshots sent to your configured email address.
- FTP Upload: Upload snapshots or video clips to an FTP server.
- AI Humanoid Detection: If available, enable this feature to specifically detect human shapes, further minimizing false alarms.
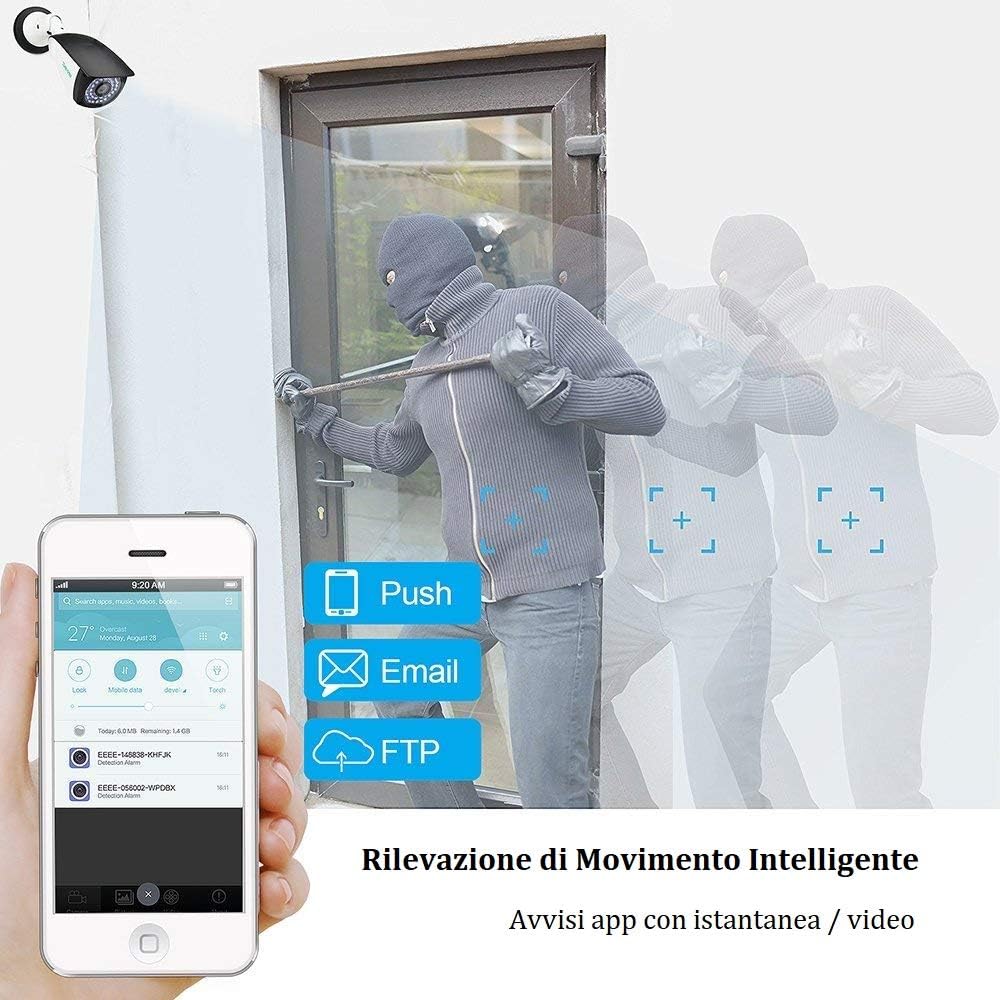
Figure 5.4: Smart Motion Detection Alerts

Figure 5.5: AI Human Detection
5.4 Recording and Playback
The camera supports continuous recording or event-triggered recording to a Micro SD card or NVR.
- Continuous Recording: If an SD card is installed and formatted, the camera can record 24/7.
- Event Recording: Recordings can be triggered by motion detection.
- Playback: Access recorded footage through the app's "History" or "Playback" section. You can view a timeline of events and download specific clips.

Figure 5.6: 24/7 Recording Timeline
5.5 Night Vision Modes
The camera offers flexible night vision capabilities.
- Infrared (IR) Night Vision: In complete darkness, the camera uses its IR LEDs to provide clear black and white footage up to 20 meters.
- Color Night Vision (Low Light): In low-light conditions, the camera may produce clear color images before switching to full IR mode.
- Settings for night vision modes can usually be adjusted in the app.

Figure 5.7: Flexible Night Vision Modes
6. Maintenance
Regular maintenance ensures optimal performance and longevity of your security camera.
- Clean Lens: Periodically clean the camera lens with a soft, dry cloth to remove dust and smudges. Avoid abrasive cleaners.
- Check Connections: Ensure all cable connections (power, Ethernet) are secure and free from damage.
- Firmware Updates: Check the app or SV3C website for available firmware updates. Keeping the firmware updated can improve performance and security.
- Inspect Housing: Regularly inspect the camera's metal housing for any signs of damage or wear, especially to the waterproof seals.
- Power Cycle: If the camera experiences issues, try power cycling it by disconnecting and reconnecting the power adapter.
7. Troubleshooting
This section addresses common issues you might encounter with your SV3C camera.
7.1 No Power / Camera Not Turning On
- Ensure the power adapter is securely connected to both the camera and a working electrical outlet.
- Verify the power outlet is functional by plugging in another device.
- Check the power adapter for any visible damage.
7.2 Cannot Connect to Wi-Fi
- Ensure the camera is within range of your 2.4GHz Wi-Fi router.
- Double-check the Wi-Fi password entered in the app.
- Temporarily connect the camera via Ethernet to ensure it's accessible, then re-attempt Wi-Fi configuration.
- Restart your router and the camera.
- The camera only supports 2.4GHz Wi-Fi. Ensure your router is broadcasting a 2.4GHz signal and your phone is connected to it during initial setup.
7.3 No Live View / Offline Status
- Check your internet connection.
- Ensure the camera has power and is connected to the network (Wi-Fi or Ethernet).
- Restart the camera and your router.
- If using Wi-Fi, check signal strength in the app. Consider relocating the camera or using a Wi-Fi extender.
7.4 False Motion Detection Alerts
- Adjust the motion detection sensitivity in the app to a lower level.
- Define specific detection zones to exclude areas with frequent irrelevant movement (e.g., trees swaying, busy roads).
- Enable AI Humanoid Detection if not already active.
7.5 SD Card Not Recording / Not Recognized
- Ensure the SD card is correctly inserted into the slot.
- Format the SD card using the camera's app settings.
- Check if the SD card is damaged or incompatible (use a high-quality Class 10 or higher card).
- Verify that recording schedules or event triggers are properly configured in the app.
7.6 Resetting the Camera
If you encounter persistent issues, a factory reset may resolve them. Locate the reset button (refer to Figure 3.1) and press and hold it for approximately 10-15 seconds until you hear a prompt or see an indicator light change. The camera will restart with factory default settings.
8. Specifications
| Model | B06W-5MP-HX |
| Video Resolution | 5MP (2560 x 1920) |
| Lens | 3.6mm HD Lens |
| Night Vision Range | Up to 20 meters (65 feet) |
| Connectivity | Wi-Fi (2.4GHz only), Ethernet (RJ45) |
| Weatherproof Rating | IP66 |
| Audio | Two-Way Audio (Built-in Microphone & Speaker) |
| Storage | Micro SD Card (up to 64GB/256GB, not included), NVR |
| Power Source | DC 12V / 1A (Power Adapter Included) |
| Power Consumption | 12 Watts |
| Operating Temperature | -20°C to 60°C (-4°F to 140°F) |
| Dimensions (LxWxH) | 20 x 7 x 6.5 cm (7.87 x 2.76 x 2.56 inches) |
| Weight | 660 g (1.46 lbs) |
| Viewing Angle | 87 Degrees |
| Compatible Devices | NVRs, PC CMS Software, Mobile Apps |
9. Warranty and Support
9.1 Technical Support
SV3C provides lifetime technical support for this product. If you have any questions, encounter issues, or require assistance, please contact our support team:
- Email: info.it@sv3c.com
- Please include your product model (B06W-5MP-HX) and a detailed description of your issue for faster assistance.
9.2 Product Recycling and Disposal
Please dispose of this product responsibly. Electronic devices should not be disposed of with household waste. Consult your local authorities for information on proper recycling and disposal methods for electronic products.
For information on broken lamps and cleaning procedures, please refer to local guidelines and safety instructions.


