1. Introduction
The Pyle PLDVRCAM71.5 is a compact dash camera designed for vehicle use, providing Full HD 1080p video recording. It features a 1.5-inch digital display, a G-Sensor for automatic collision detection and file protection, and a parking monitor function. This device records video clips to a Micro SD memory card and supports automatic recording upon vehicle startup.
2. Package Contents
Verify that all items listed below are present in your package:
- DVR Dash Cam Unit
- USB Car Power Cable
- USB Transfer Charger
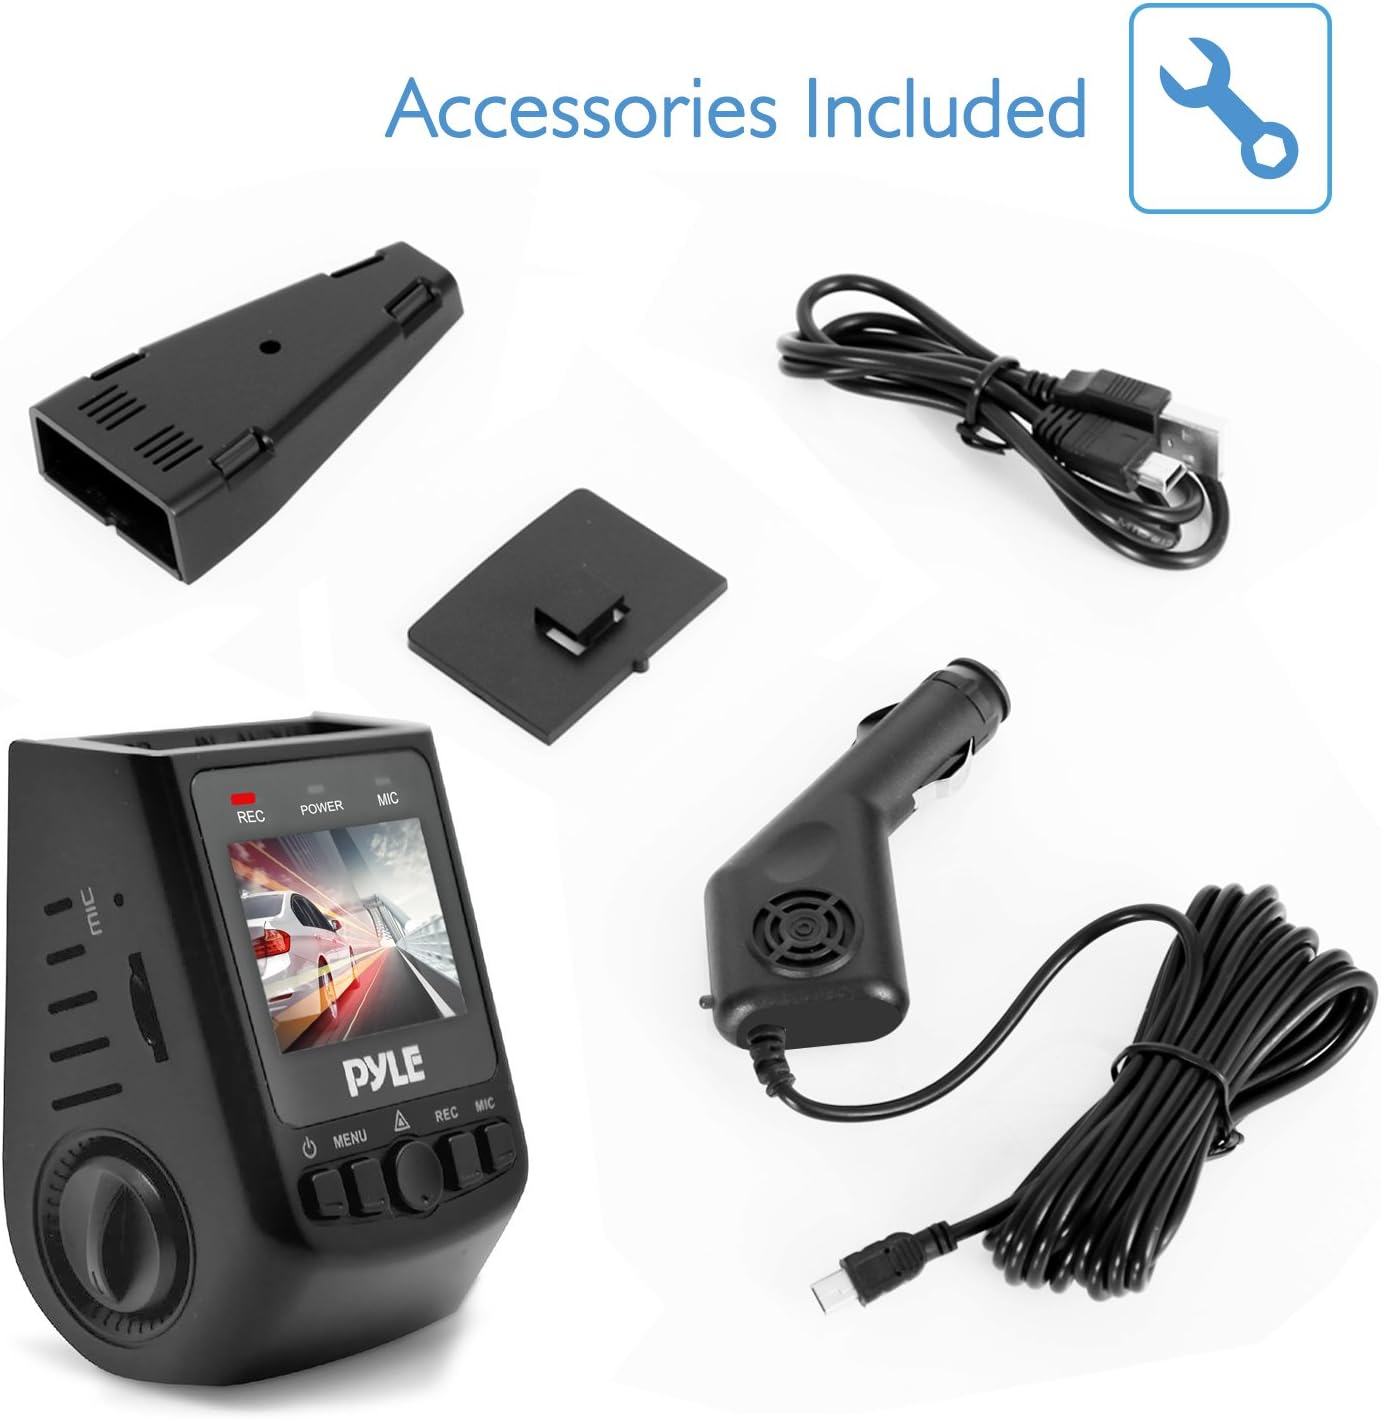
Figure 2.1: Included Accessories. This image displays the Pyle Dash Cam unit along with its USB car power cable, USB transfer charger, and a mounting bracket.
3. Product Overview
Familiarize yourself with the components and controls of your Pyle Dash Cam:

Figure 3.1: Dash Cam Components. This diagram labels the various ports and buttons on the Pyle Dash Cam, including the USB and AV interfaces, reset button, control knob, Micro SD card slot, microphone interface, power button, menu button, OK button, record button, and microphone button.
- USB Interface: For power supply and data transfer.
- AV Interface: For video output.
- Reset Button: To restart the device if it becomes unresponsive.
- Knob: Used for navigation and selection in menus.
- Card Slot: Insert Micro SD memory card here.
- MIC Interface: Built-in microphone for audio recording.
- Power Button: To turn the device on/off.
- Menu Button: To access device settings.
- OK Button: To confirm selections or start/stop recording.
- REC Button: Dedicated button to start/stop recording.
- MIC Button: To toggle microphone recording.
4. Setup
4.1. Inserting the Micro SD Card
Before operating the dash cam, a Micro SD card (up to 32GB, not included) must be inserted. Ensure the card is inserted correctly into the card slot until it clicks into place. It is recommended to format the Micro SD card within the dash cam's settings before first use to ensure optimal performance.

Figure 4.1: Micro SD Memory Card Slot. This image highlights the Micro SD card slot on the dash cam, indicating where the memory card should be inserted for recording and saving video clips.
4.2. Mounting the Dash Cam
- Attach the suction cup mount to the dash cam unit.
- Clean the desired area on your vehicle's windshield.
- Press the suction cup firmly against the windshield and engage the locking mechanism to secure it.
- Adjust the camera angle to ensure a clear view of the road ahead.
4.3. Power Connection
Connect the USB car power cable to the dash cam's USB interface and plug the other end into your vehicle's cigarette lighter socket. The device is designed for plug-and-play operation.
5. Operating Instructions
5.1. Automatic Recording
Once the vehicle engine starts, the dash cam will automatically power on and begin recording. The system indicator and power indicator will illuminate, and the 'REC' indicator on the screen will blink, signifying active recording.
5.2. Manual Recording
To manually start or stop recording, press the REC Button or the OK Button. A blinking 'REC' icon on the screen indicates that recording is in progress.
5.3. G-Sensor (Collision Detection)
The built-in G-Sensor detects sudden impacts or collisions. When activated, it automatically saves and locks the current video segment, preventing it from being overwritten during loop recording. This ensures critical footage is preserved.
5.4. Parking Monitor (Motion Detection)
With the parking mode enabled in the settings, the dash cam will automatically begin recording if it detects movement or impact while the vehicle is parked. This feature provides surveillance when the vehicle is unattended.

Figure 5.1: Motion Detect Feature. This image illustrates the dash cam's motion detection capability, which activates recording for parking surveillance.
5.5. Playback and Preview
To review recorded videos or captured images directly on the device, navigate to the playback mode using the Menu Button and select the desired file. Use the Knob or navigation buttons to browse and the OK Button to play/view.
5.6. Taking Pictures
The dash cam can also snap still images. Switch to photo mode via the Menu Button and press the OK Button to capture a picture.
6. Troubleshooting
- Device does not power on: Ensure the USB car power cable is securely connected to both the dash cam and the vehicle's cigarette lighter. Check if the vehicle's power outlet is functional.
- Recording stops unexpectedly or does not record: Verify that a Micro SD card is inserted and has sufficient free space. Format the Micro SD card through the device settings. Ensure the card is not faulty.
- Video quality is poor: Clean the camera lens with a soft cloth. Ensure the protective film (if any) has been removed from the lens. Check video resolution settings in the menu.
- G-Sensor is too sensitive/not sensitive enough: Adjust the G-Sensor sensitivity setting in the device menu.
- Screen freezes or device is unresponsive: Use a thin object (like a paperclip) to press the Reset Button.
7. Specifications
| Model Name | PLDVRCAM71.5 |
| Display Screen | 1.5-inch Digital Display |
| Video Recording Resolution | 1080p / 720p / VGA |
| Video Filetype | .MOV |
| Image Capture Resolution | 12MP / 8 MP / 5 MP / 3MP / 1.3 MP |
| Image Filetype | .JPG |
| Viewing Angle | 170° Degree Wide |
| Micro SD Card Support | Up to 32 GB (Not Included) |
| Connectivity | USB |
| Special Features | Built-In Microphone, G-Sensor, Parking Monitor |
| Product Dimensions (L x W x H) | 2.8'' x 1.8'' x 1.7'' inches |
| Item Weight | 12.3 ounces |
8. Care and Maintenance
- Keep the device dry. Moisture can damage internal circuits.
- Do not attempt to disassemble the device. Repairs should only be performed by authorized service personnel.
- Avoid exposing the device to extreme temperatures, as this can shorten its lifespan or damage the battery.
- Clean the lens regularly with a soft, lint-free cloth to ensure clear video recording.
9. Warranty and Support
Pyle products are designed and manufactured to the highest quality standards. For information regarding warranty coverage or technical support, please refer to the warranty card included with your product or visit the official Pyle website. Do not attempt to service this product yourself.


