
1. Introduction
The RICH SOLAR 40 Amp MPPT Solar Charge Controller is designed to efficiently manage power flow from your solar panels to your battery bank. Utilizing advanced Maximum Power Point Tracking (MPPT) technology, it ensures optimal energy harvest and charging performance. This controller is compatible with various deep cycle battery types and automatically detects 12V or 24V DC system voltages.
Key Features:
- Battery Compatibility: Supports Sealed, Gel, Flooded, and Lithium battery types.
- MPPT Technology: High tracking efficiency up to 99% and peak conversion efficiency of 98%.
- System Voltage: Automatically detects 12V or 24V DC system voltages.
- Comprehensive Protection: Includes overcharging, over-discharging, overload, short circuit, and reverse protection.
- Durable Design: Die-cast aluminum construction for effective heat dissipation.
- Monitoring: LCD display for real-time system information and RS232 port for optional Bluetooth module connectivity.

Figure 1: High Efficiency MPPT Technology
2. Safety Instructions
Please read all instructions carefully before installation and operation. Failure to follow these instructions may result in serious injury or damage to the product.
- Ensure all wiring is correctly connected before powering on the system.
- Always connect the battery first, then the solar panel. Disconnect in reverse order.
- Use appropriate wire gauges for all connections to prevent overheating.
- Install the controller in a well-ventilated area, away from flammable materials.
- The controller features electronic protection against overcharging, over-discharging, overload, short circuit, and reverse polarity. However, proper installation is crucial.
- Do not attempt to repair the controller yourself. Contact qualified personnel for service.
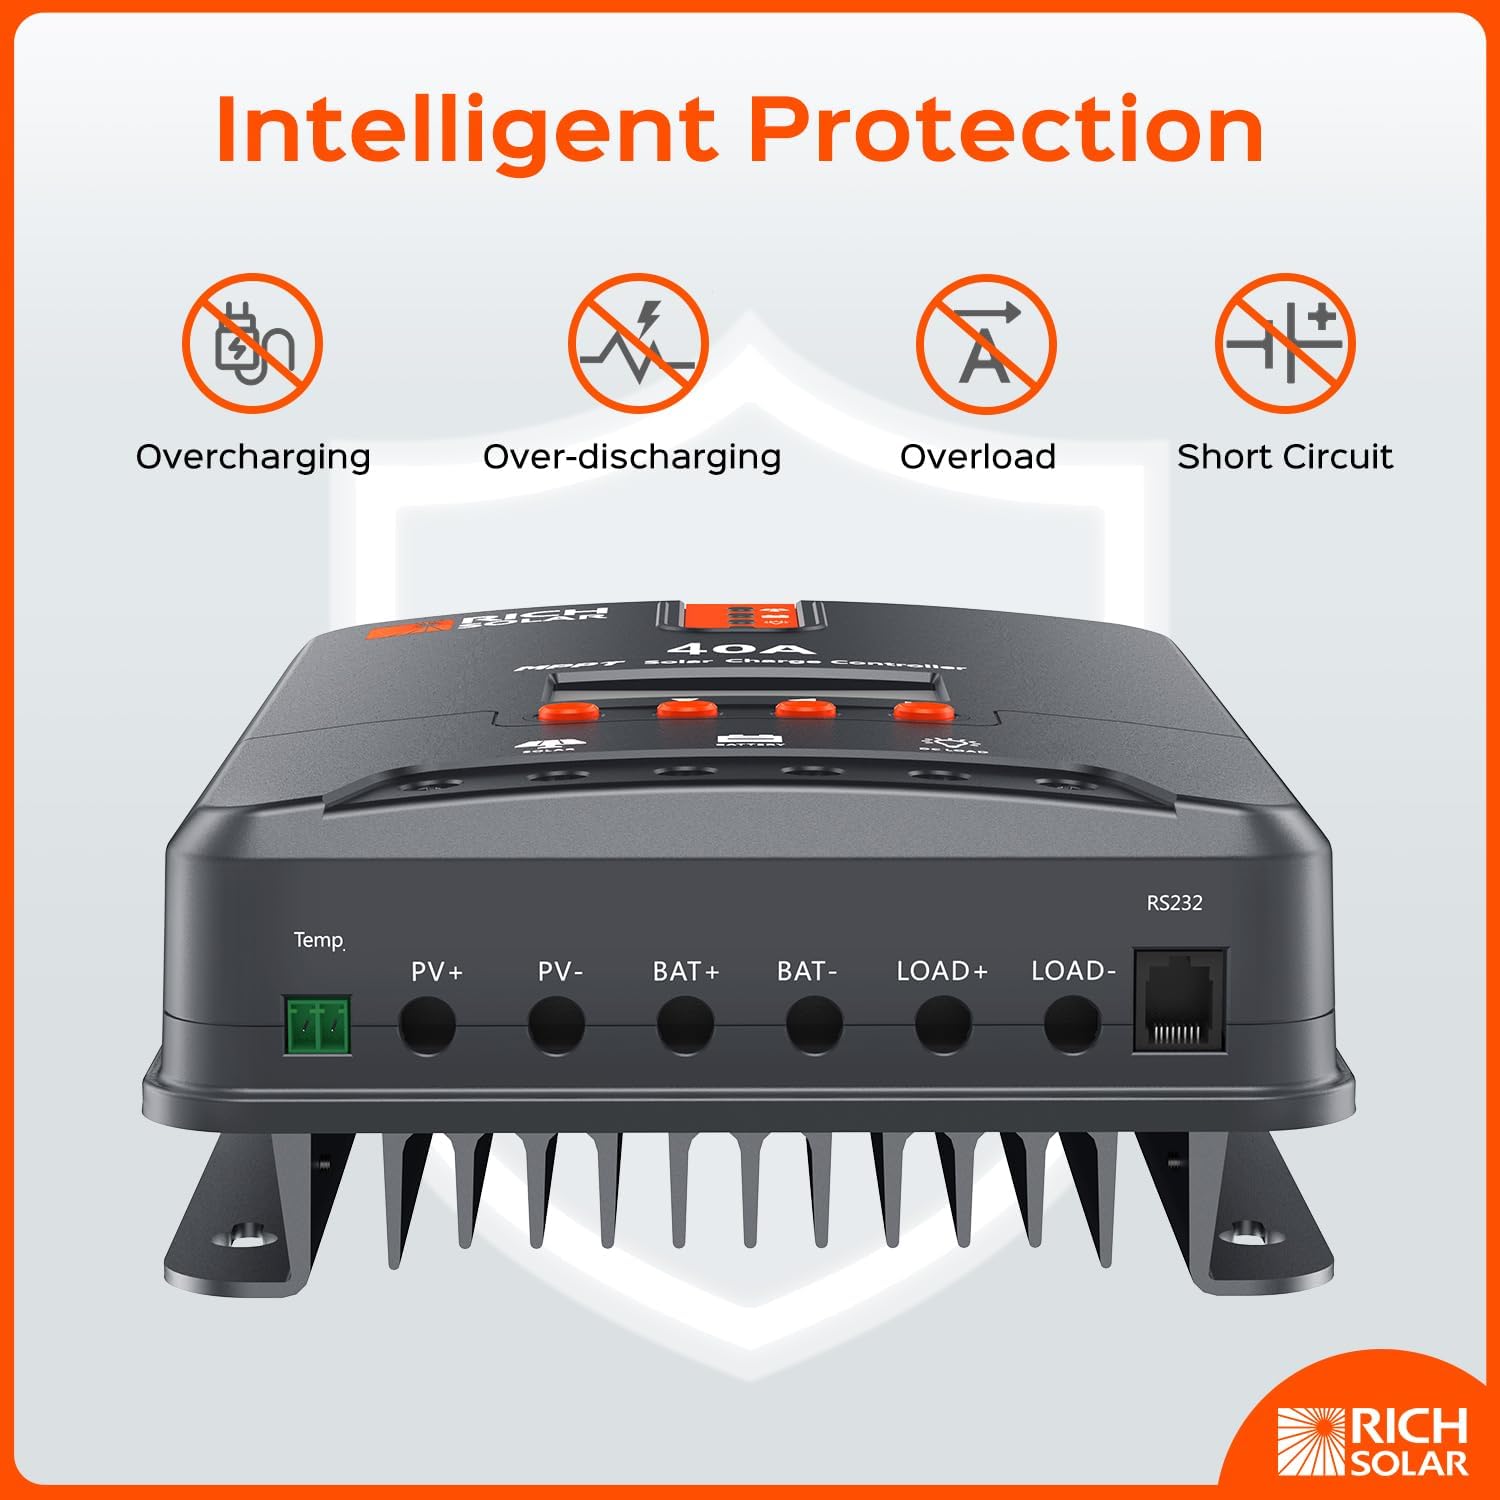
Figure 2: Intelligent Protection Features
3. Package Contents
Verify that all items are included in your package:
- 1 x RICH SOLAR 40 Amp MPPT Solar Charge Controller
- 1 x User Manual (this document)
4. Product Overview
The RICH SOLAR 40A MPPT Solar Charge Controller features a robust design with an intuitive LCD display and clearly labeled terminals for easy connection. Its die-cast aluminum casing provides excellent heat dissipation.

Figure 3: Front View of the 40A MPPT Solar Charge Controller

Figure 4: Product Dimensions
5. Installation
Proper installation is critical for the safe and efficient operation of your solar charge controller. Follow these steps carefully:
- Mounting: Choose a dry, well-ventilated location away from direct sunlight and moisture. Ensure adequate clearance around the controller for heat dissipation.
- Wiring Sequence:
- Connect the battery to the controller first. Ensure correct polarity (positive to positive, negative to negative).
- Connect the solar panels to the controller. Ensure correct polarity.
- If applicable, connect the DC load to the controller.
- Wire Gauge: Use appropriate wire gauges to minimize voltage drop and ensure safe current flow. Refer to local electrical codes and the controller's specifications.
- Grounding: Ensure the system is properly grounded according to local regulations.
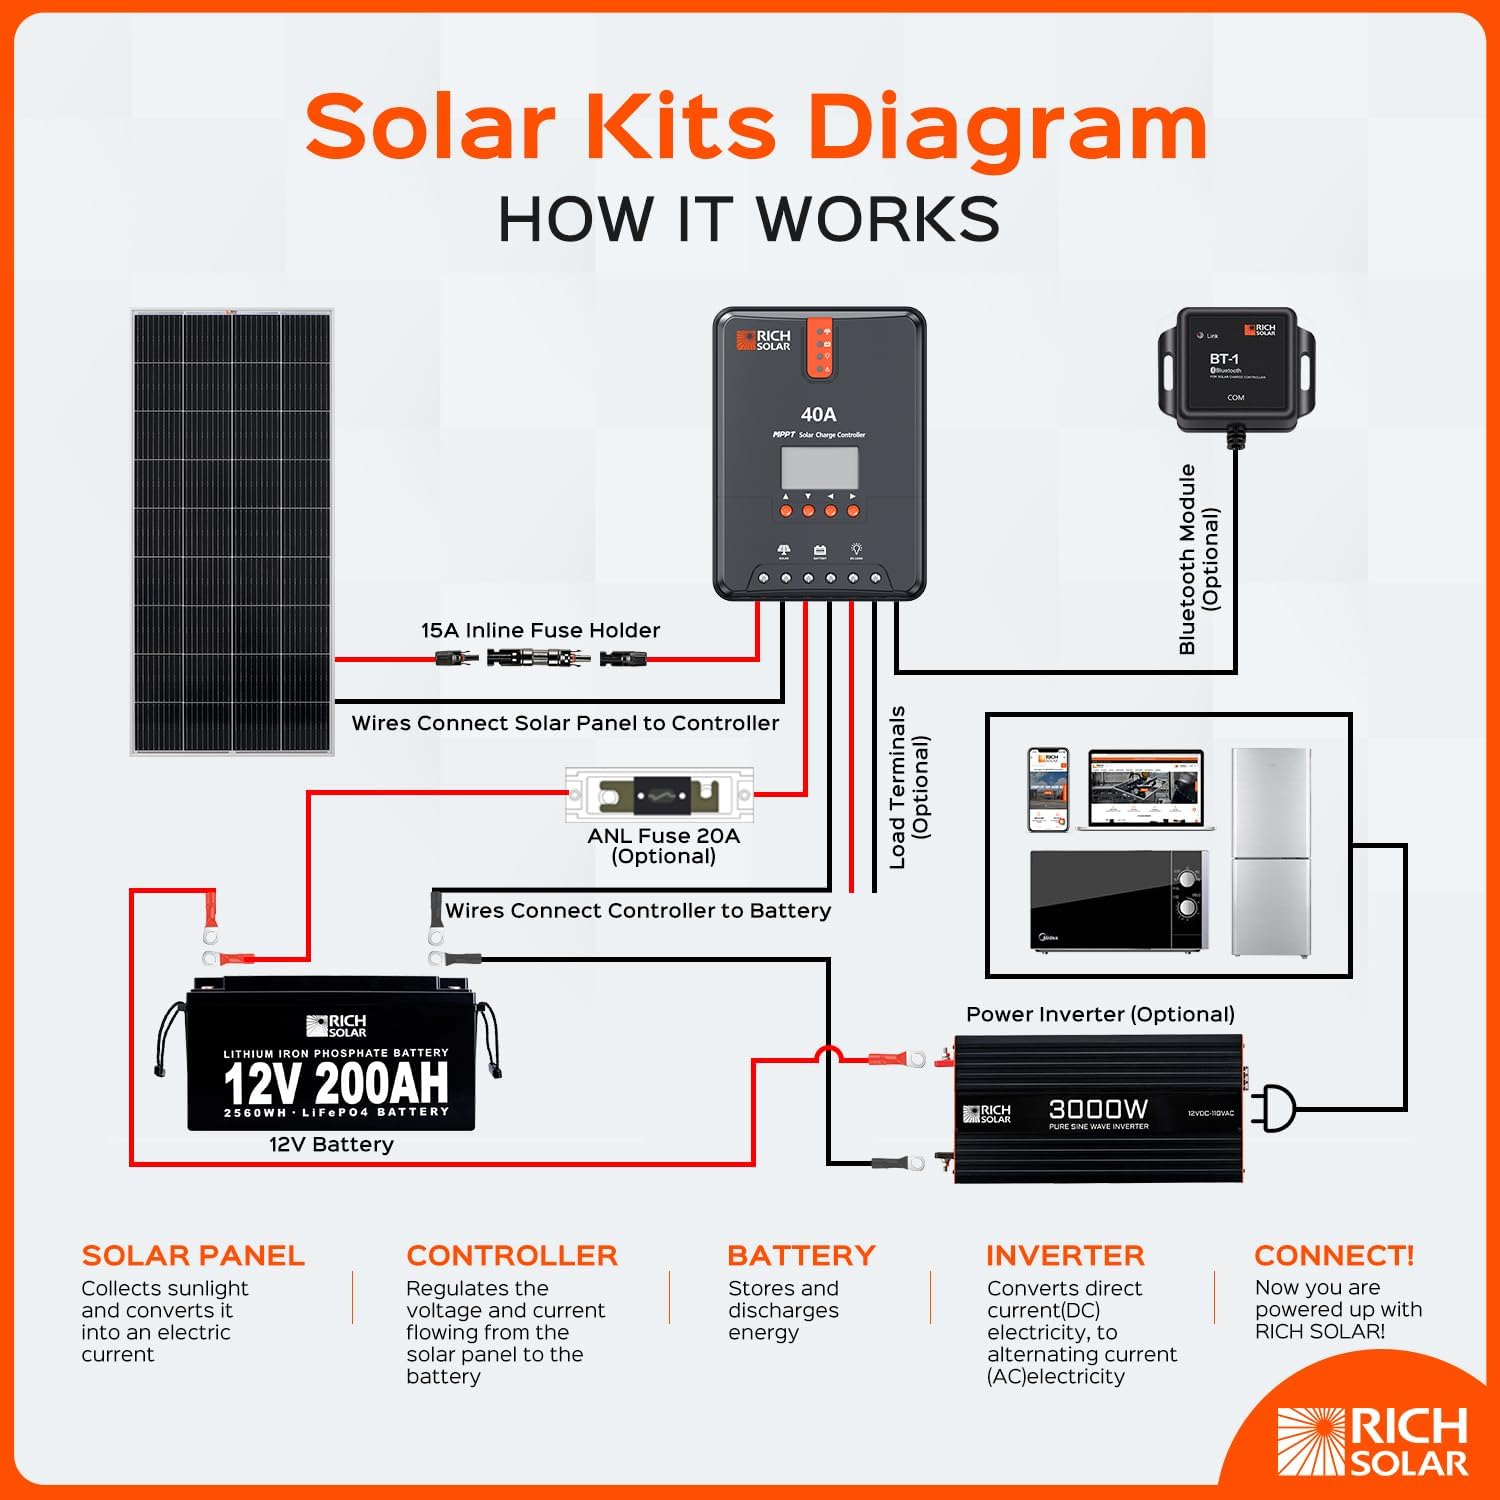
Figure 5: Typical Solar Kit Wiring Diagram
Video 1: This video demonstrates the wiring process for the RICH SOLAR 40 Amp MPPT Charge Controller, showing connections for solar panels in series and parallel configurations to maximize efficiency.
6. Initial Setup and Configuration
After installation, configure the controller for your specific battery type and system requirements using the LCD display and control buttons.
- Battery Type Selection: The controller is compatible with Sealed, Gel, Flooded, and Lithium batteries. Select the correct battery type to ensure proper charging algorithms.
- Voltage Settings: Customize charging voltages such as equalize voltage, boost voltage, and float voltage according to your battery manufacturer's recommendations.
- System Voltage Detection: The controller automatically detects 12V or 24V DC system voltages.
- Remote Monitoring (Optional): The RS232 port allows communication with the BT-1 Bluetooth module (sold separately), enabling remote monitoring via a smartphone app.
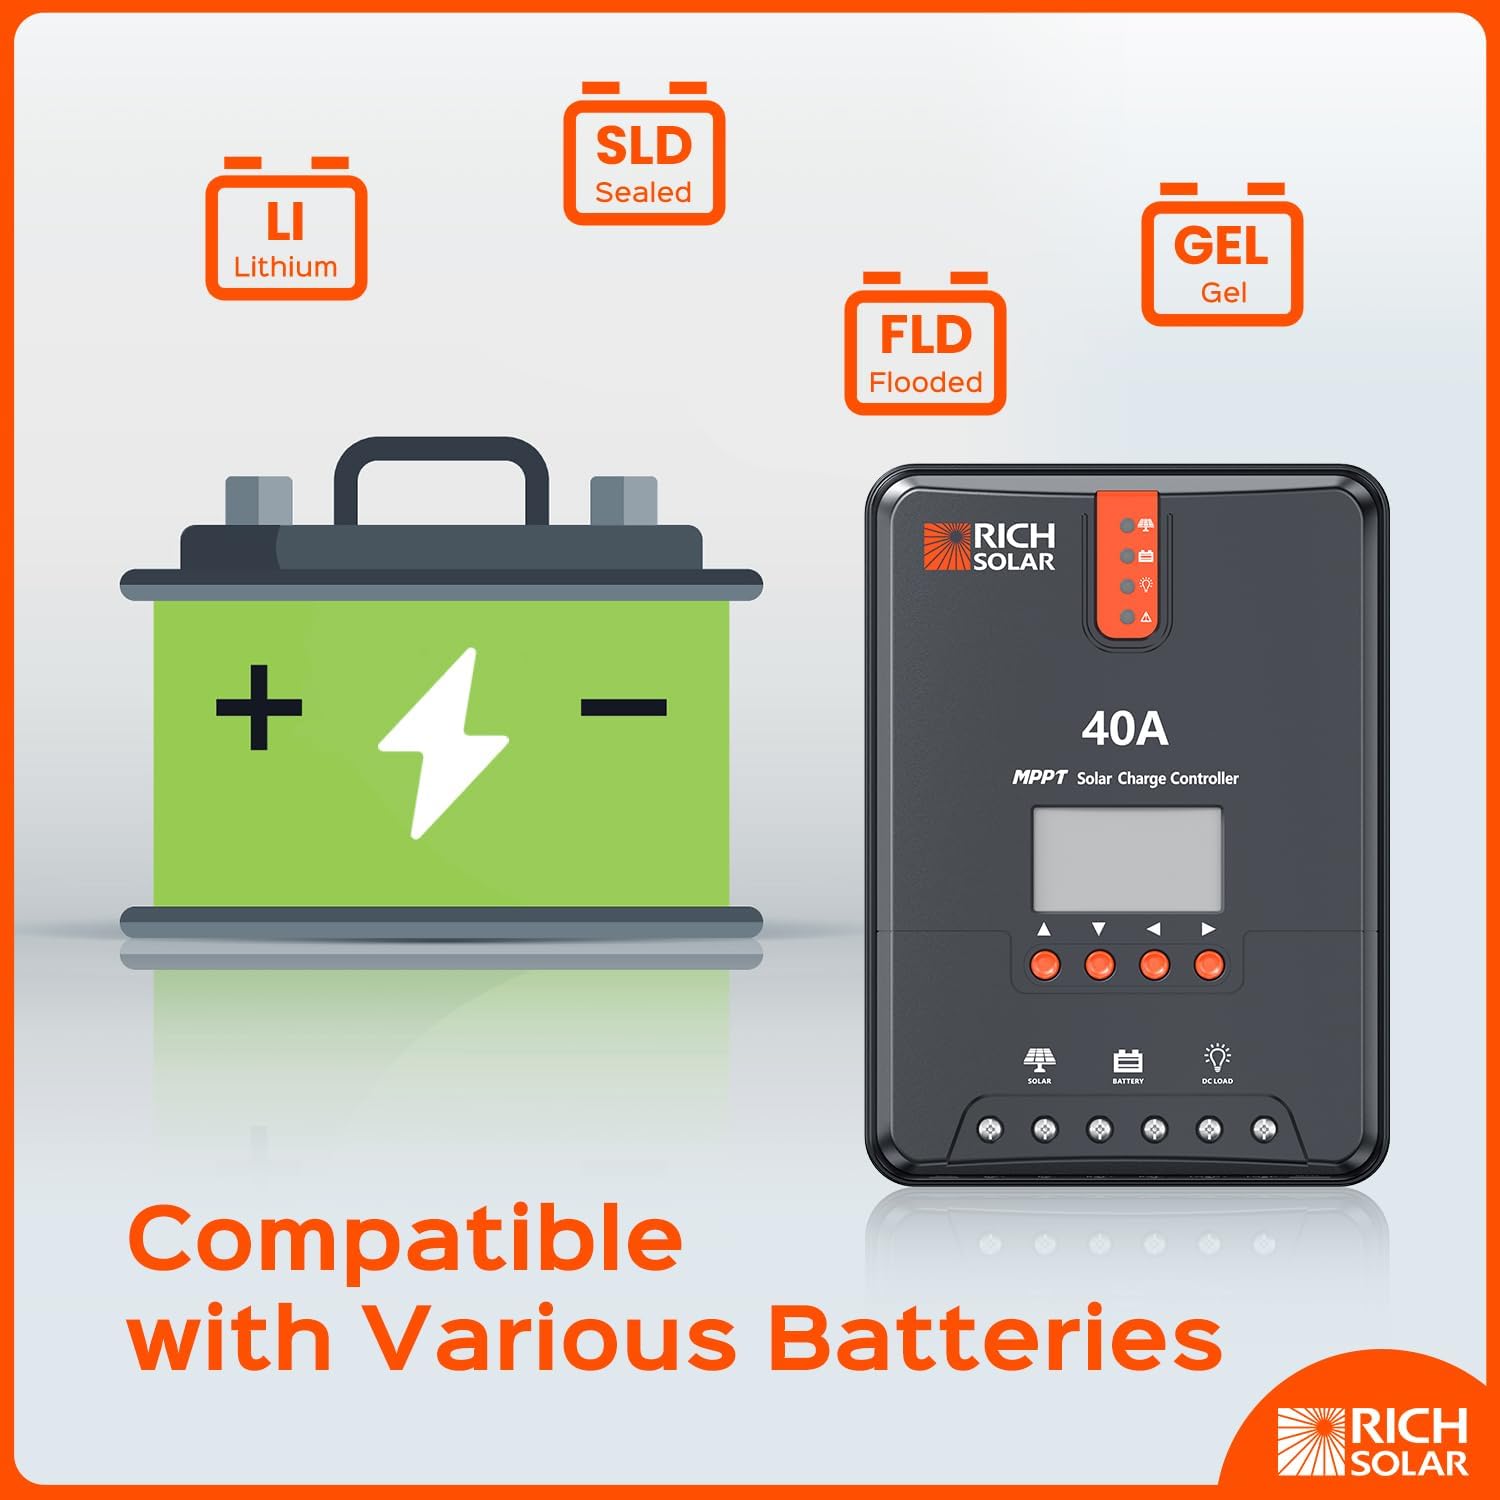
Figure 6: Battery Type Compatibility
Video 2: Learn how to adjust user settings on your RICH SOLAR MPPT Charge Controller, including battery type, equalize voltage, boost voltage, and over-discharge protection settings.
7. Operating the Controller
Once configured, the controller operates automatically. The LCD display provides real-time information about your solar system.
LCD Display Information:
- Charging Voltage: Displays the current voltage being supplied to the battery.
- Charge Stage: Indicates the current charging phase (e.g., bulk, boost, float).
- Battery Type: Shows the selected battery type.
- System Voltage: Displays the detected system voltage (12V or 24V).
- Temperature Compensation: The controller adjusts charging parameters based on battery temperature, maintaining charging efficiency in various climates.

Figure 7: LCD Display and Advanced Features
8. Maintenance
Regular maintenance ensures the longevity and optimal performance of your solar charge controller.
- Cleaning: Periodically clean the controller's exterior with a dry cloth to remove dust and debris. Ensure the heat sink fins are clear for proper airflow.
- Connection Checks: Annually inspect all wiring connections for tightness and corrosion. Re-tighten if necessary.
- Environmental Conditions: Ensure the installation environment remains within the specified operating temperature range.
9. Troubleshooting
If you encounter issues with your RICH SOLAR 40A MPPT Solar Charge Controller, refer to the following common problems and solutions. For more complex issues, please contact customer support.
| Problem | Possible Cause | Solution |
|---|---|---|
| Controller not powering on | Incorrect battery connection or low battery voltage. | Verify battery connections and ensure battery voltage is above the minimum operating threshold. |
| No charging from solar panels | Solar panel not connected, incorrect polarity, insufficient sunlight, or damaged panel/wiring. | Check solar panel connections and polarity. Ensure panels are receiving adequate sunlight. Inspect for damage. |
| Battery not fully charging | Incorrect battery type setting, low solar input, or battery degradation. | Verify battery type setting. Ensure sufficient solar input. Test battery health. |
| Error Code Displayed | Specific system fault (e.g., overvoltage, overcurrent, battery overcharged). | Consult the full user manual for a complete list of error codes and their corresponding solutions. For example, an 'Error 02' might indicate battery overcharge, which could be resolved by disconnecting and reconnecting the unit from the battery. |
10. Specifications
Detailed technical specifications for the RICH SOLAR 40 Amp MPPT Solar Charge Controller.

Figure 8: Detailed Product Specifications
| Feature | Value |
|---|---|
| Rated Battery Current | 40A |
| Rated Load Current | 20A |
| Max. PV Input Short Current | 50A |
| Max. Battery Voltage | 32V |
| Max Solar Input Voltage | 100 VDC |
| Charge Circuit Voltage Drop | ≤ 0.26V |
| Discharge Circuit Voltage Drop | ≤ 0.15V |
| Net Weight | 4.66 pounds |
| Operating Temperature | 45 Degrees Celsius |
| Product Dimensions | 9.37 x 6.81 x 2.85 inches |
| Material | Aluminum |
| Display Type | LCD |
11. Warranty and Support
RICH SOLAR is committed to providing high-quality products and customer satisfaction. For warranty information, technical assistance, or any inquiries, please contact RICH SOLAR customer support.
Contact information can typically be found on the manufacturer's website or through your point of purchase. Please have your model number (43217-120009) and purchase details ready when contacting support.

Figure 9: RICH SOLAR Customer Support


