
1. Introduction
The SATLINK WS 6916 is a digital satellite meter designed for precise installation and verification of DVB-S/S2 satellite antenna systems. This device provides essential measurements such as signal strength (PWR), Modulation Error Ratio (MER), Carrier-to-Noise ratio (C/N), and Bit Error Rate (BER) to ensure optimal satellite reception. Featuring a 3.5-inch TFT LCD screen, it allows for real-time signal monitoring and visual confirmation of image quality. Its portable design, powered by a Li-Ion battery, makes it suitable for both professional and home use.
2. Safety Information
- Read this manual thoroughly before operating the device.
- Do not expose the device to rain, moisture, or extreme temperatures.
- Use only the provided power adapter for charging to prevent damage and ensure safety.
- Avoid disassembling the device; refer all servicing to qualified personnel.
- Keep the device away from strong magnetic fields.
3. Package Contents
Verify that all items listed below are included in your package:
- SATLINK WS 6916 Digital Satellite Meter
- 12V Car Adapter Cable
- External Power Supply (Charger)
- AV Cable (3.5mm jack to RCA adapter)
- Carrying Bag
- User Manual (German language, French not guaranteed)
4. Product Overview
The SATLINK WS 6916 features a robust design with a clear display and accessible ports for various connections.

Figure 4.1: Front view of the SATLINK WS 6916 Digital Satellite Meter. This image shows the 3.5-inch TFT LCD screen and the main control buttons for navigation and function selection.
4.1. Ports and Connections
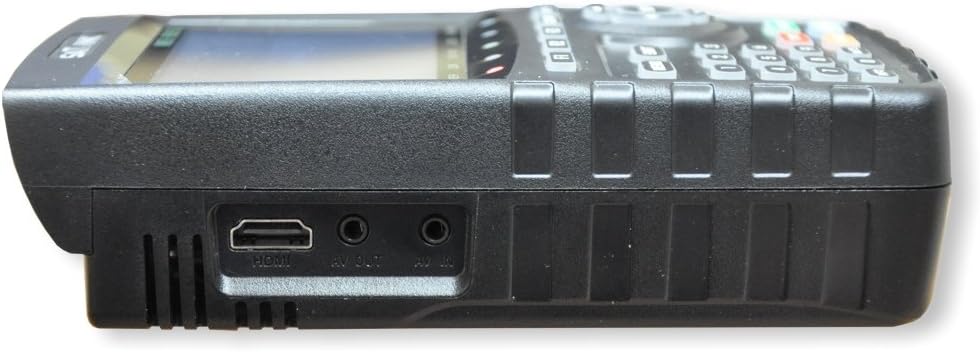
Figure 4.2: Top view of the SATLINK WS 6916. This image highlights the power switch, DC IN port for charging, and the USB port for software updates and media playback.

Figure 4.3: Side view of the SATLINK WS 6916. This image displays the side of the device with HDMI output, AV OUT (3.5mm jack), and AV IN (3.5mm jack) ports for external connections.
- LNB In (F-connector): Connects to the LNB of your satellite dish.
- AV IN (3.5 mm): For connecting external audio/video sources.
- AV OUT (3.5 mm): For outputting audio/video to an external display.
- HDMI Out: For high-definition video output to a compatible display.
- USB Port: Used for software updates, transponder list updates, and media playback.
- DC IN: Power input for charging the internal battery using the provided adapter.
5. Setup
5.1. Initial Charging
Before first use, fully charge the device's internal Li-Ion battery. Connect the external power supply to the DC IN port on the device and plug it into a wall outlet. The charging indicator will show the charging status. A full charge provides approximately 4 hours of operation.
5.2. Powering On/Off
Locate the power switch on the top of the device. Toggle the switch to the 'ON' position to power on the meter. To power off, toggle the switch to the 'OFF' position.
5.3. Connecting to LNB
Connect the LNB cable from your satellite dish to the LNB In (F-connector) port on the device. Ensure the connection is secure.
6. Operating Instructions
6.1. Menu Navigation
Use the directional buttons (Up, Down, Left, Right) and the 'OK' button to navigate through the menu options. The 'EXIT' button typically returns to the previous screen or the main menu.
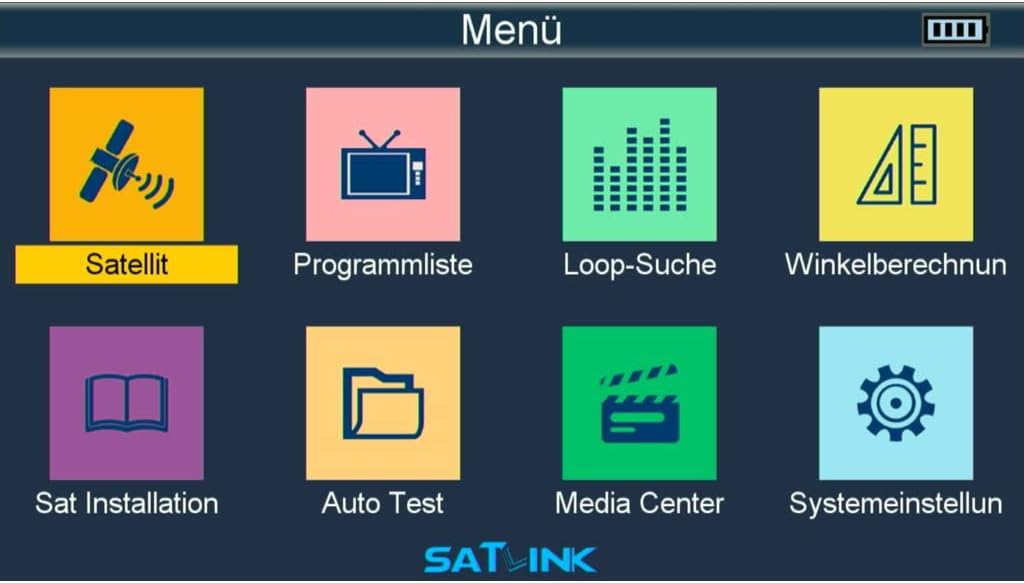
Figure 6.1: Main Menu Screen. This screen provides access to various functions including satellite search, program management, signal analysis tools, and system configurations.
6.2. Satellite Installation and Signal Measurement
To align your satellite dish and measure signal quality:
- From the main menu, select "Satellite" or "Sat Installation".
- Choose the desired satellite from the list.
- Select a transponder frequency.
- Adjust your satellite dish while observing the signal strength (PWR) and quality (MER, C/N, BER) on the screen. The device provides both digital values and a bar graph for easy interpretation.
- The device supports DiSEqC 1.0, 1.2, and USALS for multi-satellite systems and is compatible with Unicable setups.

Figure 6.2: Satellite Signal Measurement Screen. This screen displays real-time signal strength (PWR), Modulation Error Ratio (MER), Carrier-to-Noise ratio (C/N), and Bit Error Rate (BER) for precise satellite dish alignment.
6.3. Program List and Live View
After successful satellite alignment, you can view available channels:
- From the main menu, select "Program List".
- Browse the list of detected channels.
- Select a channel to view its live broadcast on the 3.5-inch TFT LCD screen, confirming image quality.
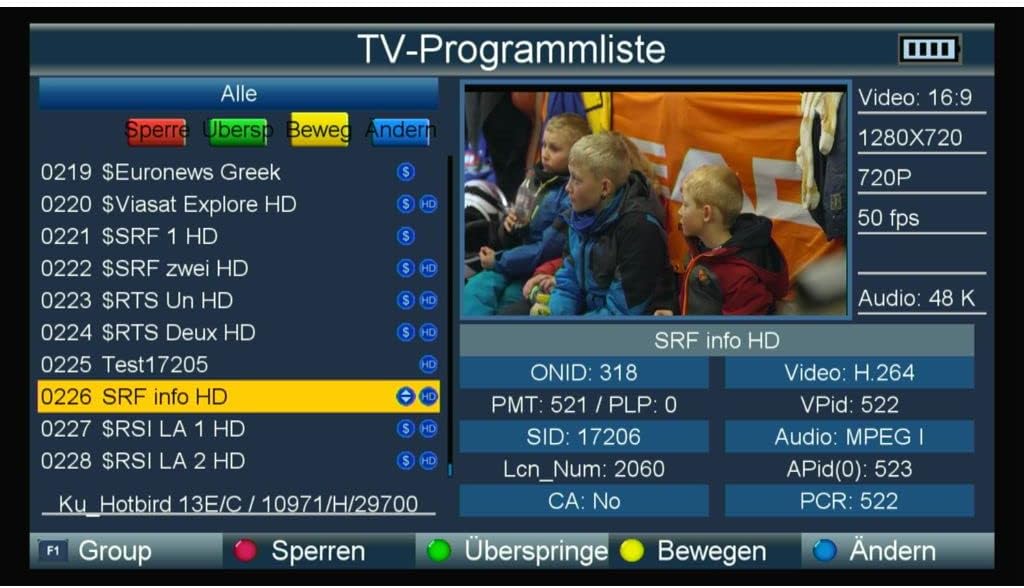
Figure 6.3: TV Program List Screen. The TV Program List allows users to browse available channels and view their technical specifications such as video resolution and audio format.

Figure 6.4: Live TV Preview Screen. The device can display live television channels, providing visual confirmation of signal quality along with detailed channel parameters.
6.4. Loop Search
The Loop Search function helps in identifying and optimizing signal reception across multiple transponders, showing signal strength for each.
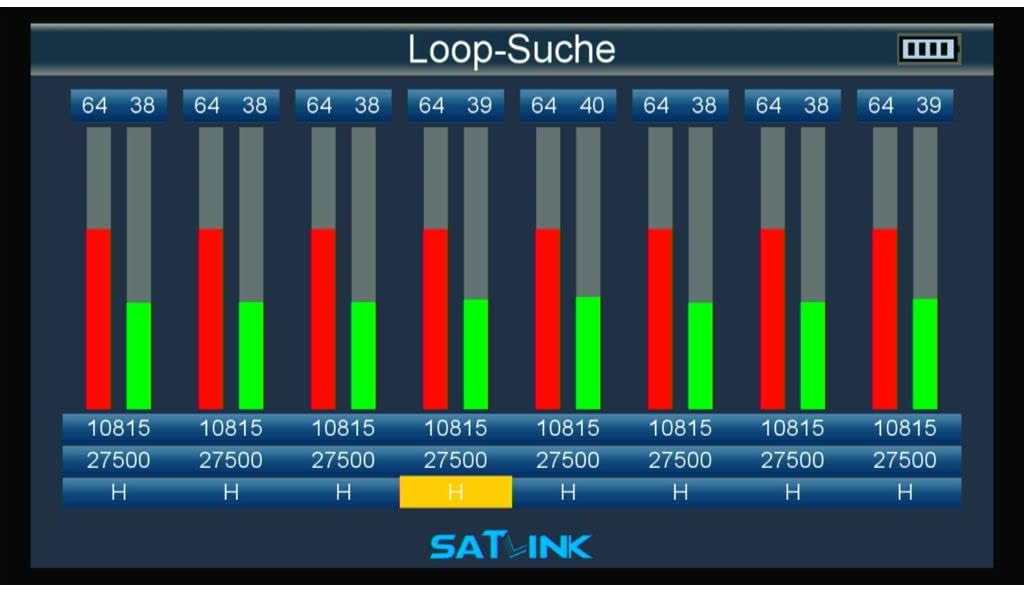
Figure 6.5: Loop Search Screen. This screen displays signal strength bars for multiple transponders, aiding in comprehensive signal optimization.
6.5. Angle Calculation
The device features automatic calculation of azimuth and elevation angles, simplifying the process of dish alignment.
6.6. Auto Test
The Auto Test feature performs a comprehensive scan of selected transponders, providing detailed signal quality metrics and indicating whether each transponder passes or fails.

Figure 6.6: Auto Test Screen. This screen provides a detailed report for each transponder, including power, C/N, BER, MER, and a pass/fail result.
6.7. Media Center
The USB port supports media playback, allowing you to view compatible audio and video files directly on the device's screen.
7. Maintenance
7.1. Battery Care
To prolong the life of the Li-Ion battery, avoid fully discharging it frequently. Recharge the device when the battery level is low. If storing the device for an extended period, ensure it is partially charged (around 50%) and recharge every few months.
7.2. Cleaning
Clean the device with a soft, dry cloth. Do not use liquid cleaners or abrasive materials, as they may damage the screen or casing.
7.3. Software Updates
Software and transponder list updates can be performed via the USB port. Refer to the manufacturer's website for the latest firmware and instructions.
8. Troubleshooting
- Device does not power on: Ensure the battery is charged. Connect the power adapter and try again. Check the power switch position.
- No signal detected: Verify that the LNB cable is securely connected to the LNB In port. Check the satellite dish alignment and ensure the correct satellite and transponder settings are selected in the menu.
- Poor signal quality: Fine-tune the satellite dish alignment. Check the LNB for any damage or obstruction. Inspect the LNB cable for cuts or loose connections.
- Screen is blank or frozen: Try restarting the device by powering it off and then on again. If the issue persists, contact support.
9. Specifications
| Screen | 3.5-inch TFT LCD |
| Satellite Frequency Range | 950 – 2150 MHz |
| DiSEqC Support | 1.0, 1.2, USALS |
| Measurement Parameters | BER, C/N, PWR, MER |
| Battery Type | Li-Ion |
| Battery Capacity | 3000 mA |
| Operating Time | Approx. 4 hours |
| Operating Voltage | 12.6 V |
| Charger Input | 175 – 250 V~, 50/60 Hz |
| Dimensions (L x H x D) | 105 x 170 x 45 mm |
| Weight | 600 g |
| Ports | LNB In (F), AV IN, AV OUT, HDMI Out, USB, DC IN |
| Menu Languages | German, English, French, Spanish, Italian, Swedish |
10. Warranty and Support
For warranty information, technical support, or service inquiries, please refer to the documentation provided with your purchase or contact your retailer/manufacturer directly. Keep your proof of purchase for warranty claims.


