1. Introduction
This manual provides detailed instructions for the iTOMA CKS3501BT FM/DAB Clock Radio. This device features a 1.4-inch cyan blue LED display, dual alarms, DAB and FM radio capabilities, Bluetooth audio streaming, a USB charging port, and a headphone jack. Please read this manual thoroughly to ensure proper operation and to utilize all available functions.

Figure 1: iTOMA CKS3501BT Clock Radio. This image shows the front of the clock radio with its large digital display indicating the time and date. The top panel with control buttons is visible, along with a smartphone connected for charging, highlighting the USB charging feature.
2. Setup
2.1 Power Connection
Connect the clock radio to an AC power outlet using the provided power adapter. The unit requires AC power for full functionality. Ensure the power cable is securely connected to both the device and the wall outlet.
2.2 Backup Battery Installation
The iTOMA CKS3501BT uses a CR2032 lithium battery (not always included) for backup. This battery preserves time and alarm settings during a power outage. The clock radio will not function without AC power, even with the backup battery installed. Replace the battery when the battery indicator lights up on the display.
- Locate the battery compartment on the bottom of the unit.
- Open the compartment cover.
- Insert one CR2032 battery with the positive (+) side facing up.
- Close the compartment cover securely.
2.3 Initial Time Setting
Upon first connection to AC power, the time and date may automatically set to a default time zone (e.g., London Time). You can adjust the time zone or manually set the time and date as follows:
2.3.1 Setting Time Format (12/24 Hour)
- Ensure the unit is in Standby mode (radio off).
- Press and hold the STANDBY button for approximately 5 seconds until "H12" or "H24" is displayed.
- Press the STANDBY button again to toggle between 12-hour and 24-hour formats.
- Wait 5 seconds or press the TIME button to exit.
2.3.2 Manual Time and Date Adjustment
- In Standby mode, press the TIME button. The hour display will blink.
- Use the TUNE + / - buttons to adjust the hour.
- Press TIME again to move to minutes, then adjust with TUNE + / -.
- Continue pressing TIME to cycle through year, month, and day settings, adjusting each with TUNE + / -.
- Press TIME one last time or wait a few seconds for the settings to save.
3. Operating Instructions
3.1 Dual Alarm Function
The iTOMA CKS3501BT features two independent alarms (AL1 and AL2) that can be set for different times and wake-up sources.
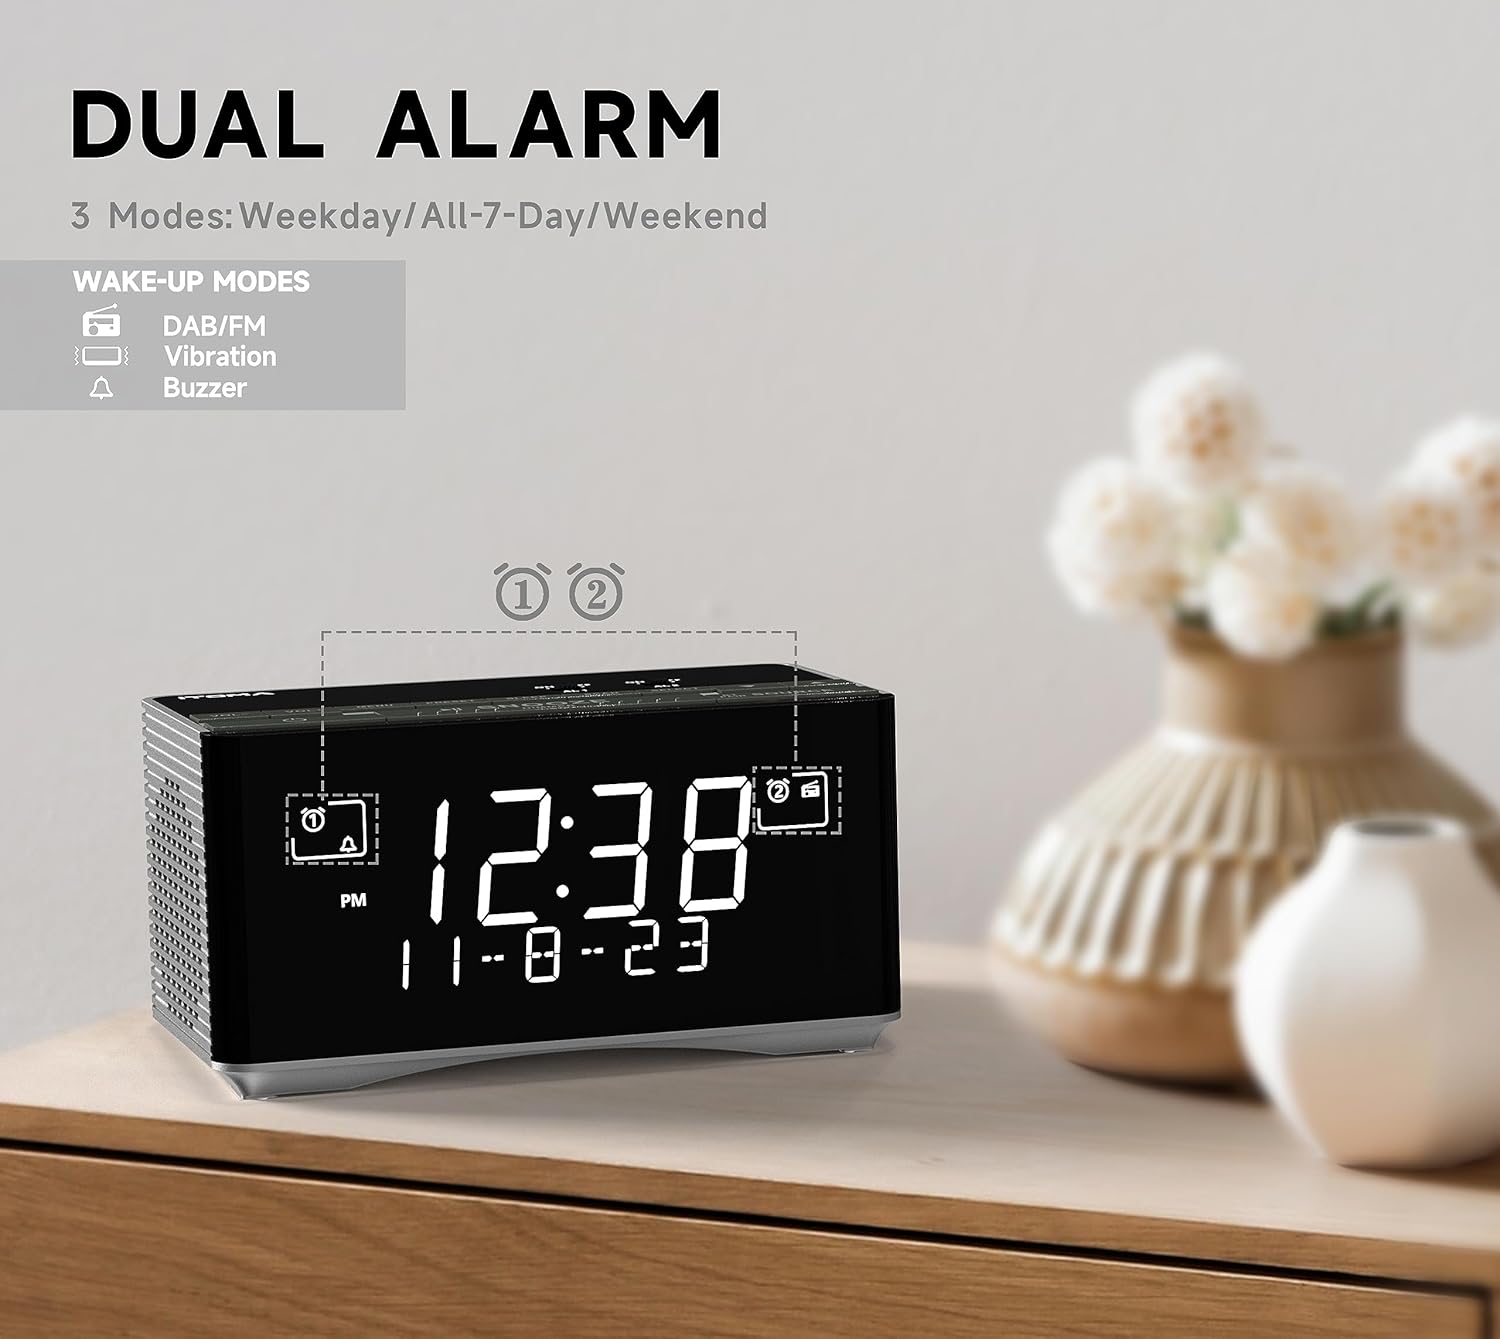
Figure 2: Dual Alarm Functionality. This image illustrates the dual alarm feature of the clock radio, highlighting the different wake-up modes available, including DAB/FM radio, vibration, and buzzer. The display shows the current time and date.
3.1.1 Setting an Alarm (AL1 or AL2)
- In Standby mode, press and hold either AL1 or AL2 for 2 seconds until the hour display blinks.
- Use the TUNE + / - buttons to set the desired alarm hour.
- Press AL1 or AL2 again to move to minutes, then adjust with TUNE + / -.
- Press AL1 or AL2 again to select the alarm frequency mode:
- WEEK: Press the WEEK button to cycle through: Any Single Day, Everyday, Weekdays, or Weekends.
- Press AL1 or AL2 again to set the alarm volume (16 levels, displayed as U1 to U30) using TUNE + / -.
- Press AL1 or AL2 one last time or wait 3 seconds to save and exit.
3.1.2 Activating/Deactivating Alarms
- Press AL1 or AL2 briefly to cycle through alarm types: Buzzer (bell icon), Radio (music note icon), or Off (no icon).
- When the alarm sounds, press the large SNOOZE/DIMMER button to activate snooze for 9 minutes.
- To stop the alarm, press AL1, AL2, or STANDBY.
3.2 DAB and FM Radio
The clock radio supports both Digital Audio Broadcasting (DAB) and FM radio frequencies. An external antenna is provided for improved reception.

Figure 3: DAB & FM Radio. This image highlights the clock radio's ability to receive both DAB and FM radio signals, with the display showing a DAB station name.
3.2.1 Tuning and Presets
- Press the STANDBY button to turn on the unit.
- Press the SOURCE button repeatedly to select either DAB or FM radio mode.
- Use the TUNE + / - buttons to manually tune to a station or press and hold to auto-scan for the next available station.
- To save a preset (up to 20 DAB and 20 FM stations):
- Tune to the desired station.
- Press and hold the AL1/STORE button until "P01" (or the next available preset number) blinks.
- Use TUNE + / - to select the desired preset number (P01-P40).
- Press AL1/STORE again to confirm.
- To recall a preset:
- In radio mode, press the AL2/MEMORY button.
- Use TUNE + / - to cycle through saved presets.
3.3 Bluetooth Connectivity
Connect your smartphone or other Bluetooth-enabled devices to stream audio wirelessly.

Figure 4: Bluetooth Audio Streaming. This image shows the clock radio connected via Bluetooth to a smartphone, demonstrating its ability to play music from external devices wirelessly.
- Press the STANDBY button to turn on the unit.
- Press the SOURCE button repeatedly until "BT" appears on the display and starts blinking. The unit is now in pairing mode.
- On your mobile device, enable Bluetooth and search for "iTOMA CKS3501BT".
- Select "iTOMA CKS3501BT" to pair. Once connected, the "BT" indicator will stop blinking, and a confirmation tone may sound.
- You can now play audio from your device through the clock radio.
- Use the SNOOZE/DIMMER button to play/pause audio.
- Use TUNE + / - to skip tracks.
- Adjust volume using the VOL + / - buttons on the clock radio or your connected device.
3.4 USB Charging Port
A USB port is located on the back of the unit, allowing you to charge compatible mobile devices (e.g., smartphones, tablets) with an output of 5V, 1.2A.
- Connect your device's USB charging cable to the USB port on the clock radio.
- Ensure the clock radio is connected to AC power for the charging function to operate.
3.5 Headphone Jack
A 3.5mm headphone jack is provided for private listening to radio or Bluetooth audio.

Figure 5: Headphone Jack. This image shows the clock radio with headphones connected to its side, illustrating the option for private audio listening.
- Plug your 3.5mm headphones into the headphone jack located on the unit.
- Audio will automatically switch from the internal speaker to the headphones.
3.6 Display Dimmer Control
The display brightness can be adjusted manually or automatically to suit ambient light conditions.

Figure 6: Auto & Manual Dimmer. This image visually explains the display dimming options, including high, medium, low, and off settings, as well as an automatic brightness adjustment mode.
- Automatic Brightness: The display brightness adjusts automatically based on the surrounding light. It will be brighter in well-lit conditions and dimmer in low-light conditions.
- Manual 3-Step Dimmer: In Standby mode, press the SNOOZE/DIMMER button repeatedly to cycle through High, Medium, and Low brightness levels.
3.7 Radio Sleep Timer
The sleep timer allows you to listen to the radio for a set duration before the unit automatically turns off.
- Ensure the radio is playing.
- Press the SLEEP button. The display will show the default sleep time (e.g., 10 minutes).
- Press the SLEEP button repeatedly to cycle through available sleep times (e.g., 10, 20, 30... up to 90 minutes).
- To cancel the sleep timer, press the SLEEP button until "OFF" appears on the display.
4. Maintenance
4.1 Cleaning
Wipe the unit with a soft, dry cloth. Do not use abrasive cleaners or solvents, as they may damage the surface.
4.2 Backup Battery Replacement
When the battery indicator appears on the display, replace the CR2032 backup battery as described in Section 2.2.
5. Troubleshooting
| Problem | Possible Cause | Solution |
|---|---|---|
| Unit does not power on. | Power cable not connected or loose. | Ensure the AC power adapter is securely plugged into the unit and a working wall outlet. |
| No sound from radio/Bluetooth. | Volume too low; incorrect source selected; headphones connected. | Increase volume. Press SOURCE to select the correct input. Disconnect headphones if using speakers. |
| Poor radio reception. | Antenna not extended or positioned correctly; weak signal. | Fully extend and adjust the position of the FM/DAB antenna. Try moving the unit to a different location. |
| Bluetooth device cannot pair. | Unit not in pairing mode; device too far; Bluetooth already connected to another device. | Ensure the clock radio is in Bluetooth pairing mode (BT blinking). Move device closer. Disconnect from other Bluetooth devices. |
| Alarm does not sound. | Alarm not activated; volume too low; incorrect alarm mode. | Verify alarm is set and activated (bell/music note icon visible). Check alarm volume. Ensure correct alarm mode (buzzer/radio) is selected. |
| Time/settings lost after power outage. | Backup battery is dead or missing. | Replace the CR2032 backup battery. |
6. Specifications
| Brand | iTOMA |
| Model Number | CKS3501BT (also referred to as 3501) |
| Display Type | 1.4" Cyan Blue LED Digital Display |
| Radio Tuner | DAB, FM Digital Tuning |
| Bluetooth | Yes, for audio streaming |
| USB Charging Port | 5V, 1.2A output |
| Headphone Jack | 3.5mm |
| Alarm Features | Dual Alarms, Snooze (9 minutes), Buzzer/Radio wake-up, Weekday/Weekend/Everyday modes, 16-level volume control |
| Dimmer Control | Automatic brightness adjustment, 3-step manual dimmer (High-Medium-Low) |
| Sleep Timer | Up to 90 minutes for radio |
| Backup Battery | 1 x CR2032 Lithium Metal (for time/settings retention during power outage) |
| Power Source | AC Cable (Electric) |
| Product Dimensions (L x W x H) | 8 x 3.81 x 7.5 cm (3.15 x 1.5 x 2.95 inches) |
| Item Weight | 730 grams (1.61 lbs) |
7. Warranty and Support
Specific warranty information for the iTOMA CKS3501BT is not provided in the product details. Please refer to the documentation included with your purchase or contact iTOMA customer support for warranty details and technical assistance.
For further support, visit the official iTOMA website or contact their customer service department.


