For Subaru Impreza WRX (2000-2007), WRX STI GDB (2000-2004), and Forester (2003-2008)
Introduction
This manual provides detailed instructions for the installation, adjustment, maintenance, and troubleshooting of your maXpeedingrods Coilover Suspension Kit. Please read this manual thoroughly before installation and use to ensure proper function and safety. This kit is designed to enhance vehicle performance and adjustability for specific Subaru models.
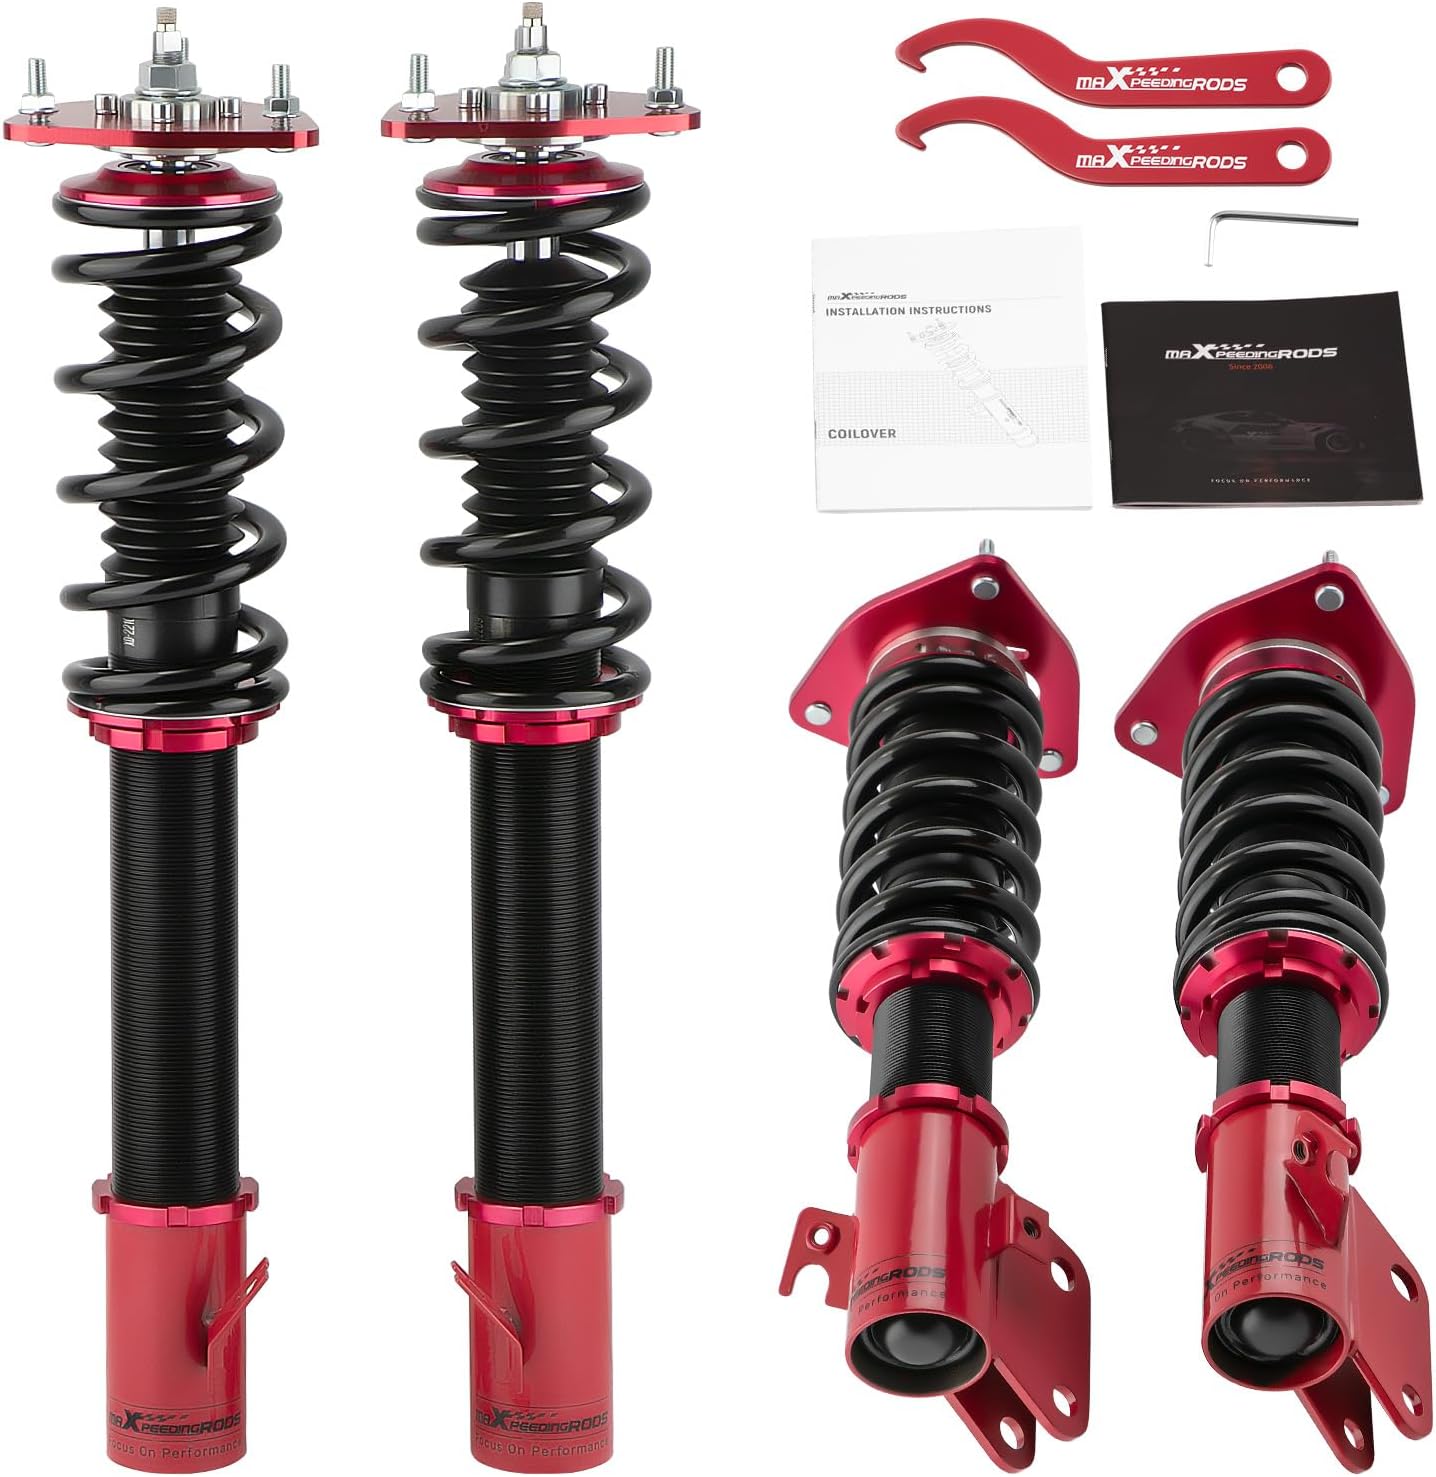
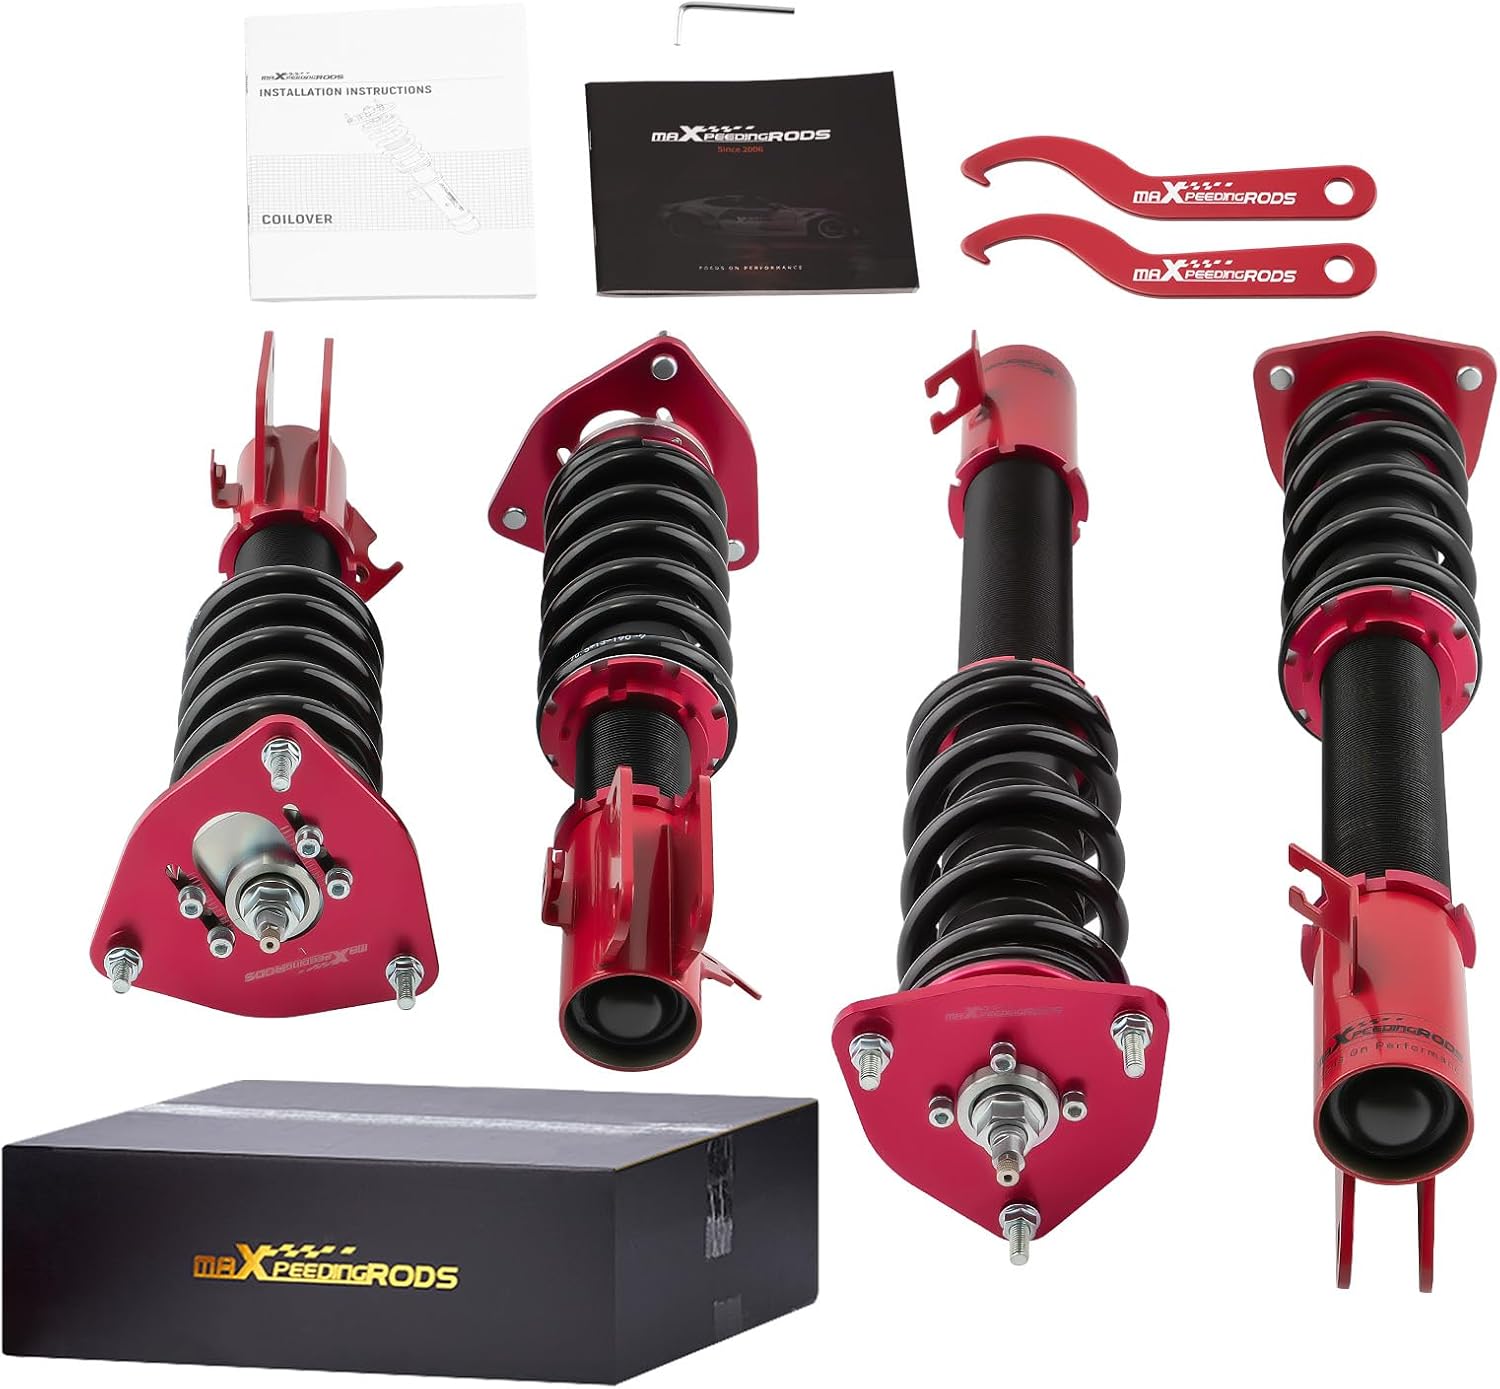
Package Contents:
2 x Front Coilover Struts
2 x Rear Coilover Struts
1 x Wrench for Height Adjustment
Installation Instructions (this manual)
Image: Complete maXpeedingrods Coilover Suspension Kit, including front and rear struts, adjustment wrenches, and instruction manuals.Image: Contents of the maXpeedingrods Coilover kit, showing the four struts, adjustment tools, and product packaging.
Vehicle Compatibility
This maXpeedingrods Coilover Suspension Kit is compatible with the following vehicle models:
Subaru Impreza WRX STI: 2000.10 - 2004.06 (GDB chassis code, with RIM P.C.D.=100)
Subaru Forester SG: 2003 - 2008
SAAB 9-2X: 2005 - 2007 (GGA, GGE chassis codes)
Note: This kit is designed to lower the vehicle's ride height and will not maintain original factory ride height.
Setup and Installation
Professional installation is highly recommended. Improper installation can lead to vehicle damage or unsafe driving conditions. Ensure all components are present and undamaged before beginning installation.
Pre-Installation Checks:
Verify all parts listed in the package contents are present.
Inspect coilovers for any shipping damage.
Ensure the vehicle is on a level surface and properly supported with jack stands.
Disconnect the battery if working near electrical components.
General Installation Steps (Consult a service manual for vehicle-specific details):
Safely lift the vehicle and remove the wheels.
Remove the original suspension components (struts, springs, mounts).
Install the new maXpeedingrods coilover units. Ensure correct orientation for front and rear units.
Secure all mounting bolts to the manufacturer's torque specifications.
Adjust initial ride height and damping settings as desired (refer to the "Operating and Adjustment" section).
Reinstall wheels and lower the vehicle.
Perform a full vehicle alignment after installation to ensure proper handling and tire wear.
Important: Some users have reported that the bottom parts that bolt to the front spindles may be on the wrong sides from the factory. Verify the 'L' (Left) and 'R' (Right) markings on the top mounting plates and ensure brake cable and speed sensor brackets align correctly. If necessary, unscrew and swap the lower mounts.
Spring Preload: The springs are high tensile with a recommended preload of 7-10 mm. Ensure the center bolt up top is tightened and spring tension is set uniformly before installation.
Image: Exploded view of a coilover unit, highlighting the camber plate top mount (6061-T6 AL), upper spring seat with radial bearing, full-length dust boot, high tensile spring, and 6061-T6 AL perch.
Operating and Adjustment
Height Adjustment:
The coilover kit allows for 1-3 inches of height adjustment. Use the provided wrench to adjust the ride height.
Loosen the lower mount (A) and locking ring (B).
Rotate the coilover body to increase or decrease the threaded distance (D) to change the ride height.
Once the desired height is achieved, tighten the lower mount (A) and locking ring (B) securely.
Image: Diagram showing the components involved in height adjustment: lower mount (A), locking ring for height adjustable (B), lock ring for preload adjustment (C), and the adjustable distance (D).Image: Visual representation of full-length height adjustment, showing two coilovers at different heights and a schematic diagram of the adjustment mechanism.
Damping Adjustment (24 Levels):
The coilovers feature 24 levels of rebound force adjustment, allowing you to fine-tune your suspension for various driving conditions. The adjustment knob is typically located at the top of the coilover shaft.
Levels 0-8: Recommended for street use, providing a more comfortable ride.
Levels 9-16: Suggested for mountain roads or spirited driving, offering a balance of comfort and performance.
Levels 17-24: Ideal for race tracks, providing maximum stiffness and control.
Turn the adjustment knob clockwise for stiffer damping and counter-clockwise for softer damping. Adjust all four coilovers equally for balanced handling.
Image: Illustration detailing the 24-level basic damping force adjustment via a screw adjuster and thread-type ride height adjustment.Image: Close-up of the coilover's top mount, showing the 24-way damping adjustment knob, radial bearing, and camber plate with pillow ball.
Camber Adjustment:
The coilovers feature adjustable camber plates, allowing for fine-tuning of wheel alignment. This adjustment should be performed by a qualified technician during a full vehicle alignment.
Image: Detailed view of the camber plate, showing the adjustment bolts for modifying wheel camber.
Maintenance
Regular maintenance ensures the longevity and optimal performance of your coilovers.
Regular Inspection: Periodically inspect coilovers for signs of wear, damage, or leaks. Check for loose bolts or nuts.
Cleaning: Keep the coilover bodies and threads clean from dirt, salt, and debris. The full-length dust boots help protect the piston shafts, but external cleaning is still important.
Lubrication: Apply a suitable lubricant to the threads if adjusting height frequently to prevent seizing.
Alignment: After any significant height or camber adjustment, a professional wheel alignment is crucial.
Image: Features of the coilover, including durable TPV full-length dust boots for piston shaft protection and a powder-coated lower mount for anti-rust and anti-corrosion performance.
Troubleshooting
Problem
Possible Cause
Solution
Unusual Noises (clunking, squeaking)
Loose mounting bolts
Improperly set spring preload
Damaged pillow ball mounts
Components rubbing
Check and tighten all mounting hardware.
Verify spring preload is within 7-10 mm.
Inspect pillow ball mounts for wear; replace if necessary.
Ensure adequate clearance between components.
Uneven Ride Height
Incorrect height adjustment
Uneven spring preload
Measure and adjust height on all four corners evenly.
Ensure spring preload is consistent across all coilovers.
Poor Handling / Instability
Incorrect damping settings
Improper wheel alignment (camber/toe)
Loose components
Adjust damping settings according to driving conditions.
Perform a professional wheel alignment.
Check all installation points for tightness.
Stiffness / Harsh Ride
Damping set too stiff
Spring preload too high
Reduce damping force (turn counter-clockwise).
Verify spring preload is within recommended range.
Specifications
Brand
maXpeedingrods
Model Number
CO-SUBGDB-R-LC-AMUS
Auto Part Position
Front, Rear
Style
Adjustable
Vehicle Service Type
Car
Exterior Finish
Black (Springs), Red (Components)
Material
Aluminum (6061-T6 AL for top mount/perch), 55CrSi Steel (Springs)
Extended Length
14.17 Inches (approximate)
Front Spring Rate
9 kg/mm (504 lbs/in)
Rear Spring Rate
7 kg/mm (392 lbs/in)
Spring Preload
7-10 mm (recommended)
Damping Levels
24-level Rebound Force Adjustable
Height Adjustment Range
1-3 inches lowering
Structure Type
Twin-tube
Item Weight
64.3 pounds
Product Dimensions
27.95 x 19.69 x 7.87 inches (packaging)
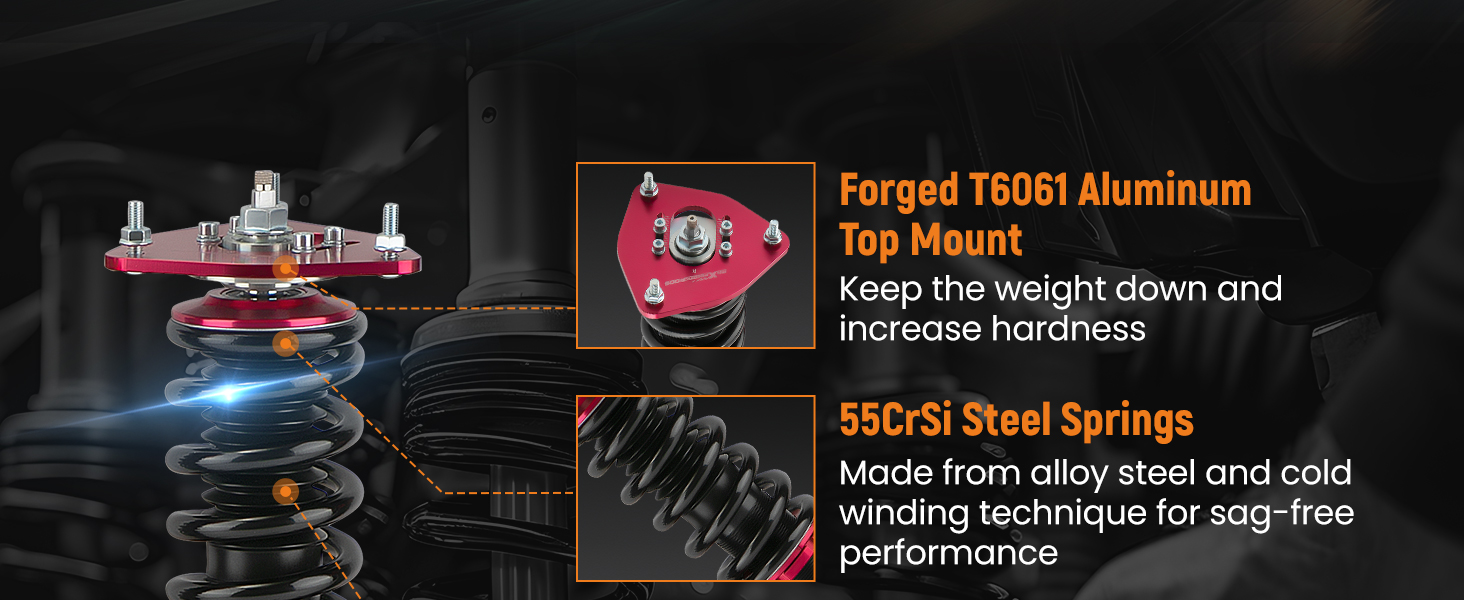
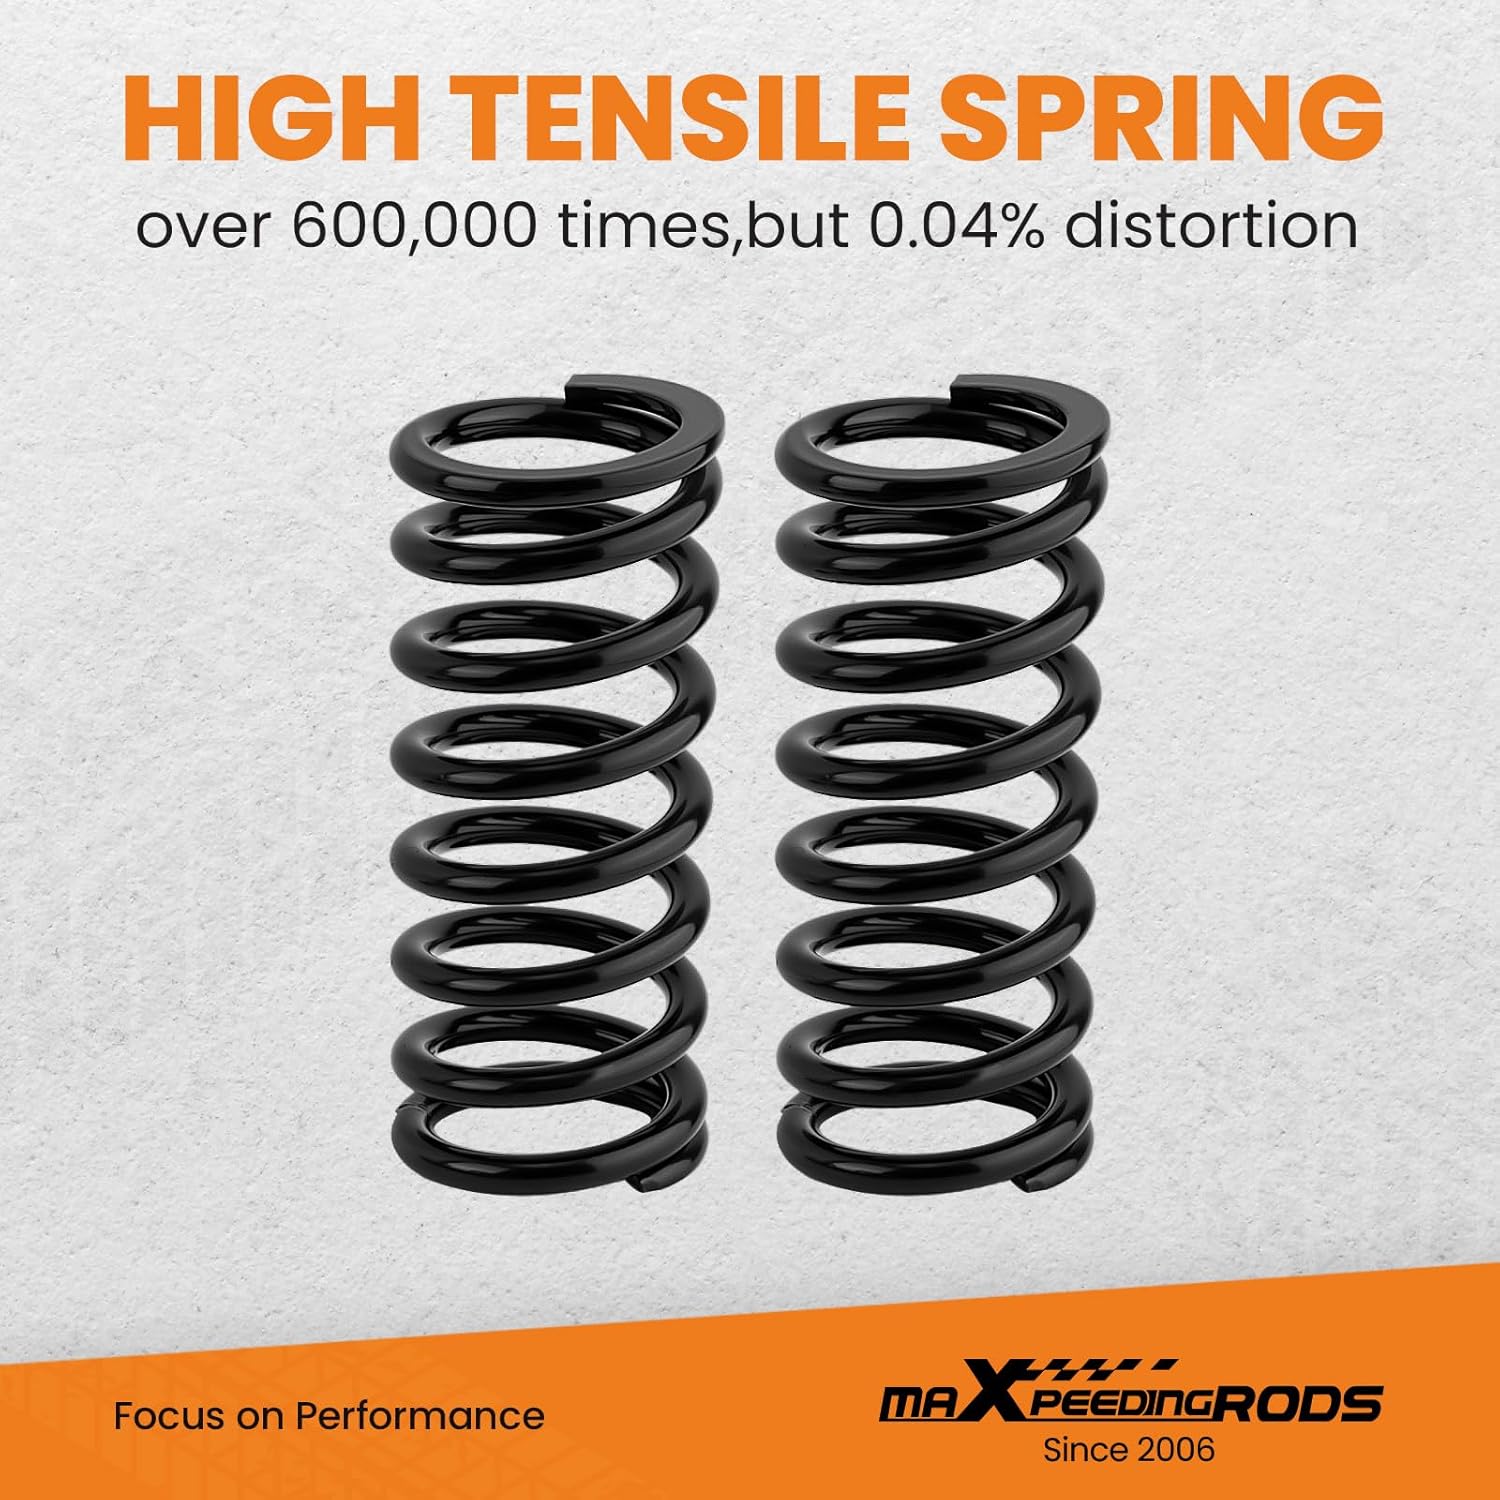
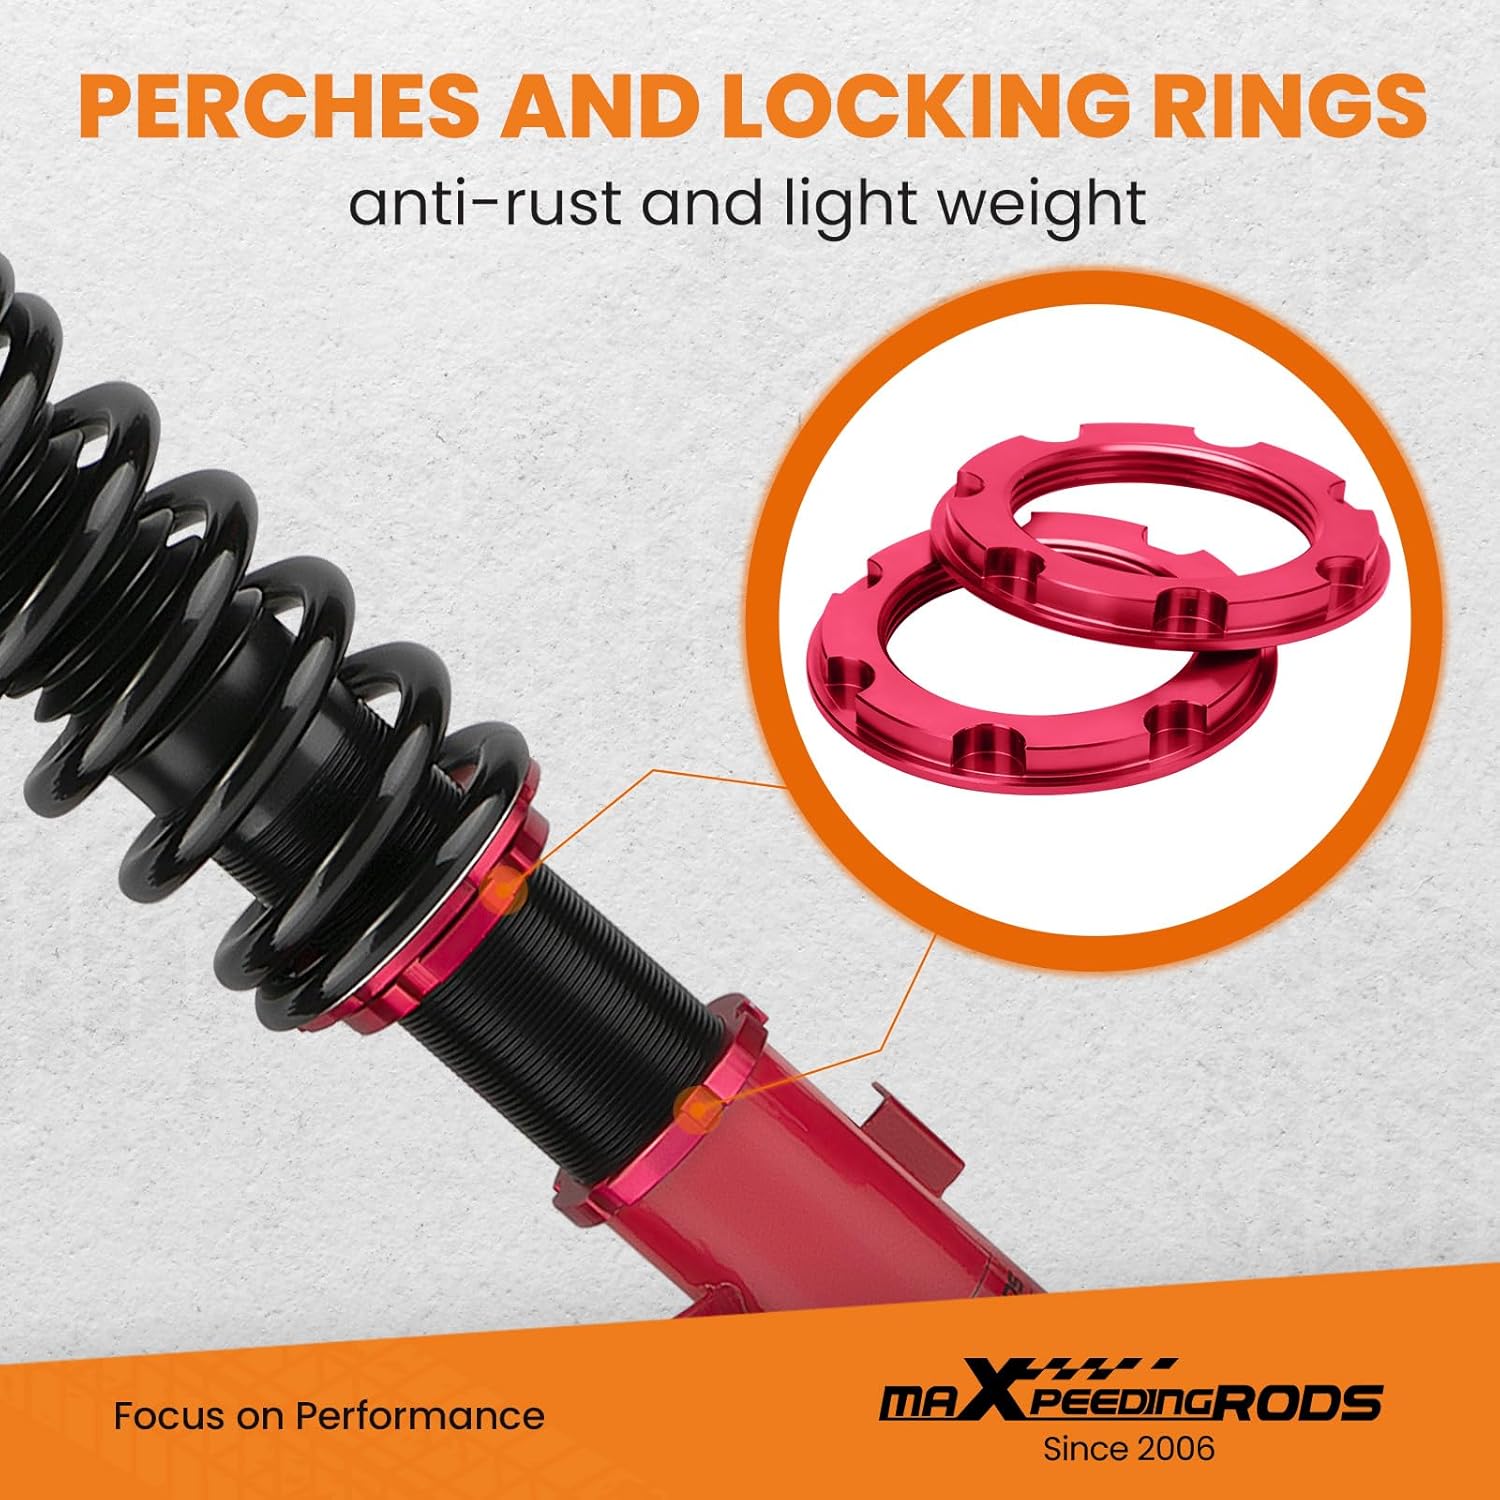
Image: High tensile springs, tested for durability with less than 0.04% distortion after 600,000 continuous cycles.Image: Detailed view of the anti-rust and lightweight perches and locking rings, essential for height adjustment.Image: Features of the coilover, including a forged T6061 Aluminum top mount for reduced weight and increased hardness, and 55CrSi Steel springs for sag-free performance.
Warranty and Support
Warranty Information:
Please refer to the warranty card included with your product or visit the official maXpeedingrods website for detailed warranty terms and conditions. Warranty coverage typically addresses manufacturing defects.
Customer Support:
For technical assistance, installation questions, or warranty claims, please contact maXpeedingrods customer support. You can find contact information on the official maXpeedingrods website or through your purchase platform.
maXpeedingrods Car Stereo Installation and Troubleshooting Guide for Honda Accord (2003-2007) Comprehensive guide for installing and troubleshooting the maXpeedingrods Double Din Car Stereo for Honda Accord models from 2003 to 2007. Covers cable connections, component identification, and common issues with solutions, supporting features like Apple CarPlay, Android Auto, GPS, and Bluetooth.
MAXPEEDINGRODS Air Spring Kit Installation Guide for GMC Sierra & Chevrolet Silverado 1500 Comprehensive installation guide for the MAXPEEDINGRODS Rear Air Helper Spring Leveling Kit, compatible with GMC Sierra 1500 and Chevrolet Silverado 1500 (1999-2007). Includes a detailed parts list, pre-installation warnings, step-by-step assembly instructions, and final checks.