Introduction
The Everbilt Self-closing Gate Kit is designed for use with gates or shed doors weighing up to 50 lbs. This kit includes spring hinges that automatically close the gate and a self-latching mechanism. The heavy-duty construction helps to prevent gate sag, ensuring reliable operation. This manual provides detailed instructions for installation, operation, and maintenance of your gate kit.
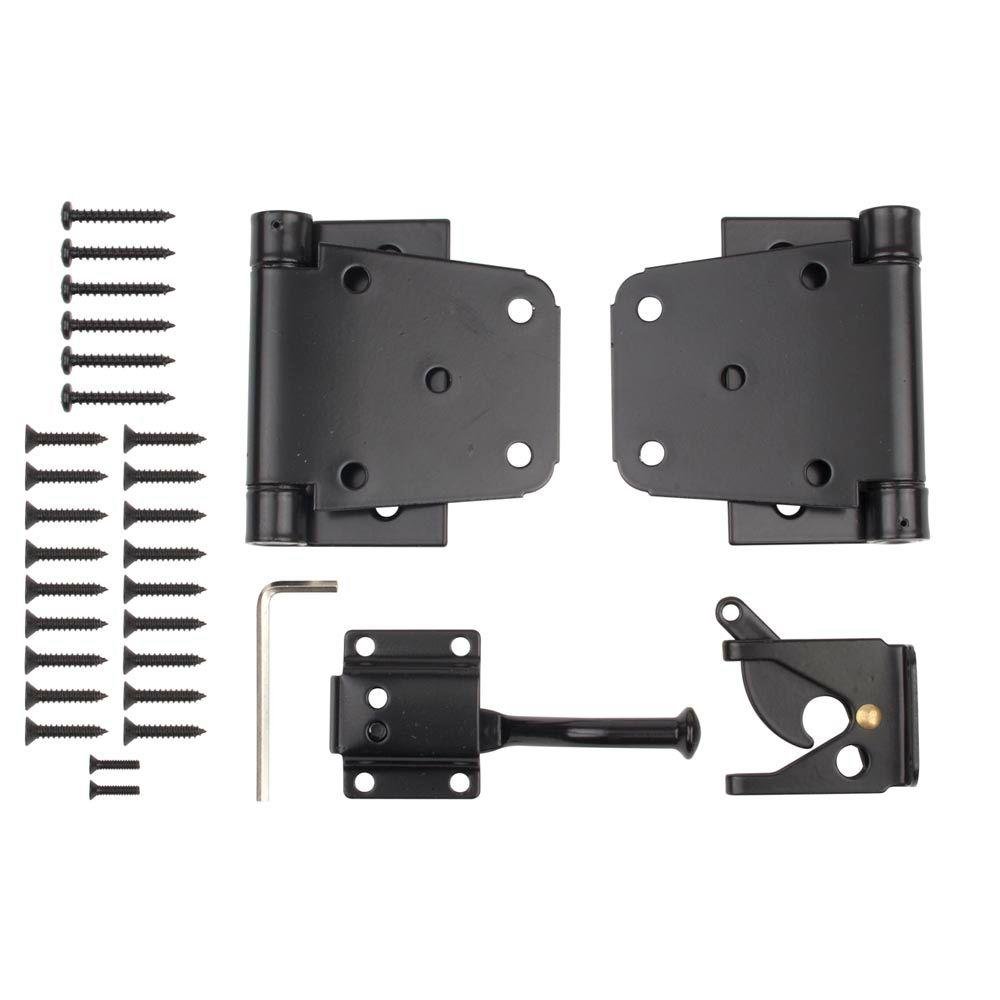
Figure 1: Everbilt Self-closing Gate Kit components. This image displays the main components of the kit, including the self-closing hinges and the gate latch, all in a black finish.
Safety Information
Please read and understand all instructions before beginning installation. Failure to follow these instructions may result in injury or product damage.
- Always wear appropriate safety gear, including eye protection, during installation.
- Ensure the gate structure is sound and capable of supporting the gate kit and the gate's weight (up to 50 lbs).
- Keep hands and fingers clear of moving parts, especially during hinge tension adjustment.
- Do not overtighten screws, as this may strip the wood or damage the hardware.
- This product is intended for residential use with gates up to 50 lbs. Do not exceed the recommended weight limit.
Package Contents
Verify that all components are present before beginning installation:
- Self-closing Spring Hinges (typically 2)
- Gate Latch with Fingertip Release
- Mounting Screws
- Hex Key (for tension adjustment)
Setup and Installation
This kit is designed for easy screw-in installation. Ensure your gate and gate post are structurally sound.
- Position Hinges: Place the self-closing hinges on the gate and gate post. Ensure proper alignment and spacing for smooth gate operation. Mark the screw hole locations.
- Pre-drill Holes: Using an appropriate drill bit size for the provided screws, pre-drill pilot holes at the marked locations. This prevents wood splitting.
- Mount Hinges: Securely attach the hinges to the gate and gate post using the provided mounting screws. Ensure hinges are flush and firmly attached.
- Install Latch: Position the gate latch on the gate and the catch on the gate post. Ensure the latch aligns correctly with the catch when the gate is closed. Mark and pre-drill holes, then secure the latch and catch with screws.
- Adjust Spring Tension: The hinges come with adjustable spring tension.
- To increase tension (make the gate close faster/stronger), insert the hex key into the adjustment hole on the hinge barrel and turn clockwise.
- To decrease tension (make the gate close slower/lighter), insert the hex key as far as it will go into the adjustment hole. Gently tap the hex key with a hammer. The tension will release. Be cautious as the hex key may snap counter-clockwise with force. Re-adjust to desired tension by turning clockwise.
- Test the gate closure after each adjustment to achieve the desired self-closing speed and force.
Operation
The Everbilt Self-closing Gate Kit is designed for simple operation.
- To open the gate, lift the fingertip release on the latch mechanism and pull the gate open.
- To close the gate, simply release it. The self-closing hinges will automatically pull the gate shut, and the latch will engage.
Maintenance
Regular maintenance will ensure the longevity and proper function of your gate kit.
- Cleaning: Wipe down the hardware periodically with a damp cloth to remove dirt and debris. Avoid abrasive cleaners.
- Lubrication: Apply a silicone-based lubricant to the hinge pins and latch mechanism annually or as needed to ensure smooth operation.
- Inspection: Periodically check all screws for tightness. Re-tighten if necessary. Inspect hinges and latch for any signs of wear or damage. Replace damaged components immediately.
- Tension Check: Verify that the hinge tension is still adequate for proper gate closure. Adjust if the gate is not closing fully or is closing too slowly.
Troubleshooting
| Problem | Possible Cause | Solution |
|---|---|---|
| Gate does not close fully. | Insufficient hinge spring tension. Obstruction in gate path. Gate too heavy. | Increase hinge spring tension (see Setup and Installation). Remove any obstructions. Ensure gate weight does not exceed 50 lbs. |
| Gate closes too slowly or too quickly. | Incorrect hinge spring tension. | Adjust hinge spring tension to desired speed (see Setup and Installation). |
| Latch does not engage or stay engaged. | Latch or catch misalignment. Latch mechanism sticking. Latch travels too far when opened. | Check alignment of latch and catch; adjust if necessary. Clean and lubricate the latch mechanism. Consider adding a small block or rubber piece above the rear of the latch mechanism to prevent it from over-rotating past vertical when opened. |
| Gate sags or is not level. | Loose mounting screws. Gate structure issues. | Tighten all mounting screws. Inspect gate and post for structural integrity and repair if needed. |
Specifications
- Model Number: 526 504
- Brand: Everbilt
- Material: Alloy Steel
- Finish: Black
- Installation Type: Screw-In
- Recommended Use: Residential High-Traffic Areas
- Maximum Gate Weight: 50 lbs
- Item Weight: 2.1 pounds
- Package Dimensions: 10.2 x 8.2 x 1.1 inches
- UPC: 030699135349
Warranty and Support
This Everbilt product is manufactured to high-quality standards. For specific warranty information or technical support, please refer to the product packaging or contact Everbilt customer service directly. Keep your purchase receipt for warranty claims.


