1. Introduction
This manual provides detailed instructions for the safe installation, operation, and maintenance of your Progress Lighting P3955-20 Heart Hall & Foyer Chandelier. This three-light inverted pendant features an Antique Bronze finish with an etched glass bowl and curvaceous arms, designed to enhance your home's aesthetic. Please read all instructions carefully before beginning installation.
For additional product information, visit the official Progress Lighting Store.
2. Safety Information
WARNING: Risk of electric shock. Disconnect power at the fuse box or circuit breaker before installation or servicing. Consult a qualified electrician if you are unsure about electrical wiring.
CAUTION: All wiring connections must be in accordance with local and national electrical codes. Ensure all connections are secure and properly insulated.
Proposition 65 Warning: This product may contain chemicals known to the State of California to cause cancer and birth defects or other reproductive harm. Please check your local laws before purchasing this product.
- Always handle the fixture with care to prevent damage.
- Do not install near flammable materials.
- Ensure the mounting surface can support the weight of the fixture.
- Use only the specified bulb type and wattage.
3. Package Contents
Verify that all components are present before beginning installation. If any parts are missing or damaged, do not attempt to assemble or install the fixture. Contact customer service for assistance.
- Chandelier Fixture (P3955-20)
- Etched Glass Bowl
- Mounting Hardware
- Installation Sheet (Detailed instructions for specific model)
4. Setup and Installation
Refer to the included Installation Sheet for model-specific wiring and mounting instructions. The following are general guidelines.
4.1 General Installation Steps
- Turn off Power: Locate the circuit breaker or fuse box and turn off the power to the junction box where you will be installing the fixture.
- Prepare Mounting: Secure the mounting bracket to the junction box using the provided screws.
- Wire Connections: Connect the fixture's wires to the house wires according to the included wiring diagram. Typically, black to black (live), white to white (neutral), and bare copper/green to bare copper/green (ground).
- Secure Fixture: Attach the fixture body to the mounting bracket.
- Install Glass Shade: Carefully attach the etched glass bowl to the fixture.
- Install Bulbs: Insert the appropriate incandescent bulbs (up to 100 watts per bulb).
- Restore Power: Turn the power back on at the circuit breaker or fuse box.

Figure 1: Main view of the Progress Lighting P3955-20 Heart Hall & Foyer Chandelier.
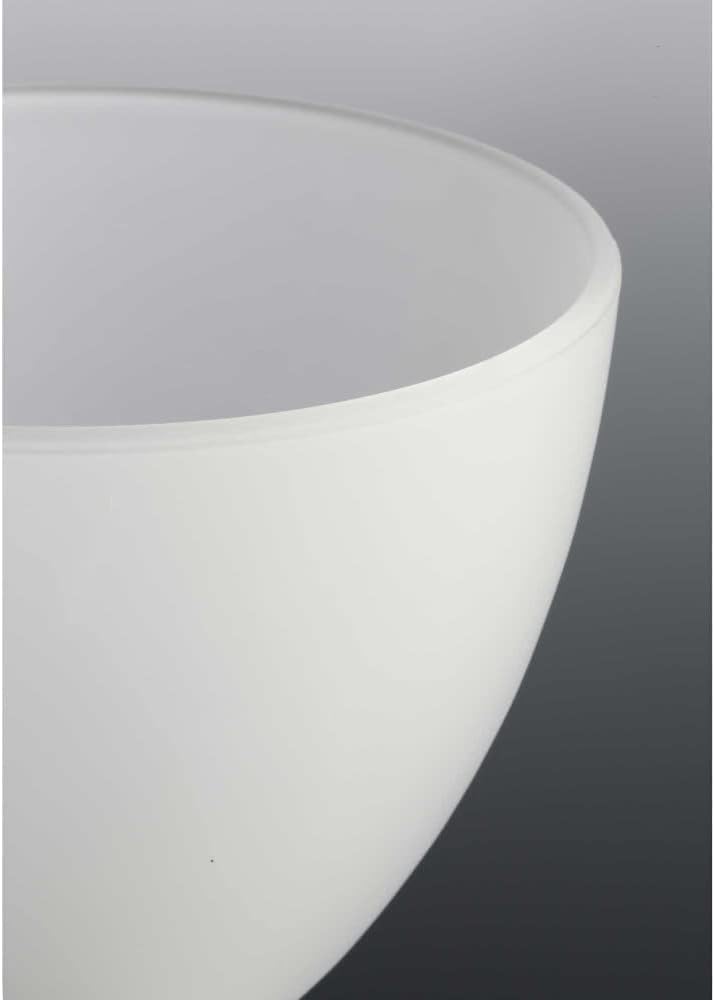
Figure 2: Close-up view of the etched glass bowl, highlighting its texture and design.

Figure 3: Side view showing the curvaceous arm and the attachment of the glass shade.

Figure 4: Bottom view of the etched glass bowl, showing the opening for bulb access.
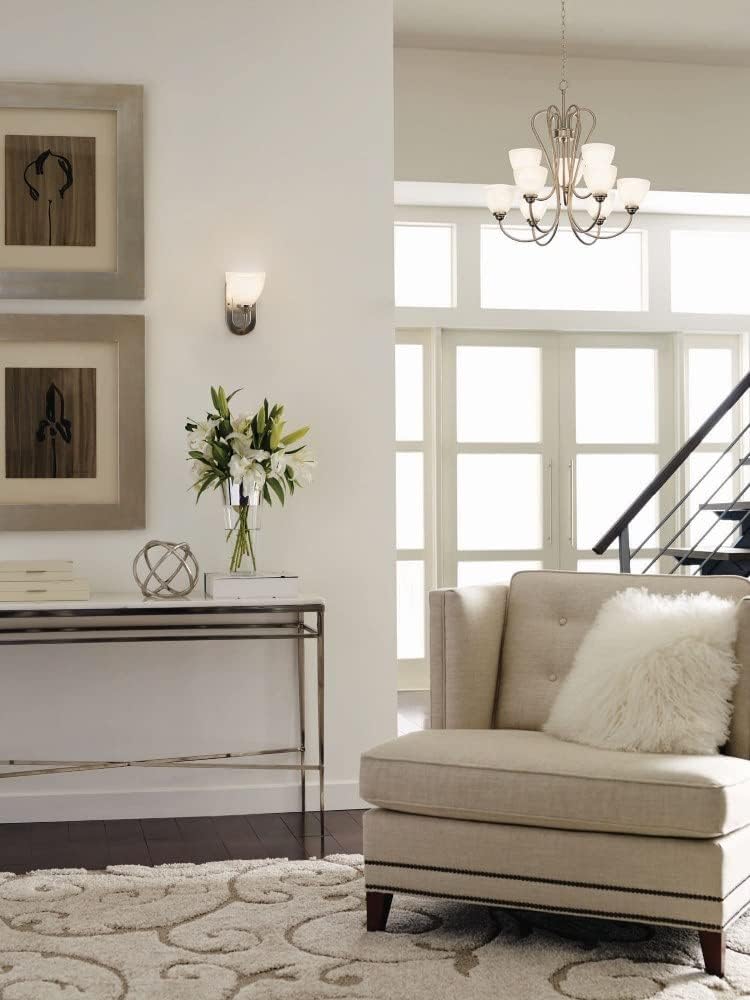
Figure 5: The P3955-20 chandelier installed in a hall or foyer, demonstrating its aesthetic appeal.
4.2 Pendant Lighting Trends and Spacing Tips
For optimal aesthetic and functional placement, consider the following guidelines for pendant lighting, which can be applied to your chandelier installation:
Video 1: Modern Pendant Light Trends by Progress Lighting. This video provides visual examples of pendant placement in various rooms. For specific pendant spacing and hanging tips over dining tables or kitchen islands, refer to the segment from 0:48 to 1:18.
- Kitchen Islands/Dining Tables: Start the row of pendants 12-15 inches in from either end of the surface, then space the remaining pendants evenly within that span.
- Fixture Size: Pendants should be at least 10 inches smaller in diameter than the width of the countertop or table.
- Hanging Height: The bottom of the pendant lighting should hang 30-36 inches above the countertop, dining table, or nightstand.
5. Operating Instructions
Once installed, your P3955-20 chandelier operates like any standard lighting fixture. Ensure the light bulbs are correctly installed and the power supply is active.
- Power On/Off: Use the wall switch connected to the fixture to turn the lights on or off.
- Control Method: The primary control method is via a wall switch. If connected to a dimmer switch, ensure the bulbs are compatible with dimming functionality.
- Light Source: This fixture uses incandescent bulbs.
6. Maintenance
Regular maintenance will help preserve the appearance and functionality of your chandelier.
- Cleaning: Turn off the power before cleaning. Wipe the fixture with a soft, dry cloth. Do not use abrasive cleaners or solvents, as they may damage the finish or glass.
- Bulb Replacement: Turn off the power before replacing bulbs. Allow bulbs to cool completely. Unscrew old bulbs and replace with new incandescent bulbs, up to 100 watts per socket.
- Inspection: Periodically check all connections and mounting hardware to ensure they remain secure.
7. Troubleshooting
If your chandelier is not functioning correctly, refer to the following common issues and solutions:
| Problem | Possible Cause | Solution |
|---|---|---|
| Light does not turn on. | No power to the fixture. Loose wire connection. Faulty bulb. | Check circuit breaker/fuse. Verify all wire connections are secure (power off). Replace bulb. |
| Lights flicker. | Loose wire connection. Incorrect dimmer switch/bulb combination. | Check wire connections (power off). Ensure dimmer and bulbs are compatible. |
| Fixture is unstable. | Improper mounting. Loose mounting hardware. | Re-secure mounting bracket and fixture to the junction box. |
If you are unable to resolve the issue, contact a qualified electrician or Progress Lighting customer service.
8. Specifications
| Feature | Detail |
|---|---|
| Model Number | P3955-20 |
| Brand | Progress Lighting |
| Color | Antique Bronze |
| Material | Alloy Steel, Glass |
| Style | Traditional |
| Light Fixture Form | Pendant |
| Room Type | Lobby, Hall, Foyer |
| Indoor/Outdoor Usage | Indoor |
| Power Source | AC |
| Light Source Type | Incandescent |
| Finish Type | Antique |
| Shade Material | Glass (Etched) |
| Number of Light Sources | 3 |
| Voltage | 120 Volts |
| Wattage | 100 watts (per bulb) |
| Assembly Required | Yes |
| Item Weight | 7 Pounds |
| Assembled Diameter | 17.75 Inches |
| Specification Met | UL Listed |
9. Warranty and Support
Warranty: Your Progress Lighting P3955-20 Chandelier comes with a 1-year Limited Warranty. This warranty guarantees your complete satisfaction with your purchase and includes professional after-sales customer service support. For warranty claims or further details, please refer to the warranty information included with your product or contact Progress Lighting directly.
Customer Support: For technical assistance, missing parts, or any questions regarding your product, please contact Progress Lighting customer service. Contact information can typically be found on the product packaging or the official Progress Lighting website.


