
1. Introduction
This manual provides detailed instructions for the assembly and care of your TAMIYA Tiger I (Sd.kfz.181) 1/35 scale model kit. The Tiger I, a German heavy tank from World War II, was renowned for its powerful armament and heavy armor. This kit allows enthusiasts to recreate a detailed replica of this iconic vehicle. Please read all instructions carefully before beginning assembly.
The kit features separately molded track links and is designed for a realistic representation of the Tiger I. The completed model will be approximately 7.1 inches long.
2. Safety Information
Please observe the following safety precautions during assembly:
- Small Parts Warning: This kit contains small parts which may pose a choking hazard for young children. Keep all components out of reach of children under 3 years of age.
- Adhesives and Paints: Use model adhesives and paints in a well-ventilated area. Avoid inhaling fumes. Refer to the specific safety instructions provided with your chosen adhesives and paints.
- Sharp Tools: Exercise caution when using hobby knives, clippers, and other sharp tools. Always cut away from your body.
- Eye Protection: Consider wearing eye protection to prevent injury from flying plastic pieces during cutting or sanding.
3. Package Contents
Your TAMIYA Tiger I model kit includes:
- Plastic parts for one Tiger I (Sd.kfz.181) tank model.
- Decal sheet for various markings.
- Instruction booklet (this document).
Note: Adhesives, paints, and modeling tools are not included and must be purchased separately.

Figure 3.1: TAMIYA Tiger I (Sd.kfz.181) Model Kit Box Art. This image displays the packaging for the model kit, featuring a depiction of the completed tank and key product information.
4. Assembly Instructions
Assembly of this model kit requires patience and attention to detail. Follow the numbered steps in the included diagrammatic instructions. The estimated assembly time is approximately 5 hours.
4.1 General Assembly Tips
- Part Preparation: Carefully remove parts from the sprues using side cutters. Clean any excess plastic (flash) with a hobby knife or sanding stick.
- Test Fit: Always test fit parts before applying adhesive to ensure proper alignment.
- Adhesive Application: Apply a small amount of plastic cement to one surface and press parts together firmly. Hold until the bond sets.
- Painting: It is often easier to paint certain sub-assemblies before joining them to the main model. Refer to the painting guide for recommended colors and schemes.
4.2 Track Assembly
The kit features separately molded track links. This method allows for a highly detailed and realistic track appearance. Assemble the track links segment by segment, ensuring proper alignment and allowing sufficient drying time for the adhesive. This process can be time-consuming but yields superior results.
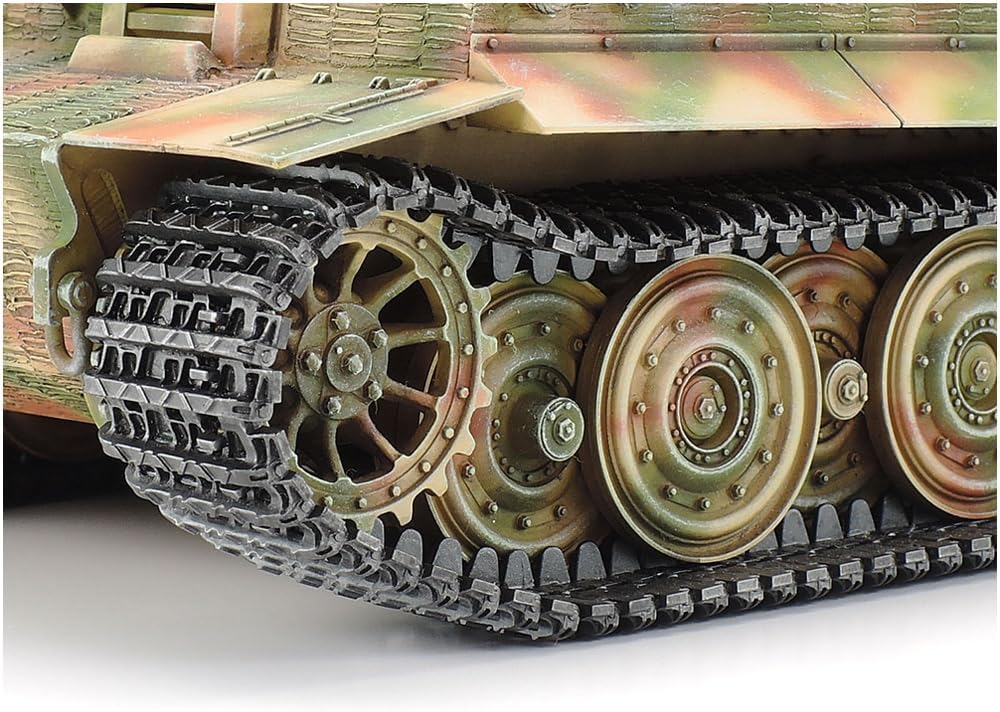
Figure 4.1: Detailed view of the assembled track links and road wheels. This image highlights the intricate detail of the individual track links and the suspension components.
4.3 Hull and Turret Assembly
Follow the diagrammatic instructions for assembling the main hull and turret components. Pay close attention to the orientation of parts and ensure all seams are clean and flush. The kit provides options for various details, so choose your preferred configuration before gluing.

Figure 4.2: Completed TAMIYA Tiger I model, front-side view. This image showcases the assembled hull, turret, main gun, and a commander figure in the cupola.
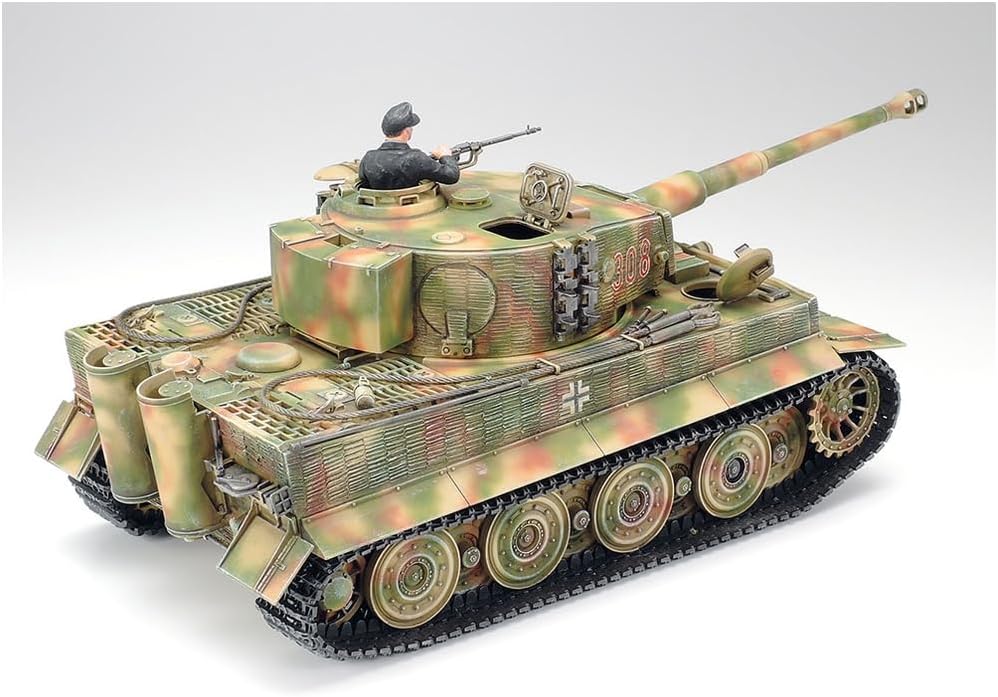
Figure 4.3: Completed TAMIYA Tiger I model, rear-side view. This image provides a view of the engine deck, exhaust systems, and rear hull details.
5. Display and Handling
Once assembled and painted, your TAMIYA Tiger I model is ready for display. Handle the model carefully to avoid damaging delicate parts such as antennas, machine guns, or track links. It is recommended to display the model on a stable surface away from direct sunlight, extreme temperatures, and high humidity to preserve its finish and structural integrity.
6. Maintenance
Model kits generally require minimal maintenance. To keep your Tiger I model in pristine condition:
- Dusting: Regularly dust the model using a soft brush or a can of compressed air. Avoid abrasive materials that could scratch the paint.
- Cleaning: If necessary, gently wipe the model with a slightly damp cloth. Do not use harsh chemicals or solvents, as these can damage the paint and plastic.
- Repairs: In case of accidental damage, use appropriate plastic cement to reattach broken parts. Touch up paint as needed.
7. Troubleshooting
Encountering issues during model assembly is common. Here are some tips for common problems:
- Parts Not Fitting: Ensure you are using the correct parts for the step. Check for any excess plastic (flash) on the parts or sprue connection points that might prevent a flush fit. Gently sand or trim as needed.
- Missing Parts: Double-check the sprues and the box. If a part is genuinely missing, contact TAMIYA customer support with your kit details.
- Decal Application Issues: Ensure the surface is clean and smooth. Use decal setting solutions to help decals conform to irregular surfaces and eliminate silvering.
- Paint Adhesion Problems: Ensure the plastic surface is clean and free of oils or mold release agents. A primer coat can improve paint adhesion.
8. Specifications
| Feature | Detail |
|---|---|
| Model Name | Tiger I (Sd.kfz.181) |
| Brand | TAMIYA |
| Model Number | TM35146 |
| Scale | 1/35 |
| Product Dimensions (L x W x H) | 7.1 x 4.16 x 3.37 inches (approximate assembled) |
| Item Weight | 0.002 ounces (kit weight) |
| Assembly Required | Yes |
| Estimated Assembly Time | 5 Hours |
| Included Components | Model kit parts |
| Batteries Required | No |
9. Warranty and Support
This TAMIYA model kit is provided without a specific manufacturer's warranty. TAMIYA is known for its high-quality products, and components are typically inspected before packaging.
For support regarding missing or defective parts, please refer to the contact information provided on the kit box or visit the official TAMIYA website for customer service details. When contacting support, please have your model number (TM35146) and proof of purchase readily available.


