1. Introduction
This manual provides comprehensive instructions for the proper use, maintenance, and care of your KRUPS 030 Perfect Froth Milk Frother attachment. This accessory is designed to enhance the milk frothing capabilities of compatible KRUPS espresso machines, allowing you to create rich, creamy froth for your favorite coffee beverages.
2. Product Overview
The KRUPS 030 Perfect Froth Milk Frother is a replacement attachment designed to fit securely onto the steam wand of your espresso machine. It consists of a durable black rubber component and a slender metal tube, working together to aerate milk effectively.
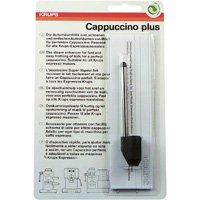
Figure 1: The KRUPS 030 Perfect Froth Milk Frother attachment, shown in its retail packaging. This image displays the black rubber base and the metal frothing tube, which are the primary components of the attachment.
3. Setup and Installation
Before first use, ensure the attachment is clean. Refer to the 'Maintenance and Cleaning' section for initial cleaning instructions.
- Identify Steam Wand: Locate the steam wand on your compatible KRUPS espresso machine.
- Attach Frother: Carefully slide the black rubber end of the Perfect Froth attachment onto the steam wand. Ensure it is pushed on firmly and securely. The fit should be snug to prevent steam leakage and ensure proper frothing.
- Verify Connection: Confirm that the smaller metal tube within the attachment is securely inserted into both the top and bottom black rubber parts. An insecure connection can lead to poor frothing performance and unusual noise.
4. Operating Instructions
Follow these steps to achieve optimal milk froth using your KRUPS 030 attachment:
- Prepare Milk: Fill a frothing pitcher with cold milk (dairy or non-dairy) to just below the spout.
- Purge Steam Wand: Briefly open the steam valve on your espresso machine to release any condensed water from the steam wand. Close the valve immediately.
- Position Frother: Submerge the tip of the Perfect Froth attachment just below the surface of the milk in the pitcher.
- Activate Steam: Open the steam valve fully. You should hear a gentle hissing sound as air is incorporated into the milk.
- Froth Milk: Keep the frother tip near the surface to create foam, then lower it slightly to heat the milk. Continue until the milk reaches your desired temperature and consistency. The pitcher will become hot to the touch.
- Turn Off Steam: Close the steam valve completely before removing the pitcher.
- Clean Immediately: Wipe the frother attachment and steam wand with a damp cloth immediately after use to prevent milk residue from drying. Refer to the 'Maintenance and Cleaning' section for detailed cleaning.
5. Maintenance and Cleaning
Regular cleaning ensures optimal performance and longevity of your frother attachment.
Daily Cleaning:
- Immediately after each use, wipe the exterior of the frother attachment with a clean, damp cloth.
- Briefly open the steam valve again to clear any milk residue from inside the attachment and steam wand.
Thorough Cleaning (Weekly or as needed):
- Remove the Perfect Froth attachment from the steam wand.
- Hand wash the attachment using warm water and a mild dish soap.
- Pay close attention to the small opening at the top of the rubber stopper and the metal tube. If blockages occur, use a paper clip or a push pin to carefully clear any dried milk residue.
- Rinse thoroughly with clean water and allow to air dry completely before reattaching.
Caution: Do not place the frother attachment in a dishwasher, as this may damage the materials.
6. Troubleshooting
If you encounter issues with your Perfect Froth attachment, consult the following table:
| Problem | Possible Cause | Solution |
|---|---|---|
| No or poor milk froth |
|
|
| Loud or unusual noise during frothing |
|
|
| Steam leakage from attachment |
|
|
7. Specifications
- Brand: KRUPS
- Model: 030
- Product Dimensions: Approximately 7.2 x 4.6 x 0.8 inches
- Item Weight: Approximately 0.16 ounces
- Material: Stainless Steel (tube), Rubber (base/stopper)
- Care Instructions: Hand Wash Only
- UPC: 010942106128
8. Warranty and Support
For information regarding warranty coverage, product support, or to purchase replacement parts, please visit the official KRUPS website or contact KRUPS customer service. Keep your proof of purchase for any warranty claims.
KRUPS Official Website: www.krups.com


