 Mini 60 Invisible Joiner
Installation Guide
Mini 60 Invisible Joiner
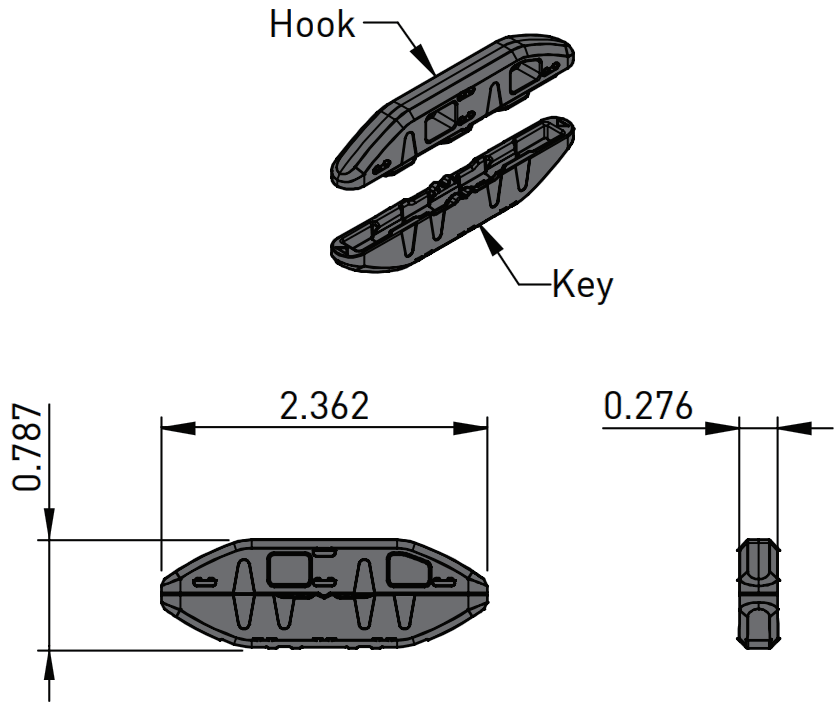
| Material | High Strength Reinforced Nylon |
| Color | Black |
| Fixing Method | Glue |
Mounting
- Router Cut Option
Use a Ø9/32” router bit to cut a slot in both substrates where the Hook and Key of the Mini 60 is to be mounted. Depth needs to be 0.394” for each.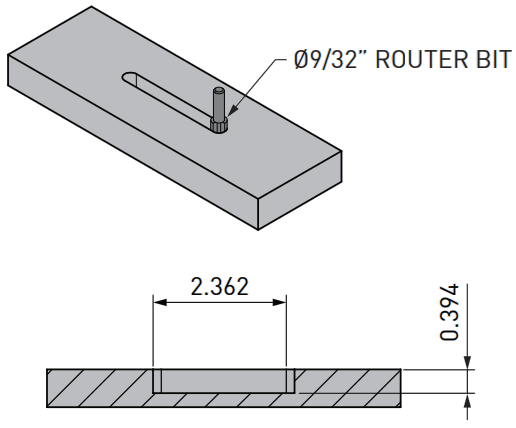
- Biscuit Cut Option
Set the depth stop to #20 and guide height for substrate thickness. Plunge in once then repeat using the Mark-Out Template, packing the guide 0.118” to achieve a 0.276” cut.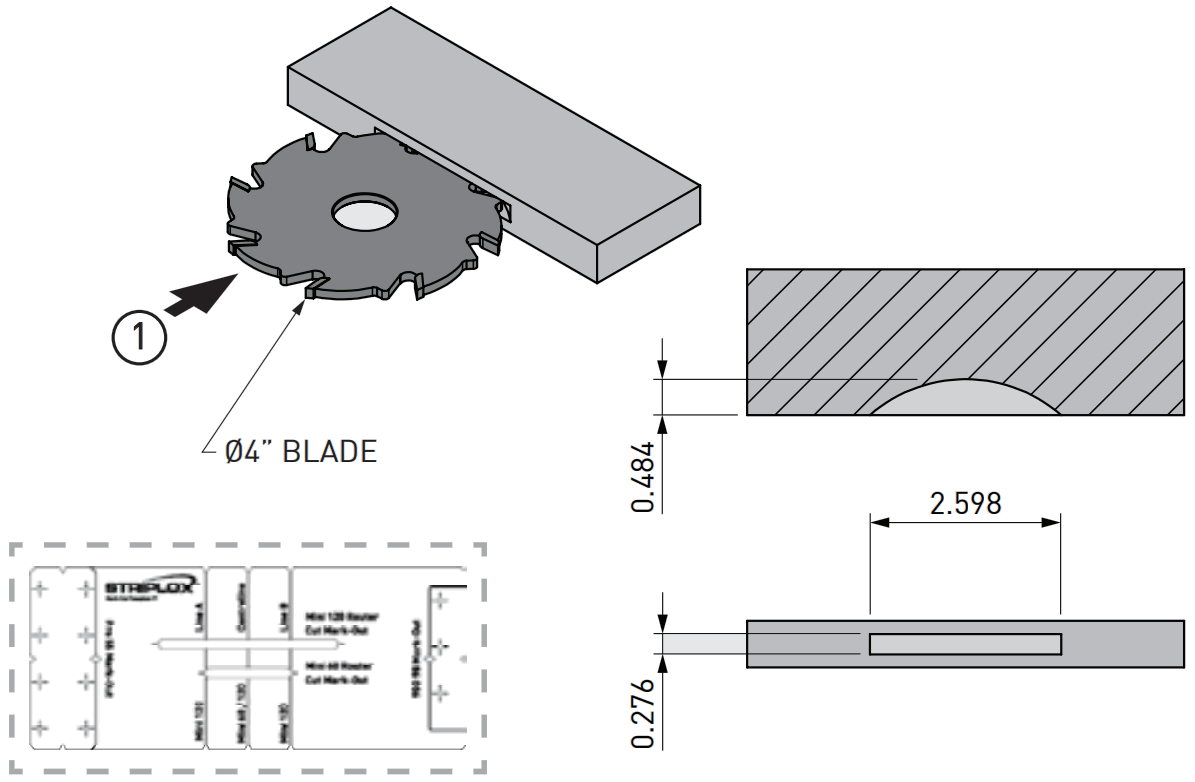
- Striplox Liquidlox
Apply Striplox Liquidlox 15 second cure adhesive to both sides of the slot in each substrate. Visit outwater.com or call 1-800-631-8375 to find out more about Striplox Liquidlox and Mark-Out Template.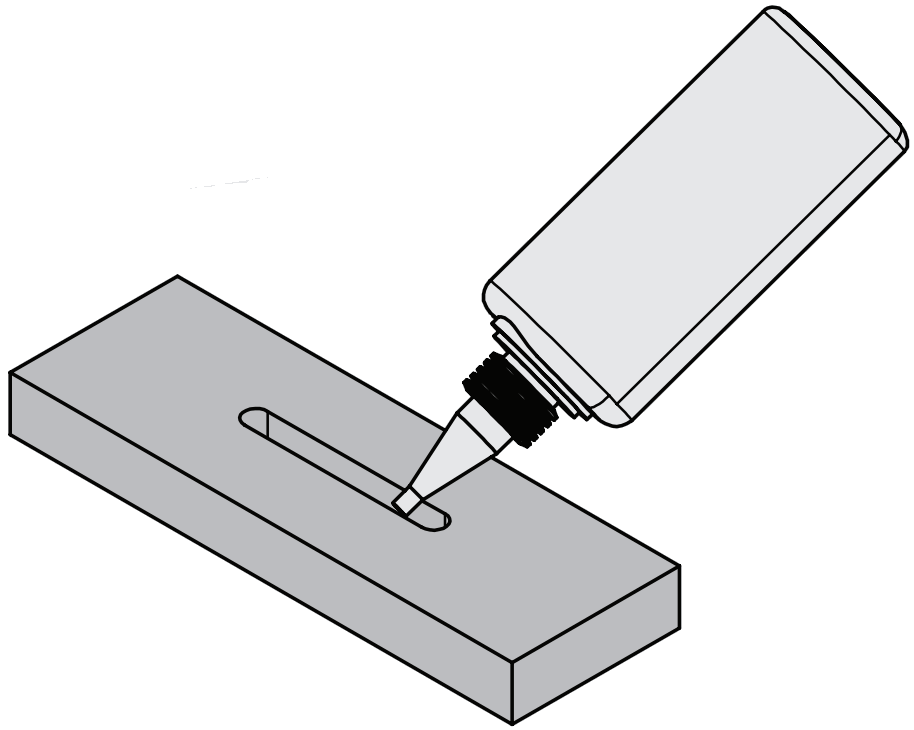
- To aid in the installation of the Key and Hook, start by inserting one end in the slot when use a hammer or mallet to tap the component into place. Ensure center lines on substrate align with center marks on Hook and Key.
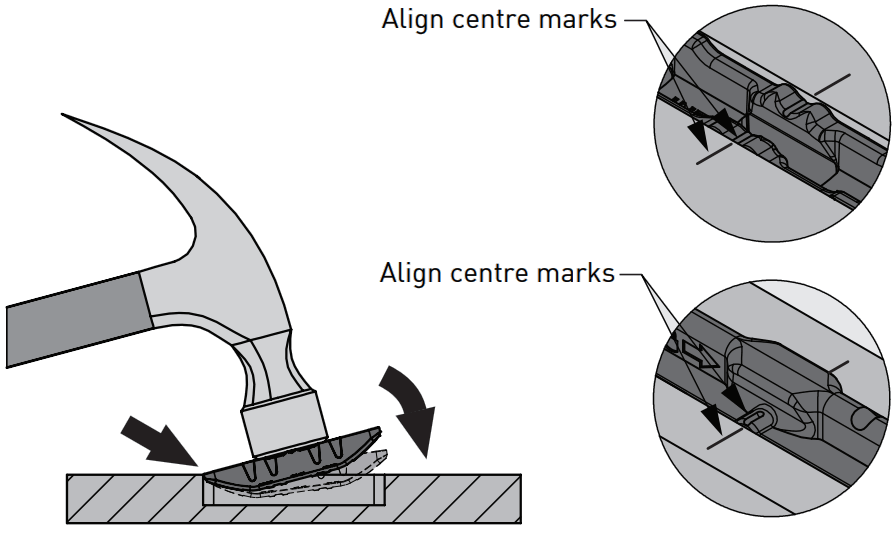
- After glue is applied, insert Key and Hook into slot until flush with substrate. Allow to dry as per glue manufactures instructions.

- The Mini 60 features locating tabs which click into place when fully assembled. Please note this feature is not a lock, making the joint fully reversible.
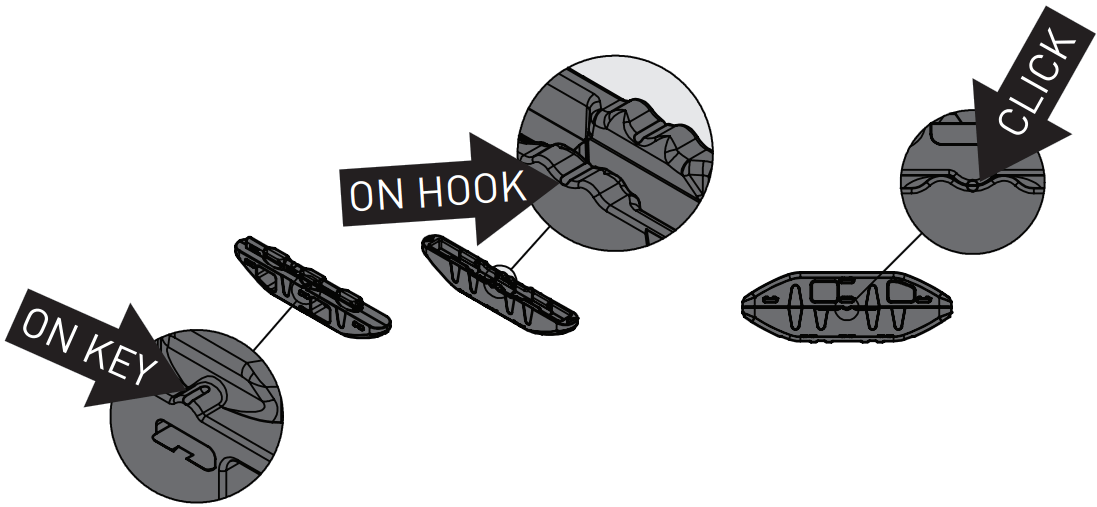
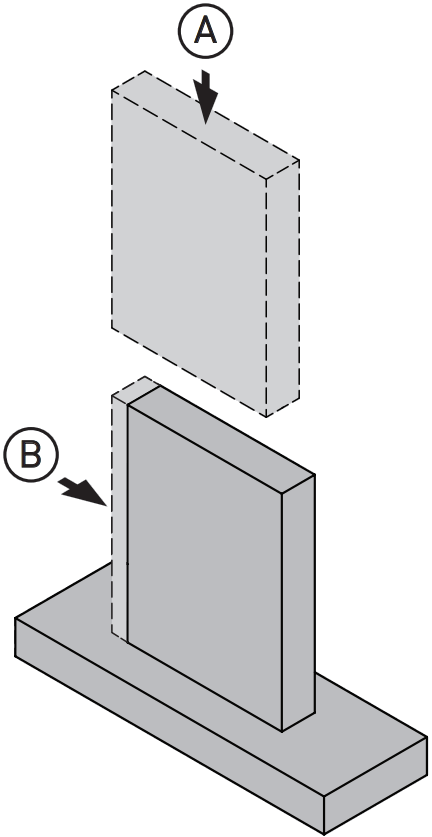
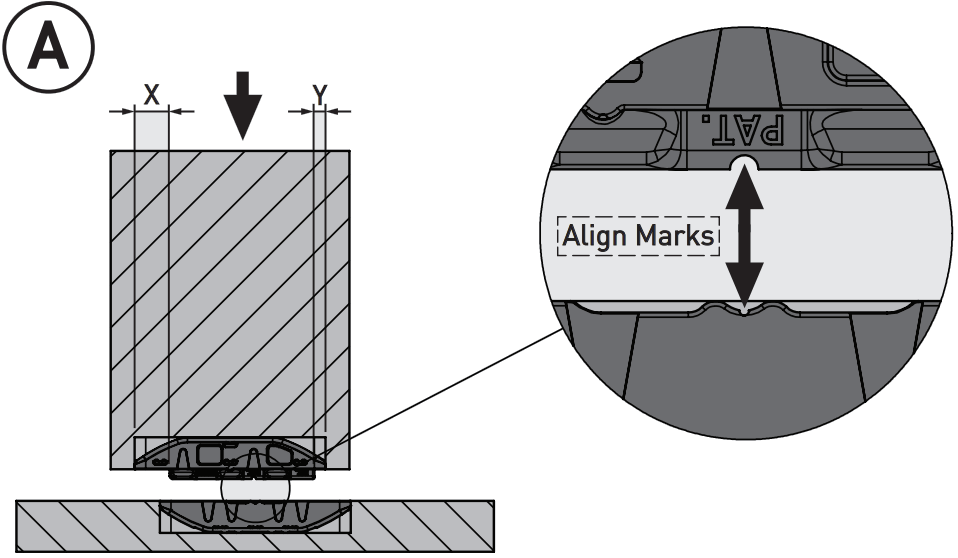
- Assembly components remembering the Key only needs to travel 1 pitch for full engagement. This is detailed in steps A and B.
 |
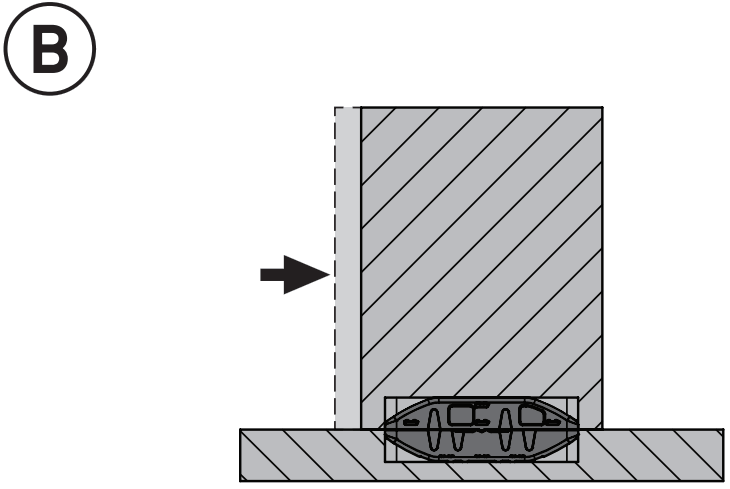 |
| Note the offset of the lugs on the Key body, length X is larger than Y. Insert the Hook into the Key with the longer X end towards the face to be pushed during assembly. | To complete the assembly push the end of the substrate (with X offset) until the Mini 60 is fully engaged. |
Load Capacity
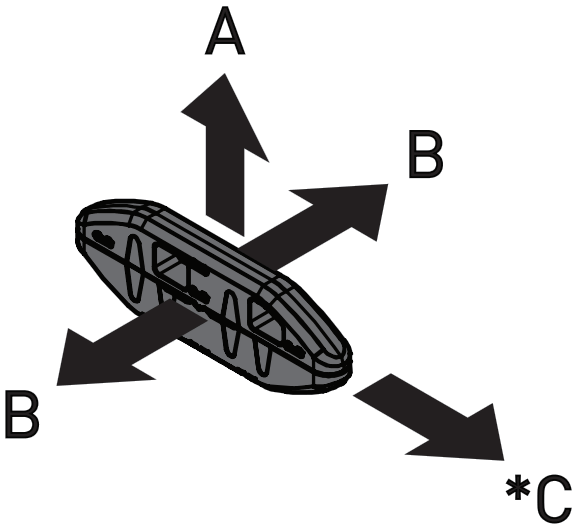
| Direction | Indic. Load Capacity |
| A | 198 lb |
| B | 220 lb |
| *C | 176 lb |
- Tested using MDF and fixed with glue.
- *C is in direction of lock-up.
Striplox™ and Joinlox® are trademark and patent protected internationally.
Installation Guide Mini 60 – US V1.1
Documents / Resources
 |
STRIPLOX Mini 60 Invisible Joiner [pdf] Installation Guide Mini 60 Invisible Joiner, Mini 60, Invisible Joiner, Joiner |


