![]() OSD Control App
OSD Control App
Instructions
OSD Control App
*After Updating/Installing the OSD Control App, this will be the first screen you are met with. The following instructions will walk-thru setting up the OSD Control App to the Nero-Max12/Max8/Control12.
Once you open the OSD Control App, you will first see this screen. For proper configuration, please keep “Group 1” selected and proceed with selecting the “Settings” Button. *Please note, the Wireless Device using the OSD Control App, should be connected to the same Wi-Fi Network that is hardwired into the Nero-Max12/Max8/Control12.


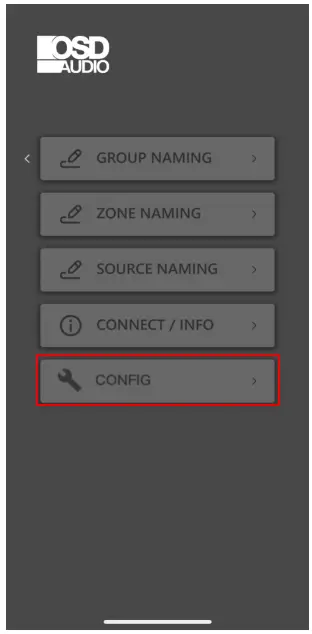
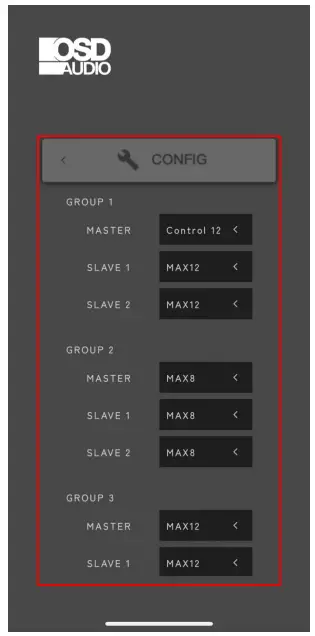
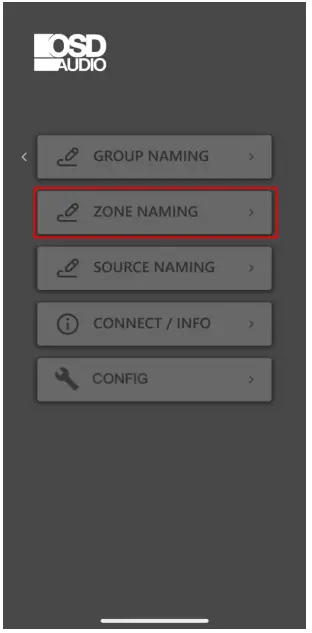
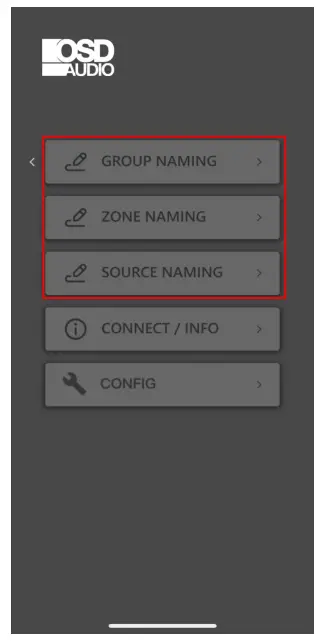
In the Settings Page, “Config” is where you can access the different ‘Groups,’ and the selected devices in each of the Groups.
*Upon setup, you will want to enter this page, and change/adjust the device from the available ‘Drop-down Menu’.
Based on the unit you have, you will be able to choose from “Max12”, “Max8”, and “Control12”. Please select your correct unit for Configuration.


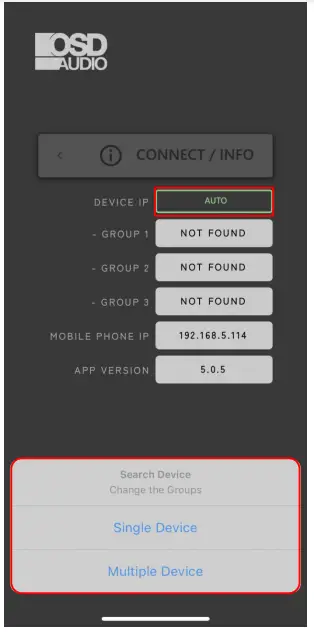
This is the “Connect/Info” Screen.
You will want to change the ‘Device I.P’ Setting from “Auto” to “Manual”, by pressing the “Auto” Button.
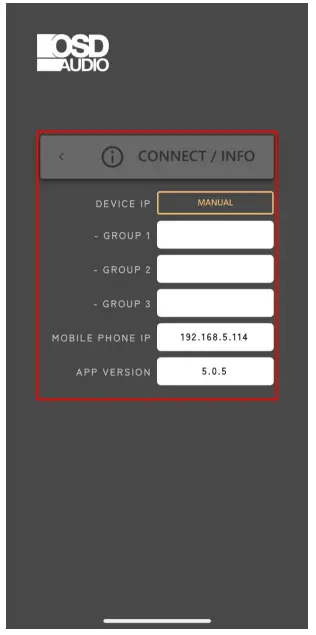 Your screen should look similar to this.
After the button is adjusted to “Manual”, you will need to press it again, to change to “Auto.
Here, the “Manual” button has been pushed to show “Auto”.
A pop-up will appear at the bottom of the screen, asking if you are Connecting a ‘Single Device’, or ‘Multiple Devices’.
This is solely based on the number of Nero-Max12, Max8 and Control12 devices you have and are looking to connect at one time.

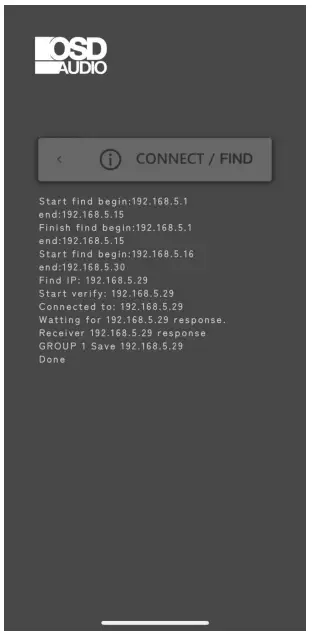
After clicking “Single Device” or “Multiple Devices”, it will take you to this screen.
This screen will show the OSD Control App cycling through the different I.P Addresses within your Network. This will continue to cycle through I.P’s until it finds the NeroMax12/Max8/Control12 on your Network
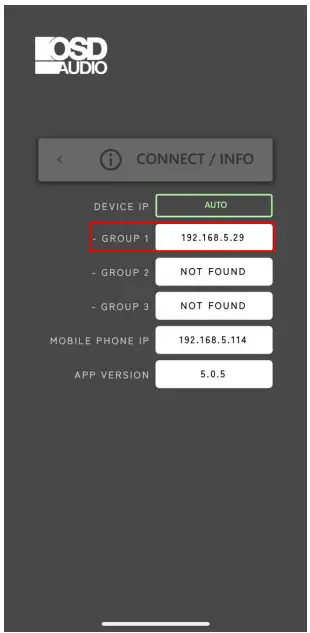
Once the OSD Control App finds the NeroMax12/Max8/Control12 I.P Address, it will refresh, and come back to this “Connect/Info” Screen. If you only have x1 NeroMax12/Max8/Control12, then it will only display “Group 1” with an available I.P Address. If you have multiple NeroMax12/Max8/Control12 units, then it will display the other I.P Address’ in a different ‘Group’ number.![]()

*Your device is now connected!
This will be the updated Home Screen.
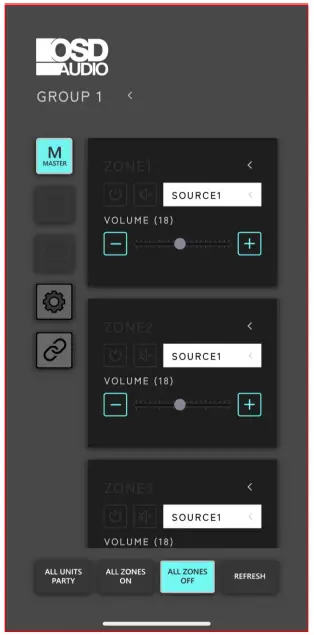


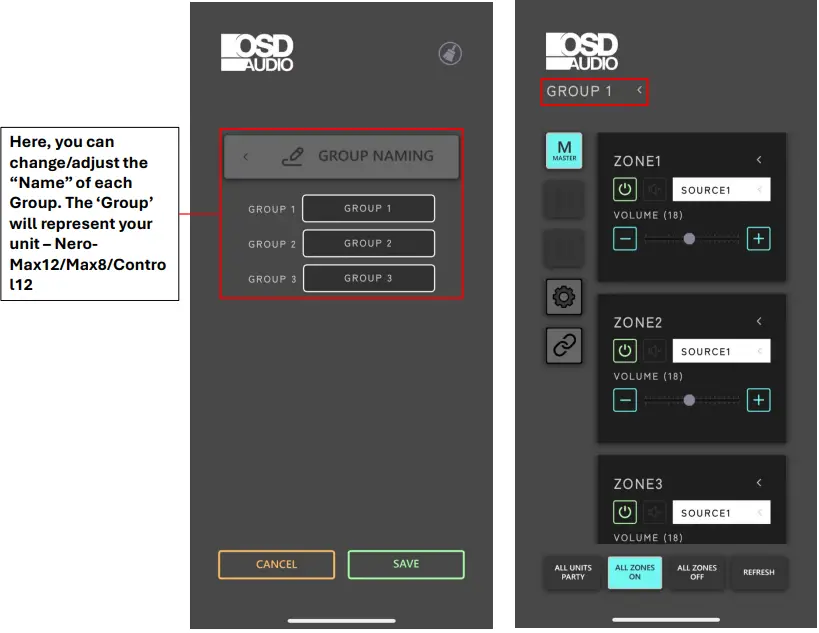


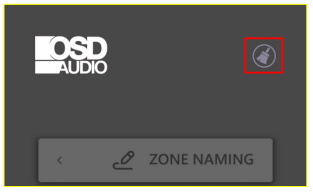
Each of the customer ‘Naming’ features now feature a new button ‘Broom’, in the top-right corner.
You can use this button to ‘Clear All’ of the Names that have been updated/adjusted.

Documents / Resources
 |
OSD AUDIO OSD Control App [pdf] Instructions Max12, Max8, Control12, OSD Control App, Control App, OSD App, App |