NXP MR-VMU-RT1176 Flight Controller

USER GUIDE
MR-VMU-RT1176
Mobile Robotics Vehicle Management Unit reference design using i.MX RT1176 Crossover MCU
About the MR-VMU-RT1176
The MR-VMU-RT1176 features an i.MX RT1176 dual core MCU with one Arm® Cortex®-M7 core at 1 GHz and one Arm Cortex-M4 at 400 MHz. The i.MX RT1176 MCU offers support over a wide temperature range and is qualified for consumer, industrial and automotive markets.
The MR-VMU-RT1176 is the default VMU for CogniPilot’s Cerebri, a Zephyr RTOS based Autopilot.
Features
Vehicle management unit
- i.MX RT1176 crossover MCU with dual cores
– Arm Cortex-M7
– Arm Cortex-M4 - 64 MB external flash memory
- 2 MB RAMTF socket for SD card
- Ethernet
– 2 wire 100BASE-T1 - USB
– USB-C 2.0 connector and JST-GH pin header - Power
– Redundant dual picoflex power port - Debug
– 10-pin debug and serial console adapter bord to 20-pin JTAG debugger and USB-C serial port - Sensors
– BMI088 6-axis IMU
– BMM150 magnetometer
– Dual BMP388 barometer
– Dual ICM-42688 6-axis IMU
– IST8310 3-axis magnetometer
– U-blox NEO-M8N GNSS module - UART JST-GH connectors
- I2C JST-GH connectors
- CAN bus JST-GH connectors
- RC IN
– RC input connector for SBUS compatible receivers
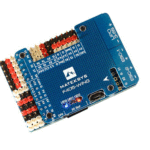
Get to know the MR-VMU-RT1176

Get to know the MR-VMU-RT1176 Continued
RC input
PWM out

Get to know the MR-VMU-RT1176 Continued
USB Type-C
I2C and CAN side

Get to know the MR-VMU-RT1176 Continued
Telemetry, ETH, UART and Debug side

Get to know the MR-VMU-RT1176 Continued
GPS and SPI port side

The default configuration can be found on GitHub:
https://github.com/zephyrproject-rtos/zephyr/blob/main//boards/nxp/vmu_rt1170/doc/index.rst
Other hardware features are not currently supported by the port.
Getting started
Unpack the kit
The VMU-RT1176 is shipped with the items listed in Table 1. Ensure the items are available in the EVK box.
| Table 1 | Kit contents | |||||||||||
| Item | Description | |||||||||||
| MR-VMU-RT1176 unit | MR-VMU-RT1176 Vehicle Management Unit • Enclosed in 3D printed enclosure |
|||||||||||
| Battery power adapter | PM02D V1.4 Battery Power adapter • Connects to Li-Po battery • Shrouded connector can be connected to VMU-RT1176’s POWER1 or POWER2 ports |
|||||||||||
| Communications cables | • 2x Power cables • 1x 8-pin SPI cable • 1x 10-pin Debug cable • 3x 6-pin Telemetry and GPS2 cables • 1x 8-pin AD&I/O cable • 1x 7-pin UART&I2C port cable • 4x 4-Pin cables for CAN and I2C ports • 1x 3-pin Servo / RC control cable • USB-C to USB-A cable |
|||||||||||
| Software | PX4 bootloader may be pre-loaded, please follow PX4 build instructions Please refer to the procedure in the following Link: https://cognipilot.org/ |
|||||||||||
| Documentation | MR-VMU-RT1176 block diagram | |||||||||||
Setting up the system
The MR-VMU-RT1176 is shipped with the items listed in Table 1. Ensure the items are available in the EVK box.
1. Settings before power-up
Locate the following:
- PM02D battery adapter board
- 1x VMU-RT1176 Power cable
- USB-A to Type-C cable
- Li-Po Battery
Connect the cables and adapter boards to VMU-RT1176.
The VMU unit is shipped with pre-built NuttX image.
2. Connect
Li-Po battery
Power on the VMU-RT1176 by plugging in a Li-Po battery to the battery adapter board (PM02D). The VMU-RT1176 will power up — the pilot LED labeled as PWR located by the CAN3 port should be on.
All other LED should be off.
3. Programming the VMU-RT1176
Connect your PC’s USB port to MCU-Link- MR’s USB Type-C port. Connect the MCU-Link-MR’s UART port to VMU-RT1176’s UART and I2C port. Make sure the VMURT1176 is powered up. Build the Zephyr application image on your PC’s workspace. Once the Zephyr application build is complete, check the connections to each module then type the following command, west flash — runner pyocd, from your Zephyr workspace to update the firmware.
4. Connect USB-A to Type-C Cable
Connect to Type-C port on the VMU-RT1176. Connect the other end of the cable to a PC acting as a host terminal. One UART connection will appear on the PC.
Open the serial console application (e.g. PuTTy for Windows, Minicom on Linux), choose the COM port number and set the baud rate to 115200.
5. Start testing
If the boot was successful, in the terminal it will show the prompt with: nsh>
Congratulations, you are up and running.
Now with the VMU-RT1176 setup complete, you can start to install other software packages and run your own code.
If the user wishes to build and run a Zephyr image, please refer to the material located at:
docs.zephyrproject.org/
Get started
Follow getting started under “Jump Start Your Design” at www.nxp.com/VMU-RT1176/start.
Support
Visit www.nxp.com/support for a list of phone numbers within your region.
Warranty
Visit www.nxp.com/warranty for complete warranty information.
www.nxp.com/VMU-RT1176
NXP and the NXP logo are trademarks of NXP B.V. All other product or service names are the property of their respective owners. © 2024 NXP B.V.
Document Number: VMURT1176QSG REV 0
Specifications
- Model: MR-VMU-RT1176
- Microcontroller: i.MX RT1176 Crossover MCU
- Features: Vehicle management unit
- Connectivity: USB Type-C, I2C, CAN, UART, Ethernet, GPS, SPI
- Power Source: Li-Po battery
FAQ
Where can I find additional support and resources for the MR-VMU-RT1176?
For additional support and resources, refer to the Jump Start
Your Design section at www.nxp.com/VMU-RT1176/start.
Documents / Resources
 |
NXP MR-VMU-RT1176 Flight Controller [pdf] User Guide MR-VMU-RT1176, MR-VMU-RT1176 Flight Controller, MR-VMU-RT1176, Flight Controller, Controller |