snap maker How to Use the Z-Axis Extension Module
 Foreword
This is a guide on how to use the Z-Axis Extension Module on your Snapmaker Original. It is divided into two sections:
- Provides information on assembly.
- Demonstrates the configuration of Snapmaker Luban.
Used Symbols
Caution: Ignoring this type of message might result in malfunction or damage of the machine and injuries to users
Notice: Details you should be aware of through- out the process
- Make sure that the hightlighted part is facing the right way.
Assembly
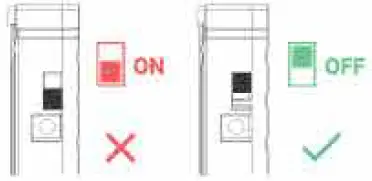
- Make sure that the machine is powered off.
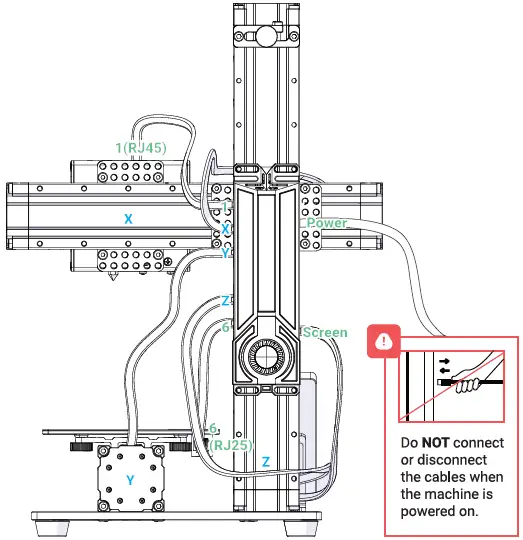
Unplug all the cables.
 Wait about 5 minutes for the machine to cool off if it just finished printing.
 - Detach the Filament Holder.
- Detach the X-Axis
(with 3D Pinting Module attached). - Detach the Controller.

- Detach the X-Axis
- Detach the previous Z-Axis.
Attach the Z-Axis Extension Module (Z-Axis thereafter).
- Attach the Filament Holder onto the Z-Axis.

- Attach the XAxis (with 3D Printing Module attached) to the Z-Axis.

- Attach the Controller to the Z-Axis.

- Connect all the cables unplugged in Step 1.
Configuration of Lubann
- Make sure that your firmware is updated to the latest 2.11, and that Snapmaker Luban is installed:
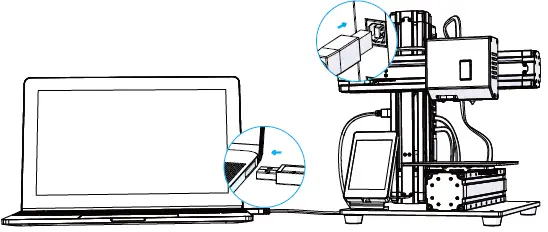
https://snapmaker.com/product/snapmaker-original/downloads. - Connect your PC with the machine using the provided USB cable, and switch the power on.
 Note: If you fail to find serial port of your machine, try and install CH340 driver at:
https://snapmaker.com/product/snapmaker-original/dowloads. - Launch Snapmaker Luban.
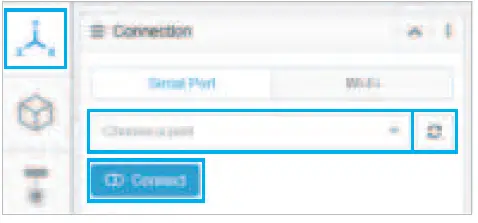
- From the left sidebar, enter Workspace
- On top left, find Connection and click the refresh button to reload serial ports list
- Click the drop-down button and select the serial port of your machine, and click Connect.
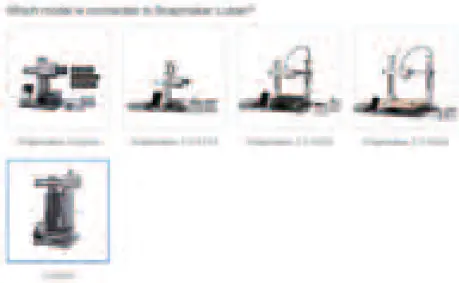
- Select Custom and the toolhead connected to the machine when prompted.
- Click Settings on the left sidebar, choose Machine Settings.
- Type 125, 125, 221 separately in the blank spaces under X, Y, and Z.
- Under Z axis Extension Module, click the drop-down button and select On.
- Click Save Changes.

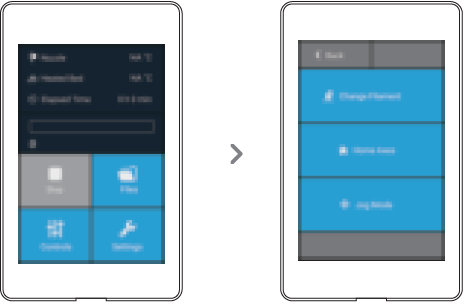
- Tap Controls on the Touchscreen, and tap Home AXes to run a homing session.
- Level the Heated Bed. For detailed instructions, refer to Quick Start Guide. Your Z-Axis Extension Module is now ready to go.
Note: If your machine is using 3D printing Module, to see if configuration is successful, tap Settings About >Build Volume on the Touchscreen.
Documents / Resources
 |
snapmaker How to Use the Z-Axis Extension Module [pdf] Installation Guide How to Use the Z-Axis Extension Module, Z-Axis Extension Module, Extension Module, Module |


