SIMPAS SmartBox Plus Software
This document provides guidance on how to complete the conversion process from SIMPAS to SmartBox and SmartBox are a registered trademark of AMVAC Chemical Corporation
Conversion process overview
The process of switching from SIMPAS to SmartBox+ requires changes to both the hardware and software configuration.
- The hardware changes involve the removal of the SIMPAS partition assembly and the installation of the SmartBox+ base unit with cradle.
- The software change requires re-configuration from 3 products to 1 product.
Components that will be shipped with the SmartBox+ conversion kit
- SmartBox base unit and cradle bracket (if required)
- SmartBox riser brackets
- Discharge elbows and clips
- Furrow tubing
Existing SIMPAS Components that will be reused with SmartBox+
- Display
- ECU
- All harnessing (except the secondary meter harnesses and RFID harness, see below)
- Meters
- Meter gaskets
SIMPAS Components that will NOT be re-used with SmartBox+:
- SIMPAS partition assembly for holding product cartridges
- SIMPAS manifold and furrow tubing
Overview of the changes required:
To convert from SIMPAS to SmartBox+ the following hardware changes must be made:
- Each SIMPAS partition assembly will be removed and replaced with a SmartBox+ Base-Container and Base-Container Cradle.
- Each SIMPAS row-unit bracket will be removed and replaced with a SmartBox+ bracket.
- Furrow-tube BRACKETS (or drop tubes, if present) will remain in place.
- The furrow-TUBES will be replaced.
- One SIMPAS granular meter/row will be transferred from SIMPAS to SmartBox+.
- SIMPAS meters not transferred to SB+ should be retained as spares.
- Most SIMPAS harnesses will remain in place for reuse with SB+.
- The RFID harness and secondary meter harnesses will be removed and not used
- The ECU and Display will remain in-place for use with SB+.
- The SIMPAS software on the ECU will be reconfigured from 3 products to 1 product
This document provides guidance on how to complete the conversion process from SIMPAS to SmartBox and SmartBox are a registered trademark of AMVAC Chemical Corporation
Conversion process step by step
Hardware:
To convert from SIMPAS to SmartBox+ the following hardware changes must be completed:
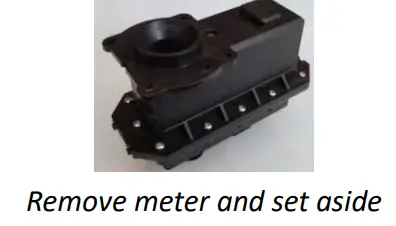
- Remove all granular meters from the SIMPAS system.
- Set the removed meters aside for re-installation on the SmartBox+ system.
- Set the removed meters aside for re-installation on the SmartBox+ system.
- Remove each partition assembly from the row-unit bracket.
- The row-unit harness will remain in place. Extract the harness from the partition assembly before removal of the partition assembly.
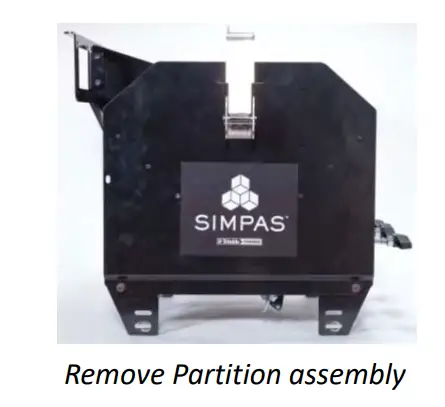
- The row-unit harness will remain in place. Extract the harness from the partition assembly before removal of the partition assembly.
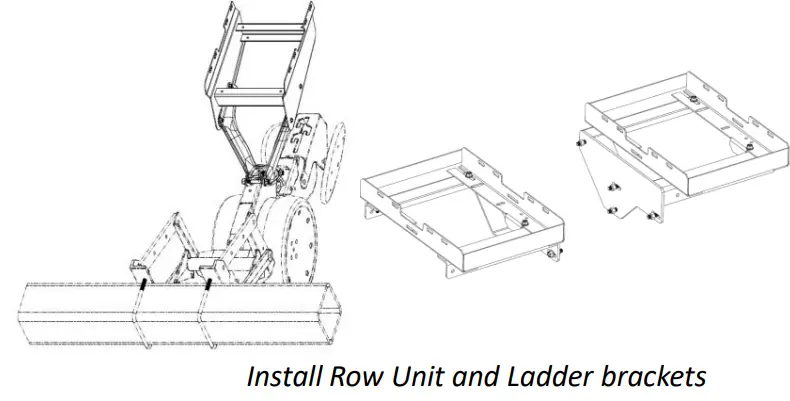
- Assess the need to remove the row-unit bracket. If needed, remove the bracket from the row unit.
- In cases where brackets have been modified or self-produced, determine if the SmartBox+ base container cradle can be mounted directly to the existing row-unit bracket.
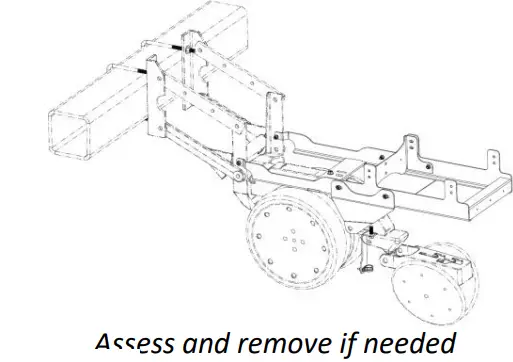
- In cases where brackets have been modified or self-produced, determine if the SmartBox+ base container cradle can be mounted directly to the existing row-unit bracket.
- Install the new row-unit and ladder brackets
- The L-Bracket that is used to retain the furrow-tube will remain in place
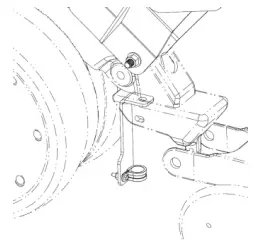
- The L-Bracket that is used to retain the furrow-tube will remain in place
- Install the SmartBox+ base-container cradle
- Use the hardware supplied with the cradle kit
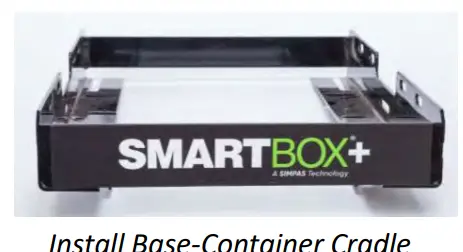
- Use the hardware supplied with the cradle kit
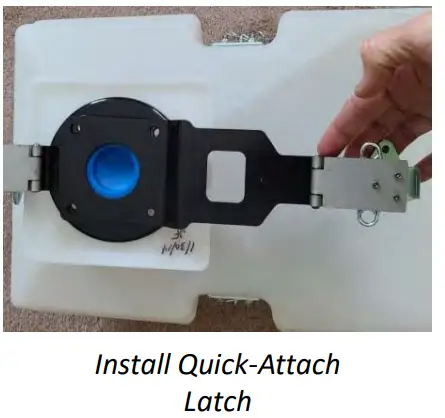
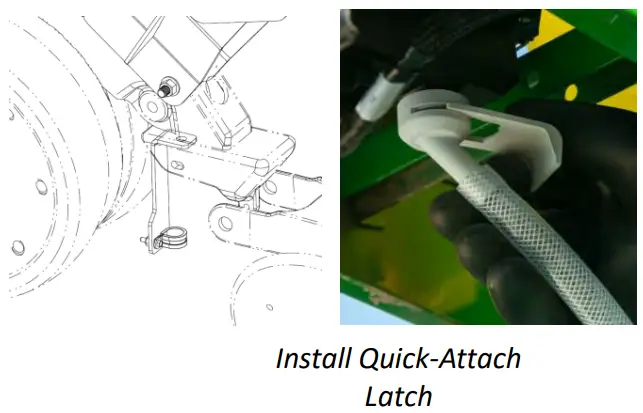
- Install the quick-attach latch assembly, onto the Base-Container Unit.
- Detailed instructions for installation of the quick-attach latch assembly can be found in the document “SmartBox+ System Installation – Quick Attach Assembly”.
- Note: The thicker orange gasket is used on the Base Unit. The thinner orange gasket is used on the Meter with the Meter funnel.
- Install the Risers onto the cradle or base unit
- The Risers are used to lift the base unit above the bracket, which provides clearance between the Granular Meter and the various parts of the row unit below.

- The Risers are used to lift the base unit above the bracket, which provides clearance between the Granular Meter and the various parts of the row unit below.
- Attach the Base-Container Unit to the installation cradle.
- Use the hardware supplied with the base-container unit and the installation cradle kit.
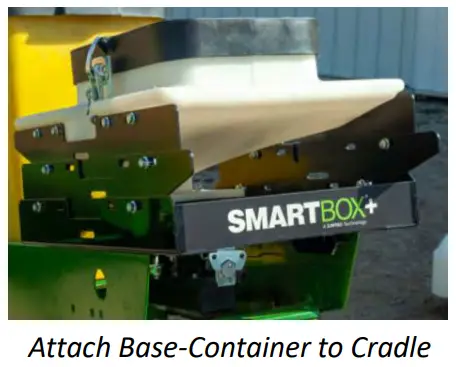
- Use the hardware supplied with the base-container unit and the installation cradle kit.
- Install the meter-funnel and gasket on the Granular Meters
- Detailed instructions on this process can be found the document “SmartBox+ System Installation – Quick Attach Assembly”.
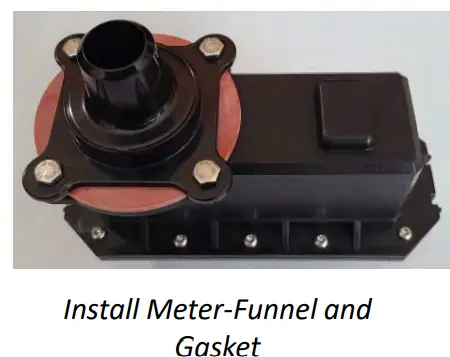
- Detailed instructions on this process can be found the document “SmartBox+ System Installation – Quick Attach Assembly”.
- Attach a Granular Meter to the Quick-Attach latch assembly that’s located on the bottom of the Base-Container unit.

- Install the furrow tubing.
- Use the existing SIMPAS L-bracket to locate the furrow-tube. It should be positioned directly above the furrow and in front of the closing wheels.
- Use the existing SIMPAS L-bracket to locate the furrow-tube. It should be positioned directly above the furrow and in front of the closing wheels.
- Connect the row-unit harness to the meter.

Harnessing
All components of the existing SIMPAS harness can be re-used for SmartBox+, except for the secondary meter harnesses and the RFID harness, which will be removed:
- Secondary Meter Harnesses (qty 2)
- PN ME0514026
- RFID module harness
- PN SMSE014
The diagram below illustrates the row-unit harness as it exists for the SIMPAS system. Note the location of the Secondary Meter and RFID harnesses, which are not needed for SmartBox+.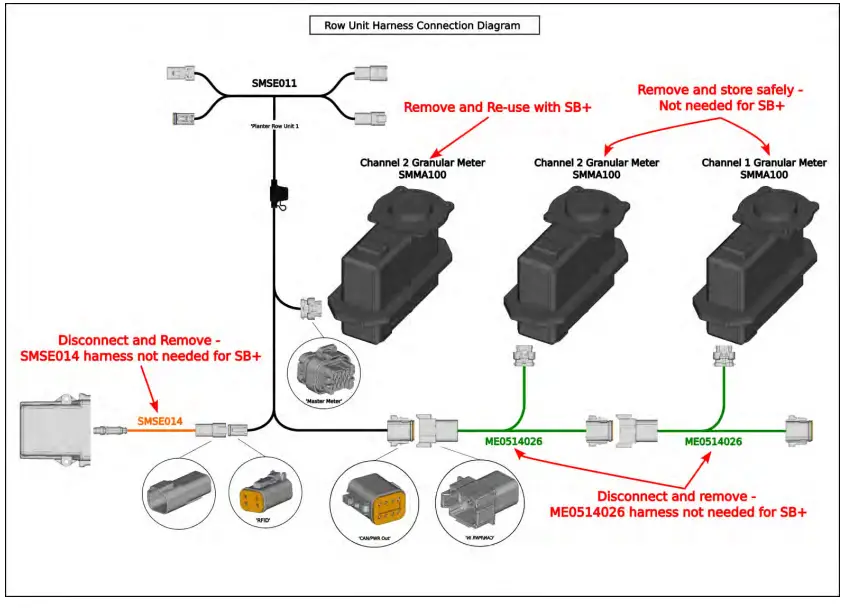
Software configuration
To function correctly, the ECU software will need to be re-configured from 3 products to 1 products. To reconfigure the software, the following operation must take place:
- This requires the use of an engineering unlock to complete, which necessitates support from either the Trimble dealer or the AMVAC technical support team.
- The process will take approximately 30 minutes
- The process can be completed remotely via TeamViewer connection, with the assistance of someone in the cab to initiate the connection.
- The reconfiguration process will require the following steps:
- Connect TeamViewer (Internet connection required, either WiFi or Cellular)
- Enter the Engineering Unlock code to expose the relevant setup parameters
- Channel number of channels from 3 to 1
- Reboot the ECU
- For diligence, review and confirm all setup parameters
- Product selection
- Calibration numbers
- Number of rows
- Row spacing
- Bar offset
- Implement switch setting
- Speed setting
Exception: If the ECU software is version 01.01.00.05 or older, a software update is required.
The ECU will need to be updated to at least version 01.01.03.00 (or newer if available).
- Trimble dealer, or the AMVAC technical support team can implement this method via a remote TeamViewer connection, but it will require the support of someone in the tractor cab to enable the TeamViewer connection.
Internet Connectivity is required. - The process will take at least 1 hour.
- Detailed steps can be provided if necessary.
Calibration
After completing the software configuration, the system will need to be calibrated to ensure pthe roduct is delivered at the desired rate.
Complete the calibration procedure by following the documentation provided at www.SIMPAS.com. If desired, your Trimble dealer can be contacted for assistance. In the case where the system was not purchased from a Trimble dealer, calibration assistance can be requested from Direct Contact on a for-hire basis at 1-888-762-7826.
Documents / Resources
 |
SIMPAS SmartBox Plus Software [pdf] User Guide SmartBox Plus, SmartBox Plus Software, Software |


