 Reptile Enclosure
Instruction Manual
IMPORTANT INSTALLATION TIPS:
- Assemble bottom with long bars first, so panel can slide in from side. Make sure the openings on the corner fittings are face down.
- On side panels with cable openings, position the opening toward the back top corner.
- When putting on top with screen, make sure the double track (for doors) is facing forward.
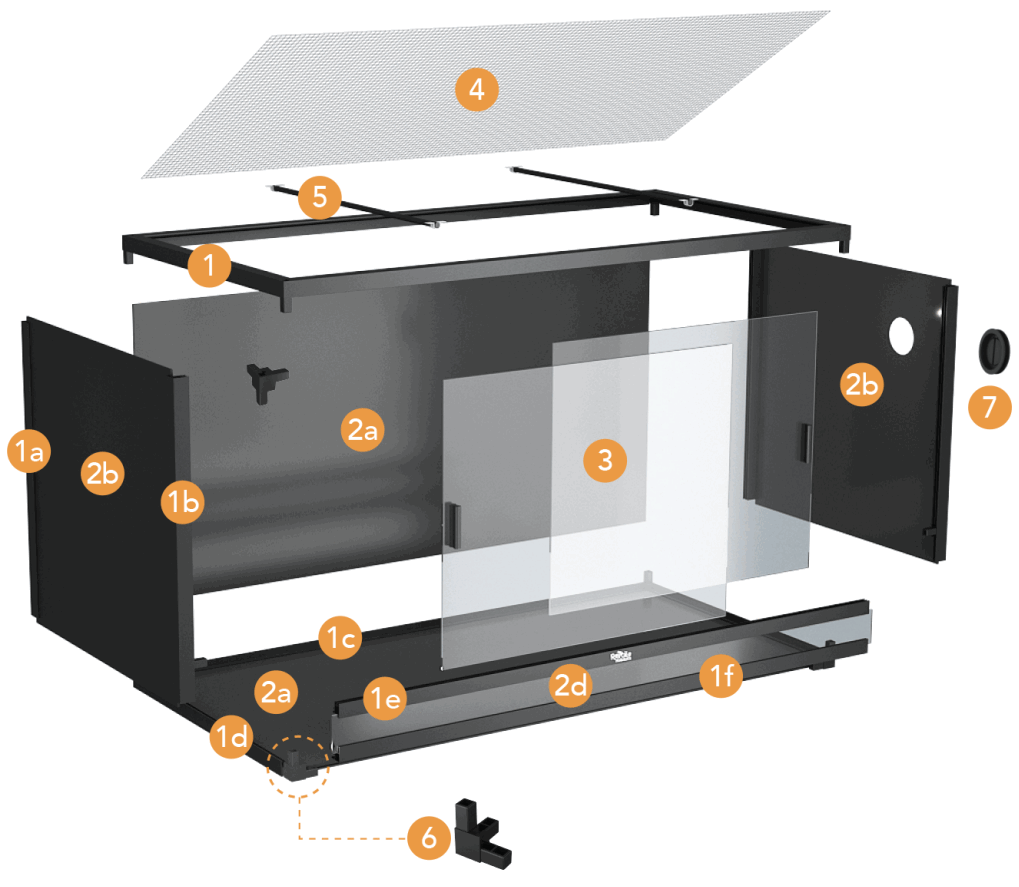
- Frames (aluminum)
- Panels (5)
- Door (2)
- Mesh (screen built-in)
- Support Bars (2)
- Corner Fittings (8)
- Cable Pass Through Port (2)
The 48x24xI2 and 36x18xI8 enclosures will have a roll of double-sided tape in place of part 1E.
STEP 1-Assemble bottom
a. Take out 4 corners (#61,4 frames (1C, 2x1D, 1F), & 1 4×2 panel (2A).
 MAKE SURE OPENINGS ARE FACE DOWN.
b. Connect 3 alumium frames to each end of 2 corner fittings.
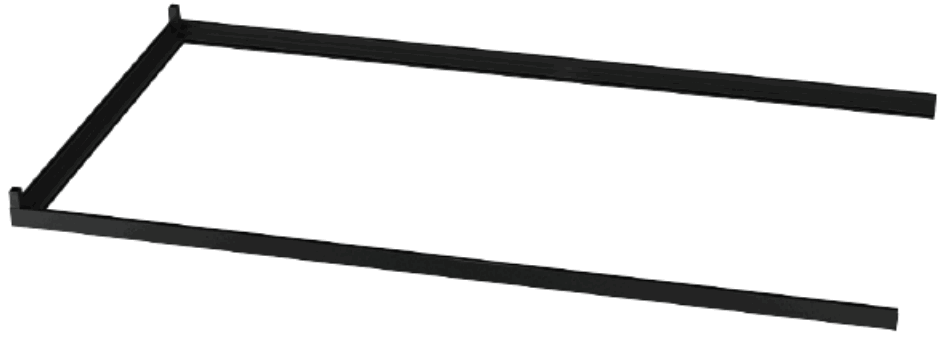
c. Slide the bottom panel into the channels of the assembled frame.
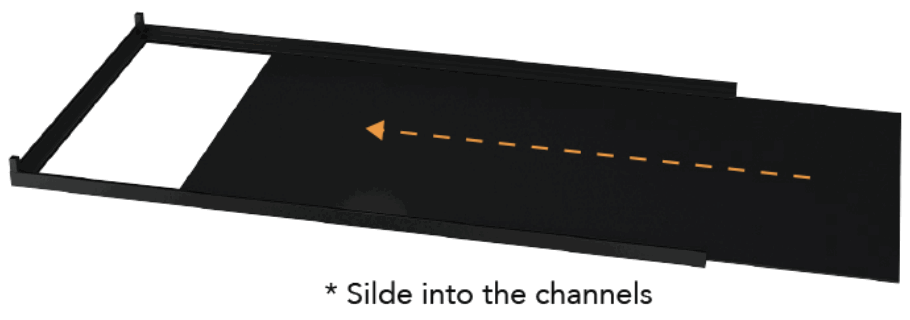
d. Attach the other frame and corner fittings to secure the bottom panel.
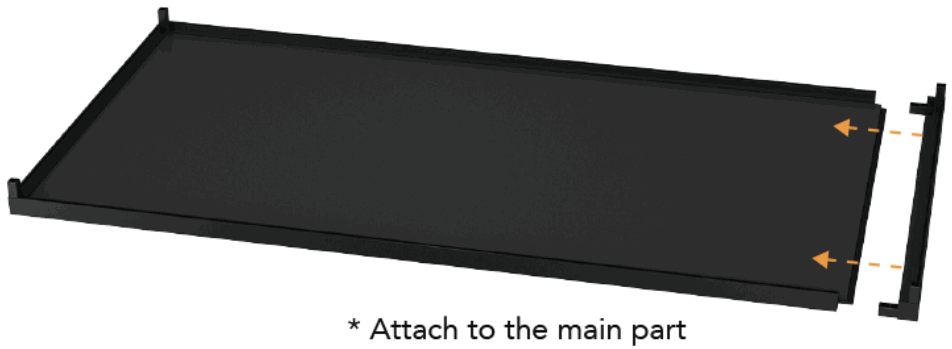
STEP 2 – Assemble sides
a. Attach 2 back frames on the back left & right corner fittings.
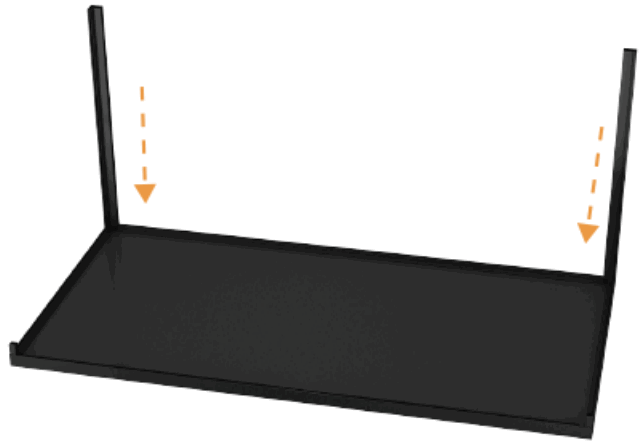
b. Insert the acrylic panel into the bottom channel.
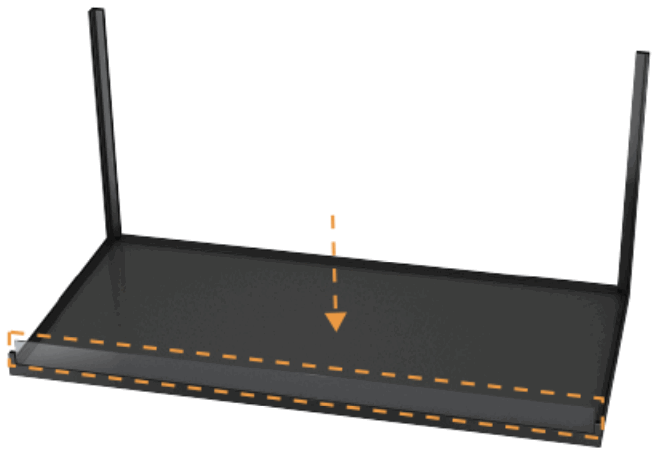
c. Connect the assembled frames to the bottom channerls, and then slide the 3 side panels into the bottom channels.

When assembling the 48x24x12 and 36x18x18 enclosures, skip Step 2C. Instead, your last step will be to attach the acrylic panel using double-sided tape.
STEP 3 – Assemble top
a. The screen is already assembled. Screw in the support bars with U-shape clamp.
*Make sure double channels on pre-assembled screen top face forward.

STEP 4 – Assemble door
a. Peel off the protective film on the acrylic doors, and then attach the door handles using screws M4*6mm.
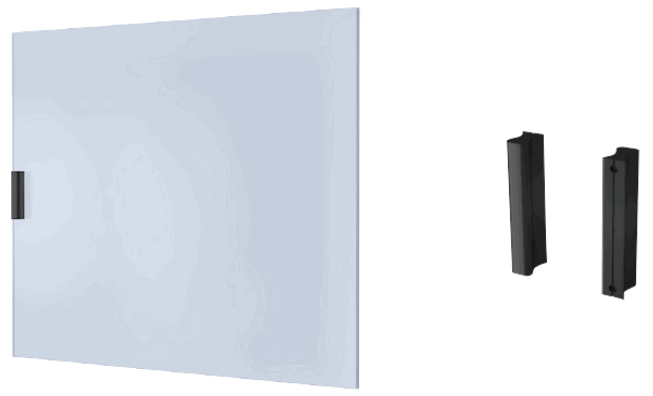 * Peel off the protective film, install the door handles on to the doors
b. Insert top edge of the left door into the back-top door rail, and then align with the back bottom door rail and drop into place and vice versa.
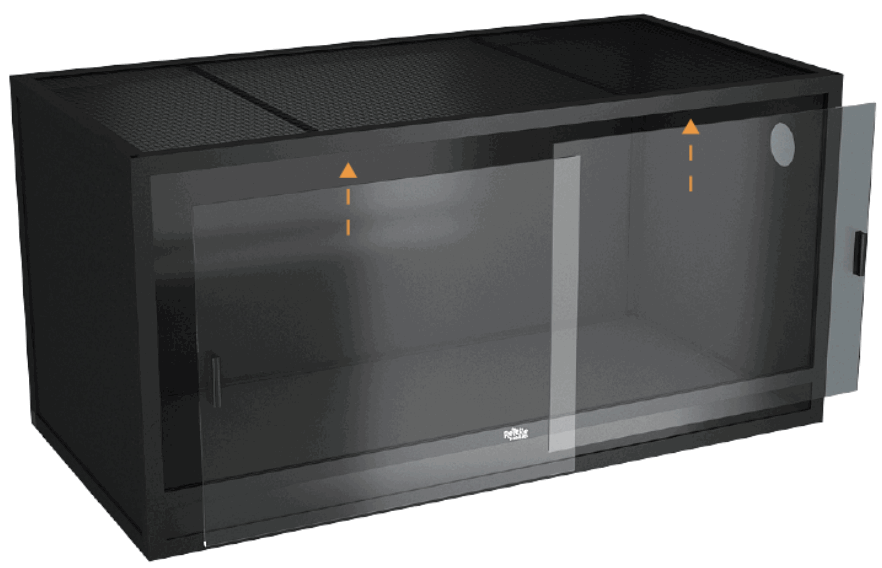 * Insert the door inside the door rail, one
STEP 5 – Assemble Cable pass through port
a. Take apart the cable pass into two pieces, and then open the acrylic door, install it on the side panel of the enclosure.

Documents / Resources
 |
Reptile Habitats Reptile Enclosure [pdf] Instruction Manual Reptile Enclosure, Reptile, Enclosure |


