RAIDER RDP-OMT05 Oscillating Multi Tool

 Double isolation
 Always wear hearing protection!
 Refer to instruction manual booklet!
 Wear safety glases!
 Wear dust mask!
Dear Customer,
Congratulations on the purchase of machinery from the fastest growing brand of electric and pneumatic tools – RAIDER. When properly installed and operating, RAIDER are safe and reliable machines and work with them will deliver a real pleasure. For your convenience has been built and excellent service network of 45 service stations across the country. Before using this machine, please carefully acquainted with these “instructions’ manual”. In the interest of your safety and to ensure proper use and read these instructions carefully, including the recommendations and warnings in them. To avoid unnecessary errors and accidents, it is important that these instructions will remain available for future reference to all who will use the machine. If you sell it to a new owner “Instructions’ manual” must be submitted along with it to enable new users to become familiar with relevant safety and operating instructions. Euromaster Import Export Ltd. is an authorized representative of the manufacturer and owner of the trademark RAIDER.
Address: Sofia City 1231, Bulgaria “Lomsko shaus se” Blvd. 246, tel 02 934 33 33, 934 10 10, www.raider.bg; www.euromasterbg.com; e-mail: info@euromasterbg.com. Since 2006 the company introduced the system of quality management ISO 9001:2008 with scope of certification: Trade, import, export and servicing of hobby and professional electrical, mechanical and pneumatic tools and general hardware. The certificate was issued by Moody International Certification Ltd, England.
Technical Data
| parameter | unit | value |
| Model | – | RDP-OMT05 |
| Rated voltage | V | 230 |
| Frequency | Hz | 50 |
| Rated power input | W | 310 |
| Oscillations at 3.0 аngular degrees | min-1 | 15000-21000 |
| Sound pressure level LpA | dB(А) | 89, K = 3 |
| Sound power level LwA | dB(А) | 97, K = 3 |
| Vibration emission value ah | m/s2 | 8.7, K = 1.5 |
| Protection class | – | II |
Product Features

- ON/OFF switch.
- Speed control dial.
- Air Vents
- Accessory holder.
Safety Notes. General Power Tool Safety Warnings.
Read all safety warnings and all instructions. Failure to follow the warnings and instructions may result in electric shock, fire and/or serious injury. Save all warnings and instructions for future reference.
Work area safety
- Keep work area clean and well lit. Cluttered or dark areas invite accidents.
- Do not operate power tools in explosive atmospheres, such as in the presence of flammable liquids, gases or dust. Power tools create sparks which may ignite the dust or fumes.
- Keep children and bystanders away while operating a power tool. Distractions can cause you to lose control.
Electrical safety.
- Power tool plugs must match the outlet. Never modify the plug in any way. Do not use any adapter plugs with earthed (grounded) power tools. Unmodified plugs and matching outlets will reduce risk of electric shock.
- Avoid body contact with earthed or grounded surfaces, such as pipes, radiators, ranges and refrigerators. There is an increased risk of electric shock if your body is earthed or grounded.
- Do not expose power tools to rain or wet conditions. Water entering a power tool will increase the risk of electric shock.
- Do not abuse the cord. Never use the cord for carrying, pulling or unplugging the power tool. Keep cord away from heat, oil, sharp edges and moving parts. Damaged or entangled cords increase the risk of electric shock.
- When operating a power tool outdoors, use a residual current device (RCD) with a rated residual current of 30 mA or less. Use an extension cord suitable for outdoor use. Use of a cord suitable for outdoor use reduces the risk of electric shock.
- If operating a power tool in a damp location is unavoidable, use a residual current device (RCD) protected supply. Use of an RCD reduces the risk of electric shock.
Personal safety.
- Stay alert, watch what you are doing and use common sense when operating a power tool. Do not use a power tool while you are tired or under the influence of drugs, alcohol or medication. A moment of inattention while operating power tools may result in serious personal injury.
- Use personal protective equipment. Always wear eye protection. Protective equipment such as dust mask, non-skid safety shoes, hard hat, or hearing protection used for appropriate conditions will reduce personal injuries.
- Prevent unintentional starting. Ensure the switch is in the off-position before connecting to power source, picking up or carrying the tool. Carrying power tools with your finger on the switch or energising power tools that have the switch on invites accidents.
- Remove any adjusting key or wrench before turning the power tool on. A wrench or a key left attached to a rotating part of the power tool may result in personal injury.
- Do not overreach. Keep proper footing and balance at all times. This enables better control of the power tool in unexpected situations.
- Dress properly. Do not wear loose clothing or jewellery. Keep your hair, clothing and gloves away from moving parts. Loose clothes, jewellery or long hair can be caught in moving parts.
- If devices are provided for the connection of dust extraction and collection facilities, ensure these are connected and properly used. Use of dust collection can reduce dust-related hazards.
Power tool use and care.
- Do not force the power tool. Use the correct power tool for your application. The correct power tool will do the job better and safer at the rate for which it was designed.
- Do not use the power tool if the switch does not turn it on and off. Any power tool that cannot be controlled with the switch is dangerous and must be repaired.
- Disconnect the plug from the power source and/or the battery pack from the power tool before making any adjustments, changing accessories, or storing power tools. Such preventive safety measures reduce the risk of starting the power tool accidentally.
- Store idle power tools out of the reach of children and do not allow persons unfamiliar with the power tool or these instructions to operate the power tool. Power tools are dangerous in the hands of untrained users.
- Maintain power tools. Check for misalignment or binding of moving parts, breakage of parts and any other condition that may affect the power tool’s operation. If damaged, have the power tool repaired before use. Many accidents are caused by poorly maintained power tools.
- Keep cutting tools sharp and clean. Properly maintained cutting tools with sharp cutting edges are less likely to bind and are easier to control.
- Use the power tool, accessories and tool bits etc. in accordance with these instructions, taking into account the working conditions and the work to be performed. Use of the power tool for operations different from those intended could result in a hazardous situation.
SERVICE
- When necessary, have your power tools serviced or repaired by a qualified person using identical replacement parts. This will ensure that the safety of the power tool is maintained.
INTRODUCTION
- This tool is intended for sawing and cutting in wood, plastic, plaster, metals and soft wall tiles as well as for dry sanding of small surfaces.
- Due to the oscillating drive the accessory swings up to 18500 times per minute for 3.2°, which makes the tool particularly suitable for precise work on edged, narrow and other hardto- reach places.
- This tool is not intended for professional use
- This tool accepts most commonly available multi-tool accessories, including existing accessories.
- Read and save this instruction manual.
SAFETY INSTRUCTIONS FOR MULTI-FUNCTION TOOLS
GENERAL
- This tool should not be used by people under the age of 16 years
- Use completely unrolled and safe extension cords with a capacity of 16 Amps (U.K. 13Amps).
- Always check that the supply voltage is the same as the voltage indicated on the nameplate of the tool (tools with a rating of 230V or 240V can also be connected to a 220V supply)
- Avoid damage that can be caused by screws, nails and other elements in your workpiece; remove them before you start working.
- Secure the workpiece (a workpiece clamped with clamping devices or in a vice is held more securely than by hand).
- Do not work materials containing asbestos (asbestos is considered carcinogenic).
- Always disconnect plug from power source before making any adjustment or changing any accessory.
- When working, always hold the tool firmly with both hands and take a secure stance
- Always keep the cord away from moving parts of the tool; direct the cord to the rear, away from the tool.
- Use protective gloves when changing accessories (contact with the accessory can lead to injuries)
- In case of electrical or mechanical malfunction, immediately switch off the tool and disconnect the plug.
- If the cord is damaged or cut through while working, do not touch the cord, but immediately disconnect the plug.
- Never use the tool when cord is damaged; have it replaced by a qualified person.
- When you put away the tool, switch off the motor and ensure that all moving parts have come to a complete standstill.
WHEN SAWING / CUTTING
- Hold power tool by insulated gripping surfaces, when performing an operation where the cutting accessory may contact hidden wiring or its own cord (a cutting accessory contacting a “live” wire may make exposed metal parts of the power tool “live” and could give the operator an electric shock).
- Keep hands away from cutting area; never reach underneath the material for any reason while cutting.
- Use suitable detectors to find hidden utility lines or call the local utility company for assistance (contact with electric lines can lead to fire or electrical shock; damaging a gas line can result in an explosion; penetrating a water pipe will cause property damage or an electrical shock).
- Do not use a saw blade which is cracked, deformed or dull.
WHEN SANDING
- Dust from material such as paint containing lead, some wood species, minerals and metal may be harmful (contact with or inhalation of the dust may cause allergic reactions and/or respiratory diseases to the operator or bystanders); wear a dust mask and work with a dust extraction device when connectable.
- Certain kinds of dust are classified as carcinogenic (such as oak and beech dust) especially i n conjunction with additives for wood conditioning; wear a dust mask and work with a dust extraction device when connectable.
- Follow the dust-related national requirements for the materials you want to work with
- Use the tool only for dry sanding (penetration of water into the tool increases the risk of an electric shock).
- Do not touch the moving sanding sheet.
- Do not continue to use worn, torn or heavily clogged sanding sheets.
- When sanding metal, sparks are generated; do not use vacuum cleaner and keep other persons and combustible material from work area.
WHEN CONNECTING NEW 3-PIN PLUG (U.K. ONLY):
- Do not connect the blue (= neutral) or brown (= live) wire in the cord of this tool to the earth terminal of the plug.
- If for any reason the old plug is cut off the cord of this tool, it must be disposed of safely and not left unattended.
ASSEMBLY AND OPERATING
INSTALLING ACCESSORIES
All accessories are installed on the multi-tool in a similar manner. For the purposes of describing the accessory installation, the half circle blade is used.
DANGER: Always remove the plug from the power source before installing or removing accessories or sandpaper. Failing to remove the plug from the power source may result in the tool accidentally being started and causing serious injury to the operator.
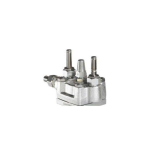
- Remove the blade screw (1) and washer (2) from the accessory holder (3) by turning the screw counter clockwise. Use the 5 mm Hex key (4) if the screw is too tight to be removed by hand (Fig. 1).
NOTES:- For “open back” accessories (Fig. 1a), the blade screw does not have to be removed. Simply loosen the blade screw sufficiently to allow the accessory mount to slide between the washer and the accessory holder.
- For “closed back” accessories (Fig. 1b), the blade screw and washer must be completely removed from the tool.

- Place the blade (5) on the accessory holder (Fig. 2).
NOTES:- Make sure the alignment slots (6) in the blade fit over the alignment pins (7) in the accessory holder and the printed side of the blade is facing the tool.
- The blade can be mounted at various angles left or right of center if required.
- Thread the screw (1) through the washer (2) and the blade and into the accessory holder threaded hole (8).
- Turn the screw clockwise until it is finger tight.
NOTES:- Check to make sure the convex curve of the washer (9) is facing the head of the screw and the slots in the edge of the washer fit over the alignment pins in the accessory holder.
- Make sure the alignment slots in the blade are still mated with the alignment pins in the accessory holder.
- Firmly tighten the screw with the 5 mm hex key.
NOTE: Check to make sure the slots in the blade are still mated with the alignment pins on the accessory holder after the screw is fully tightened.
INSTALLING SANDPAPER
- Install the hook & loop sanding pad (1) onto the tool (Fig. 3).
- Firmly press the sandpaper (2) onto the hook & loop pad.
NOTES: a) Place the sandpaper so the holes in the sandpaper line up with the matching holes in the hook & loop pad. b) Press the sandpaper firmly onto the hook & loop pad. - To remove the sandpaper, simply peel the sandpaper away from the hook & loop pad (Fig. 4).

ON/OFF SWITCH
- To turn the tool ON, slide the ON/OFF switch (1) toward the front of the tool.
- To turn the tool OFF, slide the ON/OFF switch toward the rear of the tool.
- before the accessory reaches the workpiece, the tool should run at full speed
- before switching off the tool, you should lift it from the workpiece.
Adjusting working speed
- with wheel F the required oscillating frequency can be adjusted from low to high (also while tool is running)
- the optimal working speed depends on the material and can be determined with practical trials.
Holding and guiding the tool
- while working, always hold the tool at the grey-coloured grip area(s).
- keep ventilation slots uncovered.
- do not apply too much press sure on the tool (excessive pressure will cause excessive heat and may shorten the service life of the accessory).
APPLICATION ADVICE
- Use segment saw blade for separating and plunge cuts in wood, plaster, gypsum and plastics (also for sawing close to edges, in corners and other hard-to reach areas)
- Use plunge-cut saw blade for separating and deep plunge-cuts in wood, plaster, gypsum and soft plastics (also for sawing close to edges, in corners and other hard-to-reach areas)
NOISE/VIBRATION
- Measured in accordance with EN 62841 the sound pressure level of this tool is 89 dB(A) and the sound power level 97 dB(A) (standard deviation: 3 dB), and the vibration (hand-arm method)
- when sanding 8.8 m/s² (uncertainty K = 1.5 m/s²)
- when cutting with plunge-cut saw blade 13.9 m/s² (uncertainty K = 1.5 m/s²)
- when cutting with segment saw blade 7.2 m/s² (uncertainty K = 1.5 m/s²)
- The vibration emission level has been measured in accordance with a standardised test given in EN 62841; it may be used to compare one tool with another and as a preliminary assessment of exposure to vibration when using the tool for the applications mentioned.
- using the tool for different applications, or with different or poorly maintained accessories, may significantly increase the exposure level.
- the times when the tool is switched off or when it is running but not actually doing the job, may significantly reduce the exposure level
- protect yourself against the effects of vibration by maintaining the tool and its accessories, keeping your hands warm, and organizing your work patterns.
REPLACING THE CARBON BRUSHES

- Remove and inspect the carbon brushes after periods of extended use. Replace them when they eventually wear down. The brushes should be kept clean and free to slide up and down in
- the holders. Both brushes should be replaced at the same time as a pair.
- Only use identical brushes from your Clarke dealer.
Use a screwdriver to remove the brush holder covers from the machine body. Draw out the worn brushes and insert new ones before replacing the brush holder caps. 9. STORAGE
- Make sure that the tool is stored in a clean, dry place, out of reach of children when not in use.
- Always store the impact wrench and its sockets in the case supplied.
Disposal.
 The machine, accessories and packaging should be sorted for environmental-friendly recycling. The plastic components are labelled for categorized recycling. Do not dispose of power tools into household waste! According the European Guideline 2012/19/EC for Waste Electrical and Electronic Equipment and its implementation into national right, power tools that are no longer usable must be collected separately and disposed of in an environmentally correct manner.
EUROMASTER IMPORT EXPORT LTD
1231, Sofia, Bulgaria, 246 Lomsko shose Blvd.,
- tel.: +359 700 44 155
- fax: + 359 2 934 00 90 www.euromasterbg.com;
- e-mail: info@euromasterbg.com
FAQ
Q: How do I change accessories on the RAIDER PRO oscillating multi-tool?
A: To change accessories, follow these steps:
- Turn off the tool and unplug it from the power source.
- Release the current accessory by following the manufacturer’s instructions.
- Attach the new accessory securely according to the provided guidelines.
Q: What should I do if the tool malfunctions?
A: If you encounter any issues with the tool, refer to the troubleshooting section in the user manual or contact RAIDER customer service for assistance.
Documents / Resources
 |
RAIDER RDP-OMT05 Oscillating Multi Tool [pdf] User Manual RDP-OMT05 Oscillating Multi Tool, RDP-OMT05, Oscillating Multi Tool, Multi Tool |