PROLED USMTLDS3020W Smart Track Lights Dual Sensor

Smart Series Instructions
Smart Series is a smart retail lighting solution based on Artificial Intelligence (Al) and Internet of Things (loT) technologies. Full-spectrum and high-saturation Smart Series analyze commodity information automatically with built-in sensors, and the light spectrum and saturation can be adjusted adaptively. All the lights connected with Bluetooth mesh, while communicating with AWS Cloud through Wi-Fi. Global e-commerce growth is the biggest challenge the traditional business faces. According to study, “Personalized shopping experience” and “Preview commodity in person before purchase” are the top reasons why shoppers still prefer brick-and-mortar stores. Smart Series retail lighting solution gives shoppers a new shopping experience in brick-and-mortar stores.

Smart tracklight dual sensor


Smart recessed dual sensor

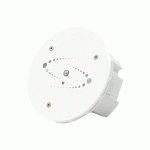
Smart surface mounted dual sensor

App Overview
The App is designed to configure and set Smart Series over Bluetooth mesh, and the APP communicates with the cloud server via Wi-Fi router.

Default Settings

Terminology


Recommended Distance and Detection interval for Auto Mode
- For clothes, the recommended distance between Smart Tracklights tracklight and clothing is 0.8-2.5 meters, and 0.5-1.5 meters for bags. For commodities smaller than bags, recommend using APP “Take photo” or “Customization”.
- To ensure the best lighting effect, please align luminaire’s center beam spot on the center of commodity.
- Auto Mode detects commodity automatically every 20 minutes by default. Tap “Auto Mode” item to change the time interval. For normal use, recommend set it up by minutes, and for demo and test purpose by seconds.

Download and Install App
Search “Unibright smart control” from App Store for iOS, or Google Play Store for Android Languages English, French, German and Dutch
App Compatibility
- iPhone: Requires iOS 13.0 or later
- iPad: Requires iPadOS 13.0 or later
- iPod touch: Requires iOS 13.0 or later
- Mac: Requires macOS 11.0 or later and Mac with the Apple M1 chip
- Android: V4.4 or later

Product lifespan refers to lighting time when the luminous flux of 50% luminaires in a batch of the same luminaires reaches 70% of the initial luminous flux(L70B50) . The estimated product lifespan is based on the indoor ambient temperature of 25,good air circulation and working at rated voltage. *Color sensor recognizes the color of the illuminated object.The data Sensor will monitor and make statistics on the sta !us of commercial passenger flow.
The leakage current(contact current or protective conductor current) of the circuit depends greatly on the conductor,such as the length of the conductor specification.In the field, the connection of power cord to conductor specification. In the field, the connection of the power cord to the luminaires ,and the arrangement of the power cord of the lamp also have a efiect In some cases it is also referred to as the ground drain current.
- Please be sure to cut off the power before operation.
- Do not continue to use if the luminaire is damaged.
- Luminaies should not be stored and used in corrosive environments or in environments containing hazardous substances such as sulfide,halides ,phthalates ,etc.
- Luminaires should be installed outside the reach of human hands. Warming: The light source and parts of this luminaires are not replaceable. When the light source and parts reach the end of their lfe,the whole luminares should be replaced.
Sign Up and Login
- Tap “Sign Up” to create your account and password.
- Follow the instructions to complete “Sign Up” and get into “Login” page.
- Use your email and password to log in.

Create a Store
- Create a store before adding any devices for first-time use.
- Tap “About”and choose “Store Management” to create a store.
- The administrator must create the store first, then invite other members to join.

Share and Join a Store
- For administrator, choose the store > tap “Add member” > share the invitation code.
- To join a store, choose “Join a store” > Input the invitation code and confirm.
- Note: except the administrator, other members do not have the right to add and set up devices or create groups.

Administrator transfer
For administrator, choose the store > tap “Administrator transfer” > choose a member> Tap “Confirm”, and the administrator will become a common member.

Sub-administrator
To facilitate the management of lighting in a store, user can set up store members as subadministrators.
- Tap a member in the Store Settings page.
- Tap “Done” and the member will become a sub-administrator.

Sub-administrator gains admin right
- Sub-administrator logs in to the account and tap “Right setting” in the Store Settings page.
- Tap “Secure admin right” and the subadministrator gains admin right. The original administrator loses admin right.
- The sub-administrator secure admin right for one hour during which other sub-administrators cannot obtain admin right.
- During this time, the sub-administrator can release admin right, allowing other subadministrators to obtain admin right.

Add new devices
- Step 1: Tap “Add new device” or”+” on the top right of the App to view all spotlights within Bluetooth reach. Step 2: Choose device and Tap
“Done”. The corresponding spotlight will flash 5 times, enter a name for the spotlight and select a use occasion. Step 3: Tap “Done”, App will show Settings page and pop up “View Commodity position right now” window. If “Software update” window pops up, please update the software first.
 Select use occasion
- First-level use occasion has 1o categories: Groceries, Clothing & aces, Plants, Leather,
Tile,Mineral,Artwork,Ceramics ,Furniture and Others. - Groceries has sublevel categories: Fruit, Vegetable, lced(seafood), Meat, and Bread.
- If category not determined while setting up the light, choose “Others” first, then correct it later.
- Use occasion can be changed by tapping on “Auto Mode”.

Software update
- Tap “Update” on “Software update” popup box.
- Choose your Wi-Fi and enter the password.(2.4GHz supported only)
- Tap “Upgrade” to update the firmware to latest version for th is spotlight. Do not leave until the updating has been finished.

Settings page
Tap settings icon of the light on Devices page to get into Settings page.  Light Setting
There are three ways to set lighting.  Light Setting: Auto Mode
- Auto mode is on by default. The spotlight senses commodity information and tune the light automatically according to a professional formula library.
- Using other light setting methods, like Take a picture or Color Selection, will tum Auto Mode off. Turn “Auto Mode” on in App if use Auto Mode again.
- Sensor on spotlight senses commodity information every 20 minutes by default.
- Under Auto mode, the sensor on the light will sense commodities information every 20 minutes and the use occasion is “Clothing and Aces” by default. Tap on “Auto Mode” item to time interval and use occasion change page. For normal use, recommend setting time interval by minutes, and “by Seconds” is for demo or test purpose. 5. If need to change use occasion, select a proper use occasion.

Select page
To use Take a picture or Colo Selection or Brightness Adjustment function, tap “Light setting” on Settings page, or tap the spotlight icon on Devices page. 
Take a picture
- Take a picture of target commodity or choose a photo from albums.
- “Draw a box” or “tap” on the target color, then the light will change accordingly.Usually drawing a box is suitable for large area of a color or mixed colors, and tapping is for choosing a small area from mixed colors.
- The brightness can be adjusted by dragging the slider below.
- If you are not satisfied with the light, tap “More” to have more choices.
- Tap “Done” to save the setting, and “Auto Mode” will be turned off automatically.

Color Selection
- Tap “Color Selection” on Light setting page.
- User can tune color, saturation, color temperature, and brightness of the light.
- Tap “Done” to save the setting, and “Auto Mode” will be turned off automatically.

Brightness
- Tap “Brightness” on Light setting page.
- Drag the slider to adjust brightness of spotlight.

Power Setting
- Tap “Power Selling” on Settings page
- Drag the slider to adjust output power of spotlight.

Energy Saving Setting
- If customer(s) detected by the movable sensor on the light, the brightness tum to
- If no customer detected, dim the light to the pre-set brightness level after a chosen time.
- Tap “Confirm” to complete the setting, and return to abandon.
Note: This function is off by default. Follow the instructions below to active it.
Auto-dim(min): how many minutes after customers leave the light starts to dim. The range is from 1 minute to 60 minutes. rightness without customers: what percentage of brightness to illuminate at the standby status. The range is from 0%-100%. 
Settings Reset
- Tap setting icon and enter the Settings page.
- Tap “Reset Settings.”
- Tap “Reset” .The device will be removed from the app and reset lo factory default settings.

Picture of device
- Tap the picture of device .
- Take a picture or choose a photo from albums.
- Tap “Choose” and the device icon will be set.


Data:Operation
- Tap “Data”. Only Meta Pro Dual devices are showed here.
- Tap spotlight icon to get into setting page.

Barcode
- Tap “Commodity barcode”.
- Scan the commodity barcode or type it manually or input the name of the commodity.
- This function associates the spotlight with commodity for data analysis.

Switch and Wi-Fi Configuration
- Data function requires Internet connection. Configure Wi-Fi before use.
- Tap “Wi-Fi Config” .
- Turn on Data function, enter Wi-Fi name and password(2.4GHz supported only),lap “Done” to finish configuration.
- Wi-Fi configuration requires Bluetooth connection.

Display
- Tap “Single Spotlight” to display the corresponding data to the current device.
- Tap “All Spotlights” on the top right to display data of all Meta2 Pro Dual devices in the store.
- You can view data remotely.

Authorization
- Administrator can view data of all Meta2 Pro Dual devices in the store. Other users do not have the right unless the administrator authorizes them.
- For authorization, tap “Data Collection” on About page > Choose the store> Tap “Add member” > Choose “By invitation code” to share the invitation code or “By account” to type invitee’s account.
- For other users, Tap “Join a Store” > Enter the invitation code.
- Authorized users can view data of the store.

Comparison between Stores
- This function is also designed for chain stores in different places. Store administrators need to authorize headquarter users separately.
- Headquarter users can check the data of all chain stores.
- Tap “All stores” to get into comparison page. Currently there are two functions: Data Collection(most popular commodities) and Store popularity.

Create/De ete a Group
- On Groups page, tap “+” > Input a group name > Tap “Confirm” to add a group.
- If you want to delete a group on the list, slide left to delete it.
- on Devices page,users can switch different groups.

Group Setting
On the Groups page, tap setting icon to get into Group Setting page.
- Light On/Off :
Tum on or off all lights in the group by APP. In order to avoid turning on or off too frequently, there is a three-second wail between On and Off. - Light setting :
As the same as the single device, but this item here is for all lights in the group. - Energy saving setting :
When there is a device with sensor in the group, energy saving settings can be activated. All devices with sensor and without sensor in the group will be synchronized. - Auto Mode:
Only device with sensor is activated. - Rename group:
Rename the group. - Group members :
Show how many devices in the group. Tap to show device list.
Group members management
- Tap “Group members” to get into device list.
- Tap “+” to add new devices to the group.
- Slide left on the device list to delete ii from current group.
- For multi operation of deleting , tap .. .”on the top right comer.

Primary-Secondary setting
- Tap “Primary-Secondary setting'” to get into device list.
- Select a device as the Primary light and tap “Bind” to complete setting (non-sensor device cannot be used as Primary light).
- Set the Primary light to Auto Mode. When the Primary light detects target object, the light changes and the Secondary lights will follow. Set the Primary light to energy-saving mode. When the Primary light enters energy-saving mode, the Secondary lights will follow. Thal is, if you make any changes for the Primary light, the Secondary lights will follow.

All Devices Control
- Get into “Groups” page. There is an item “All devices” on the top.
- Tap setting icon to get into All devices page.

Creal a scene
- ln”Scene”page, tap “Creal a scene”or “+”.
- Enter a name for the scene.

Add devices to the scene
- Tap “Add devices”> “devices”> tap a device.
- Select the effect of the device: “On”, “Off’, or “Customization”. For example , tap”Customization”and tune color saturation, color temperature, and brightness of the light.
- User can add multiple devices or groups in one scene.
- Tap “preview”to check the effect of the lighting.
- Tap “Done”to save the settings.

Execute a scene
Tap the scene icon and the lighting will change to the set effect. 
Scene setting
- Tap “Scene setting” > tap a device.User can modify the effect of the lighting.
- Slide left on the device list to delete it.
- Tap “Done”to save the settings.

Delete a scene
- Tap the scene icon and hold on.and a dialog box pops up.
- Tap “Delete” and delete the scene.

How to deal with disconneted device
- Tap and hold on the light icon, and a dialog box pops up.
- Choose “Remove” to remove the light from App.
Note: Please be very cautious to use this function! If the light can be connected with App, please remove it with “Settings reset” in Settings page. If you remove a device this way, the only way to get it back is resetting it physically and add it back again.
How to reset a device physically? Please press the physical button on the device for more than 3 seconds. 
Status of the Smart Series
| Status | Indication |
| Device Connecting | The light will be flashing 5 limes |
| Device Connected Failed | APP shows Time Out |
| Device ConnectedSuccesses | The light will be flashing 5 limes |
| Light changes automatically | The APP shows “Auto Mode” on |
The first things to check if the light does not work well:
| Problems | Indications Status | Solution |
|
Connection Failures |
Time Out |
|
|
Mismatches |
Lighting doesn’t match commodity |
|
App latest version
- iOS: 1.9.5
- Android: 1.0.65
- Subject to change without notice.
Instructions
 Please follow the sequence of installation step by step. Switch off the electricity before commencing installation
UNI-BRIGHT nv
Belcrownlaan 13-Q
- 2100 Antwerp – Belgium
- T +32 (0)3 641 61 40
- F +32 (0)3 645 18 31 www.proled.com
Questions & Feedback?
Any questions & feedback on the Smart Series luminaires or APP. Please email info@unibright.be
Documents / Resources
 |
PROLED USMTLDS3020W Smart Track Lights Dual Sensor [pdf] Instruction Manual USMTLDS3020W Smart Track Lights Dual Sensor, USMTLDS3020W, Smart Track Lights Dual Sensor, Track Lights Dual Sensor, Lights Dual Sensor, Dual Sensor |