QA-R-011 Wireless RF Relay Module - Operation Manual & Specifications
Model: QA-R-011
Brand: QIACHIP
Product Overview
The QA-R-011 is a compact wireless RF relay module designed for controlling various loads remotely. It operates on a wide voltage range and offers multiple working modes for flexible application.
Key Features:
- Wireless control for LED lamp strings, Christmas tree lights, and general light control switches.
- Operates on a long-range working voltage range of DC 3.6V to 24V.
- Features ultra-low power consumption and high sensitive response.
- Supports multiple working modes including Momentary, Toggle, Latching, Time Delay, and Power-On Self-Start.
Wiring Diagrams
Important Note: Please do not operate with electricity connected.
LED Light Wiring Diagram
This diagram illustrates how to connect the QA-R-011 module to control LED lights.
- Input Power: Connect a DC power source (3.6V–24V) to the IN+ and IN- terminals on the module.
- Output Load: Connect the LED light or string to the OUT+ and OUT- terminals. The output can handle DC 3.6V–24V with a maximum current of 3A.
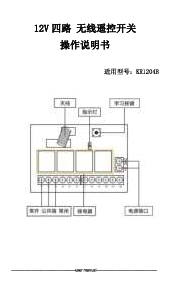
- The module features an integrated antenna (ANT) for wireless reception and a learning button (⚙️ Learning Button) for setup.
Electromagnet Wiring Diagram
This diagram shows the connection for controlling an electromagnet.
- Input Power: Connect a DC power source (3.6V–24V) to the IN+ and IN- terminals.
- Output Load: Connect the electromagnet to the OUT+ and OUT- terminals. The diagram shows a typical electromagnet setup with a relay contact (IN 4007).
- The module features an integrated antenna (ANT) and a learning button (⚙️ Learning Button).
Function Description and Setup Methods
Compatibility Note: For optimal performance and reliable pairing, it is recommended to use QIACHIP brand remote controls (transmitters) and controllers (receivers). Compatibility with other brands is not guaranteed.
Pairing Limit: The receiver can store up to 5 remote controls. Pairing more than 5 remotes will cause the earliest paired remote to be overwritten.
Reset Function
This function clears all previously paired remote controls from the receiver's memory, rendering them inoperable until re-paired.
Reset Setup: Press the receiver's learning button 8 times. The receiver's LED indicator will flash several times, indicating that the reset is complete. All remote controls must be re-paired after a reset.
Wireless Remote Switch Working Modes
The QA-R-011 module supports several operating modes, configurable via the learning button and remote controls.
Momentary (Jog Mode) [▶️]
When this mode is paired: Press and hold the remote button; the relay connects. Release the remote button; the relay disconnects.
Toggle (Self-Locking Mode) [?]
When this mode is paired: Press the remote button once; the relay connects. Press the remote button again; the relay disconnects.
Latching (Interlock Mode) [?]
When this mode is paired: Press remote button A; the relay connects. Press remote button B; the relay disconnects. This mode requires learning two different buttons, one for ON and one for OFF.
Time Delay Mode [⏳]
When this mode is paired: Press the remote button; the relay connects. After releasing the remote button, the relay disconnects automatically after a preset delay (5s, 10s, 15s, or 20s).
Power-On Self-Start Mode [⚡]
When this mode is set: Upon power restoration to the receiver after an outage, the relay will automatically connect.
Receiver Operating Mode Settings
Caution: Carefully observe the indicator light status during setup. Incorrect settings may prevent the receiver from functioning correctly.
Learning the Code: (Momentary Mode) [▶️]
- Press the receiver's learning button once.
- Wait for the LED to light up, indicating it has entered setting mode.
- Press the remote button (e.g., Button A). The receiver's LED indicator will flash 3 times and then turn off, confirming successful setup.
Learning the Code: (Toggle Mode) [?]
- Press the receiver's learning button twice.
- Wait for the LED to light up, indicating it has entered setting mode.
- Press the remote button (e.g., Button A). The receiver's LED indicator will flash 3 times and then turn off, confirming successful setup.
Learning the Code: (Latching Mode) [?]
Note: For latching mode, you need to learn two different buttons: the first for "ON" and the second for "OFF".
- Press the receiver's learning button three times.
- Wait for the LED to light up, indicating it has entered setting mode.
- Press remote button A (for ON). The LED indicator will flash 3 times.
- Press remote button B (for OFF). The LED indicator will flash 3 times and then turn off, confirming successful setup.
Learning the Code: (Time Delay Mode) [⏳]
The delay duration is set by the number of times the learning button is pressed:
- Press learning button 4 times: 5 seconds delay.
- Press learning button 5 times: 10 seconds delay.
- Press learning button 6 times: 15 seconds delay.
- Press learning button 7 times: 20 seconds delay.
- After selecting the delay duration by pressing the learning button, wait for the LED to light up.
- Press the remote button (e.g., Button A). The LED indicator will flash and turn off, confirming successful setup.
Learning the Code: (Automatic Energize When Power) [⚡]
Press and hold the remote control button for 5 seconds. The receiver indicator flashes 3 times, confirming the setting is complete.
Product Parameters
| Parameter | Value |
|---|---|
| Working Voltage | DC 3.6V–24V |
| Maximum Load | 2A (Max Load Power 40W) |
| Static Current | <5 mA |
| Working Frequency | 433.92MHz |
| Reception Sensitivity | <-108dBm |
| Size | 25.5 mm x 13mm x 5mm (Length x Width x Height) - Mini size |
| Encoding Format | 1527 Learning Code |
| Modulation Mode | ASK (Superheterodyne) |
| Number of Stored Remote Controls | ≤ 5 (per function mode) |
| Working Mode | Momentary, Toggle, Latching, Time Delay, Power-On Self-Start |
| Learning Style | Learning Button |
| Working Temperature | -20°C to 80°C |


