Ubiquiti E7 Installation Guide
This guide outlines the installation process for the Ubiquiti E7.
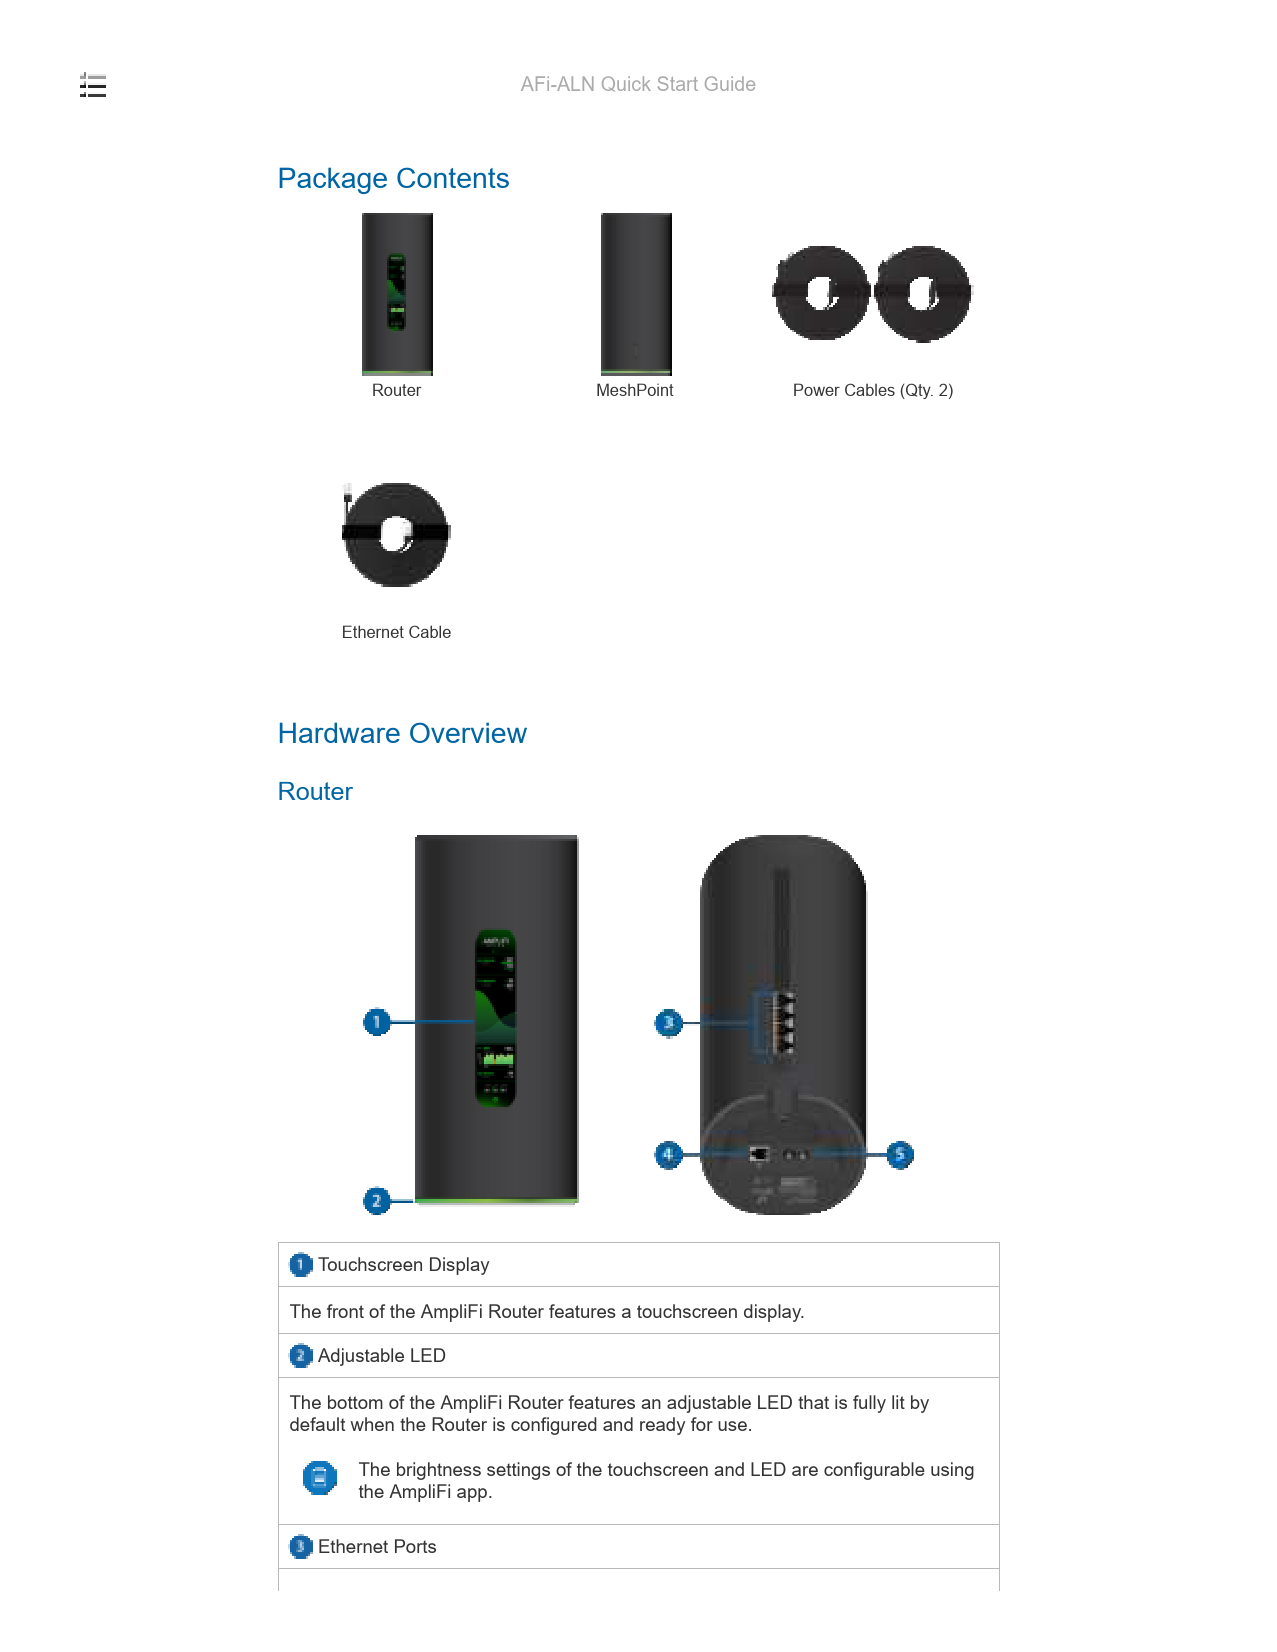
Package Contents
The E7 package includes the following items:
- 1x E7 Device (a)
- 1x Mounting Bracket (b)
- 1x Ceiling Mount Plate (c)
- 1x Wall Mount Plate (d)
- 4x M3 Screws (e)
- 4x Washers (f)
- 4x Wall Anchors (g)
- 4x M3 Screws (h)
- 1x Cable Clip (i)
- 4x M2.5 Screws (j)
- 1x Allen Wrench (k)
- 2x 6#-32T Screws (l)
- 1x Cable Clip (m)
Mounting Options
The E7 can be mounted in various configurations:
Ceiling Mount
The E7 can be mounted to a ceiling using the provided mounting bracket and plate.
[Diagram showing E7 mounted to a ceiling]
Wall Mount
The E7 can be mounted to a wall using the provided mounting bracket and plate.
[Diagram showing E7 mounted to a wall with a cable]
Surface Mount
The E7 can be mounted directly to a surface.
[Diagram showing E7 mounted to a surface]
Pole Mount
The E7 can be mounted to a pole using the provided mounting hardware.
[Diagram showing E7 mounted to a pole]
Installation Steps
Follow these steps for a secure installation:
- Attach the appropriate mounting plate (b, c, or d) to the E7 device using the M3 screws (e) and washers (f).
- For ceiling or wall mounting, secure the mounting plate to the desired surface using the appropriate screws (g, h, l) and anchors (g) if necessary.
- Slide the E7 device onto the mounted plate until it clicks into place.
- Secure the device using the M2.5 screws (j) if required by the mounting configuration.
- Use the cable clips (i, m) to manage the network cable.
Additional Information
For detailed specifications and advanced configuration, please refer to the official Ubiquiti E7 documentation.