Logitech MX KEYS S Advanced Wireless Illuminated Keyboard User Manual

MX KEYS S
In the Box
Compatibility
Getting Started
QUICK SETUP
For quick interactive setup instructions, go to the interactive setup guide.
For more detailed information, continue with the following detailed setup guide.
DETAILED SETUP
- Make sure the keyboard is turned on.
The number 1 LED on the keyboard should blink quickly.

NOTE: If the LED is not blinking quickly, perform a long press (three seconds). - Choose how you want to connect:
- Use the included Logi BOLT wireless receiver.
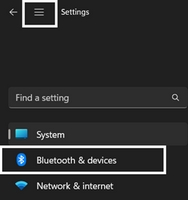
Plug the receiver into a USB port on your computer. - Connect directly via Bluetooth.
Open the Bluetooth settings on your computer to complete the pairing.
Click here for more details on how to do this on your computer. If you experience issues with Bluetooth, click here for Bluetooth troubleshooting.
- Use the included Logi BOLT wireless receiver.
- Install Logitech Options+ Software.
Download Logitech Options+ to enable additional features. To download and learn more go to logitech.com/optionsplus.
LEARN MORE ABOUT YOUR PRODUCT
Product Overview

1 – Universal layout
2 – Mac layout
3 – Easy-Switch keys
4 – ON/OFF switch
5 – Battery status LED and ambient light sensor
Pair to a second computer with Easy-Switch
Your keyboard can be paired with up to three different computers using the Easy-Switch button to change the channel.
- Select the channel you want and press and hold the Easy-Switch button for three seconds. This will put the keyboard in discoverable mode so that it can be seen by your computer. The LED will start blinking quickly.
- Connect your keyboard to your computer using Bluetooth or the USB receiver:
- Bluetooth: Open the Bluetooth settings on your computer to complete the pairing. You can find more information here.
- USB receiver: Plug the Logi Bolt receiver into a USB port, open Logitech Options+, select: Add devices > select Logi Bolt receiver, and follow the instructions.
- Once paired, a short press on the Easy-Switch button will allow you to switch channels.
INSTALL SOFTWARE
Download Logitech Options+ to use all the possibilities this keyboard has to offer. To download and learn more about the possibilities, go to logitech.com/optionsplus.
Logitech Options+ is compatible with Windows and Mac.
Multi-OS keyboard
Your keyboard is compatible with multiple operating systems (OS): Windows 10,11 or later, macOS 11 or later, iOS, Linux, Chrome OS, and Android.
If you are a Windows, Linux, and Android user, the special characters will be on the right side of the key:

If you are a macOS or iOS user, the special characters and keys will be on the left side of the keys:

Battery Status Notification
Your keyboard will let you know when it is running low. From 100% to 11% your LED will be green. From 10% and below, the LED will be red. You can continue typing for more than 500 hours without backlighting when the battery is low.

Plug the USB-C cable at the top right corner of your keyboard. You can continue typing while it is charging.

Smart backlighting
Your keyboard has an embedded ambient light sensor that reads and adapts the level of backlighting accordingly.
For dark-colored keyboards:
| Room brightness | Backlight level |
| Low light – under 100 lux | L2 – 25% |
| Mid light – between 100 and 200 lux | L4 – 50% |
| High light – over 200 lux | L0 – no backlight* |
*Backlight is turned OFF.
For pale gray keyboards:
| Room brightness | Backlight level |
| Low light – under 55 lux | L4 – 50% |
| High light – over 55 lux | L0 – no backlight* |
*Backlight is turned OFF.
There are seven backlight levels.
You can change the backlight levels at any time, with two exceptions: the backlight cannot be turned ON when the room brightness is high, or the keyboard battery is low.
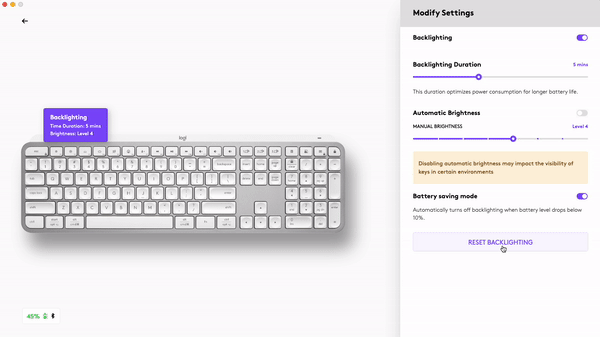
Backlight customization using Logi Options+
You can customize the backlighting in your MX Keys S using Options+:
Use the Backlighting Duration slider to adjust it to your preferred duration:
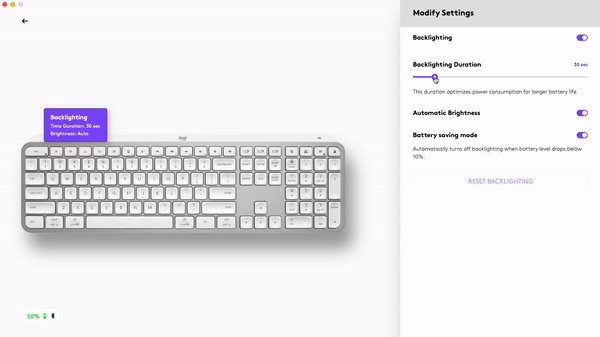
Use the Automatic Brightness slider to change to manual mode and adjust to your preferred level of brightness.
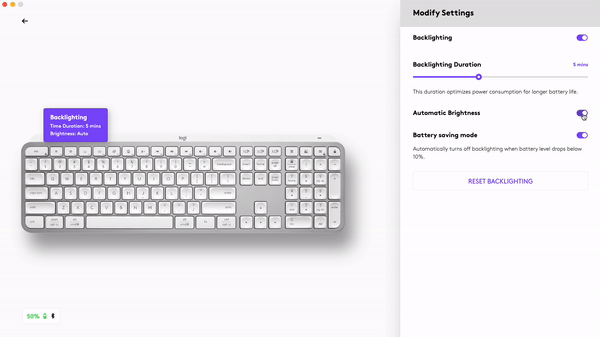
You can always go back to the default settings by clicking the reset button.
Software notifications
Install Logitech Options+ software to get the most out of your keyboard.
Click here for more information,
- Backlight level notifications
Change the backlight level and to know in real-time what level you have.

- Backlighting disabled
There are two factors that will disable backlighting:

When your keyboard has only 10% of the battery left when you try to enable backlighting, this message will appear. If you want the backlight back, plug in your keyboard to charge.
When the environment around you is too bright, your keyboard will automatically disable backlighting to avoid using it when unnecessary. This will also allow you to use it longer with backlight in low-light conditions. You will see this notification when you try to turn backlighting ON. - Low battery
When your keyboard reaches 10% of battery left, backlighting turns OFF and you get a battery notification on the screen.
- F-Keys switch
Press Fn + Esc to swap between Media keys and F-Keys. We’ve added a notification to let you know you’ve swapped.

NOTE: By default, the keyboard has direct access to Media Keys.
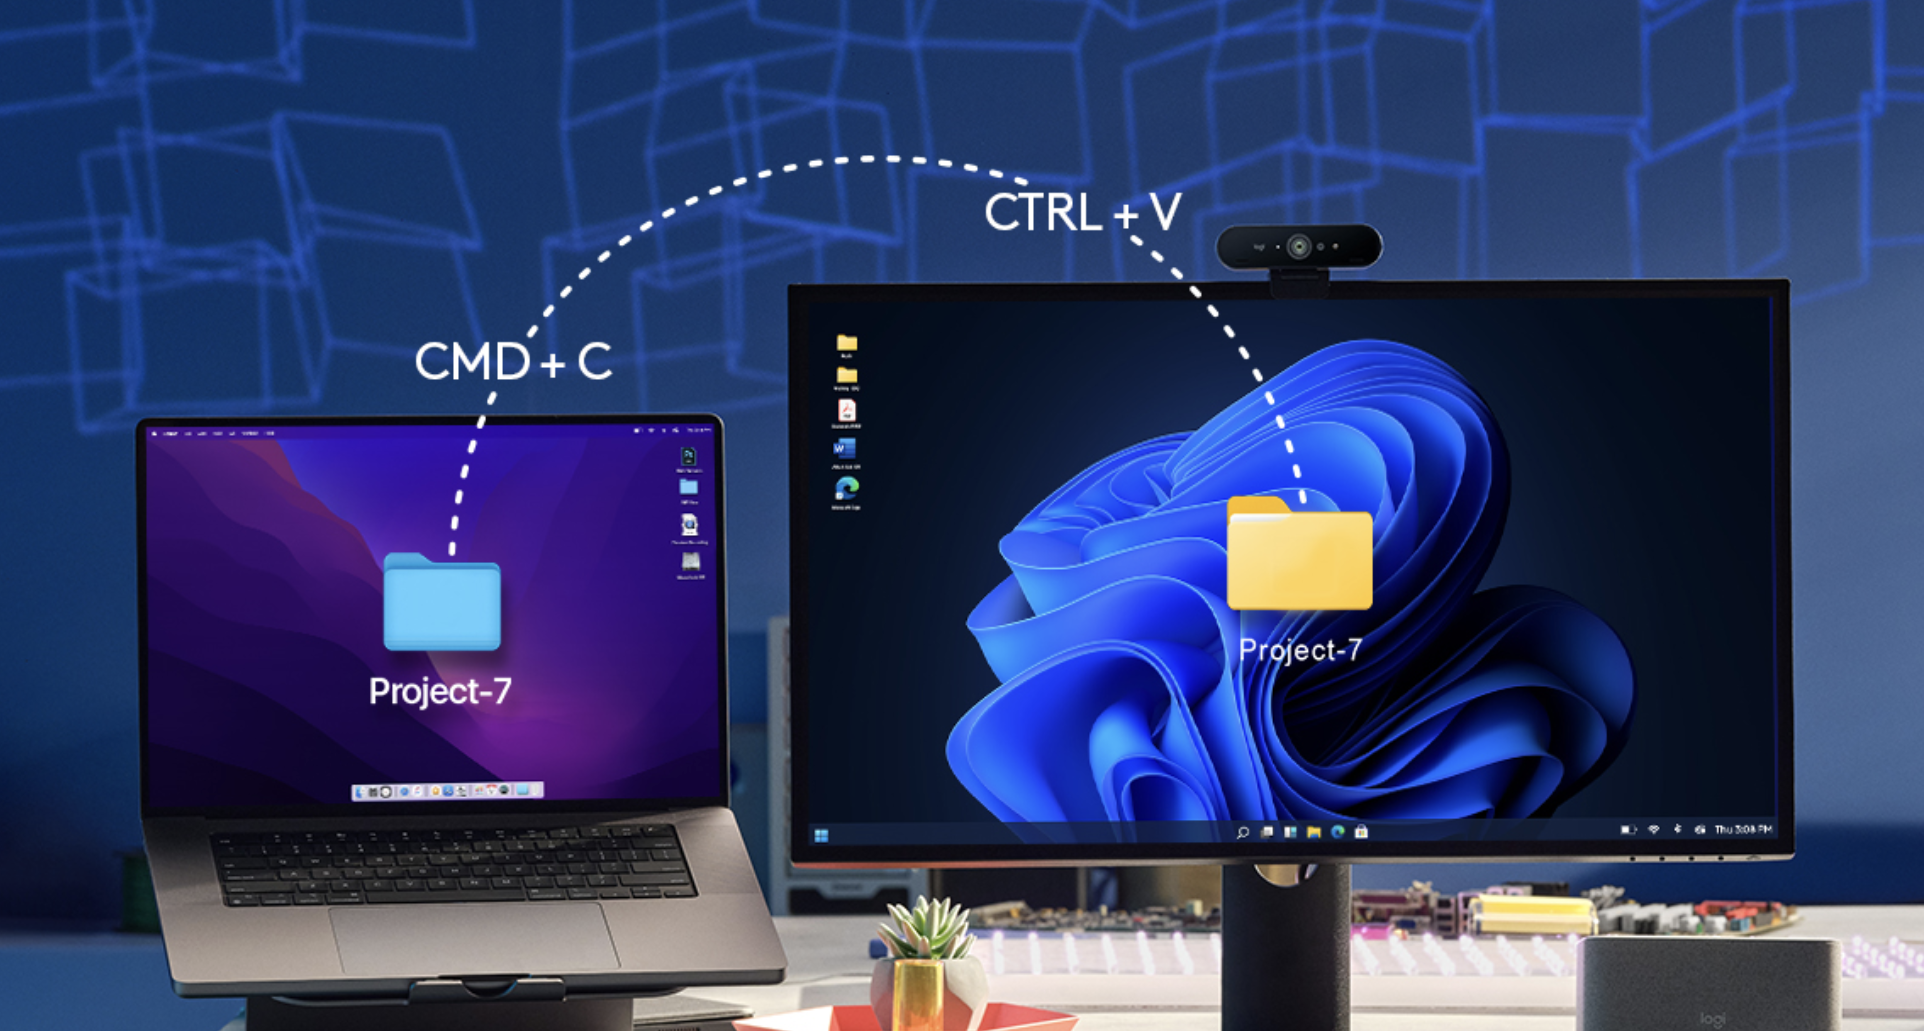
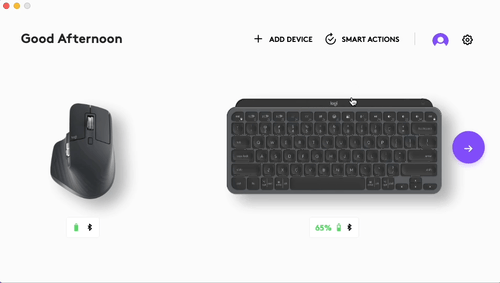
Logitech Flow
You can work on multiple computers with your MX Keys S keyboard. With a Flow-enabled Logitech mouse, such as MX Master 3S, you can work and type on various computers with the same mouse and keyboard using Logitech Flow technology.
You can use the mouse cursor to move from one computer to another. MX Keys S keyboard will follow the mouse and switch computers simultaneously. You can even copy and paste between computers. You must install Logitech Options+ software on both computers and follow these instructions.
You can check which other mice are Flow-enabled here.
Specification
| Product Information | ||
|---|---|---|
| Component | Model Number (M/N) | Location |
| Keyboard | Y-R0073 | Back of keyboard |
| Receiver | N/A | On receiver |
| Physical Specifications | ||||
|---|---|---|---|---|
| Component | Height (mm / inch) | Width (mm / inch) | Length (mm) | Weight g |
| Keyboard | 20.5mm | 131.63mm | 430.20mm | 810g |
| Palmrest | 8mm | 67mm | 430mm | 180g |
| Cable | 1 m | |||
| General Product Specifications | |
|---|---|
| Wireless Connectivity | Dual connectivity: – Logitech USB receiver, 2.4 GHz wireless technology. (10m) – Bluetooth low energy technology |
| Software Support (at release) | Logitech Options, Logitech Flow |
| OS/Platform Support (at release) | Windows, Mac, iOS, Android, Linux (basic support) |
| Apps Available (at release) | Logitech Options, Logitech Flow |
| System Requirements | Multi-OS Scheme: Logi Bolt USB Receiver: Windows 10, 11 or later macOS 11 or later Linux®1 Chrome OS1 Bluetooth Low Energy: Wireless Technology Required: Bluetooth Low Energy Windows 10, 11 or later macOS 11 or later Linux1 Chrome OS1 iPadOS 14 or later1 iOS 14 or later1 Android 9.0 or later1(1) Device basic functions will be supported without software for systems other than Windows and macOS. |
| Keyboard Specifications | |
|---|---|
| Connection Type | Logitech Bolt USB receiver and Bluetooth Low Energy |
| Backlighting | Yes |
| Keyboard Type | Scissor Keys |
| Durability (keypresses) | Function keys: 5 million Standard keys: 10 million |
| Actuation force (g / ounce) | 60 g |
| Total Travel Distance (mm / inch) | 1.8mm |
| Materials Used | Plastic |
| Battery Details | 1500 mAh |
| Battery Life (rechargeable) | In a bright room between 100-200 lux, the backlight is set at Level 4: L10 → 146 hours = 6.1 days = 0.9 weeks (+ 364 hours = 15.2 days = 2.2 weeks on the remaining 10% of battery without backlight)When the room is a little darker and under 100 lux, the backlight will be at Level 2: L8 → 242 hours = 10.1 days = 1.4 weeks (+ 364 hours = 15.2 days = 2.2 weeks on the remaining 10% of battery without backlight)When the backlight is OFF: battery life is five months |
| Corded or Wireless | Wireless |
| Wireless Range | 10m |
| Power Adapter Input | USB-A to USB-C |
| Power Adapter Notes | Detachable power cord |
FAQ
Frequently Asked Questions
Understanding dual layouts on Logi keyboards
A dual layout keyboard is one that is compatible across different operating systems (OS) such as macOS, Windows, iOS, Chrome, Android, and so on.
Some keys on a dual layout keyboard can perform actions on different operating systems while they maintain their original position. When a key is capable of performing different functions on different operating systems, the functions and operating system are indicated by label colors and split lines.
What are modifier keys, and what do they do?
Modifier keys are special keys on your keyboard that temporarily modify the normal action of another key when pressed together. By themselves, modifier keys usually do nothing; that is, pressing any of the ⇧ Shift, Alt, or Ctrl keys alone does not generally trigger any action from the computer.
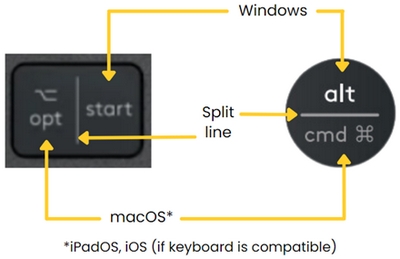
Modifier keys on dual layout keyboards
While the Windows layout has an Alt key on either side of the space bar, macOS has a CMD key in the same positions. On a dual layout keyboard, the keys next to the space bar can do both the Alt and CMD actions, depending on what OS the keyboard is connected to. The label on these keys mention both OS-specific functions they can perform, separated by a line.
Key label color/format
Depending on the language layout of the keyboard, some symbols are accessed by pressing certain keys with dedicated modifiers. These key+modifier combinations can be identified by the similar color or text formats printed on them.
Example:
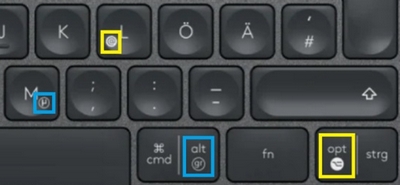
The @ sign is reserved for macOS. It is accessed by pressing the OPT key together with the L key. The µ symbol is reserved for Windows and is accessed by pressing ALT GR and M simultaneously.
For example, in the image above the keys outlined in yellow have symbols that are bold and on the left to indicate they are used by the specific OS. The keys that are outlined in blue have symbols on the right and aren’t in bold, indicating they are used by a different OS.
Bluetooth – Pairing and Troubleshooting
What do you want to do today?
| I’d like to connect my device | I’d like troubleshooting tips |
Connect your device
Windows Windows 11
Windows 8
NOTE: It may take up to five minutes for Windows to download and enable all drivers, depending on your computer’s specifications and your internet speed. If you have not been able to connect your device, repeat the pairing steps and wait a while before you test the connection. macOS
Upon pairing, the LED light on your Logitech device stops blinking and glows steady for 5 seconds. The light then turns off to save energy. Chrome OS
Upon pairing, the LED light on your Logitech device stops blinking and glows steady for 5 seconds. The light then turns off to save energy. Android
Upon pairing, the LED light on the Logitech device stops blinking and glows steady for 5 seconds. The light then turns off to save energy. iOS / iPadOS
Upon pairing, the LED light on the Logitech device stops blinking and glows steady for 5 seconds. The light then turns off to save energy. |
Bluetooth troubleshooting tips
Try these steps to fix issues with your Logitech Bluetooth device:
Other useful FAQs that may help to fix the issue:
|
How do I customize my MX Keys S keyboard using Smart Actions?
Smart Actions in the Logi Options+ App is a new feature. It gives you the power to skip repetitive actions by automating multiple tasks with a single keystroke so you can streamline your workflow.
Click here to learn more about Smart Actions.
-
How do I customize keyboard backlighting on my MX Keys S?
You can customize the Backlighting on your MX Keys S using Logi Options+.
- Use the Backlighting Duration slider to adjust it to your preferred duration
- Use the Automatic Brightness slider to change to manual mode and adjust to your preferred level of brightness
- You can always return to the default settings by clicking the reset button.
What are the new F row keys on MX Keys S?
MX Keys S comes with three new F row keys.
1 – Dictation
2 – Emoji
3 – Mute/unmute microphone

Dictation

The dictation key lets you convert speech-to-text in active text fields (notes, email, and so on). Simply press and start speaking.
Emoji

You can quickly access emojis by pressing the emoji key.
Mute/unmute microphone

You can mute your microphone with a simple press during video conferencing calls. To enable the key, download Logi Options+ here.
On macOS, the Play/Pause and media control buttons by default, launch and control the macOS native Music app. The default functions of keyboard media control buttons are defined and set by macOS itself and therefore cannot be set in Logitech Options+.
If any other media player is already launched and running, for example, playing music or a movie onscreen or minimized, pressing the media control buttons will control the launched app and not the Music app.
If you wish your preferred media player to be used with the keyboard media control buttons it must be launched and running.
How to enable Accessibility and Input monitoring permissions for Logitech Options+
We’ve identified a few cases where devices aren’t detected in the Logitech Options+ software or where the device fails to recognize customizations made in the Options+ software (however, the devices do work in out-of-box mode with no customizations).
Most of the time this happens when macOS is upgraded from Mojave to Catalina/BigSur or when interim versions of macOS are released. To resolve the problem, you can enable permissions manually. Please follow the steps below to remove the existing permissions and then add the permissions. You should then restart the system to allow the changes to take effect.
Remove existing permissions
To remove the existing permissions:
- Close Logitech Options+ software.
- Go to System Preferences -> Security & Privacy. Click the Privacy tab, and then click Accessibility.
- Uncheck Logi Options+.
- Click on Logi Options+ and then click on the minus sign ‘–’ .
- Click on Input Monitoring.
- Uncheck Logi Options+.
- Click on Logi Options+ and then click on the minus sign ‘–’.
Add the permissions
To add the permissions:
- Go to System Preferences > Security & Privacy. Click the Privacy tab and then click Input Monitoring.
- Check Logi Options+ and click Quit Now.
- In Security & Privacy, on the Privacy tab, click on Accessibility.
- Check Logi Options+ and click the lock key for authentication.
- Restart the system.
- Launch the Logi Options+ software and then customize your device.
How to enable direct access to F-keys
Your keyboard has by default access to the Media and Hotkeys such as Volume Up, Play/Pause, Desktop view, and so on.
If you prefer to have direct access to your F-keys simply press Fn + Esc on your keyboard to swap them.
You can download Logitech Options+ to get on-screen notifications when you swap from one to the other. Find the software here.
Logitech Options+ compatibility with Linux and Chrome
Logitech Options+ is supported on Windows and Mac only.
You can find out more about Logitech Options+ features here.
Pair to a second computer with Easy-Switch
To pair your device to a second computer:
- Plug the Logi Bolt receiver into a USB port.
- Open Logitech Options, and select: Add devices > Add a Bolt Device and follow the on-screen instructions.
Once paired, a short press on the Easy-Switch button will allow you to switch channels.
Keystroke ghosting on Logitech membrane keyboards
The two most common Logitech keyboards are mechanical and membrane, with the primary difference being how the key activates the signal that is sent to your computer.
With membrane, the activation is made between the membrane surface and circuit board and these keyboards can be susceptible to ghosting. When certain multiple keys (usually three or more*) are pressed simultaneously, not all of the keystrokes will appear and one or more may disappear ( ghosted).
An example would be if you would type XML very rapidly but don’t release the X key before pressing the M key and subsequently press the L key, then only X and L would appear.
Logitech Craft, MX Keys and the K860 are membrane keyboards and may experience ghosting. If this is a concern we would recommend to try a mechanical keyboard instead.
*Pressing two modifier keys (Left Ctrl, Right Ctrl, Left Alt, Right Alt, Left Shift, Right Shift and Left Win) together with one regular key should still work as expected.
The keyboard backlight did not reset and go to automatic light detection after sleep
If your MX Keyboard doesn’t turn on the keyboard backlight after you wake it up, we recommend updating the firmware using the instructions below:
- Download the latest Firmware Update Tool from the download page.
- If your mouse or keyboard is connected to a Unifying receiver, follow these steps. Otherwise, skip to step 3.
- Make sure to use the Unifying receiver that originally came with your keyboard/mouse.
- If your keyboard/mouse uses batteries, please take the batteries out and put them back in or try replacing them.
- Unplug the Unifying receiver and reinsert it into the USB port.
- Turn off and on the keyboard/mouse using the power button/slider.
- Press any button on the keyboard/mouse to wake up the device.
- Launch the downloaded Firmware Update Tool and follow the on-screen instructions.
- If your keyboard/mouse still does not work, please reboot your computer and repeat the steps at least two more times.
- If your mouse or keyboard is connected using Bluetooth and is still paired to your Windows or macOS computer:
- Turn off and on your computer’s Bluetooth or reboot your computer.
- Turn off and on the keyboard/mouse using the power button/slider.
- Launch the downloaded Firmware Update Tool and follow the on-screen instructions.
- If your keyboard/mouse still does not work, please reboot your computer and repeat the steps at least two more times.
- If your mouse or keyboard is connected using Bluetooth but is no longer paired:
- Remove the Bluetooth pairing from the computer (if any).
- Unplug the Unifying receiver (if any).
- Launch the downloaded Firmware Update Tool and follow the on-screen instructions.
- On the ‘connect receiver’ window, press any button on the keyboard or mouse to wake up the device.
- The devices will be connected and the firmware update should proceed.
If the issue persists, please contact our customer support team.
It is not possible to use one Easy-Switch button to at the same time change both your mouse and keyboard to a different computer/device.
We do understand that this is a feature that a lot of customers would like. If you are switching between Apple macOS and/or Microsoft Windows computers, we offer Flow. Flow allows you to control multiple computers with a Flow-enabled mouse. Flow automatically switches between computers by moving your cursor to the edge of the screen, and the keyboard follows.
In other cases where Flow is not applicable, one Easy-Switch button for both mouse and keyboard might look like a simple answer. However, we cannot guarantee this solution at the moment, as it is not easy to implement.
-
Volume keeps increasing after I press the volume button on my keyboard
If the volume keeps increasing or decreasing after you press the volume button on your MX Keys keyboard, please download the firmware update that addresses this issue.
For Windows
For Mac
NOTE: If the update doesn’t install the first time, please try running it again.
-
My NumPad/KeyPad is not working, what should I do?
- Make sure that the NumLock key is enabled. If pressing the key once doesn’t enable NumLock, press and hold the key for five seconds.

- Verify that the correct keyboard layout is selected in Windows Settings and that the layout matches your keyboard.
- Try enabling and disabling other toggle keys such as Caps Lock, Scroll Lock, and Insert while checking if the number keys work on different apps or programs.
- Disable Turn on Mouse Keys:
- Open the Ease of Access Center — click the Start key, then click Control Panel > Ease of Access and then Ease of Access Center.
- Click Make the mouse easier to use.
- Under Control the mouse with the keyboard, uncheck Turn on Mouse Keys.
- Disable Sticky Keys, Toggle Keys & Filter Keys:
- Open the Ease of Access Center — click the Start key, then click Control Panel > Ease of Access and then Ease of Access Center.
- Click Make the keyboard easier to use.
- Under Make it easier to type, make sure all checkboxes are unchecked.
- Verify the product or receiver is connected directly to the computer and not to a hub, extender, switch, or something similar.
- Make sure the keyboard drivers are updated. Click here to learn how to do this in Windows.
- Try using the device with a new or different user profile.
- Test to see if the mouse/keyboard or receiver on a different computer.
- Make sure that the NumLock key is enabled. If pressing the key once doesn’t enable NumLock, press and hold the key for five seconds.
-
Mouse or keyboard stopped working during firmware update and blinks red and green
If your mouse or keyboard stops working during a firmware update and starts to blink repeatedly red and green, this means the firmware update has failed.
Use the instructions below to get the mouse or keyboard working again. After you download the firmware, select how your device is connected, either using the receiver (Logi Bolt/Unifying) or Bluetooth and then follow the instructions.
- Download the Firmware Update Tool specific to your operating system.
- If your mouse or keyboard is connected to a Logi Bolt/Unifying receiver, follow these steps. Otherwise, skip to Step 3.
- Make sure to use the Logi Bolt/Unifying receiver that originally came with your keyboard/mouse.
- If your keyboard/mouse uses batteries, please take the batteries out and put them back in or try replacing them.
- Unplug the Logi Bolt/Unifying receiver and reinsert it into the USB port.
- Turn off and on the keyboard/mouse using the power button/slider.
- Press any button on the keyboard/mouse to wake up the device.
- Launch the downloaded Firmware Update Tool and follow the on-screen instructions.
- If your keyboard/mouse still does not work, please reboot your computer and repeat the steps at least two more times.
- If your mouse or keyboard is connected using Bluetooth and is still paired to your Windows or macOS computer:
- Turn off and on your computer’s Bluetooth or reboot your computer.
- Turn off and on the keyboard/mouse using the power button/slider.
- Launch the downloaded Firmware Update Tool and follow the on-screen instructions.
- If your keyboard/mouse still does not work, please reboot your computer and repeat the steps at least two more times.
Do not remove the device pairing from the System Bluetooth or Logi Bolt when the device is blinking red and green.
If the issue persists, please contact our customer support team.
-
External keyboard shortcuts for iPadOS
You can view the available keyboard shortcuts for your external keyboard. Press and hold the Command key on your keyboard to display the shortcuts.

-
Change modifer keys of external keyboard on iPadOS
You can change the position of your modifier keys at any time. Here’s how:
- Go to Settings > General > Keyboard > Hardware keyboard > Modifier Keys.
-
Toggle between multiple languages on iPadOS with an external keyboard
If you have more than one keyboard language on your iPad, you can move from one to the other using your external keyboard. Here’s how:
- Press Shift + Control + Space bar.
- Repeat the combination to move between each language.
-
Warning message when Logitech device is connected to iPadOS
When you connect your Logitech device, you might see a warning message.
If this happens, make sure to connect only the devices you’ll be using. The more devices that are connected, the more interference you might have between them.
If you are having connectivity issues, disconnect any Bluetooth accessories that you’re not using. To disconnect a device:
- In Settings > Bluetooth, tap the information button next to the device name, then tap Disconnect.

Bluetooth mouse or keyboard not recognized after reboot on macOS (Intel-based Mac) – FileVault
If your Bluetooth mouse or keyboard does not reconnect after a reboot at the login screen and only reconnects after the login, this might be related to FileVault encryption.
When FileVault is enabled, Bluetooth mice and keyboards will only re-connect after login.
Potential solutions:
- If your Logitech device came with a USB receiver, using it will solve the issue.
- Use your MacBook keyboard and trackpad to login.
- Use a USB keyboard or mouse to login.
Note: This issue is fixed from macOS 12.3 or later on M1. Users with an older version might still experience it.
Keyboard backlight behavior when charging
Your keyboard is equipped with a proximity sensor that detects your hands whenever you come back to type on your keyboard.
Proximity detection will not work when the keyboard is charging — you have to press on a key of the keyboard to turn the backlight on. Turning the keyboard backlight off while charging will help with the charging time.
The backlighting will stay on for five minutes after typing, so if you are in the dark, the keyboard won’t turn off while typing
Once charged and the charging cable removed, the proximity detection will work again.
Keyboard backlighting changes by itself
Your keyboard is equipped with an ambient light sensor that adapts the keyboard backlight according to the brightness of your room.
There are three default levels that are automatically if you do not toggle the keys:
- If the room is dark, the keyboard will set the backlighting to a low level.
- In a bright environment, it will adjust to a high level of backlighting to add more contrast to your environment.
- When the room is too bright, over 200 lux, the backlighting will turn off as the contrast is no longer visible, and it won’t drain your battery unnecessarily.
When you leave your keyboard but keep it on, the keyboard detects when your hands approach and it will turn the backlight back on. The backlighting won’t turn back on if:
- Your keyboard has no more battery, below 10%.
- If the environment you’re in is too bright.
- If you’ve turned it off manually or using Logitech Options software.


