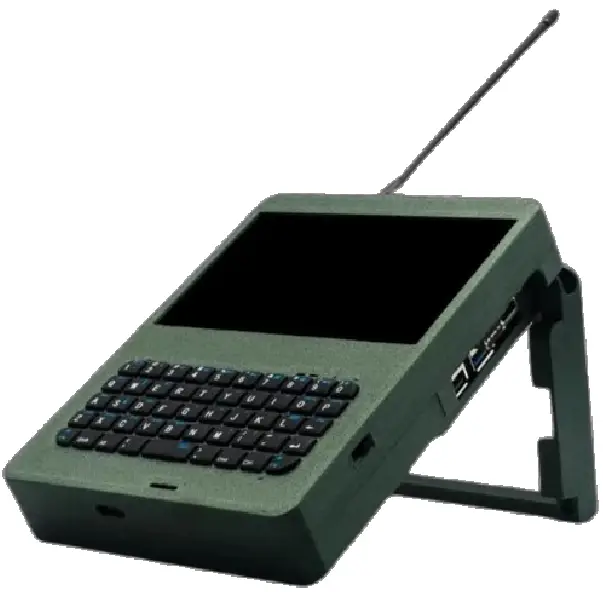
spec5 Nomad Radio Linux ARM Computer
Thank You
Thank you for ordering your Spec Five Nomad from Spec Five. Here are the instructions to get you connected to your new device and join the mesh.
WARNING: DO NOT POWER ON YOUR SPECFIVE NOMAD UNTIL YOU HAVE CONNECTED THE ANTENNAS.
POWERING THE SPECFIVE NOMAD WITHOUT THE ANTENNAS CONNECTED CAN CAUSE DAMAGE TO THE LORA BOARD.
Antenna Connection
If removed for shipping or storage, Install the antennas according to the image below. The Long Antenna is the Lora Antenna and the short antenna is the GPS antenna.
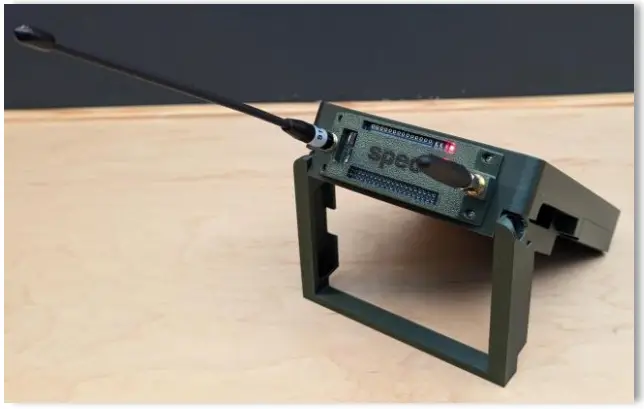
Installing the antennas in the incorrect location will not damage the Lora Board but it will reduce the range and transmission strength of the radio.
Charging The Device
- Use a USB-C cable to charge the Nomad from a 5 volt power adapter.
- Below the Keyboard is a battery level indicator which will illuminate when the power switch(on the right side of the Nomad) is in the ON(up) position.
Starting The Nomad
- Move the switch on the Right side of the Nomad to up/ON position.
a. The Battery level indicator below the keyboard will illuminate
b. The speaker will make a pop/crackle sound as it powers up
c. The Screen will initially come on a show “no signal”, but as the Raspberry Pi boots the screen will get signal. - The Nomad is set from the factory to boot to the home screen without the need to Login. The factory username and password are as follows:
User name: spec5
Password: 123456
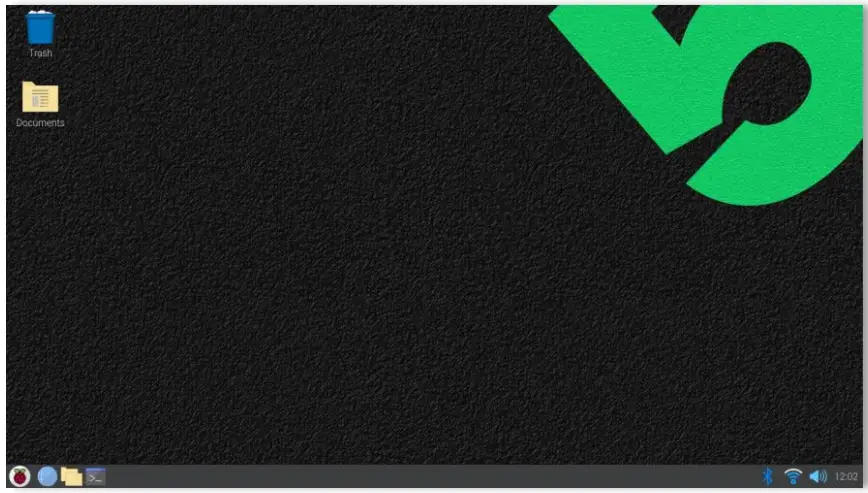
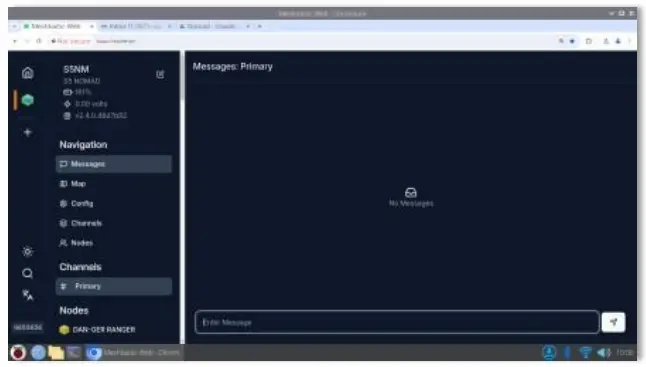
Nomad Home Screen
Using The Meshtastic Client
- Open the Web browser (Chromium).
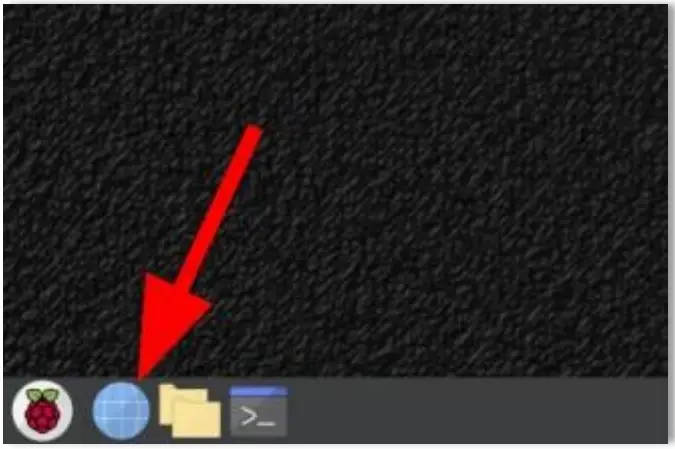
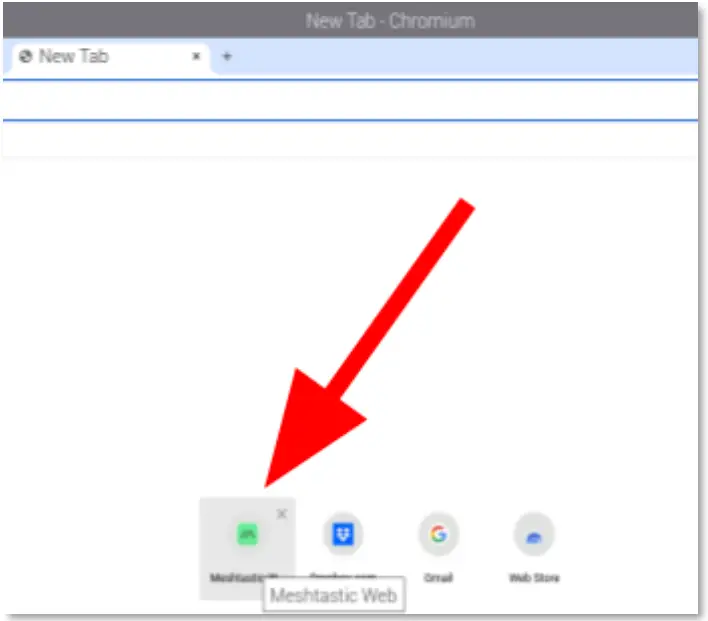
- Select the Meshtastic Client from the recently viewed web pages.
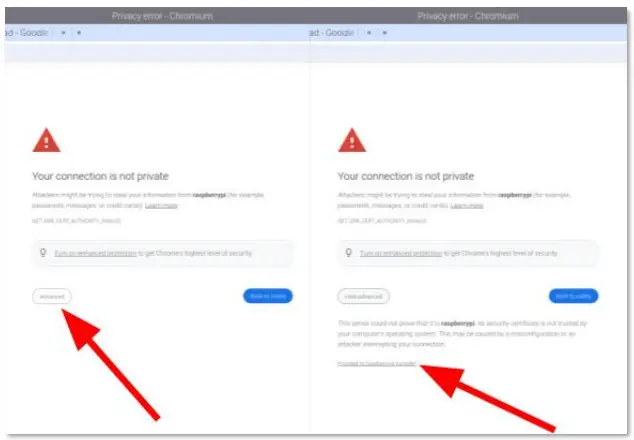
- If you get a privacy error in Chromium, click “Advanced” and then click “Proceed to raspberrypi”.
- Connect to a new device in the web client.
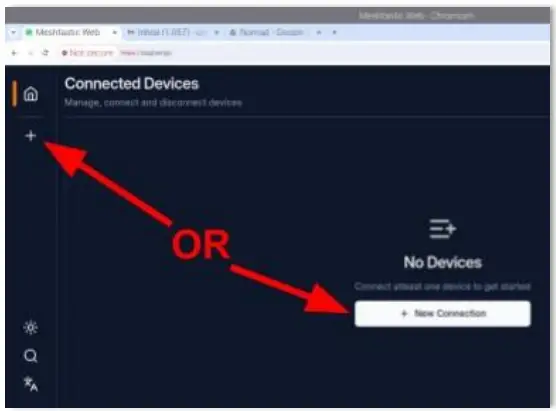
- The IP address for connecting to the Lora Radio will auto-populate as “raspberrypi”, click Connect.
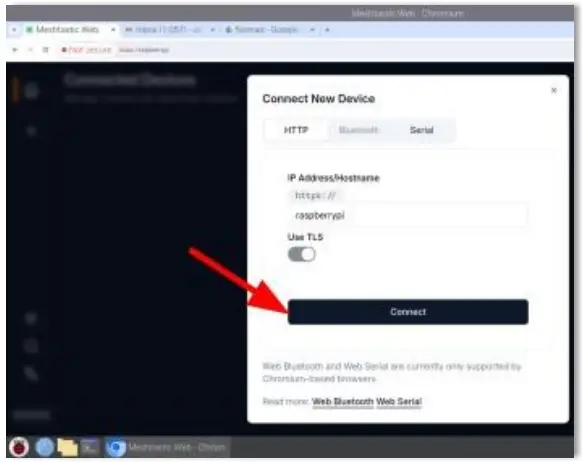
- Now you are connected to the Lora Radio through the Meshtastic Web Client.
From here you have all of the functionality of the Phone Apps: Send Messages, join/create channels, change Configuration Settings, change device name/call sign.
- Important configuration settings to check:
a. Config -> Radio Config -> LORA Set Region to US.
b. Config -> Radio Config -> Device Set Role to Client.
c. Config -> Radio Config -> Position Set GPS Mode to Enabled.
You’re Good to Go!
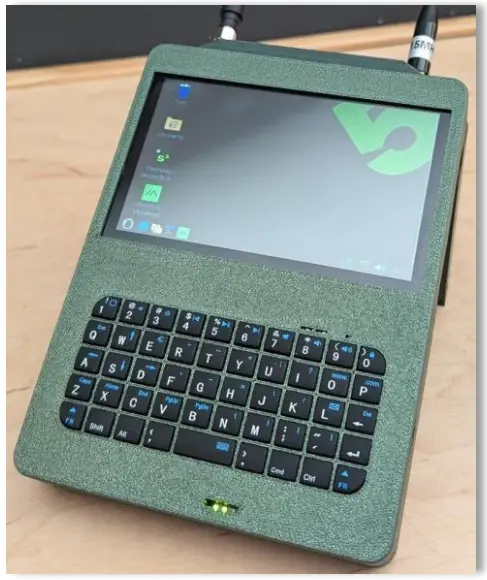
Keyboard Connection
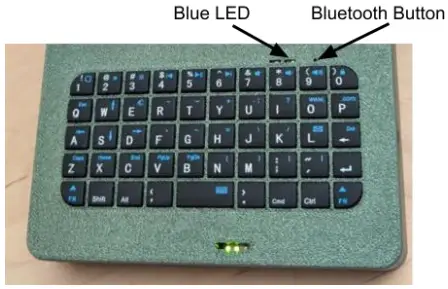
The Keyboard connects to the Raspberrypi via Bluetooth. The keyboard turns on with the main power switch and comes pre connected to the Pi. If the keyboard is not working it likely is no longer connected over Bluetooth. To reconnect the keyboard:
- Use a round, blunt object like a paperclip to press the Bluetooth Button on the keyboard. The Blue LED will blink when the Keyboard is in Bluetooth pairing mode.
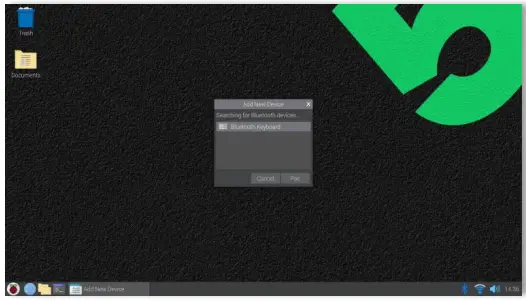
- On the Menu Bar click on the Bluetooth icon, and select add device.
- In the Pop up window, a “Bluetooth Keyboard” should be found. Click Pair and wait for the pairing process to successfully complete.
Customer Support
Other Resources:
For more information on radio configuration settings, visit https://meshtastic.org/docs/configuration/
For more information about our products, visit specfive.com
© 2024, Spec Five LLC All Right Reserved specfive.com

Documents / Resources
 |
spec5 Nomad Radio Linux ARM Computer [pdf] User Guide Nomad Radio Linux ARM Computer, Radio Linux ARM Computer, Linux ARM Computer, ARM Computer |