![]()
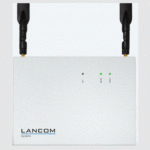
LANCOM SYSTEMS 1781EW Plus Secure Site
Please observe the following when setting up the device
- When setting up on the desktop, please attach the adhesive rubber footpads
- Do not rest any objects on top of the device
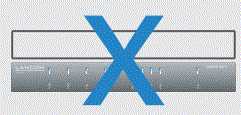
- Keep side ventilation slots free
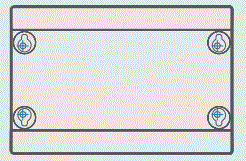
- In case of wall mounting, use the drilling template as supplied
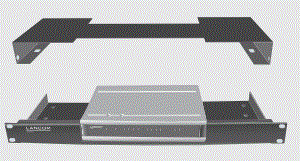
- Rack installation with the optional LANCOM Rack Mount (not supplied)
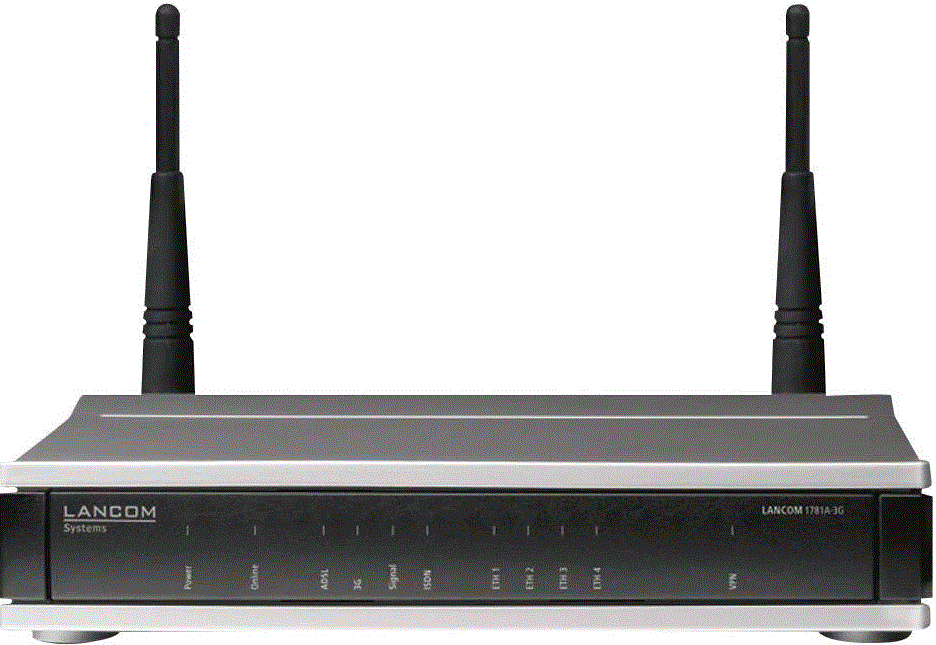
CONTROL PANEL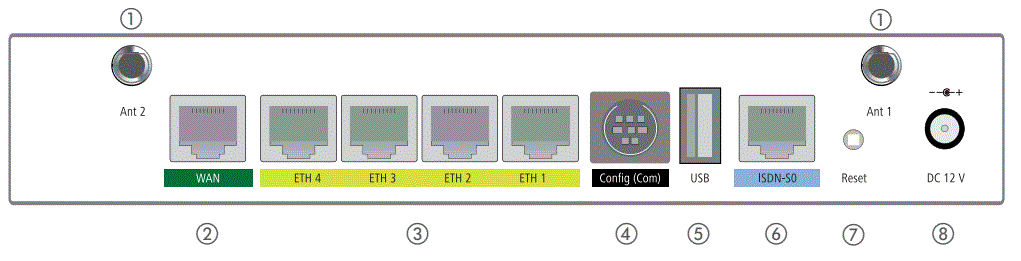
- Wi-Fi antenna connectors
- Connect the supplied Wi-Fi antennas to the Ant 1 and Ant 2 connectors. The desired MIMO behavior may have to be configured under > Physical WLAN settings > Radio > Antenna grouping.

- Connect the supplied Wi-Fi antennas to the Ant 1 and Ant 2 connectors. The desired MIMO behavior may have to be configured under > Physical WLAN settings > Radio > Antenna grouping.
- WAN interface
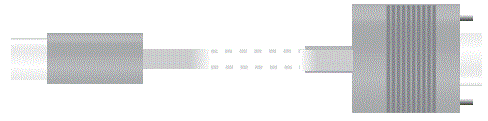
- Connect the WAN interface to your WAN modem using the included Ethernet cable with dark green connectors.
 Ethernet interfaces
- Connect one of the interfaces ETH 1 to ETH 4 to your PC or a LAN switch using the cable with kiwi-colored plugs.
- Serial configuration inteface
- For configuration, connect the device and a PC with a serial configuration cable (available as an accessory).

- For configuration, connect the device and a PC with a serial configuration cable (available as an accessory).
- USB interface
- Connect a USB storage medium or a USB printer to the USB interface.
- Connect a USB storage medium or a USB printer to the USB interface.
- ISDN interface
- Connect the ISDN interface to the NTBA using the ISDN cable with light blue plugs if you want to use ISDN additionally.

- Connect the ISDN interface to the NTBA using the ISDN cable with light blue plugs if you want to use ISDN additionally.
- Reset button
- Press and hold for up to 5 seconds:

- Press and hold for up to 5 seconds:
- Device restart
- Hold down until all LEDs light up for the first time: Reset the configuration and restart the device

- Hold down until all LEDs light up for the first time: Reset the configuration and restart the device
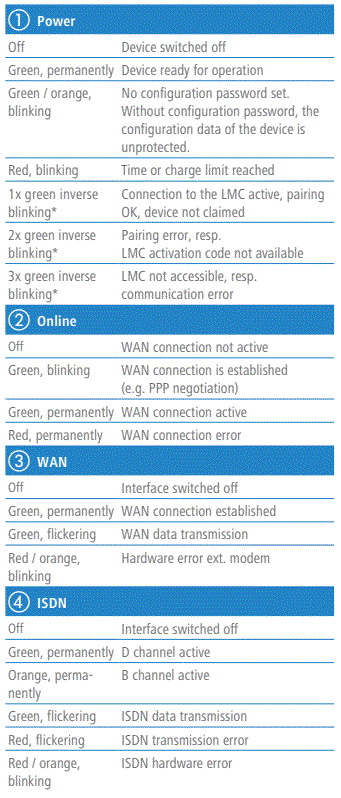
- Power
- Turn the bayonet connector of the cable 90° clockwise when plugging it into the device until it locks into place. Only use the supplied power supply unit!
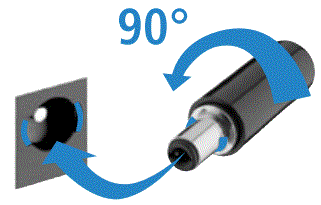
- Turn the bayonet connector of the cable 90° clockwise when plugging it into the device until it locks into place. Only use the supplied power supply unit!
REAR PANEL
The additional power LED statuses are displayed in 5-seconds rotation if the device is configured to be managed by the LANCOM Management Cloud.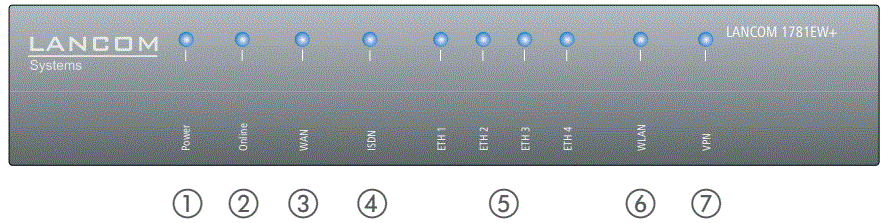

INFORMATION
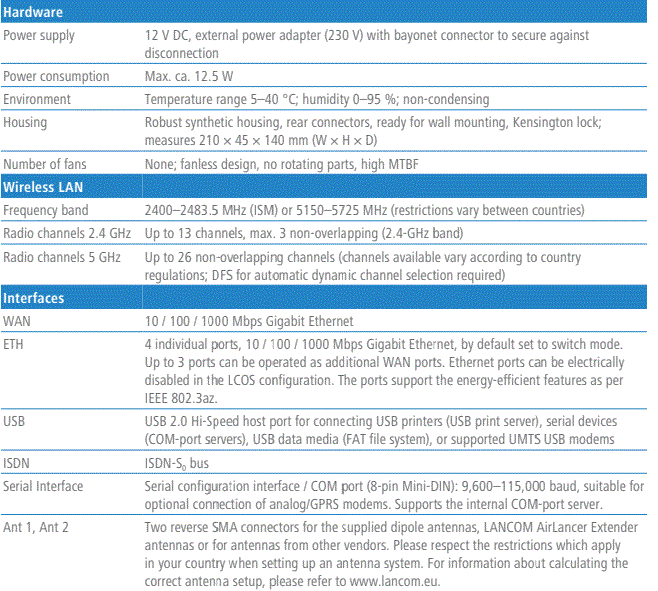
When working with separately purchased antennas, please ensure you do not exceed the maximum permissible transmission power. The system operator is responsible for adhering to the threshold values. Antennas are only to be attached or changed when the device is switched off. Mounting or dismounting antennas while the device is switched on may destroy the 4G or
Wi-Fi modules!
- Before initial startup, please make sure to take notice of the information regarding the intended use in the enclosed installation guide!
- Operate the device only with a professionally installed power supply at a nearby power socket that is freely accessible at all times.
Documents / Resources
 |
LANCOM SYSTEMS 1781EW Plus Secure Site Connectivity Combined with WiFi [pdf] User Guide 1781EW Plus, Secure Site Connectivity Combined with WiFi, 1781EW Plus Secure Site Connectivity Combined with WiFi, Site Connectivity Combined with WiFi, Connectivity Combined with WiFi, Combined with WiFi |