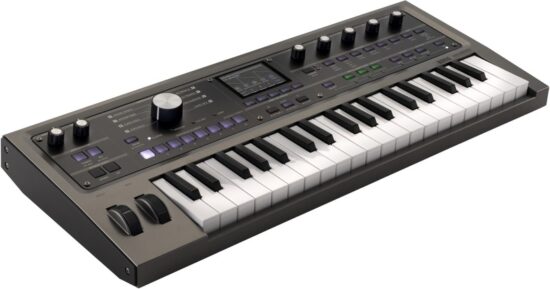
KORG MK-2 Synthesizer Vocoder
Specifications:
- Model: MK-2
- Manufacturer: Korg
- Power Supply: AC adapter
- Compliance: FCC Part 15, FCC Regulation Warning
Product Information:
The MK-2 is a synthesizer/vocoder designed for creating electronic music. It features a compact design and versatile controls for sound manipulation.
Product Usage Instructions
Precautions:
- Power Supply: Connect the designated AC adapter to the correct voltage outlet.
- Interference: Operate the unit at a suitable distance from radios and televisions to avoid reception interference.
- Handling: Avoid applying excessive force to switches or controls to prevent breakage.
- Cleaning: Use a clean, dry cloth to wipe the exterior. Avoid liquid cleaners or flammable polishes.
- Storage: When transporting in a soft case, ensure the keyboard or controls are not facing downward.
Keeping Manual:
After reading the manual, keep it for future reference.
Equipment Care:
Avoid setting containers with liquid near the equipment. Keep metal objects away to prevent electrical hazards.
Notice to Consumers:
Unauthorized changes or modifications can void the user’s authority to operate the equipment.
FAQ
Q: Can I use a different AC adapter with the MK-2?
A: It is recommended to use the designated AC adapter to avoid damage to the unit.
Q: How should I clean the exterior of the MK-2?
A: Use a clean, dry cloth. Avoid liquid cleaners or flammable polishes.
Q: What should I do if liquid spills on the equipment?
A: If liquid enters the equipment, unplug the AC adapter and contact your nearest Korg dealer for assistance.
Precautions
Location
Using the unit in the following locations can result in a malfunction.
- In direct sunlight
- Locations of extreme temperature or humidity
- Excessively dusty or dirty locations
- Locations of excessive vibration
- Close to magnetic fields
Power supply
Please connect the designated AC adapter to an AC outlet of the correct voltage. Do not connect it to an AC outlet of voltage other than that for which your unit is intended.
Interference with other electrical devices
Radios and televisions placed nearby may experience reception interference. Operate this unit at a suitable distance from radios and televisions.
Handling
To avoid breakage, do not apply excessive force to the switches or controls.
Care
If the exterior becomes dirty, wipe it with a clean, dry cloth. Do not use liquid cleaners such as benzene or thinner, or cleaning compounds or flammable polishes.
Keep this manual
After reading this manual, please keep it for later reference.
Keeping foreign matter out of your equipment
Never set any container with liquid in it near this equipment. If liquid gets into the equipment, it could cause a breakdown, fire,or electrical shock.
Be careful not to let metal objects get into the equipment. If something does slip into the equipment, unplug the AC adapter from the wall outlet. Then contact your nearest Korg dealer or the store where the equipment was purchased.
Transporting and storing this unit in a soft case
When transporting or storing this product in a soft case, be careful that the keyboard or the controls such as the switches are not facing downward. Also, do not place other objects on top of the case in which this product is stored.
IMPORTANT NOTICE TO CONSUMERS
This product has been manufactured according to strict specifications and voltage requirements that are applicable in the country in which it is intended that this product should be used.
If you have purchased this product via the internet, through mail order, and/or via a telephone sale, you must verify that this product is intended to be used in the country in which you reside.
WARNING: Use of this product in any country other than that for which it is intended could be dangerous and could invalidate the manufacturer’s or distributor’s warranty. Please also retain your receipt as proof of purchase otherwise your product may be disqualified from the manufacturer’s or distributor’s warranty.
THE FCC REGULATION WARNING (for USA)
NOTE: This equipment has been tested and found to comply with the limits for a Class B digital device, pursuant to Part 15 of the FCC Rules. These limits are designed to provide reasonable protection against harmful interference in a residential installation.
This equipment generates, uses, and can radiate radio frequency energy and, if not installed and used in accordance with the instructions, may cause harmful interference to radio communications. However, there is no guarantee that interference will not occur in a particular installation. If this equipment does cause harmful interference to radio or television reception, which can be determined by turning the equipment off and on, the user is encouraged to try to correct the interference by one or more of the following measures:
- Reorient or relocate the receiving antenna.
- Increase the separation between the equipment and receiver.
- Connect the equipment into an outlet on a circuit different from that to which the receiver is connected.
- Consult the dealer or an experienced radio/TV technician for help.
If items such as cables are included with this equipment, you must use those included items.
Unauthorized changes or modification to this system can void the user’s authority to operate this equipment.
SUPPLIER’S DECLARATION OF CONFORMITY (for USA)
- Responsible Party: KORG USA INC.
- Address: 316 SOUTH SERVICE ROAD, MELVILLE,NY
- Telephone: 1-631-390-6500
- Equipment Type: SYNTHESIZER/VOCODER
- Model: MK-2
This device complies with Part 15 of FCC Rules. Operation is subject to the following two conditions:
- This device may not cause harmful interference, and
- this device must accept any interference received, including interference that may cause undesired operation.
Notice regarding disposal (EU only)
When this “crossed-out wheeled bin” symbol is displayed on the product, owner’s manual, battery, or battery package, it signifies that when you wish to dispose of this product, manual, package or battery you must do so in an approved manner. Do not discard this product, manual, package or battery along with ordinary household waste. Disposing in the correct manner will prevent harm to human health and potential damage to the environment. Since the correct method of disposal will depend on the applicable laws and regulations in your locality, please contact your local administrative body for details. If the battery contains heavy metals in excess of the regulated amount, a chemical symbol is displayed below the “crossed-out wheeled bin” symbol on the battery or battery package.
Connections
- Before making any connections, ensure that all of your devices are turned off. Operating this unit or your devices in a careless way might cause electric shock, damage your speaker system or cause a malfunction.
Connecting to a power source
DC9V jack 1 : Connect the included AC adapter here.
- Be sure to use only the included AC adapter. Using a different AC adapter may cause a malfunction or other issues.
Note: The microKORG2 can also operate on batteries. For details on how to insert the batteries and correctly display the remaining battery power, refer to the Owner’s Manual. Note that batteries are not included, and must be purchased separately.
Connecting audio devices
OUTPUT L/MONO and R jacks 4 : Connect these jacks to the INPUT jacks of your mixer, powered monitor speakers or other audio equipment.
Headphones jack 3 : Connect your headphones here.

Connecting the included mic
Mic holder 7 : Connect the included mic here. While holding the base of the included mic, align the protrusion on the mic with the guide of the mic holder, and push the mic into the holder. Do not use excessive force.
When removing the included mic,hold it by the base and pull it out.

MIC IN CONDENSER jack 6:
Connect the plug of the included mic here.
Other connections
Connect the related devices and equipment to the following jacks as necessary.
- DAMPER/ SWITCH jack 5: Connect accessories (sold separately) here, a damper pedal or pedal switch.
- For details on MIDI, USB and AUX connections, refer to the Owner’s Manual.
Turning the power on/off
Before turning the power on, make sure that the volume is turned all the way down on your other devices.
If you’ve connected equipment such as monitor speakers, turn the power on/off in the following order.
- When turning the power on: turn volume of all equipment all the way down → turn on the microKORG2 → turn on the monitor speakers
- When turning the power off: turn volume of all equipment all the way down → turn off the monitor speakers → turn off the microKORG2
Power button 2: Long-press the button to turn the power on or off.
Note: The microKORG2 automatically turns off when the front panel buttons, knobs, keyboard or other controls are not used for a certain length of time (the time is set to two hours by default). This is the auto power-off function.
Adjusting the volume
- VOLUME knob 1: Use this to adjust the volume of sound that’s output from the OUTPUT jacks and headphones jack.
- MIC knob [2: Adjusts the mic volume.
Note: Lower the volume when you’re not using the mic.
Selecting and playing programs
Selecting a sound
- Press the BANK button 8 to select a program bank.
- Turn the PROGRAM SELECT dial 9 to select the program genre.
- Press a PROGRAM NUMBER button 10 between 1 and 8 to select the program number.
Play the keyboard 11 to hear the sound.
Controlling the octave, pitch, etc.
- Press the OCTAVE SHIFT UP and DOWN buttons 5 to switch the octave range of the keyboard (over a range of +3 octaves).
- Use the PITCH wheel 6 to control the pitch.
- Use the MOD wheel 7 to control the depth of modulation.
Performance edit
Use the edit controls (the five knobs) to adjust the sound and other elements while you’re playing.
- Press the FUNCTION 5 button (FUNC/HOME) 13.
- Use the edit control 1-5 knobs 15 to adjust the sound.
Parameter examples
- Cutoff: adjusts the brightness of the sound with a filter
- Resonance: adds a unique character to the sound
- AMP EG Attack, Release: adjusts the speed at which the sound rises and falls in volume
Editing the sounds
The programs consist of two timbres, and each timbre features three oscillators (OSC), a noise generator (NOISE), a filter,filter EG, amp EG, two LFOs and six patches The addition of effects gives you a great degree of freedom in creating your own sounds
Editing
- Press the TIMBRE button 16 to select the timbre to edit.
Note: This is enabled for dual programs, but is disabled for single programs. - Press the TIMBRE EDIT buttons 17 to select the section of the parameter you want to edit. The page switches each time you press the buttons.
- Turn the edit control 1-5 knobs 15 to edit the parameter values.
See the Owner’s Manual for details on the parameters.
Setting the volume balance between the two timbres
- Long-press the TIMBRE button 16.
- Turn the edit control 1-4 knobs 15 to set the volume and pan.
Displaying the oscilloscope
- Press the FUNCTION 3 button (SCOPE) 13 to show/hide the oscilloscope.
When the oscilloscope is shown, you can view the waveform on the display when you play a note on the keyboard.
Using the vocal processor
Playing the vocoder
The vocoder uses the audio that you input from a mic or other source to modulate the oscillator’s waveform, creating an effect that sounds like the instrument is talking.
We recommend that you first select from the program that’s available when the VOCODER button 20 ON/OFF LED is lit (see the “Voice Name List”).

- Press the VOCODER button 20 while holding down the ON/OFF button 19 to turn the vocoder on/off.
- While vocalizing into the mic, use the MIC knob 2 to adjust the mic volume.
Note: Adjust the input level so that “MICO” doesn’t appear in red in the upper left part of the display. This knob adjusts the signal volume after A/D conversion. - Play the keyboard while vocalizing into the mic.
Adjusting the settings
- Press the VOCODER button 20 to show the VOCODER page and the FILTER BAND page.
- Use the edit control 1-5 knobs 15 to set the parameters.
Parameter examples- Mic Direct: sets the direct output level for the mic audio
- Synth D/W: adjusts the balance between the synth and the vocoder sounds
- Formant Shift: sets each cutoff frequency for the filter on the carrier side
- Use each of the TIMBRE EDIT buttons 17 and edit control 1-5 knobs 15 to set the parameters for each oscillator section.
Using hard tune to correct the pitch
This feature is used to correct the vocal pitch. Use this to create robot-like voices, or to adjust the formant for a thicker, lower vocal sound or for a thinner, higher sound.
We recommend that you first select from the program that’s available when the HARD TUNE button 20 ON/OFF LED is lit (see the “Voice Name List”).
- Press the HARD TUNE button 20 while holding down the ON/OFF button 19 to switch hard tune on/off.
- Use the MIC knob 2 to adjust the mic volume (see “Playing the vocoder”).
- Vocalize into the mic.
Adjusting the settings
- Press the HARD TUNE button 20 to show the HARD TUNE page.
- Use the edit control 1-3 knobs 15 to set the parameters.
Parameter examples- Intensity: sets the degree of pitch correction
- Speed: sets the speed of pitch correction
- Formant: changes the character of the voice
Changing your voice with the harmonizer
This shows how to shift the pitch of your vocals and add that voice as a harmony to the original vocals for output.
We recommend that you first select from the program that’s available when the HARMONIZER button 20 ON/OFF LED is lit (see the “Voice Name List”).
- Press the HARMONIZER button 20 while holding down the ON/OFF button 19 to turn the harmonizer on/off.
- Use the MIC knob 2 to adjust the mic volume (see “Playing the vocoder”).
- Vocalize into the mic.
Adjusting the settings
- Press the HARMONIZER button 20 to show the Harmonizer page.
- Use the edit control 1-5 knobs 15 to set the parameters.
Parameter examples- HarmoLvl: sets the output level for the harmony sound
- Formant: changes the character of the voice
- Harmony: sets the number of harmonies to output
- Pitch 1, 2: sets how far to shift the pitches of harmonies 1 and 2
Controlling the pitch over a scale or via keyboard
Note: Check this setting if the vocal processor isn’t working as expected.
The pitch of the vocal processor is controlled by the audio signal that’s detected from the mic, or by what you play on the keyboard.
- Long-press the VOCAL PROCESSOR button (VOCODER, HARD TUNE, HARMONIZER) 20 to show the VOCAL SETTING page.
- Use the edit controls (1-3 knobs) 15 to adjust the values.
Parameter examples- Scale/KBD: when set to “Scale”, the vocal pitch is corrected to match the “Scale Key” and “Scale Type” you set
- Scale Key: sets the scale tonic
- Scale Type: sets the scale to use
- Scale/KBD: when set to “Keyboard”, the vocal pitch is corrected to match the keys you play on the keyboard
Configuring the effects
The output from oscillator or from the vocal processor is sent through the following signal chain to apply effects: modulation effect (MOD) → delay effect (DELAY) → reverb effect (REVERB) → equalizer (EQ).
- To turn each effect on/off, press the button for the respective effect (MOD, DELAY, REVERB, EQ 21) while holding down the ON/OFF button 19.
- Press the EFFECT MOD, DELAY, REVERB or EQ button 21 to adjust the effect. The respective page is shown.
- Use the edit control 1-5 knobs 15 to adjust the values.
Parameter examples
MOD/DELAY/REVERB- Type: selects effect type
- Dry/Wet: sets the depth of the effect
EQ - Low Freq, High Freq: sets the frequency to adjust
- Low Gain, High Gain: adjusts the respective gains
Note: If you raise the equalizer gain too much, the output may distort.
Using the arpeggiator
The arpeggiator automatically plays all the notes of a held chord as individual events.

Playing arpeggios
- Press the ARPEGGIATOR ON button 4 to toggle the arpeggiator.
- Hold down a chord on the keyboard to make the arpeggio play.
- Set the tempo by pressing the TEMPO button [3] a number of times.
Modifying the arpeggio
- Press the EDIT ARP A/B button 18 to select the ARP A,B page.
- Use the edit control 1-5 knobs 15 to change the way that the arpeggiator plays.
Parameter examples
ARP A- Swing: makes the rhythm swing
- Latch: keeps playing the arpeggio even after you take your hands off the keyboard ARP B
- Type: changes the order in which arpeggio notes are played
- Gate Time: changes the length of the notes played in the arpeggio
Tip: You can also toggle the latch by long-pressing the ARPEGGIATOR ON button.
- Press the PROGRAM NUMBER 1-8 buttons 10 to turn on/off the arpeggio notes, up to eight steps.
Pressing a button to turn off the LED changes the note for that step into a rest, which alters the performance (see the diagram).
Type: Up Last Step: 8

Saving a program
Save the programs you’ve edited to the memory of the microKORG2. Any edits you make will be lost if you turn off the power of the microKORG2 or select a different program before saving the data.
- Press the FUNCTION 4 (WRITE) button 13.
- Press the BANK button 8 to select the bank where the program will be saved.
Note: We recommend saving your data to the USER banks,which contain initialized programs. - Turn the PROGRAM SELECT dial 9 to select the genre.
- Press PROGRAM NUMBER buttons 1-8 10 to select the save destination program number.
Press the FUNCTION 5 (CANCEL) button to cancel. - Name the program. Move the cursor using the FUNCTION 1 (CUR <) and 2 (CUR >) buttons 13, and select the character with the edit control 1-5 knobs 15.
- To save, press the FUNCTION 4 (EXECUTE) button 13.
After the data is saved, the microKORG2 returns to its normal operating state.
Registering and selecting favorites
- You can register up to eight favorite programs and quickly recall them later. This is useful when you’re playing live and in similar situations.
Registering a favorite program
- Select a program to register.
Long-press the PROGRAM NUMBER 1-8 buttons 10 you want to register.
The button blinks and the program is registered.
Selecting a favorite
Long-press the BANK button 8.
- Press the PROGRAM NUMBER 1-8 buttons 10 to select the favorite programs assigned to each.
- To exit favorites mode, press the BANK button 8 or turn the PROGRAM SELECT dial 9.
Using the looper
This feature lets you record what you play on the microKORG2, and then play it back.
Recording
- Press the LOOP RECORDER
 button 14 (the button blinks red).
 - Press the
 button 14. Recording starts after the pre-count.
 - Record what you play on the keyboard or the vocal processor.
Recording is done over and over within the loop range, as an overdub. - Press the button 14 to stop recording and switch to playback mode.
- Press the button 14 to stop.
Tip: You can also record the input signal from the AUX IN jack (see the Owner’s Manual for details).
Playing back
- Press the button 14 to begin playback, and press the button again to stop.
Undo/redo
- Press the
 button 14 to erase (undo) the audio you just recorded. Press the button again to return to the previous state (redo).
Deleting data
- Long-press the button 14 to delete all of the data you recorded.
Note: The delete operation cannot be undone.
Editing the settings
- Long-press the button 14 to show the LOOP SETTING A page, which contains the recording-related settings.
Long-press the button 14 to show the LOOP SETTING B page, which contains the playback-related settings. - Use the edit control 1-5 knobs 15 to set the parameters.
Parameter examples
LOOP REC SETTINGS- Length: sets the length of the recording
- Rec Start: sets when the recording starts from standby mode
- Quality: sets the quality of the recorded data
LOOP PLAY SETTINGS - St. Length: sets the stutter playback length
- Press the FUNCTION 5 (HOME) button 13 to exit the settings.
- The recorded audio data is deleted once you turn the power off.
Specifications
- Keyboard: 37 keys (mini keyboard, velocity sensitive)
- Sound generation system: Analog modeling synthesis system
- Timbres: max. of 2 (in Dual mode)
- Maximum polyphony: Synthesizer 8 voices, Vocoder 4 voices, Hard Tune 1 part, Harmonizer 2 parts
- Effects, EQ: Modulation, delay, reverb, 2-band EQ
- Arpeggiator: 10 types, step arpeggiator function
- Programs: 256 (4 banks x 8 genres x 8 programs)
- Loop recorder: Approx. 43 sec. (32-bit floating point, stereo)
- Input/output jacks:
- OUTPUT – L/MONO, R jacks (6.3 mm TS phone jack, unbalanced)
- Headphones jack (6.3 mm TRS phone jack, unbalanced)
- MIC IN – CONDENSER jack (+5 V 3.5 mm TRS mini phone jack, unbalanced)
- MIC IN – DYNAMIC jack (6.3 mm TS phone jack, unbalanced)
- AUX IN jack (3.5 mm TRS mini phone jack, unbalanced)
- DAMPER/SWITCH jack (6.3 mm TS phone jack)
- MIDI IN, OUT connectors
- USB Type-C port
- Display: 2.8-inch TFT IPS LCD
- Power supply: DC 9 V AC adapter (included), six AA batteries (alkaline or nickel-metal hydride)
- Battery life: Approx. 4 hours or more (when using alkaline batteries)
- Dimensions (W x D x H): 542 × 238 x 65 mm (21.34″ × 9.37″ x 2.56″)
- Weight: MK-2 2.2 kg/4.85 Ib, MK-2 MBK/MWH 2.1 kg/4.63 Ib (without batteries and included microphone)
- Included items: Condenser mic, AC adapter (DC 9 V), Precautions/Quick Start Guide
- Accessories (sold separately): DS-1H damper pedal, PS-1 or PS-3 pedal switch
- Specifications and appearance are subject to change without notice for improvement.
- The GUI design of this instrument was developed in collaboration with BLINKSONIC®.
- All product names and company names are the trademarks or registered trademarks of their respective owners.

https://korg.com/html_manual/microkorg2/
Documents / Resources
 |
KORG MK-2 Synthesizer Vocoder [pdf] User Guide MK-2 Synthesizer Vocoder, MK-2, Synthesizer Vocoder, MK-2 Vocoder |