ATIKA ASP 10 TS-2 Log Splitter

 Do not operate the machine before having read the operating instructions, understand all the notes, and assemble the machine as described here.
Keep the instructions in a safe place for future use.
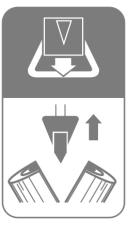
Extent of delivery
After unpacking, check the contents of the box for
- completeness
- possible transport damage.
| 1 | Pre-assembled device unit |
| 2 | Protective arm |
| 3 | Safety hook |
| 4 | Log lifter |
| 5 | Wheel |
| 6 | Wheel axle |
| 7 | Transport support wheel |
| 8 | Fastener bag |
| 9 | Operating instructions |
| 10 | Assembly and operating instruction sheet |
| 11 | Warranty declaration |

Report any damage or missing items to your dealer, supplied,r or the manufacturer immediately. Complaints made at a later date will not be acknowledged.
Symbols on the machine
- Carefully read the operator’s manual before the machine.
 Wear hearing protection when working with the machine to protect your hearing. Wear safety goggles when working with the machine to protect the eyes from chips and splinters.
 Wear safety shoes when working with the machine to protect the feet from falling logs.
 Wear safety gloves when working with the machine to protect the hands from chips and splinters
 Do not be exposed to rain. Protect against humidity.
 It is prohibited to remove or modify protective and safety devices.
 Must be operated by a single person only. Keep bystanders as well as pets and domestic animals away (minimum distance of 5 m) from the danger zone.
 Cutting and crushing risk! Never touch dangerous areas when the plitting blade is moving.
 Keep your workplace in an orderly condition! Untidiness can result in accidents.
 Caution! Moving machinery parts. Always pay full attention to the splitting blade’s movement.
 Caution! Switch off the motor and disconnect the mains plug before performing cleaning, maintenance, or repair work.
 Do not remove jammed logs with your hands.
 Dispose of the old oil properly (local oil disposal point). The old oil must not be poured into the ground or drainage system, or mixed with other waste.
 Vent the hydraulic system before putting the log splitter into the opera-tion. (see “Start-up”)
 Strapping point
 Lifting point
 Make sure that the motor turns in the correct direction (see motor arrow) because operation in the wrong direction damages the oil pump. (see “Start-up”)
- This product complies with European regulations specifically applicable to it.
Electrical devices do not go into the domestic rubbish.
Give devices, accessories, and packaging to eco-friendly recycling.
According to the European Directive 2012/19/EU on electrical and electronic scrap, electrical devices that are no longer serviceable must be separately collected and brought to a facility for environmentally compatible recycling.
See Working with the log splitter
Symbols operating instructions
 Potential hazard or hazardous situation. Failure to observe these instructions may lead to injuries or cause property damage.
 Observing this important information on proper instructions leads to malfunction. ndling. Failure
 User information. This information helps you to use
- Assembly, operation, and servicing Here you are explained exactly what to do.
 Important notes for environmentally compatible conduct. Failure to observe these instructions may lead to environmental damage.
- Please refer to the attached assembly and operating instruction sheet for references to figure numbers in the text.

Normal intended use
- The log splitter must only be used for splitting logs.
- The log splitter is only applicable for private utilization in the field of house and hobby.
- Only straight-cut logs are suitable for use with the log splitter
- Metal parts (nails, wire, etc.) must be removed from logs before splitting.
- The intended usage also includes compliance with the operating, servicing, and repair conditions prescribed by the manufacturer and following the safety instructions included in the instructions.
- The relevant accident prevention regulations for the opera-tion as well as the other generally acknowledged occupational medicine and safety rules must be complied with.
- Every other form of use is considered improper use. The manufacturer accepts no liability for any damages resulting from improper use, and any risk is in this case borne solely by the user.
- Unauthorized modifications on the log splitter exclude the liability of the manufacturer for damages of any kind resulting from it.
- Only persons who are familiarised with the device and informed about possible risks are allowed to prepare, operate, and service this device. Repair works may only be carried out by us or by a customer service agent nominated by us.
Residual risks
- Even if used properly, residual risks can exist even if the relevant safety regulations are complied with due to the design determined by the intended purpose.
- Residual risks can minimized if the “Safety advice and the “Intended usage” as well as the whole of the operating instruc-tions are observed.
- Observing these instructions, and taking proper care, will reduce the risk of personal injury or damage to the equipment.
- Risk of injury from ejected wood pieces.
- Risk of injury to feet from wood dropping down
- Risk of injury to fingers when detaching jammed wood pieces
- Noncompliance with safety instructions may result in injuries to the operator or property damages.
- Carelessness, failure to comply with the safety regulations, and incorrect use can result in injuries to your hands and fingers when the splitting blade is moving risks from electricity when using improper electrical connec-tions.
- Touching live parts of opened electrical components.
- Risk of fire and slipping by leaking hydraulic fluid.
- Impairment of hearing when working on the machine for longer periods without ear protection.
- In addition, despite all the precautionary measures taken, non-obvious residual risks can still exist.
Safety instructions
Before starting this device, read and keep to the following advice. Also, observe the preventive regulations of your professional association and the safety provisions applicable in the respective country, and protect yourself and others from possible injury.
- Pass the safety instructions on to all persons who work
- Keep these safety instructions in a safe place.
- Persons who work with the firewood splitter must have received proper instructions about the intended work and be familiar with the use of the firewood splitter and the safety instructions.
- Make yourself familiar with the equipment before using it, by reading and understanding the operating instructions.
- Do not use the machine for unsuitable purposes (see “Nor-mal intended use” and “Working with the log splitter”).
- Be attentive. Be observant. Attend to what you do. Start working with rationality. Do not use the device when you are tired or under the influence of drugs, alcohol, or mmedications One moment of carelessness when using the device can result in serious injuries.
- Children and young persons under 18 years of age as well as persons who have not read the instruction manual are not allowed to operate this product.
- Never work while persons, in particular small children, or pets are close to you.
- Do not allow other persons, especially children, to touch the tool or motor.
Personal protective equipment
- Never work without suited protective equipment.
- Do not wear loose-fitting clothes or jewelry; they could be caught by movable parts.
- Hairnet in case of long hair
- eye and ear protection
- Solid shoes with toe protection caps (safety shoes)
- Long pants
- protective gloves
- First-aid material
- Mobile telephone if required
Safety instructions – before working
Carry out the following checks before the initiation and regularly during the working process. Observe the relevant sections in the operating instruction manual:
- Is the device assembled completely and properly?
- Is the device in good and safe condition?
- Are the handles clean and dry?
- Before starting your work make sure that:
- no other persons, children, or animals stay within the working area,
- you can always step back without any barriers,
- you have always a secure standing position.
- Is the workplace free of the risks of a stumble? Keep your workplace in an orderly condition! Untidiness can result in accidents -Risk of stumbling!
- Take environmental influences into consideration:
- Do not work under insufficient light conditions (e.g. fog, rain, snow flurry, or twilight).
- Do not work in bad weather conditions (e.g. risk of lightning rain, snow flurry).
- Do not use this machine near inflammable liquids or gas es
- The operator is responsible for accidents or risks which occur to other persons or their properties.
- Ensure that you stand in a secure standing position and maintain your balance at all times.
- Do not modify the machine or parts of it.
Safety instructions – operating
- Take up a working position that is close to the controls.
- Never stand on top of the machine.
- Turn off the device when taking a break so that nobody is at risk. Secure the device against unauthorized access.
Safety notices for firewood splitters
- The log splitter may only be operated by a single person.
- Never try to split logs containing nails, wire, or other similar objects.
- Already split wood and wood chips create a dangerous working area. The operator may stumble, slip, or fall. Always keep the working area neat.
- Never place the hands-on or near any moving parts of the machine when it is switched on.
- Only split wood that corresponds to the dimensions is to be processed.
Safety instructions – while working
- Never work alone. Keep acoustic and visual contact with other persons at all times to allow immediate first aid in emergency cases.
- Immediately stop the engine in imminent danger or mergency cases.
- Never leave the device running unattended.
- Immediately stop working when you feel unwell (e.g. headache dizziness, nausea, etc.). Otherwise t, there is an increased risk of accidents.
- Do not overload the machine! You work better and safer in the given performance range.
- Take breaks when working so that the engine can cool down.
Behavior in an emergency
- Initiate all required first aid measures suited for the injury and seek qualified medical advice as quickly as possible.
- Protect the injured person against further injuries and immobilize the injured person.
General safety instructions
- Use the machine, accessories, tools, etc. in compliance with these instructions. When doing so take the work conditions and the activity to be carried out into account. The use of the machine for other than the intended applications may cause dangerous situations.
- Do not spray the machine with water. (origin of danger electric current).
- Do not leave the machine standing in the rain or use it when raining.
Maintain the machine carefully:
- Follow the maintenance instructions.
- Keep handles dry and free of oil, resin, and grease. Check the machine for possible damage:
- Before further use of the machine, e the safety devices must be checked carefully for their proper and intended function. Only operate the device with complete and correctly attached safety equipment and do not alter anything on the device that could impair its safety.
- Check whether movable parts function perfectly and do not stick or whether parts are damaged. All parts must be correctly installed and fulfill all conditions to ensure perfect operation.
- Damaged safety devices and parts must be properly repaired or exchanged by a recognized, specialist workshop; insofar as nothing else is stated in the instructions for use.
- Damaged or illegible safety labels have to be replaced.
- Do not allow any tool key to be plugged in! Before switching on, check always that all tools are removed.
- Store unused equipment in a dry, locked place out of the reach of children.
- Switch the machine off and remove the mains plug from the socket when
- Carrying out repair work.
- Performing maintenance and cleaning work.
- liminating faults.
- checking of connection cables whether they are swallowed or damaged
- Storage and transport
- Leaving unattended (even during short interruptions).
- Do not carry out repair operations on the machine other than those described in the section “Maintenance” but contact the manufacturer or authorized customer service centers.
- Repairs to other parts of the machine must be carried out by the manufacturer or one of his customer service points.
- Use only original spare parts and accessory parts. Accidents can arise for the user through the use of other spare parts. The manufacturer is not liable for any damage or injury resulting from such action.
Electrical safety
- Design of the connection cable according to IEC 60245 (H 07 RN-F) with a core cross-section of at least
 5 x 1.5 mm² for a maximum cable length of up to 10 m Never use the machine with a power supply cable of over 10 m in length. Longer power supply cables will cause a voltage drop the motor will not be able to provide its maximum performance and the operation of the machine will be impaired.
 - Plugs and coupler outlets on connection cables must be made of rubber, non-rigid PVC, or other thermoplastic material of the same mechanical stability or be covered with this material.
- The connector of the connection cable must be splash-proof. When installing the power supply cable observe that it does not interfere, is not squeezed, and the plug connec-tion does not get wet.
- Wind off completely the cable when using a cable drum. Do not use the cable for purposes for which it is not meant. Protect the cable against heat, oil, and sharp edges. Do not use the cable to pull the plug from the socket.
- Regularly check the extension cables and replace them if they are damaged.
- Do not use any defective connection cables.
- When working outdoors, only use extension cables especially approved and appropriately labeled for outdoor use.
- Do not set up any provisional electrical connections.
- Never bypass protective devices or deactivate them.
- The electrical connection or repairs to electrical parts of the machine must be carried out by a certified electrician one of our customer service points. Local regulations – especially regarding protective measures – must be observed.
Description of device / Spare parts
Please refer to the attached assembly and operating in action sheet.

Assembly
- Connect the firewood splitter to the power supply system only after having finished the complete as-sembly.
- Mount the wheels, the protective arm, the safety hook, the log file, r, and the transport support wheel as shown in Figures 2 – 9 in the assembly and operating chart.
- Make sure after mounting that all screwstightenedd firmly.
Location
- Do not operate the machine in the direct vicinity of gas or petrol pipes or containers, or any other easily inflammable materials.
- The machine must be placed stably on a solid and flat surface (such as a concrete floor). To ensure the stability, it is necessary to screw the machine with two dowels and screws (at least M12 x 160) on the ground.
Commissioning
- Check that the machine is completely and correctly assembled
- Before each use, check
- Connection cables for defects (cracks, cuts, etc.).
- Do not use any dedefectiveables there are no damages to the machine (see „safety instructions“)
- all screws are tight.
- check the hydraulic system for any possible leaks
- hydraulic hoses and fittings
- shut-off devices
- the oil level
Bleeding
- Vent the hydraulic system before putting the log splitter into operation.
- Unscrew the oil cap (22) by several turns so that air may escape from the oil tank.
- Leave the oil cap open during operation.
- Close the oil cap before moving the log splitter, as otherwise, othe oil will leak at this point.
- If the hydraulic system is not vented, the trapped air will damage the seals and cause permanent damage to the log splitter.
Mains connection
- Compare the voltage given on the machine model plate with the mains voltage and connect the machine to the relevant and properly earthed plug.
- Only use extension cables with sufficient core cross-section.
- Connect the machine via a 30 mA fault current safety switch.
- Fuse protection: 16 A time-lag

![]() Switching on:
Switching on:
Press the green button.
![]() Switching off
Switching off
Press the red button.
Before every use, check the function of the disconnection mechanism (by switching on and off). Do not use any device where the switch can not be switched on and off. Damaged switches must be repaired or replaced immediately by customer service.
Restart protection in case of power failure (zero-voltage initiator)
- The equipment will switch off automatically if there is a power cut. Repress the green button to switch it on again.
Log splitter with 400 V a3~
![]() Make sure that the motor turns in the correct direction (see motor arrow) because operation in the wrong direction damages the oil pump.
Make sure that the motor turns in the correct direction (see motor arrow) because operation in the wrong direction damages the oil pump.
Check the direction of rotation:
- Start the motor.
- Actuate both operating handles, the splitting blade moves down.
- If the splitting blade is already in the lowest position: actuate the return lever, and the splitting blade moves up.
- If the splitting blade does not move, switch off the motor and change the direction of rotation.
You can change the direction by placing a screwdriver in the slot provided in the plug collar, and adjust the correct direction n moving to the left or right app and lying slight pressure.
Hydraulics
Check the hydraulic lines and hoses before each use.
- Never operate the machine in the event of any possible danger from hydraulic fluid.
- Ensure that the machine and working area are clean and free of oil.
- The danger of slippage or fire!
- Check the hydraulic reservoir regularly to ensure that it contains enough hydraulic oil (see “Care and maintenance).
Working with the log splitter
What type of logs can I split?
Size of logs
- Log length min. 560 – max. 1040 mm
- Log diameter min. 100 – max. 300 mm
The log diameter is a recommended guideline figure, because: thin logs can be difficult to split if they contain knots or if the fibers are too strong. Do not try to split green logs. Dry logs are much easier to split and do not cause jams as often as green (damp) wood.
- Hardwood tenseness bursting: Exercise utmost caution! Be aware that wood with knots can burst open. Never split wood that has not been debranched beforehand.
Special instructions for splitting logs:
Preparations
The logs to be split should be cut to the maximum dimensions. Ensure also that the logs are cut straight and square. Wood with slanting ends can slip off during splitting. Place the log properly on the log splitter, so as not to cause any risk of stumbling or falling to the operator. Check before splitting if the splitting column has been sufficiently lubricated to allow its trouble-free retraction and extension.
 Operating
Two-hand operation
- This log splitter shall be operated by a single person. Never allow two or more persons to operate this log splitter.
- Never block the control handles.
- Press the green switch on the electric motor. Wait a few moments until the motor has reached its operating revolutions and the required pressure has been built up in the hyhydraulicump. Check the direction of the motor in the log splitter with the eephase motor (400 V 3~), because operation in the wrong direction damages the oil pump.
- Push down the operating handle on the left (12) until the log is held by the fixing claw (14). Adjust the fixing claw according to the height of the log. Loosen the wing screw (A) and adjust the fixing claw.
- Press and hold the operating handle left (12) and push the operating handle right (13) down to the half to split the log slowly first.

- Then press the right-hand control handle down to split the log to the end.
Splitting process
- With the right operating handle (13) you can adjust the splitting force according to the type of wood:

- Maximum splitting force at a lower speed for splitting particularly hard or stored logs or at the beginning of the splitting process middle position of the operating handle.
- High splitting speed with lower splitting force for splitting normal logs or at the end of the splitting process lower position of the operating handle.
Reverse
- Push down the return lever (25) until the splitting blade (17) is in the highest position again.
Before each use, make sure that the operating handles function properly.
Adjusting the stroke height
In the case of shorter wood pieces, the efficiency can be increased by shortening the return of the splitting cutter.
- Place the log on the base plate and move the splitting blade down to approx. 2 cm from the log by pressing down the two operating handles.
- Release the operating handles so that the splitting blade remains in this position and switch off the unit.
- Pull out the power.
- Shorten the return path at the rod fitted to the side by fixing the holding screw at the necessary height.
Log lifter
![]() You can use the log lifter to raise the log for large and heavy pieces of wood.
You can use the log lifter to raise the log for large and heavy pieces of wood.
- Release the safety hook (3) from the log lifter (4).
- Now lower the splitting knife until the log lifter is on the ground.
- Now place the log on the log lifter and let the splitting blade move up again.
- Now you can place the log on the base plate.
Splitting logs:
- Place the log to be split vertically on the base plate.
- Make sure that the log is level and stands independently on the base plate. Never try to split the log horhorizontallynly split the logs in the direction of the wood fibers. The machine can be damaged if you try to split wood across the grain.
- Make sure that the fixing claw (14) is adjusted according to the height of the log.
- Hook the safety hook into the log lifter.
- Remove split wood pieces from your direct working area. This helps to avoid accidents.
- Never try to split two logs at once.
- Never try to remove or replace the log during the splitting process.
Never try to force the splitting of the log by maintaining the pressure for several seconds. This can lead to damage to the machine. Position the log again on the base plate and repeat the splitting operation or put the log to one side.
How to release a jammed log?
There is a risk of knotted logs getting stuck during the splitting process.
- Switch the machine off and disconnect the power.
- Do not remove jammed logs with your hands.
- Carefully move the stuck log with a crowbar backward and forward Don´t damage the splitting pillar.
- Never hammer on the stuck log.
- Never use a saw to cut the stuck log out of the machined not enlist the aid of a second person – this is a one-man job.
Finishing work:
- Move the splitting blade to the highest position (retracted state).
- Switch off the machine and disconnect the mains plug.
- Follow the care and maintenance instructions.
Maintenance and care
- Before each maintenance and cleaning work Switch off the device.
- Pull out the power plug.
Maintenance and repair work other than those described in this chapter is only allowed to be carried out by service staff. For maintaining and cleaning, removed security devices must unconditionally be mounted properly and proven again. Only use genuine spare parts. Other than genuine parts may result in unpredictable damages and injury. Be sure to remove any tools from the machine after completion of service work.
Wear protective gloves to avoid injury to the hands.
Observe the following to to keep the log splitter in good working order:
- Clean the machine thoroughly after you have finished using it.
- Remove any residual remains on the machine.
- Check the oil level and change the oil as necessary.
- Check the device for obvious defects such as
- loose fastening elements
- worn or damaged components
- correctly assembled and faultless covers and protective devices.
- Check hydraulic hoses and hose connections regularly for any leaks and firm fittings.
- Lubricate the splitting column (18) regularly or oil it using environmentally friendly spray oil.
Sharpening the splitting blade
After longer operating periods, for reduced splitting per- formance or slight deformation of the cutting edge, grind the splitting blade or sharpen it with a fine file (remove burrs).
How do I check the oil level?
- The splitting column must be in a run-in state.
- Unscrew the oil dipstick.
- Clean the dipstick and the oil seal.
- Screw the oil dipstick back into the opening and tighten it.
- Unscrew the oil dipstick again.
- The oil level must lie between MIN and MAX.
- Replenish the same type of oil if the level is too low (MIN or less).
- Check the oil seal and replace it if it is damaged in any way.
- Replace the dipsticwithto the oil reservoir.
- Release the dipstick by a few turns to allow the air to escape from the oil tank.
When should I change the oil?
The first oil change should be carried out after 50 operat-ing hours, and then every 500 operating hours.
- Two persons are required.
![]() Changing the oil:
Changing the oil:
- The splitting column must be in a run-in state.
- Unscrew the oil dipstick.
- Place a container under the log splitter to catch the old oil. The container should have a capacity of at least 3. liters.
- Screw off the drain plug (29) to allow the oil to flow out.
- The entire oil will not drain but a residue will remain in the oil circulation.
- Insert the seal and drain plug again.
- Pour in the new hydraulic oil (Quantity, see “Technical Data”) using a clean funnel.
Fill in the oil slowly and not all at once. Check the oil level in between.
Never fill in too much oil. - Clean the dipstick and the oil seal.
- Check the oil seal and replace it if it is damaged in any way.
- Replace the dipstick with the oil reservoir.
- Release the dipstick by a few turns to allow the air to escape from the oil tank.
- After an oil change, let the splitting column move up and down several times without load.
Dispose of the old oil properly (local oil disposal point). The old oil must not be poured into the ground or drainage system, or mixed with other waste.
Hydraulic oil
We recommend the following hydraulic oils for the hydraulic lic cylinder:
- Shell Tellus T 22
- Aral Vitam Gf 22
- BP Energol HLP 22 order no. 400142 (1 litre)
- Mobil DTE 11
- or equivalent
Do not use any other types of oil. The use of any other type of oil will adversely affect the operation of the hydraulic cylinder.
Transport instructions
 Before each transport
- Move the splitting blade up Switch off the device.
- Close the oil cap.
- Pull the t power plug.
- Remove the split woodLoosen the locking pin (E) and fix the transport support wheel (7) in position C for transport. Position D is only for storage.
- If necessary, swivel the transport drawbar (26) down. Grasp the handle (16) and carefully tilt the firewood splitter towards you.
- Now you can easily transport the firewood splitter.
- For transport, for example, on the trailer: While doing so, secure the log splitter at the point (b) provided with straps.
- Transport with a crane: Attach the rope to the lifting point (a) provided for this purpose.
- Never lift the unit by the transport handles (16).
- Carefully secure the unit against tipping oversliding ing away before each transport.
Storage
- Before each storage
- Move the splitting blade up
- Switch of the f device.
- Close the oil cap
- Pull out the t power plug
Store machines that are not in use in a dry locked place protected against frost and outside the reach of children and unauthorized persons. Before extended storage, please observe the followingincreaseease the service life of the device to ensure smooth operation:
- Thoroughly clean the device.
- Check the device for damaged or worn parts.
Guarantee
Please observe the enclosed terms of the guarantee.
Possible faults
![]() Before each fault elimination:
Before each fault elimination:
- Switch of the f device.
- Pull the power plug.

In case of further faults or inquiries please contact your local dealer.
Technical data


Technical modifications reserved!
Documents / Resources
 |
ATIKA ASP 10 TS-2 Log Splitter [pdf] Instruction Manual ASP 10 TS-2, ASP 12 TS-2, ASP 14 TS-2, ASP 10 TS-2 Log Splitter, ASP 10 TS-2, Log Splitter, Splitter |


