
1. Introduction
Thank you for choosing the Jesverty SPS-3010CII Dual Output DC Power Supply. This device is a high-precision, stable, and reliable bench power supply designed for various applications including laboratories, educational sites, factory manufacturing tests, maintenance repairs, battery charging, and DIY electronics projects.
This manual provides detailed instructions for the safe and efficient operation, setup, maintenance, and troubleshooting of your SPS-3010CII power supply. Please read this manual thoroughly before use and retain it for future reference.
2. Safety Instructions
- Always connect the power supply to a grounded electrical outlet.
- Do not operate the device in wet or damp conditions.
- Ensure proper ventilation around the unit to prevent overheating. Do not block ventilation openings.
- Before making any connections or disconnections, ensure the power supply is turned off and disconnected from the main power source.
- Do not exceed the maximum voltage and current ratings of the device or the connected load.
- In case of smoke, unusual odors, or abnormal operation, immediately turn off the power supply, disconnect it from the mains, and contact customer support.
- Only qualified personnel should attempt to repair the device. There are no user-serviceable parts inside.
- Keep the device away from flammable materials and explosive environments.
3. Product Overview
The Jesverty SPS-3010CII is a versatile DC power supply featuring two independent output channels (CH1 and CH2) and advanced functionalities for precise power delivery.
Key Features:
- Dual Output & Dual Range Design: Two independently adjustable channels. Expand output range via series (0-62V, 0-10A) or parallel (0-32V, 0-20A) connection.
- USB-A & USB-C 20W Quick-Charge: Integrated fast-charging ports for external devices.
- Encoder Adjustment & Output Control: Precision encoder for digital voltage and current adjustment, with dedicated output control buttons for CH1 and CH2.
- Comprehensive Protection: Over-Current Protection (OCP), Temperature-regulated cooling fan, and Short Circuit Alarm.
- Compact & Lightweight Design: Space-saving form factor for various work environments.
- High Precision Display: 4-digit LED display with 0.01V voltage and 0.01A current accuracy.
Front Panel Layout:

Figure 3.1: Front Panel Overview of the Jesverty SPS-3010CII DC Power Supply, showing dual outputs, display, control buttons, and USB ports.
- Power Switch: Turns the unit on/off.
- Display Screen: Shows voltage, current, and power for CH1 and CH2.
- CH1/CH2 Buttons: Selects the channel for adjustment.
- RETURN Button: Returns to the main display or previous setting.
- SER Button: Activates series connection mode for combined output.
- PARA Button: Activates parallel connection mode for combined output.
- OCP Button: Toggles Over-Current Protection.
- OUTPUT Button: Enables or disables the output for the selected channel.
- USB-A & USB-C Ports: 20W fast charging outputs.
- Encoder Knob: Rotates to adjust values, presses to switch digit selection.
- Output Terminals (CH1, CH2, SER/PARA): Connect test leads for power output.
4. Setup
- Unpacking: Carefully remove the power supply and all accessories from the packaging. Verify that all items listed in the "What's in the Box" section are present.
- Placement: Place the power supply on a stable, level surface with adequate ventilation. Ensure there is sufficient space around the unit for airflow, especially around the rear cooling fan.
- Power Connection: Connect the provided power cord to the AC input socket on the rear panel of the power supply, then plug the other end into a grounded electrical outlet.
- Initial Power On: Press the power switch on the front panel to turn on the unit. The display should illuminate, showing default voltage and current settings.
- Self-Test: The unit will perform a brief self-test upon startup. Observe the display for any error messages.
5. Operating Instructions
5.1 Basic Operation (Independent Channels)
- Select Channel: Press the CH1 or CH2 button to select the desired output channel. The selected channel's indicator will light up.
- Adjust Voltage: With the channel selected, press the encoder knob. The voltage digit will blink. Rotate the knob to adjust the voltage. Press the knob again to move to the next digit or to confirm the setting.
- Adjust Current: After setting the voltage, press the encoder knob until the current digit blinks. Rotate the knob to adjust the current limit. Press the knob again to move to the next digit or to confirm the setting.
- Enable Output: Connect your load to the corresponding output terminals (CH1 or CH2). Press the OUTPUT button to enable the power output. The output indicator will light up.
- Disable Output: Press the OUTPUT button again to disable the power output.

Figure 5.1: High precision 4-digit LED display showing accurate voltage and current readings.
5.2 Series and Parallel Output Combination
The SPS-3010CII allows for internal series or parallel connection of its two channels to expand the output range.
- Important: Only select CH1 to activate and switch between Series/Parallel modes.
5.2.1 Series Mode (SER)
In series mode, the voltages of CH1 and CH2 are added, while the current remains the same as the lower of the two channels. This provides a higher voltage output (up to 62V) with the same current (up to 10A).
- Ensure both CH1 and CH2 are set to the desired voltage and current limits independently.
- Select CH1 by pressing the CH1 button.
- Press the SER button. The SER indicator will illuminate. The display will show the combined voltage and the lower of the two current settings.
- Connect your load to the dedicated SER/PARA output terminals.
- Press the OUTPUT button to enable the combined output.
Figure 5.2: Display showing combined output in Series Mode (e.g., 62V, 10A).
5.2.2 Parallel Mode (PARA)
In parallel mode, the currents of CH1 and CH2 are added, while the voltage remains the same as the lower of the two channels. This provides a higher current output (up to 20A) with the same voltage (up to 32V).
- Ensure both CH1 and CH2 are set to the desired voltage and current limits independently.
- Select CH1 by pressing the CH1 button.
- Press the PARA button. The PARA indicator will illuminate. The display will show the combined current and the lower of the two voltage settings.
- Connect your load to the dedicated SER/PARA output terminals.
- Press the OUTPUT button to enable the combined output.
Figure 5.3: Display showing combined output in Parallel Mode (e.g., 32V, 20A).
Video 5.1: Demonstration of setting up and using the parallel output function on the Jesverty DC Power Supply. This video illustrates how to simultaneously press the "PARA" button and adjust values using the encoder knob.
5.3 Over-Current Protection (OCP)
The OCP function protects your load from excessive current. When activated, if the output current exceeds the set limit, the power supply will automatically cut off the output and trigger an alarm.
- Select the desired channel (CH1 or CH2).
- Press the OCP button to activate or deactivate the over-current protection. The OCP indicator will light up when active.
- The current limit set for the channel acts as the OCP threshold.
- If OCP is triggered, disconnect the load, resolve the over-current condition, and then press the OUTPUT button to reset and re-enable the output.
Figure 5.4: The OCP button and indicator for activating over-current protection, which detects and responds to short circuits or overcurrents.
5.4 USB Quick-Charge Ports
The power supply includes USB-A and USB-C ports on the front panel, both supporting 20W fast charging.
- Connect your smartphone, Arduino UNO, Raspberry Pi, or other compatible electronic modules to the USB-A or USB-C port for charging or power.
- These ports operate independently of the main DC outputs.
5.5 Battery Charging Function
The SPS-3010CII can be used to charge various types of batteries, including Ni-MH, Lithium, LiFePO4, and Lead-Acid batteries.
- Important: Always set the correct voltage and current limits for the specific battery type you are charging before connecting the battery. Incorrect settings can damage the battery or the power supply.
- Refer to the battery manufacturer's specifications for appropriate charging voltage and current.
- Connect the battery to the appropriate output terminals (CH1, CH2, or combined SER/PARA, depending on the required voltage/current). Ensure correct polarity.
- Enable the output and monitor the charging process.

Figure 5.5: Illustration of the power supply connected for battery charging, showing compatibility with various battery types.
6. Maintenance
- Cleaning: Disconnect the power supply from the mains before cleaning. Use a soft, dry cloth to wipe the exterior of the unit. Do not use abrasive cleaners or solvents.
- Ventilation: Regularly check that the ventilation openings are clear of dust and debris to ensure proper cooling.
- Storage: When not in use for extended periods, store the power supply in a cool, dry place, away from direct sunlight and extreme temperatures.
- Inspection: Periodically inspect the power cord and test leads for any signs of damage. Replace damaged components immediately.
7. Troubleshooting
| Problem | Possible Cause | Solution |
|---|---|---|
| No power when turned on | Power cord not connected; Power outlet faulty; Power switch off. | Ensure power cord is securely connected. Test the outlet with another device. Confirm power switch is in the 'ON' position. |
| No output voltage/current | Output disabled; OCP triggered; Incorrect settings; Faulty test leads. | Press the OUTPUT button to enable. Check if OCP indicator is on and reset if necessary. Verify voltage/current settings. Check test lead connections and integrity. |
| OCP (Over-Current Protection) frequently triggers | Load draws too much current; Current limit set too low. | Increase the current limit setting (ensure it's safe for your load). Check your load for short circuits or excessive current draw. |
| Fan is noisy or unit overheats | Blocked ventilation; High ambient temperature; Heavy load. | Ensure ventilation openings are clear. Operate in a cooler environment. Reduce the load if possible. |
| Inaccurate readings | External interference; Calibration required. | Move away from strong electromagnetic fields. If persistent, contact customer support for calibration information. |
If you encounter problems not listed here or if the suggested solutions do not resolve the issue, please contact Jesverty Customer Service for assistance.
8. Specifications
| Parameter | Value |
|---|---|
| Model Number | SPS-3010CII |
| Brand | Jesverty |
| Output Voltage (Independent) | 0-32V DC (per channel) |
| Output Current (Independent) | 0-10A (per channel) |
| Output Voltage (Series Mode) | 0-62V DC |
| Output Current (Series Mode) | 0-10A |
| Output Voltage (Parallel Mode) | 0-32V DC |
| Output Current (Parallel Mode) | 0-20A |
| Maximum Power | 620 Watts |
| Display Accuracy | 0.01V, 0.01A |
| USB-A & USB-C Output | 20W Quick-Charge (each) |
| Protection Features | OCP (Over-Current Protection), Overload Protection, Short Circuit Alarm |
| Cooling | Temperature-regulated fan |
| Dimensions (D x W x H) | 8.46 x 7.36 x 4.45 inches (215 x 187 x 113 mm) |
| Weight | Approx. 4.5 lbs (2.1 kg) |
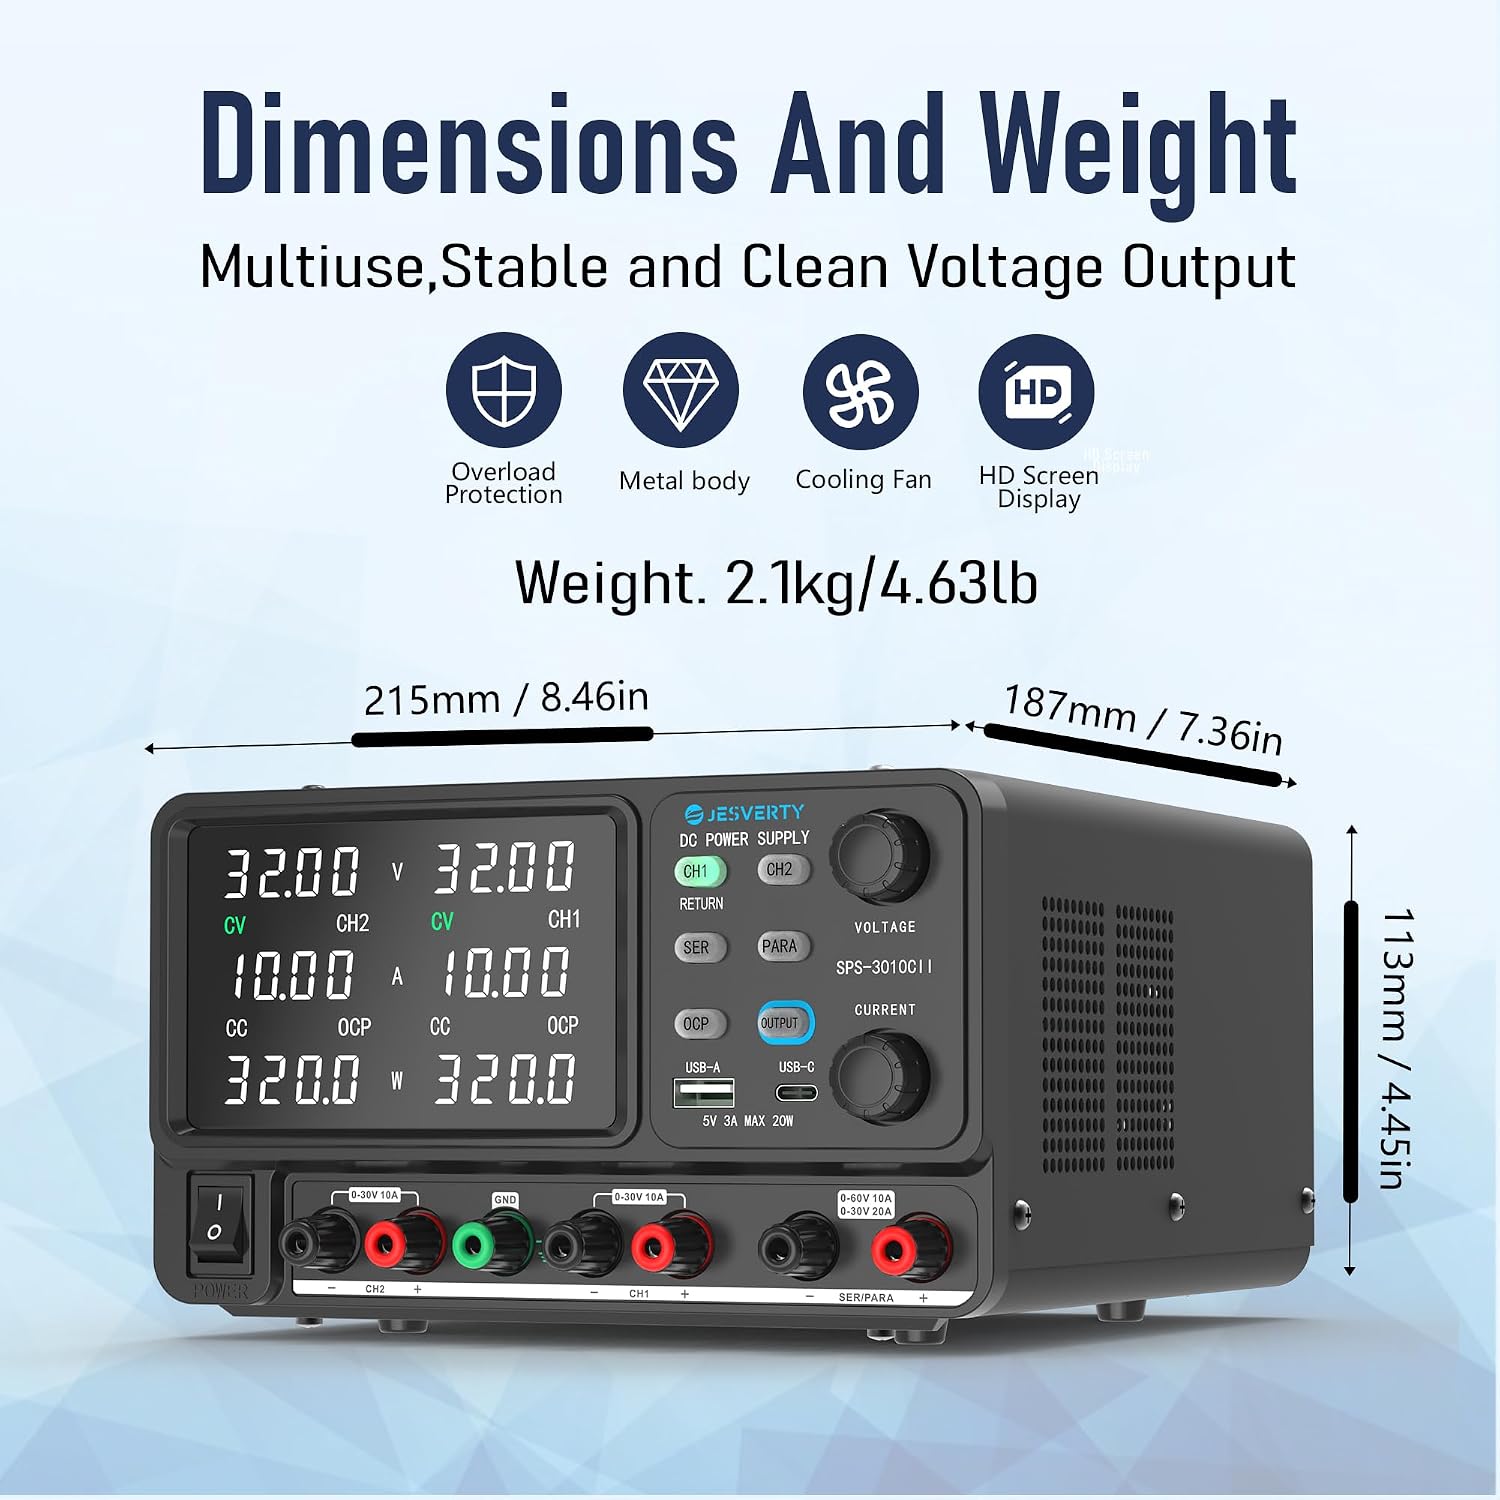
Figure 8.1: Physical dimensions and weight of the power supply.
9. Warranty and Customer Support
Your Jesverty SPS-3010CII DC Power Supply comes with a manufacturer's warranty. Please refer to the warranty card included in your package for specific terms and conditions.
For technical support, questions, or any issues regarding your product, please do not hesitate to contact Jesverty Customer Service.
- Contact Method: You can reach Jesverty Customer Service via Amazon message or through the email address provided on the back of your instruction manual.
- Please have your model number (SPS-3010CII) and purchase details ready when contacting support.


