
1. Introduction
Thank you for choosing the SIHOO B300-PRO Ergonomic Office Chair. This chair is designed to provide superior comfort and support for extended periods of sitting, whether for work, gaming, or relaxation. Featuring advanced ergonomic adjustments such as 6D armrests, multi-directional lumbar support, and a breathable mesh design, the B300-PRO adapts to your body's movements and posture. This manual will guide you through the assembly, operation, and maintenance of your new chair to ensure you get the most out of its features.
2. Safety Information
- Always ensure all bolts and screws are securely tightened before using the chair.
- Do not stand on the chair. Use it only for sitting.
- Do not exceed the maximum weight capacity (refer to specifications).
- Keep children away from moving parts during adjustment to prevent injury.
- Avoid placing heavy objects on the armrests or backrest when not seated.
- Use the chair on a flat, stable surface to prevent tipping.
- Regularly inspect the chair for any loose parts or damage. Discontinue use if any damage is found.
3. Assembly Instructions
The SIHOO B300-PRO chair requires assembly. Please follow these instructions carefully. It is recommended to assemble the chair in a spacious area, and due to the weight of some components, having a second person assist may be beneficial. All necessary tools are included.
- Unpack Components: Carefully remove all parts from the packaging. Verify that all components listed in the parts list are present.
- Attach Casters to Base: Insert the casters into the holes on the chair base until they click into place.
- Insert Gas Lift: Place the gas lift cylinder into the center hole of the chair base.
- Assemble Seat Mechanism: Attach the seat mechanism to the underside of the seat cushion using the provided screws. Ensure the front of the mechanism aligns with the front of the seat.
- Attach Armrests: Secure the armrests to the seat assembly using the designated screws.
- Attach Backrest: Connect the backrest to the seat assembly. Ensure the lumbar support mechanism is correctly aligned.
- Attach Headrest: Slide the headrest into its designated slot at the top of the backrest.
- Connect Seat to Gas Lift: Carefully place the assembled seat onto the gas lift cylinder.
- Final Check: Ensure all screws are tightened and all parts are securely connected before use.
Note: The assembly process typically takes around 30 minutes. Gloves are provided to protect your hands during assembly.
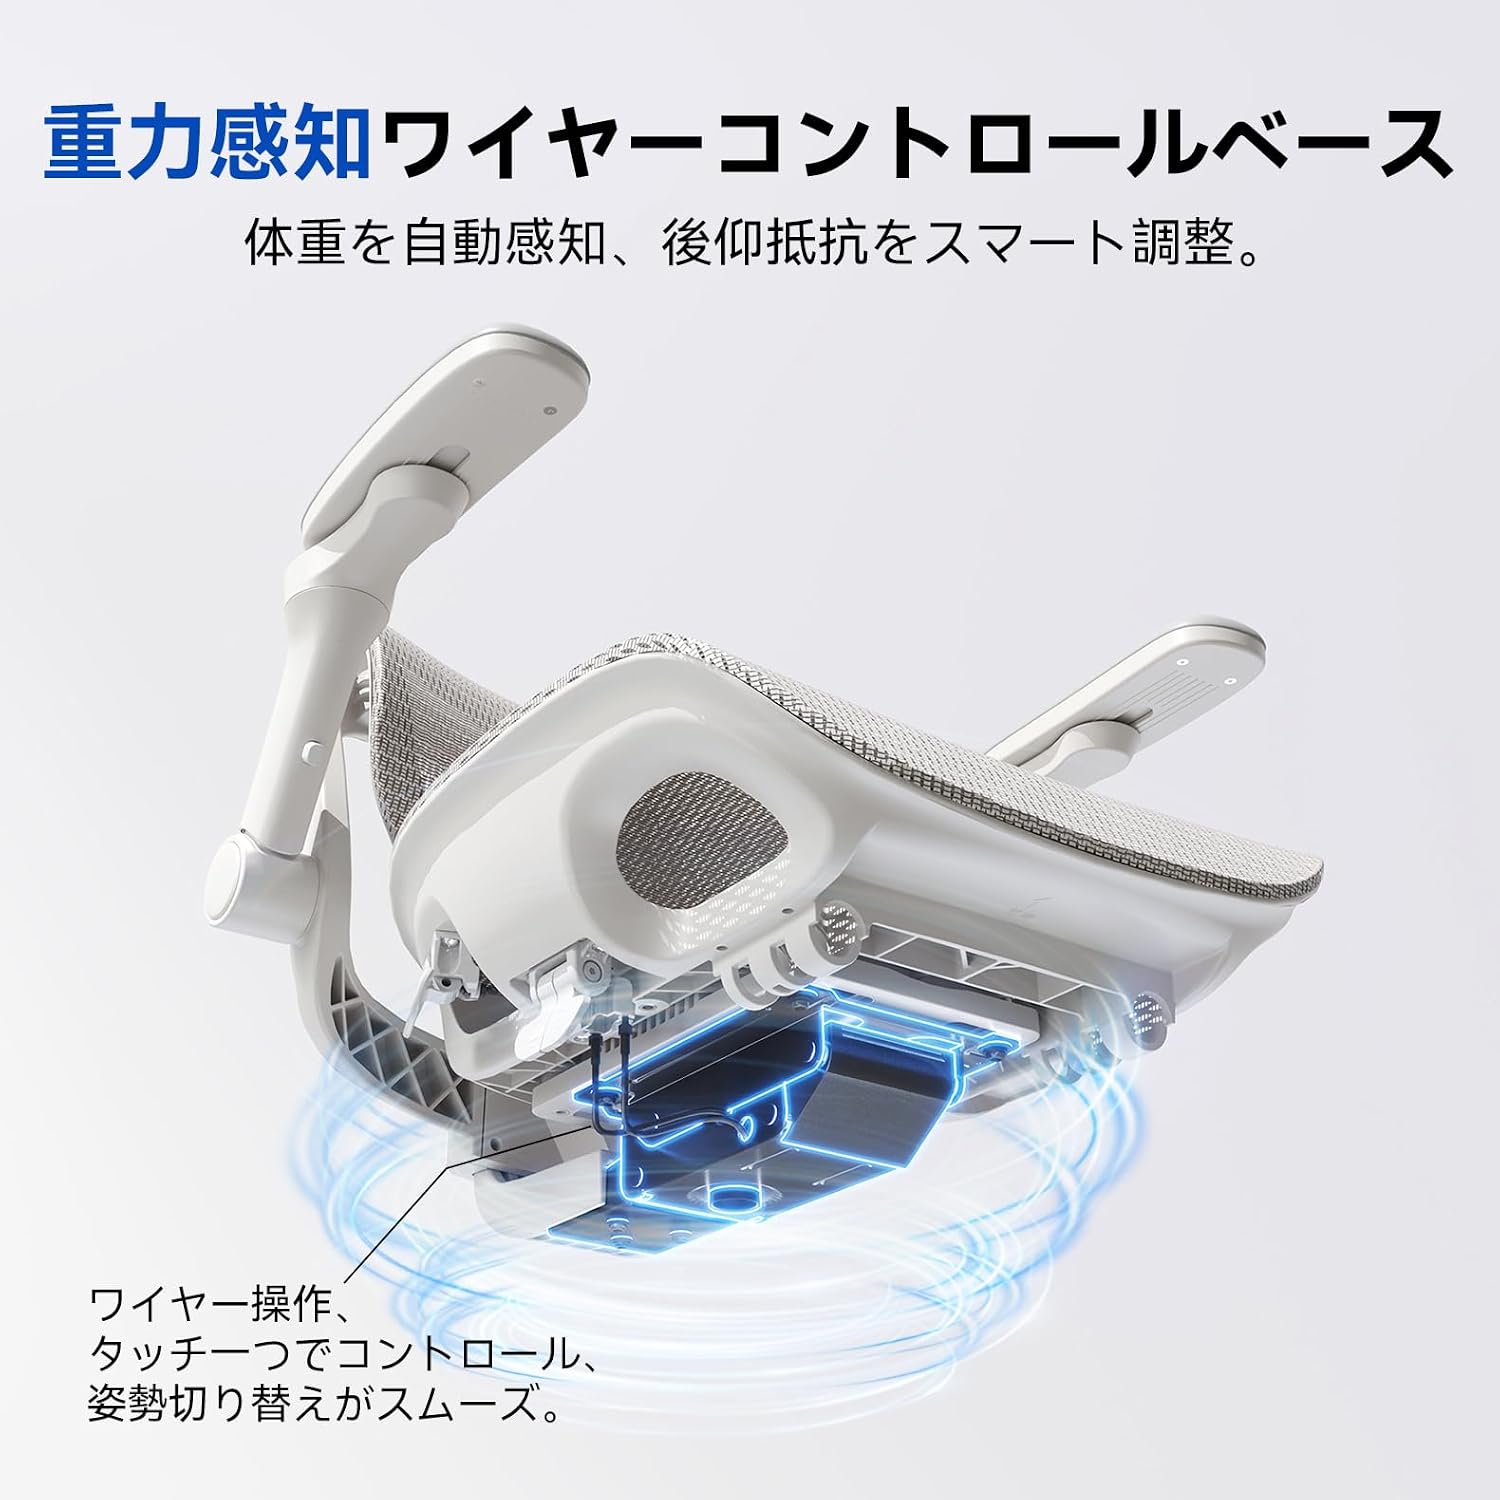
Image: All components of the SIHOO B300-PRO chair laid out for assembly, including the base, casters, gas lift, seat, backrest, armrests, and headrest.
4. Operating Instructions
Your SIHOO B300-PRO chair offers multiple adjustment options for personalized comfort. All primary adjustments are conveniently located under the seat.
4.1. Seat Height Adjustment
- To raise the seat: While standing, pull the right lever (typically) upwards. The seat will rise automatically. Release the lever at the desired height.
- To lower the seat: While seated, pull the right lever upwards. The seat will lower. Release the lever at the desired height.
- The chair features a 5-stage height adjustment mechanism.
4.2. Recline Function and Lock
- To recline: Pull the left lever (typically) outwards to unlock the backrest. Lean back to the desired angle.
- To lock recline: Push the left lever inwards to lock the backrest at one of the three preset angles: 110°, 123°, or 135°.
- The smart mechanism automatically adjusts recline resistance based on your body weight.

Image: The gravity-sensing wire control base located under the seat, illustrating how a single touch controls height and recline, ensuring smooth posture changes.
4.3. 6D Armrest Adjustment
The 6D armrests offer extensive customization to support various postures and activities:
- Up/Down (4.5cm): Press the button on the side of the armrest and slide it vertically.
- Front/Back (4.5cm): Slide the armrest pad horizontally forward or backward.
- Left/Right (1.5cm): Slide the armrest pad horizontally left or right.
- Rotation (360°): Rotate the armrest pad to your preferred angle.
- Width Adjustment: The armrests can be moved inwards or outwards to adjust the overall width.
- Recline Linkage: The armrests move in conjunction with the backrest when reclining, maintaining continuous arm support.

Image: A visual guide demonstrating the six directions of adjustment for the armrests: up/down, front/back, left/right, rotation, width, and recline linkage.
4.4. Multi-Directional Lumbar Support
The lumbar support system is designed to adapt to your lower back curve, providing targeted support:
- Up/Down (50mm): Adjust the height of the lumbar support by sliding it vertically.
- Front/Back (20mm): Adjust the depth of the lumbar support by sliding it horizontally.
- Adaptive Movement (10mm front/back, 3° left/right): The lumbar support dynamically follows your movements, filling the gap between your back and the chair to maintain spinal alignment.

Image: Detailed illustration of the 4D micro-precision lumbar support, highlighting its 50mm vertical adjustment, 20mm horizontal extension, 10mm adaptive front/back movement, and 3° left/right adaptive movement.
4.5. Headrest Adjustment
- Height Adjustment (11cm): Slide the headrest up or down to align with your neck and head.
- Angle Adjustment (20° bracket rotation, 45° headrest rotation): Tilt the headrest to find the most comfortable angle for your head and neck support.

Image: Illustration detailing the 3D bionic wide headrest's adjustments, including 11cm vertical slide, 20° bracket rotation, and 45° headrest rotation for comprehensive head and neck support.
4.6. Seat Depth Adjustment
- To adjust seat depth: Locate the lever or button under the seat (often near the front). Pull or press it and slide the seat cushion forward or backward to achieve optimal thigh support. Release the lever/button to lock the position.

Image: A composite image demonstrating how the chair adapts to different postures, including focused work, long-term desk work, relaxed reclining, and side-facing for meetings, highlighting the adaptive lumbar and seat adjustments.
5. Maintenance
- Cleaning: Wipe the mesh and plastic parts with a damp cloth and mild detergent. Avoid abrasive cleaners.
- Mesh Care: The breathable mesh is durable. Avoid sharp objects that could tear or puncture it.
- Lubrication: Moving parts generally do not require lubrication. If any squeaking occurs, consult customer support.
- Fasteners: Periodically check all screws and bolts to ensure they are tight. Re-tighten if necessary.
- Casters: Clean casters regularly to remove hair and debris that may hinder smooth movement.
6. Troubleshooting
| Problem | Possible Cause | Solution |
|---|---|---|
| Chair does not adjust height | Gas lift malfunction or lever not engaged. | Ensure the height adjustment lever is fully pulled. If the issue persists, the gas lift may need replacement. Contact support. |
| Backrest does not recline or lock | Recline mechanism locked or damaged. | Ensure the recline lock lever is disengaged. Check for any obstructions. If damaged, contact support. |
| Chair squeaks or wobbles | Loose fasteners or worn components. | Tighten all visible screws and bolts. If squeaking persists, identify the source and apply a small amount of silicone spray if appropriate, or contact support. |
| Casters do not roll smoothly | Debris caught in casters. | Turn the chair over and remove any hair, dust, or debris from the caster wheels. |
| Lumbar support feels too firm | Personal preference or incorrect adjustment. | Adjust the lumbar support's height and depth to find a more comfortable position. Experiment with different settings. |
7. Specifications
| Brand | SIHOO |
| Model | B300-PRO (Specific models: B300-PRO-M102, B300-PRO-JT-1) |
| Color | Light Gray |
| Material | Polypropylene, Mesh |
| Product Dimensions (D x W x H) | 72 cm x 73.5 cm x 110 cm |
| Item Weight | 19.8 kg |
| Special Features | 6D Armrests, Multi-directional Lumbar Support, 5-stage Height Adjustment, 3-stage Recline Lock (110°, 123°, 135°), Breathable Mesh, Centralized Controls |
8. Warranty and Support
The SIHOO B300-PRO office chair comes with a 3-year quality guarantee. This warranty covers manufacturing defects and material flaws under normal use.
For warranty claims, technical assistance, or any questions regarding your product, please contact SIHOO customer support through the retailer where you purchased the chair or visit the official SIHOO website for contact information. Please have your purchase receipt and model number ready when contacting support.


