
Introduction
Thank you for choosing the Ketive Outdoor Elevated 2-Tier Chicken Coop. This manual provides essential information for the safe and efficient assembly, operation, and maintenance of your new chicken coop. Please read all instructions carefully before beginning assembly and retain this manual for future reference.
Safety Guidelines
- Always wear appropriate safety gear, such as gloves, during assembly.
- Ensure all parts are securely fastened before placing animals inside.
- Place the coop on a level, stable surface to prevent tipping.
- Regularly inspect the coop for any damage or loose components.
- Keep children and pets away from the assembly area.
Package Contents
Before assembly, verify that all components listed below are present. If any parts are missing or damaged, please contact customer support.
| Component | Quantity |
|---|---|
| Wooden Panels (various sizes) | Set |
| Galvanized Wire Mesh Panels | Set |
| Nesting Box Components | 1 Set |
| Slide-Out Tray | 1 |
| Ramp | 1 |
| Roost Bars | 2 |
| Hardware (screws, hinges, latches, L-brackets) | Assorted |
| Assembly Manual | 1 |
Assembly Instructions
Follow these steps carefully to assemble your Ketive Chicken Coop. It is recommended to have two adults for assembly.
-
Step 1: Prepare the Base
Assemble the bottom frame of the coop using the designated wooden panels and screws. Ensure all connections are tight and stable.
Image: Diagram showing the assembly of the coop's base frame.
-
Step 2: Install Side Panels and Roosting Area
Attach the side panels to the base. Construct the elevated roosting area, ensuring the internal roost bars are securely fitted.
Image: Diagram illustrating the attachment of side panels and the roosting area.
-
Step 3: Attach Nesting Box and Roof
Secure the 3-compartment nesting box to the side of the coop. Install the roof panels, ensuring they are weather-resistant and properly aligned.
Image: Diagram showing the installation of the nesting box and roof.
-
Step 4: Insert Slide-Out Tray and Ramp
Slide the removable tray into its designated slot beneath the roosting area. Attach the non-slip ramp for easy access between the ground and the elevated coop.
Image: Diagram illustrating the insertion of the slide-out tray and attachment of the ramp.
For a visual guide, please refer to the official product video below:
Video: Official product video demonstrating the features and assembly of the Ketive Elevated 2-Tier Hen House with 3-Compartment Nesting Box.
Operating Instructions
Nesting Box Access
The 3-compartment nesting box is designed for easy egg collection. The top lid can be propped open using the wooden support rod, allowing hands-free access without disturbing the hens inside the coop.

Image: Close-up view of the 3-compartment nesting box with its lid open, showing eggs inside. Features include a leak-proof PVC design and a metal lock.
Chicken Access and Security
The coop features a sliding door for chickens to move between the elevated roosting area and the ground run. Ensure the door is securely closed at night to protect your flock from predators. The non-slip ramp provides safe passage for your chickens.

Image: Side view of the chicken coop showing a chicken entering through the sliding door and the non-slip ramp.
Expandable Run Connection
This coop is designed to connect with compatible wire mesh chicken runs (sold separately) to provide a larger activity space for your flock. Follow the instructions provided with the run extension for proper attachment.

Image: Diagram showing the dimensions of the coop and how it can connect to an expandable run for increased space.
Maintenance
Cleaning the Coop
Regular cleaning is crucial for the health of your chickens. The slide-out tray makes this process simple:
- Pull out the metal-lined tray from beneath the roosting area.
- Empty accumulated droppings and bedding into a compost bin or waste receptacle.
- Wipe the tray clean with a damp cloth and a mild, pet-safe disinfectant.
- Replace with fresh bedding before reinserting the tray.

Image: Close-up of the pull-out tray, demonstrating its smooth operation for quick and easy cleanup.
Additionally, the large front door and observation window provide multiple access points for thorough cleaning of the entire coop interior.

Image: Diagram highlighting the three access areas (front door, nesting box lid, and slide-out tray) for easy cleaning.
General Care
- Periodically check all screws and fasteners for tightness and re-tighten as needed.
- Inspect the wooden components for signs of wear, rot, or insect damage. Apply a pet-safe sealant if necessary to prolong the coop's lifespan.
- Ensure the galvanized wire mesh is intact to prevent predators from entering.
- Clean the nesting boxes regularly and replace bedding to maintain hygiene.
Troubleshooting
| Problem | Possible Cause | Solution |
|---|---|---|
| Coop feels unstable. | Loose fasteners; uneven ground. | Check and tighten all screws. Relocate the coop to a level surface. |
| Difficulty sliding out the tray. | Accumulated debris; warped wood. | Clear any debris from the tray's runners. Inspect for warping and contact support if severe. |
| Predator access concerns. | Unsecured doors/latches; damaged mesh. | Ensure all doors and nesting box lids are latched. Repair or replace damaged mesh immediately. The elevated design and L-shaped reinforcements help deter predators. |
| Chickens not using nesting boxes. | New environment; insufficient bedding. | Give chickens time to adjust. Ensure nesting boxes have ample, clean bedding. |
Specifications
- Model: KET-PET87-KY
- Dimensions (L x W x H): 39.1" x 32.7" x 39.4"
- Capacity: Designed for 2-4 chickens
- Material: Fir wood, Galvanized wire mesh
- Features: Elevated 2-tier design, 3-compartment nesting box, slide-out tray, reinforced L-shaped frame, expandable run connection, non-slip ramp, 2 roost bars.
- Intended Use: Outdoor poultry housing
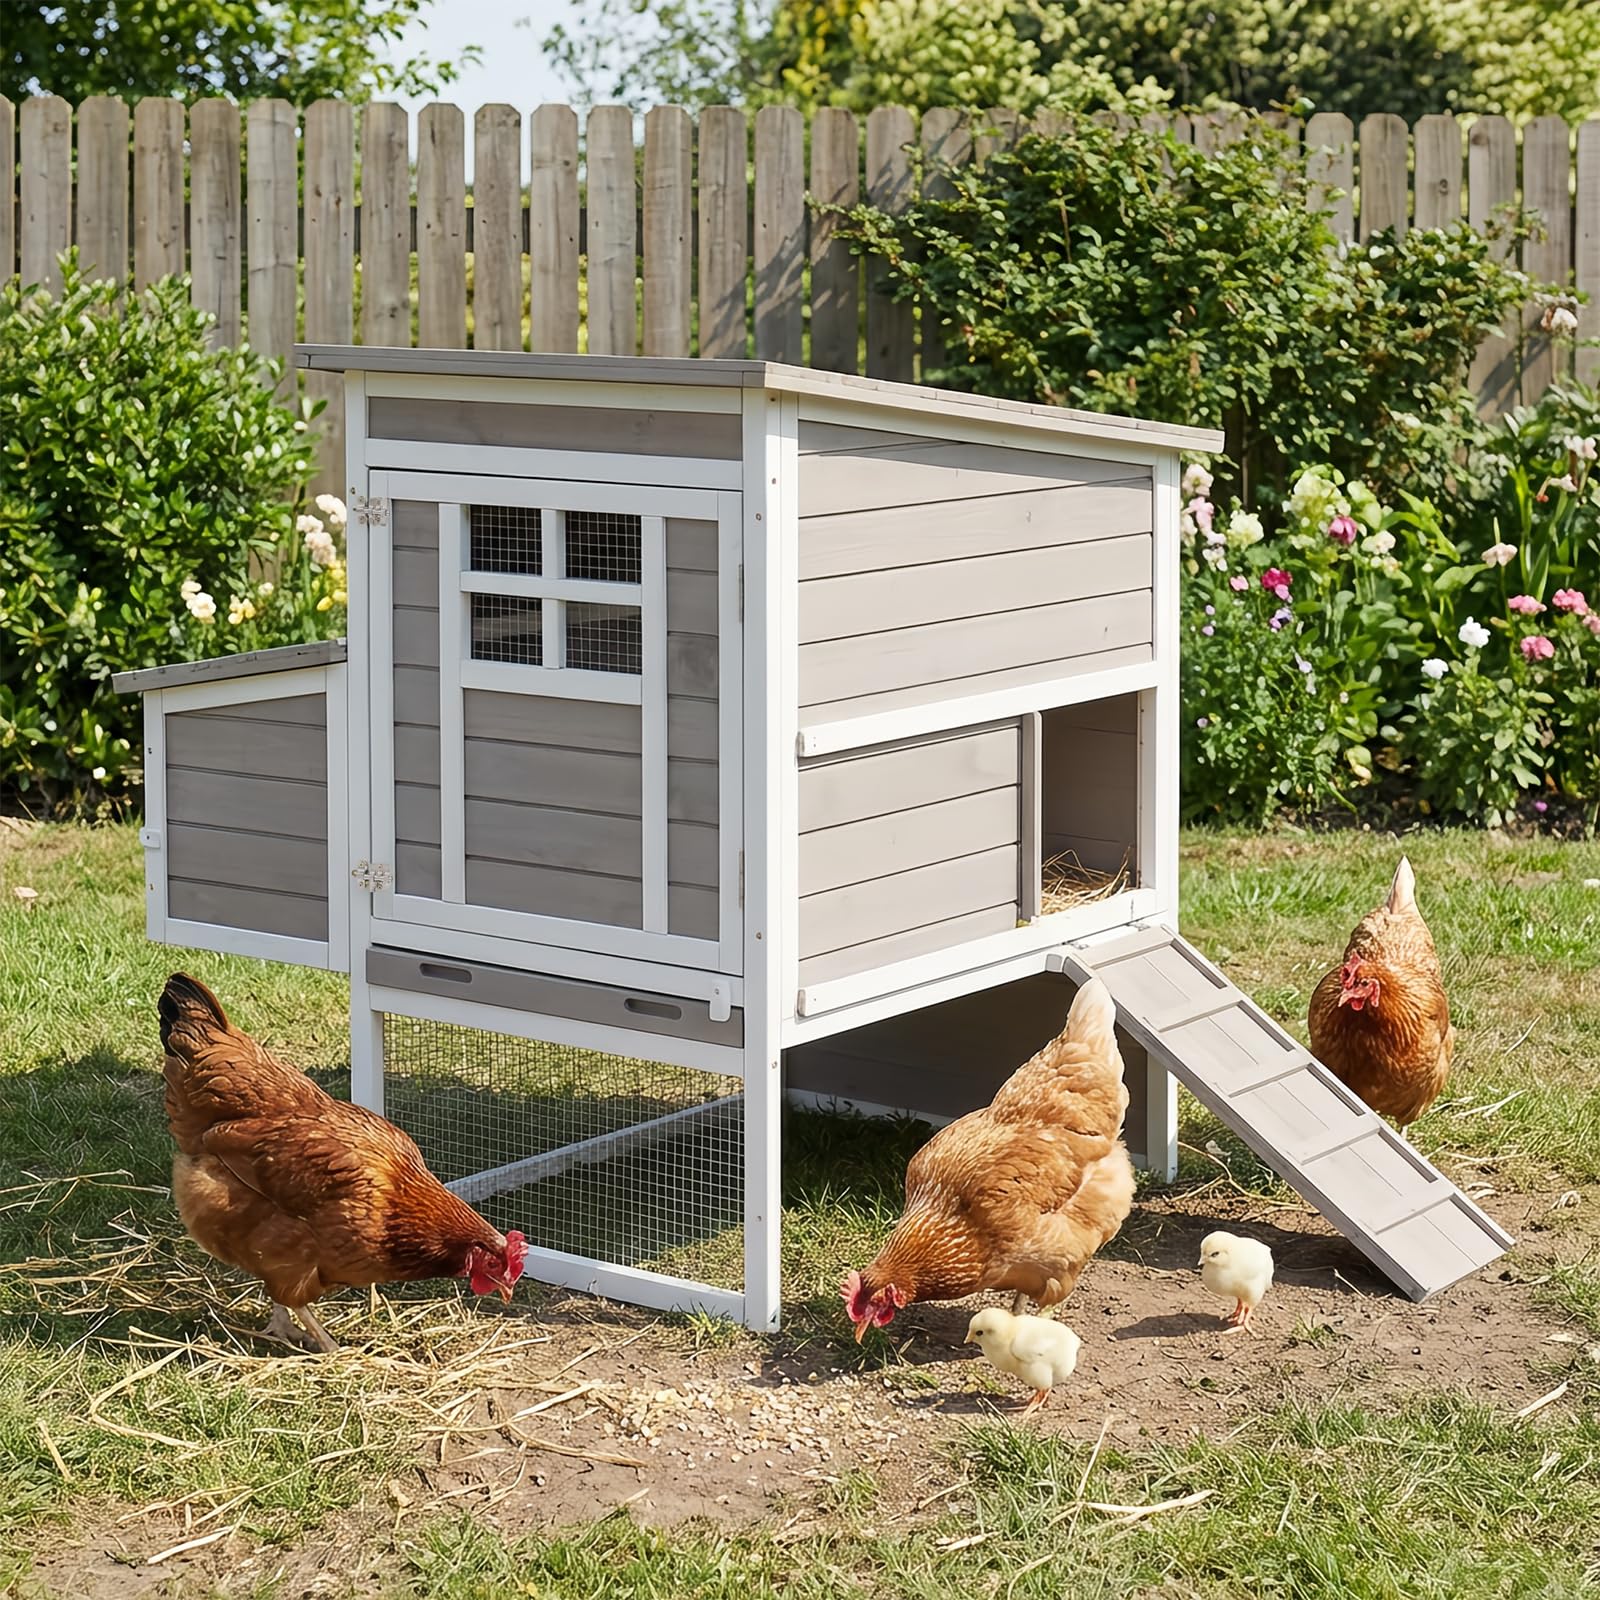
Image: The Ketive Outdoor Elevated 2-Tier Chicken Coop in a backyard setting.
Warranty and Support
Ketive products are manufactured with quality and durability in mind. For specific warranty details, please refer to the product packaging or contact Ketive customer service directly. Our support team is available to assist with any questions regarding assembly, parts, or product functionality.
For assistance, please visit the Ketive Store on Amazon or contact us through your purchase platform.