
1. Introduction
The EPOMAKER TH108 V2 PRO is a full-size mechanical keyboard designed for versatility and performance. It features multi-mode connectivity (Bluetooth, 2.4GHz wireless, and wired USB-C), a customizable screen and knob, hot-swappable switches, RGB lighting, and a gasket-mounted design for a comfortable typing experience. This manual provides instructions for setting up, operating, maintaining, and troubleshooting your keyboard.
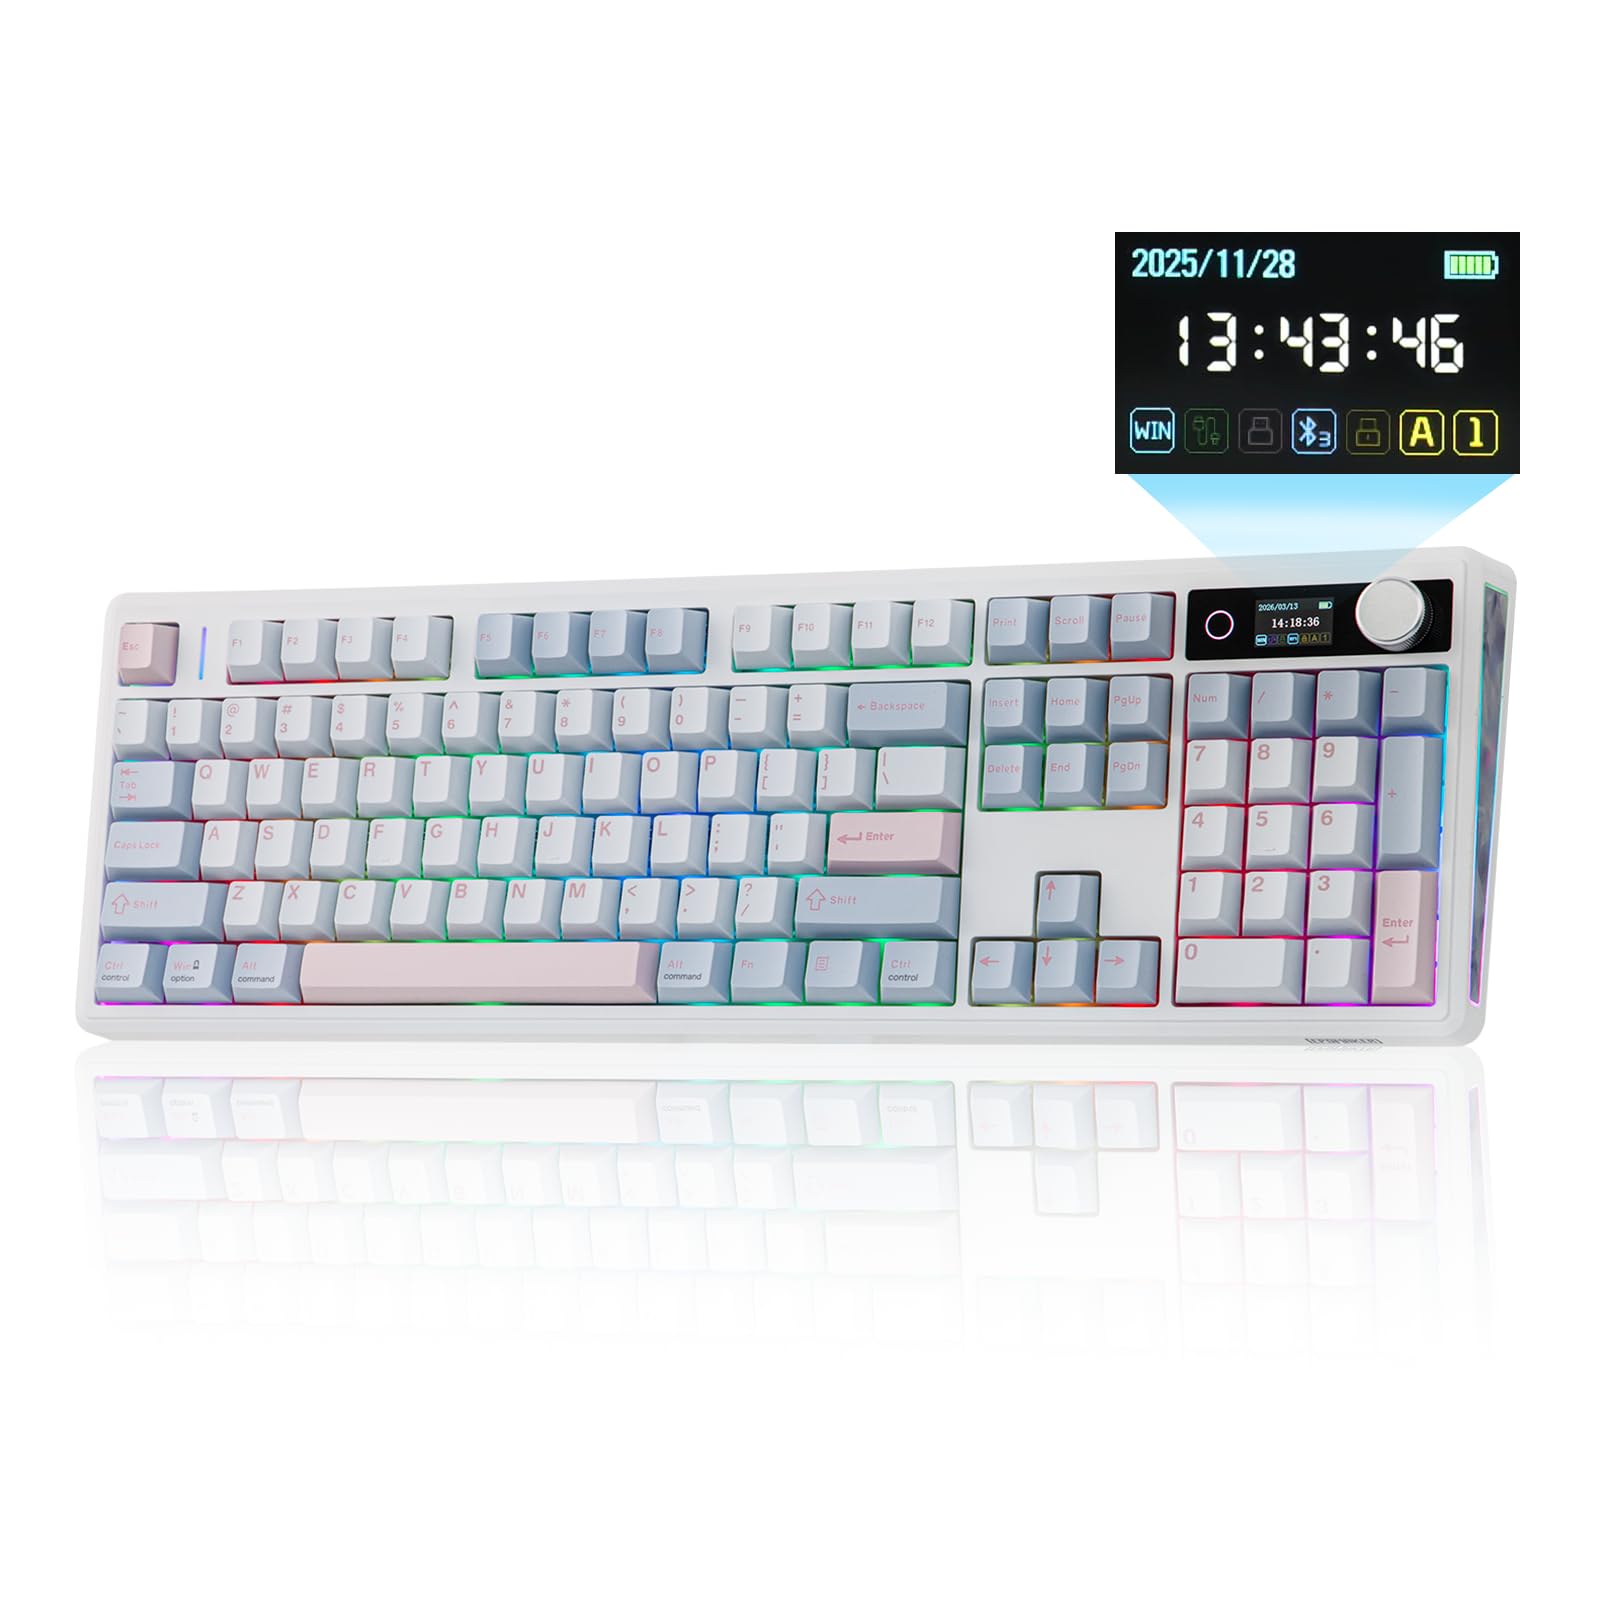
Figure 1.1: EPOMAKER TH108 V2 PRO Mechanical Keyboard
2. What's in the Box
- EPOMAKER TH108 V2 PRO Full-Sized Gaming Keyboard
- Detachable USB A-to-C Cable
- Wireless 2.4Ghz Receiver (stored under the left kick-stand)
- Extra Switch
- 2-in-1 Switch-and-Keycap Puller
- Summarized Multilingual Manual and Product Card

Figure 2.1: Location of the 2.4Ghz Wireless Receiver
3. Product Overview
The TH108 V2 PRO keyboard integrates several features for enhanced user experience:
- Multi-Mode Connectivity: Supports Bluetooth, 2.4GHz wireless, and wired USB-C connections.
- Customizable Screen & Knob: A 1.06-inch functional glass screen displays real-time keyboard information, backlight settings, and supports custom GIFs or images. The rotary knob controls volume and screen pages, and is customizable.
- Hot-Swappable Switches: Allows for easy replacement of mechanical switches without soldering.
- Gasket Mount Design: Multiple layers of sound-dampening materials (PORON, latex, IXPE, silicone, foams) provide a soft, bouncy typing feel and a deep acoustic profile.
- RGB Lighting: Features per-key adjustable south-facing LEDs, an integrated light bar, and a custom decor panel for vibrant lighting effects.
- Long Battery Life: Equipped with a 10000mAh battery, providing up to 200 hours of continuous use.
- Mac/Windows Compatibility: Includes dedicated Mac modifier keycaps for seamless switching between operating systems.

Figure 3.1: Cushioned Gasket Structure

Figure 3.2: Pre-Lubed Linear Switches

Figure 3.3: Mac Modifier PBT Keycaps

Figure 3.4: Vibrant RGB Lighting
Product Videos
Video 3.1: Comparison between TH108 PRO and TH108 V2 PRO, highlighting key differences and improvements.
Video 3.2: Demonstrates the typing sound and feel of Creamy Jade and Sea Salt Silent V2 switches on the TH108 V2 PRO.
Video 3.3: Provides close-up views of various components and design elements of the TH108 V2 PRO keyboard.
4. Setup
4.1 Connectivity Options
The TH108 V2 PRO supports three connection modes:
- Wired Mode: Connect the keyboard to your device using the provided USB A-to-C cable.
- 2.4GHz Wireless Mode: Insert the 2.4GHz USB receiver (found under the left kick-stand) into your device's USB port. Switch the keyboard's mode selector to 2.4G.
- Bluetooth Mode: Switch the keyboard's mode selector to BT. Press FN + Q/W/E to select a Bluetooth channel. The indicator light will flash, indicating pairing mode. Search for "TH108 V2 PRO" on your device and connect.
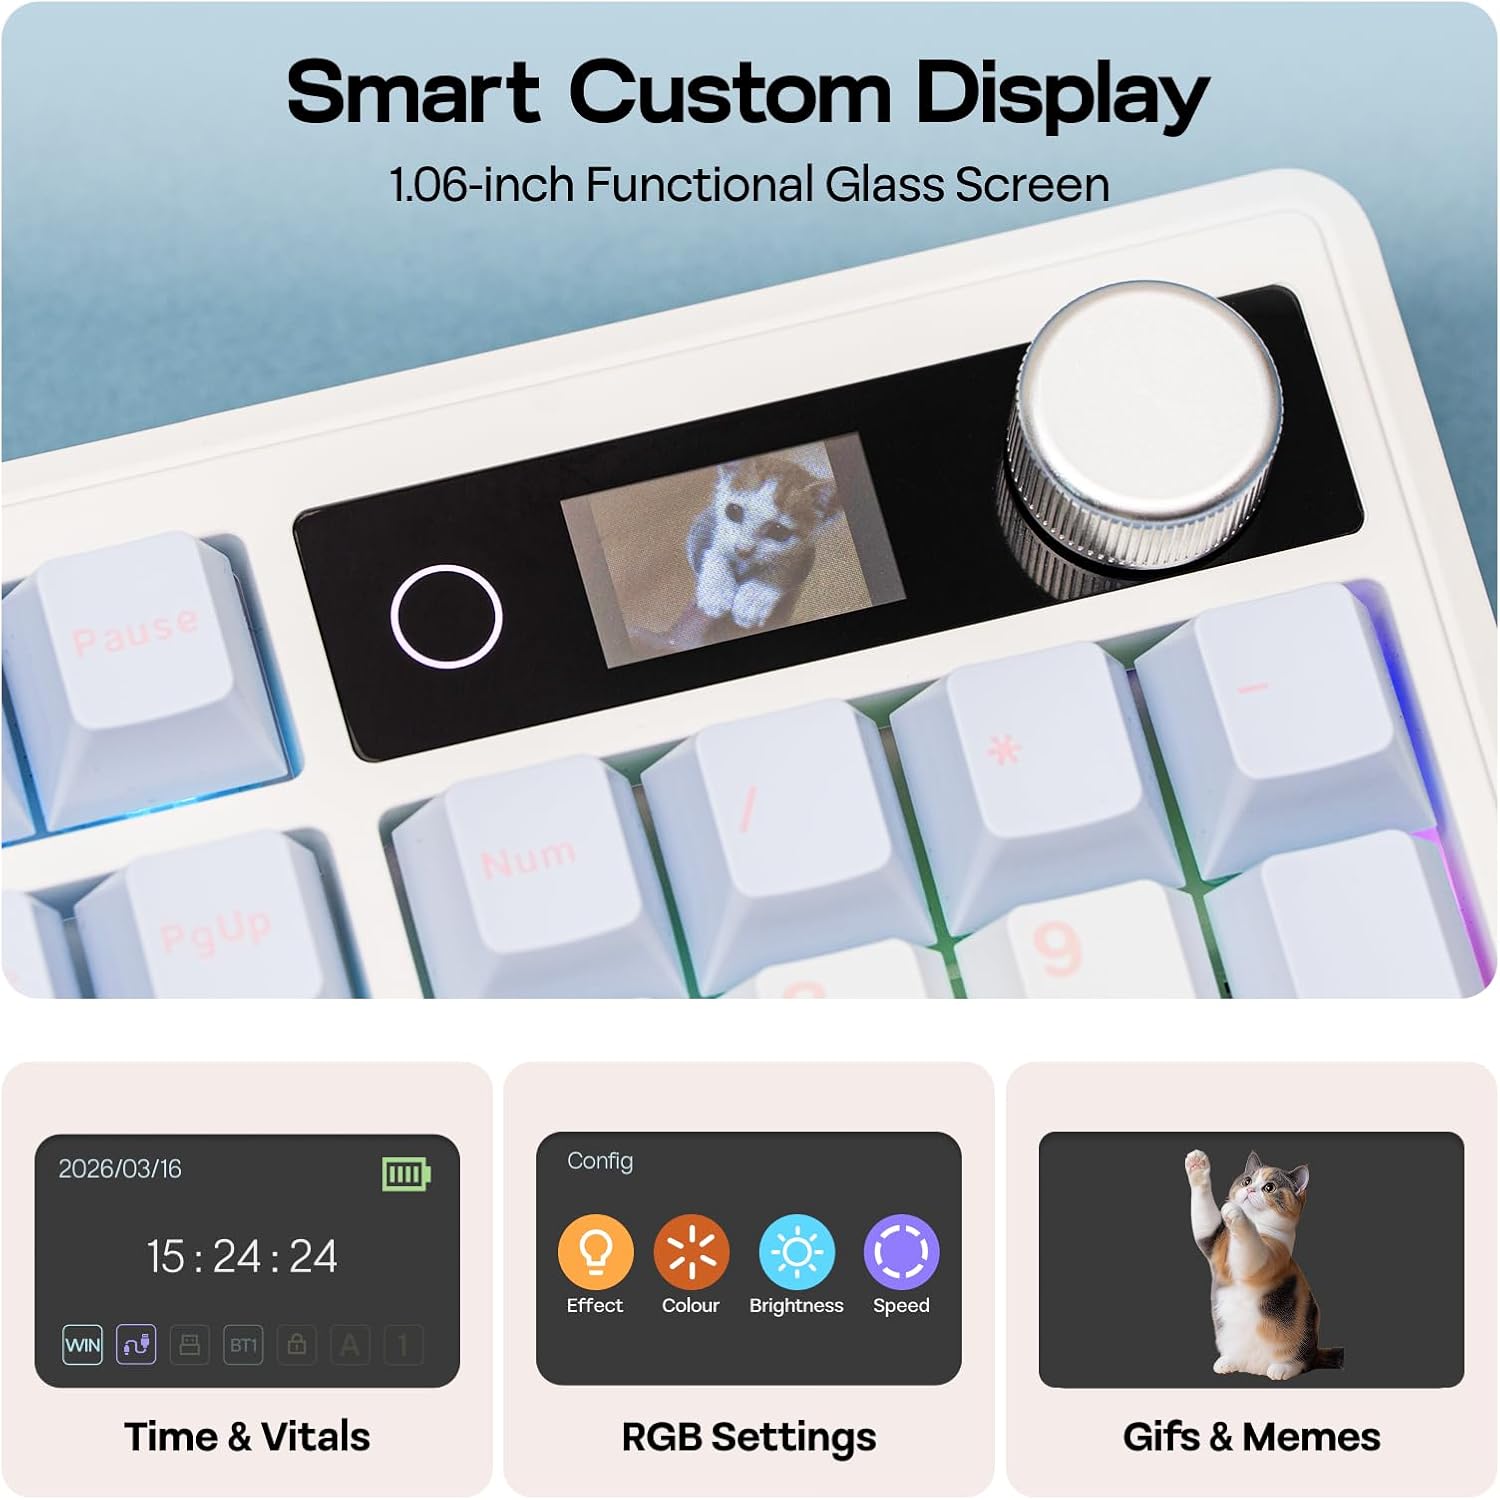
Figure 4.1: Connection Hub and Mode Switches
4.2 Operating System Switch
Use the dedicated switch on the keyboard to toggle between Windows (WIN) and Mac operating system layouts. This ensures correct key mapping for your system.
4.3 Initial Charge
Before first use, it is recommended to fully charge the keyboard using the provided USB-C cable. The screen will indicate charging status.
Video 4.2: An unboxing video of the TH108 V2 PRO, showing initial setup components.
5. Operating Instructions
5.1 Screen and Knob Functions
The 1.06-inch screen displays various information and settings. The rotary knob allows for quick adjustments:
- Default Knob Function: Rotate to adjust volume. Press to mute/unmute.
- FN + Knob: Toggles between screen pages (e.g., time, battery, connection status, RGB settings).
- Customization: The screen can display custom GIFs, drawings, or photos. This is managed via the web-compatible software.

Figure 5.1: Smart Custom Display and Knob
5.2 RGB Lighting Control
The keyboard features customizable RGB backlighting. You can adjust effects, colors, brightness, and speed using:
- Integrated Knob and Screen: Use FN + Knob to navigate to RGB settings on the screen, then use the knob to adjust.
- Keyboard Shortcuts: Refer to the included quick guide for specific FN key combinations to change RGB modes.
- Web-Based Software: For advanced customization, including per-key lighting and custom effects.
5.3 Programmable Software
The TH108 V2 PRO utilizes a web-compatible software for advanced customization. This software allows you to:
- Remap keys
- Record macros
- Customize RGB lighting
- Adjust keyboard settings
- Upload GIFs or images to the screen
Access the software via the official EPOMAKER website. It is compatible across various devices and operating systems.
Video 5.2: A guide on how to customize your TH108 V2 PRO using the available software and features.
6. Maintenance
6.1 Cleaning
- Disconnect the keyboard from all power sources before cleaning.
- Use a soft, lint-free cloth slightly dampened with water or a mild cleaning solution to wipe the keycaps and chassis.
- For dust and debris between keycaps, use compressed air or a small brush.
- Avoid harsh chemicals, abrasives, or excessive moisture.
6.2 Keycap and Switch Replacement
The TH108 V2 PRO features hot-swappable switches, allowing for easy replacement without soldering.
- Use the provided 2-in-1 switch-and-keycap puller.
- To remove a keycap, gently pull it upwards with the keycap puller.
- To remove a switch, use the switch puller to grasp the top and bottom clips of the switch and pull straight upwards.
- When inserting a new switch, ensure the pins are straight and align with the PCB sockets. Press firmly until it clicks into place.
- When replacing keycaps, align them with the switch stem and press down gently.
7. Troubleshooting
- Keyboard not responding:
- Ensure the keyboard is charged.
- Check the connection mode switch (wired, 2.4GHz, Bluetooth) matches your setup.
- For 2.4GHz, ensure the receiver is properly inserted.
- For Bluetooth, re-pair the device.
- Try connecting via USB-C cable to rule out wireless issues.
- RGB lighting not working/incorrect:
- Check RGB settings via the screen or software.
- Ensure brightness is not set to zero.
- Update keyboard firmware if available.
- Keys not registering:
- If a specific key is not working, try removing and re-inserting its switch.
- Ensure the switch pins are not bent.
- Test with a different switch if available.
- Software issues:
- Ensure you are using a compatible browser (e.g., Chrome) for the web-based software.
- Clear browser cache or try a different browser.
- Refer to the EPOMAKER support website for software-specific FAQs.
8. Specifications
| Brand | EPOMAKER |
| Model Name | TH108 V2 PRO |
| Connectivity Technology | 2.4Ghz Wireless, Bluetooth, USB Cable |
| Keyboard Description | Mechanical |
| Number of Keys | 104 |
| Keyboard Layout | QWERTY |
| Switch Type | Linear, Linear Silent (depending on variant) |
| Special Features | Backlit, Ergonomic, Hot-Swappable, Programmable Keys, Volume Roller, Screen |
| Keyboard Backlighting | RGB |
| Power Source | Battery Powered (10000mAh) |
| Material | Plastic (Enclosure), Polycarbonate (Plate) |
| Compatible Devices | Gaming Console, Laptop, PC, Smartphone, Tablet |
| Compatible OS | Android, Windows, Mac OS 11 Big Sur and above |
| Polling Rate (Wired) | 1000Hz |
| Latency (Wired) | 2ms |
9. Warranty and Support
The EPOMAKER TH108 V2 PRO Mechanical Keyboard comes with a 1-Year Warranty from the date of purchase.
For technical support, warranty claims, or additional information, please visit the official EPOMAKER website or contact their customer service directly. You can also find more resources and product information on the EPOMAKER Store on Amazon.


