
1. Introduction
Thank you for choosing the Garvee 2 Flip Drawer Shoe Cabinet. This manual provides essential information for the safe assembly, operation, and maintenance of your new shoe cabinet. Please read these instructions carefully before beginning assembly and retain them for future reference.

Image 1.1: The Garvee 2 Flip Drawer Shoe Cabinet, designed for a clutter-free home.
This compact and space-saving shoe cabinet (31.4"W × 9.4"D × 43.4"H) is ideal for small apartments and tight spaces such as hallways, entryways, and living rooms. Its slim profile maximizes storage efficiency without compromising functionality. The cabinet features two flip-front drawers with adjustable shelves and one top drawer for smaller items.
2. Safety Information
WARNING: To prevent serious injury, always follow these safety guidelines.
- Always assemble the cabinet according to the provided instructions.
- Secure the cabinet to the wall using appropriate hardware to prevent tip-over, especially if the cabinet will be used to store heavy items or if there are children or pets in the household.
- Do not allow children to climb on or play with the cabinet.
- Ensure all screws and fasteners are tightened securely before use. Periodically check and re-tighten as necessary.
- Do not overload the drawers or shelves.
3. Package Contents
Before assembly, verify that all parts and hardware listed in the included installation manual are present and undamaged. If any parts are missing or damaged, do not proceed with assembly. Contact customer support for assistance.

Image 3.1: Example of product components. Refer to your specific manual for a detailed list of parts.
4. Setup and Assembly Instructions
Assembly is straightforward with clear step-by-step instructions included in the installation manual provided with your product. Please refer to that manual for detailed diagrams and specific hardware. The following is a general overview of the assembly process:
- Unpack and Identify Parts: Carefully unpack all components and hardware. Lay them out on a clean, soft surface to prevent scratches. Compare them against the parts list in your manual.
- Assemble the Frame: Attach the side panels to the base and top panels using the provided screws and dowels. Ensure all connections are secure.
- Install Back Panel: Secure the back panel to the assembled frame using small nails or screws.
- Assemble Flip Drawers: Construct the two flip-front drawers according to the manual's instructions. This typically involves attaching the front panel to the side mechanisms.
- Install Adjustable Shelves: Insert the dual-groove adjustable shelves into the flip drawers. These can be positioned at different heights to accommodate various shoe types.
- Install Top Drawer: Assemble and slide the top drawer into its designated slot.
- Attach Legs and Handles: Secure the four sturdy metal legs to the base of the cabinet. Attach the square black handles to the flip drawers and top drawer.
- Wall Anchoring: For safety, especially in households with children or pets, secure the cabinet to a wall using the anti-tip hardware provided. Follow the specific instructions for wall mounting in your manual.
5. Operating Instructions
5.1 Flip Drawers with Adjustable Shelves
The Garvee shoe cabinet features two flip-front drawers designed for easy access and storage. Each flip drawer contains two adjustable shelves.
- Opening: Gently pull the handle on the flip drawer outwards and downwards to open. The drawer will pivot forward, revealing the shoe compartments.
- Adjusting Shelves: The internal shelves can be adjusted or removed to fit different shoe shapes and sizes, including boots, high heels, slippers, sports shoes, and leather shoes. To adjust, carefully unclip the shelf from its current position and re-clip it into a higher or lower groove. To remove, unclip both sides and pull the shelf out.
- Closing: Push the flip drawer upwards and inwards until it securely latches into the closed position.

Image 5.1: Illustration of the adjustable and removable panels within the flip drawers to accommodate various shoe types.

Image 5.2: The cabinet is suitable for storing various shoe types due to its adjustable shelves.
5.2 Top Drawer
The top drawer is designed for storing small daily items, such as keys, socks, shoe care tools, or other accessories.
- Opening: Pull the handle on the top drawer outwards.
- Closing: Push the drawer inwards until it is fully closed.

Image 5.3: The top drawer provides convenient storage for small daily essentials.
5.3 Ventilation and Elevated Legs
- Ventilated Slat Panels: The hollow-out design of the flip drawer panels promotes air circulation, helping to banish shoe odors.
- Elevated Metal Legs: The 4.72-inch elevated metal legs allow for easy cleaning underneath the cabinet and can accommodate robot vacuums. They also provide space to store slippers directly beneath the unit.
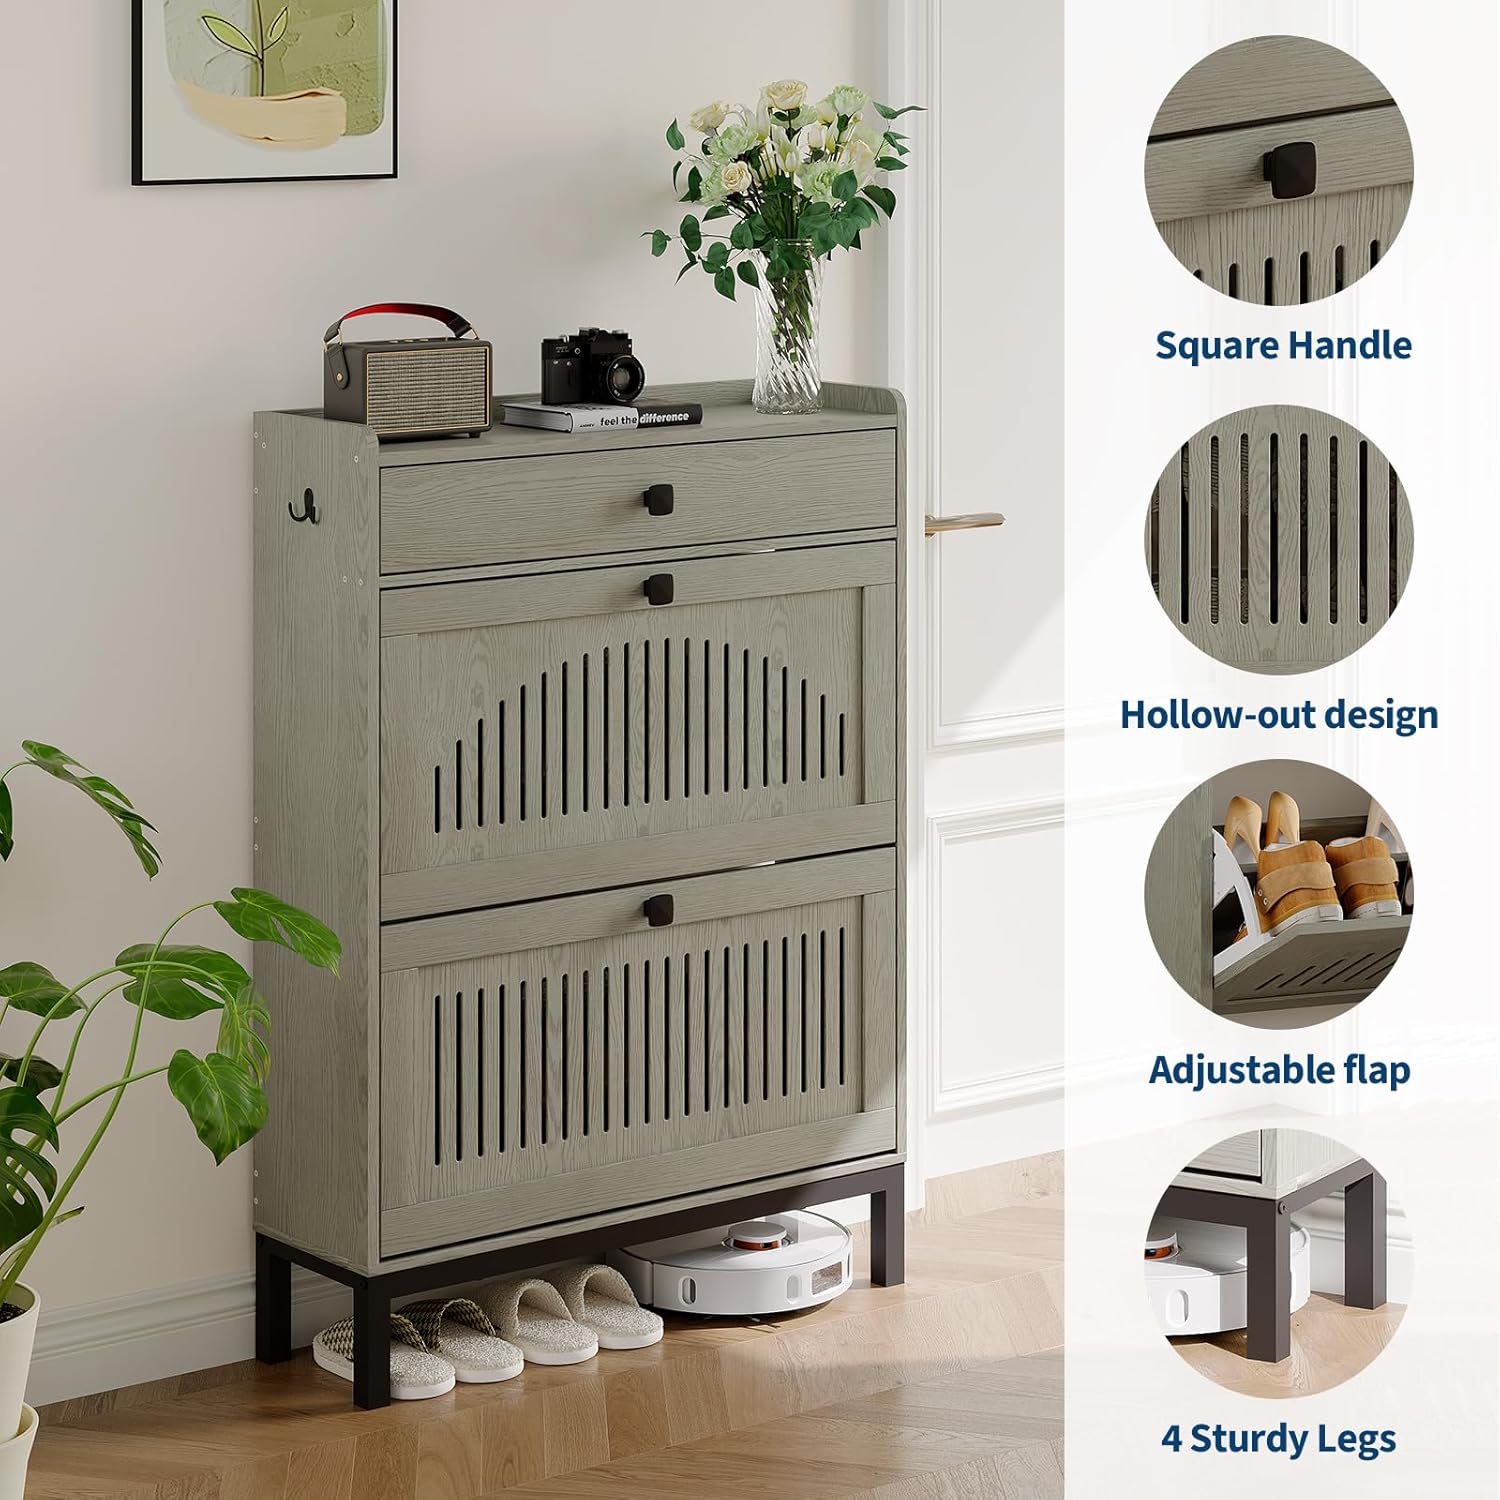
Image 5.4: Key design features including the square handle, ventilated panels, adjustable flap, and sturdy legs.
6. Maintenance
- Cleaning: Wipe the cabinet surfaces with a soft, damp cloth. Avoid harsh chemicals or abrasive cleaners, which can damage the wood finish.
- Dusting: Regularly dust the cabinet to prevent buildup.
- Spills: Immediately wipe up any spills to prevent staining or water damage to the wood.
- Hardware Check: Periodically check all screws and fasteners to ensure they remain tight. Re-tighten if necessary.
- Avoid Direct Sunlight: Prolonged exposure to direct sunlight can cause fading or damage to the wood finish.
7. Troubleshooting
- Drawers not closing smoothly:
Check for any obstructions inside the drawer or along the runners. Ensure the drawer mechanisms are correctly aligned and all screws are tightened. - Cabinet feels unstable:
Verify that all assembly screws are fully tightened. Ensure the cabinet is placed on a level surface. If instability persists, ensure the wall anchoring hardware is properly installed and secured. - Shelves not staying in place:
Ensure the adjustable shelves are correctly clipped into both grooves on the flip drawer mechanism. - Missing parts or damaged components:
Do not attempt to assemble the product with missing or damaged parts. Contact Garvee customer support immediately for replacement parts.
8. Specifications

Image 8.1: Product dimensions for the Garvee 2 Flip Drawer Shoe Cabinet.
| Feature | Detail |
|---|---|
| Brand | Garvee |
| Model Number | Gar-ZHD-PTH_33A7GBYF-ShoeRack-q64 |
| Color | Washed Grey |
| Material | Wood |
| Product Dimensions (D x W x H) | 9.4"D x 31.4"W x 43.4"H |
| Item Weight | 51.8 pounds |
| Number of Flip Drawers | 2 |
| Number of Top Drawers | 1 |
| Adjustable Shelves | Yes (2 per flip drawer) |
| Mounting Type | Floor Mount (with wall anchoring recommended) |
| Elevated Legs Height | 4.72 inches |
| UPC | 820559992645 |
9. Warranty Information
Garvee products are manufactured to high-quality standards. Specific warranty details, including coverage period and terms, are typically provided with your purchase documentation or can be found on the official Garvee website. Please retain your proof of purchase for any warranty claims.
10. Customer Support
If you have any questions, require assistance with assembly, or need to report missing/damaged parts, please contact Garvee customer support. Refer to the contact information provided in your product packaging or visit the Garvee store online for support options.
For further assistance, you may visit the Garvee Store: Garvee Store on Amazon