
Introduction
Thank you for choosing the TRIUMPHKEY Corner Desk. This L-shaped desk is designed to provide a spacious and organized workspace for your home or office. Featuring a reversible design and integrated storage shelves, it offers flexibility and functionality. This manual provides detailed instructions for assembly, operation, maintenance, and troubleshooting to ensure you get the most out of your new desk.
Product Overview
Key Features
- Reversible L-shaped Design: The corner desk can be configured with the storage shelves on either the left or right side to suit your space and preference.
- Ample Storage: Equipped with three open shelves, providing significant space for books, files, computer towers, and other office essentials. The middle shelf can be removed to accommodate larger items.
- Sturdy Construction: Built with a robust alloy steel frame and an X-shaped support brace for maximum durability and stability.
- Durable Surface: The desk surface is waterproof and easy to clean, ensuring longevity and simple maintenance.
- Adjustable Feet: Features adjustable leveling feet to ensure stability on uneven floors.
Product Dimensions

Figure 1: Product dimensions and weight capacities. Main desk: 120cm (length) x 80cm (depth) x 75cm (height). Shelf unit: 27cm (depth) x 80cm (length) x 75cm (height). Main desk weight capacity: 136kg. Shelf weight capacity: 15kg per shelf.
Setup and Assembly
Before You Begin
- Safety First: Always assemble the desk on a soft, clean surface to prevent scratches. Keep small parts away from children.
- Check Contents: Verify that all parts and hardware listed in the packaging are present and undamaged. If any parts are missing or damaged, contact customer support.
- Required Tools: An Allen key and a spanner are typically included. For easier assembly, a screwdriver (Phillips head) may also be useful.
Assembly Steps
Follow these steps carefully. Refer to the included assembly instructions for detailed diagrams and part numbering.
- Prepare the Main Desk Frame: Assemble the metal legs and support beams for the main desk section. Ensure all screws are finger-tight at this stage.
- Attach Main Desk Panel: Secure the larger desk panel to the assembled main desk frame using the provided screws.
- Assemble Shelf Unit Frame: Construct the metal frame for the three-tier shelf unit.
- Decide Shelf Orientation: Determine whether you want the shelf unit on the left or right side of the main desk. This desk features a reversible design.
- Install Shelves: Place the shelf panels into the shelf unit frame. The middle shelf can be removed if you need space for a computer tower.
- Connect Desk Sections: Join the main desk section with the shelf unit, ensuring proper alignment.
- Install X-Braces: Attach the X-shaped reinforcement braces to the back of the desk frame. These braces enhance stability and prevent wobbling.
- Tighten All Screws: Once all parts are in place and aligned, gradually tighten all screws using the provided tools. Do not overtighten.
- Adjust Leveling Feet: Turn the adjustable feet at the bottom of the desk legs to level the desk and prevent wobbling on uneven floors.

Figure 2: The reversible design allows the shelf unit to be placed on either side.

Figure 3: Technical diagram for shelf assembly and placement.

Figure 4: X-brace installation for enhanced stability and adjustable shelf options.

Figure 5: Adjustable leveling feet for stability.
Operating Instructions
Maximizing Your Workspace
- Utilize Reversible Shelves: Position the shelf unit on the side that best suits your room layout and workflow.
- Flexible Storage: Use the open shelves to store books, documents, or decorative items. Remove the middle shelf if you need to place a larger computer tower or other tall equipment.
- Maintain Stability: Periodically check the adjustable feet to ensure the desk remains level and stable.
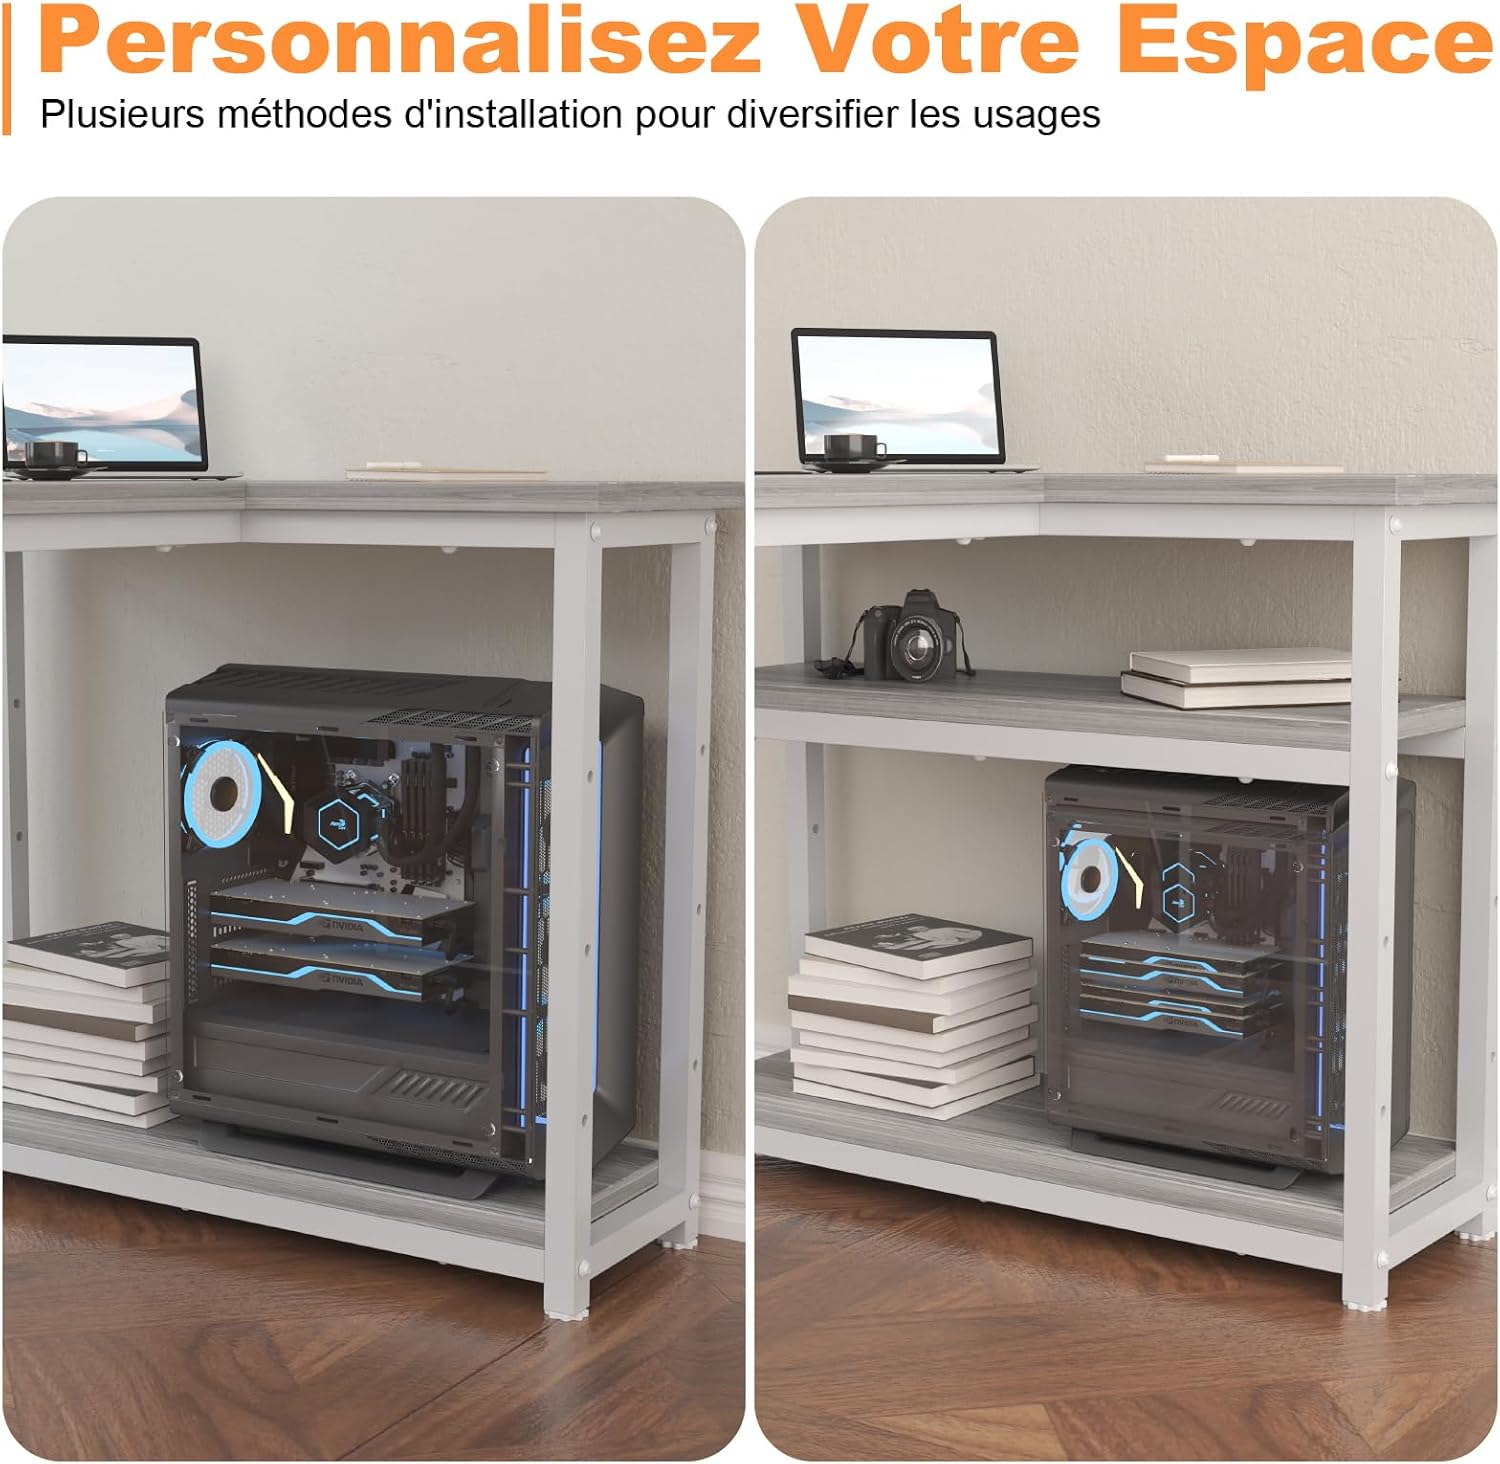
Figure 6: Examples of flexible shelf configurations.
Maintenance
Care and Cleaning
- Cleaning the Surface: The desk surface is waterproof. Wipe spills immediately with a dry cloth. For general cleaning, use a soft, damp cloth and mild detergent. Avoid abrasive cleaners or harsh chemicals.
- Frame Maintenance: Regularly check all screws and connections to ensure they are tight. Retighten if necessary to maintain structural integrity.
- Avoid Overloading: Do not exceed the recommended weight capacities for the desk (136kg for the main desk, 15kg per shelf) to prevent damage.

Figure 7: Waterproof desk surface for easy cleaning.
Troubleshooting
Common Issues and Solutions
- Desk is Wobbly:
- Ensure all screws are securely tightened.
- Adjust the leveling feet at the bottom of each leg to compensate for uneven floor surfaces.
- Verify that the X-braces are correctly installed and tightened.
- Parts Do Not Align During Assembly:
- Double-check the assembly instructions to ensure all parts are oriented correctly. Some parts may look similar but have specific left/right or front/back orientations.
- Loosen all screws slightly, adjust the alignment, and then retighten gradually.
- Missing or Damaged Parts:
- Contact TRIUMPHKEY customer support immediately with your purchase details and a description of the issue.
Specifications
| Feature | Specification |
|---|---|
| Brand | TRIUMPHKEY |
| Model | 120x80x75CM |
| Dimensions (L x W x H) | 120 cm x 80 cm x 75 cm |
| Color | Grey |
| Material | Alloy Steel (Frame), Metal (Top) |
| Number of Shelves | 3 (Reversible, Adjustable) |
| Main Desk Weight Capacity | 136 kg |
| Shelf Weight Capacity | 15 kg per shelf |
| Special Features | Reversible design, X-shaped reinforcement, Adjustable leveling feet, Waterproof surface |
| Assembly Required | Yes (Tools and instructions included) |
Warranty and Support
Limited Warranty
This TRIUMPHKEY product comes with a limited warranty. Please refer to your purchase documentation for specific terms and conditions regarding warranty coverage. The warranty typically covers manufacturing defects under normal use.
Customer Support
For any questions, assistance with assembly, or to report missing/damaged parts, please contact TRIUMPHKEY customer support through your retailer or the official brand website. Please have your model number and purchase date ready when contacting support.
