
Introduction
Thank you for choosing the KINGrinder K7 Manual Coffee Grinder. This manual provides essential information for the proper setup, operation, and maintenance of your grinder to ensure optimal performance and longevity. Please read these instructions carefully before first use.
Key Features:
- Upgraded 7-Angle Stainless Steel Conical Burr: Designed for enhanced cutting performance, improved grinding efficiency, and consistent particle size.
- Top Adjustment Dial: Offers precise grind control with fine micro-adjustments, suitable for various brewing methods.
- Magnetic + Locking Design Powder Receiver: Ensures secure attachment and easy collection of ground coffee.
- Efficient Multi-Bearing Stabilization: Triple bearing support maintains shaft stability for smoother operation and uniform grounds.
- Durable All-Metal Construction: Built with premium aluminum alloy and stainless steel for lasting durability.
- Easy to Clean and Maintain: Designed for simple disassembly.
Product Overview and Components
The KINGrinder K7 is engineered for precision and durability. Understanding its main components will assist in its proper use and maintenance.
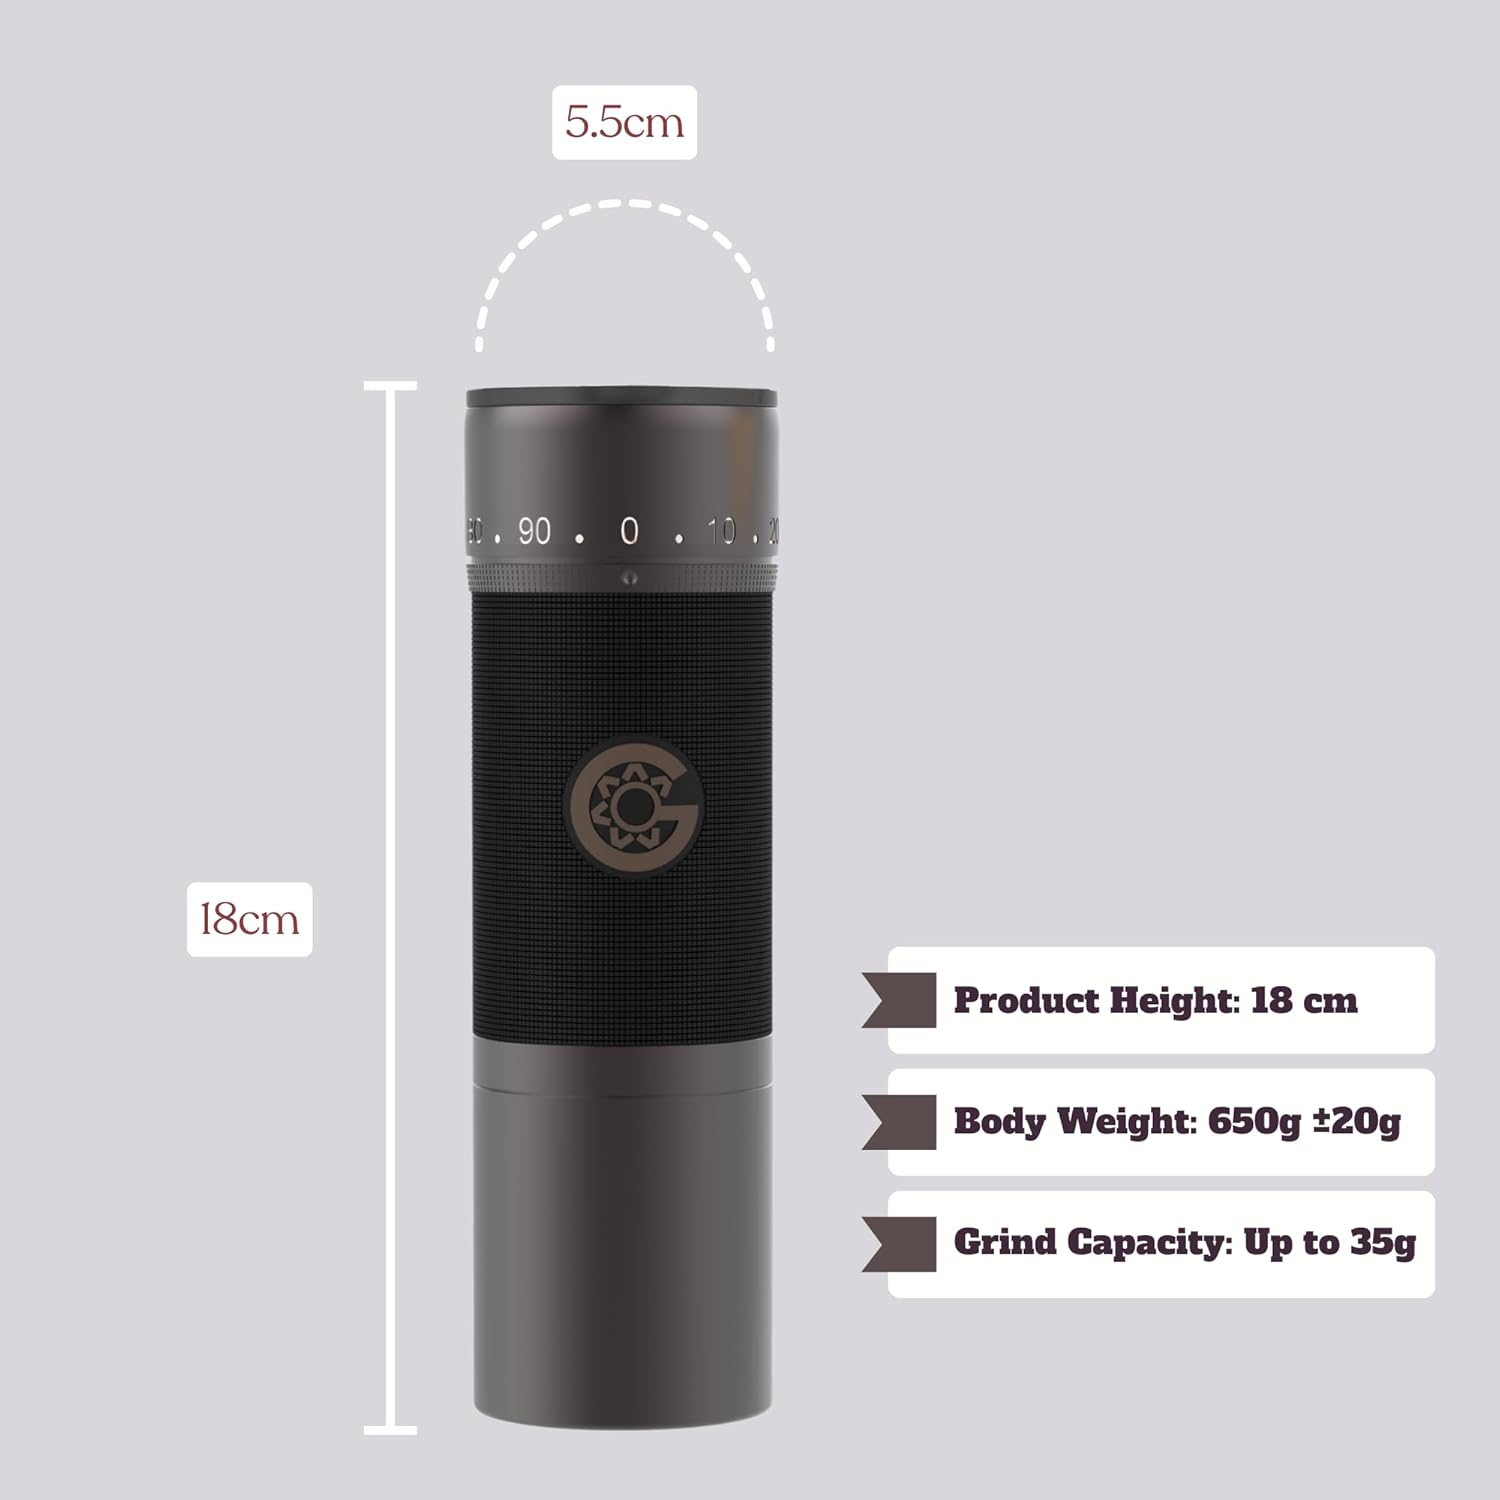
Figure 1: Exploded view of the KINGrinder K7, highlighting its internal components including the aluminum alloy body, 10mm center shaft, precision bearings, and stainless steel burr.
- Grinder Body: Constructed from durable aluminum alloy.
- Bent Handle: Ergonomically designed for comfortable and efficient grinding.
- Top Adjustment Dial: Located at the top for easy grind size selection.
- Stainless Steel Conical Burr: The core grinding mechanism.
- Magnetic Catch Cup: Detachable cup for collecting ground coffee, secured by magnets and a locking mechanism.
- Center Shaft and Bearings: Provide stability and smooth rotation during grinding.

Figure 2: Detail of the magnetic catch cup with its locking design for secure attachment.
Setup
The KINGrinder K7 comes largely pre-assembled. Follow these steps for initial setup:
- Unpack: Carefully remove all components from the packaging.
- Inspect: Check for any visible damage or missing parts.
- Initial Cleaning: Before first use, it is recommended to clean the grinder to remove any manufacturing residues. Refer to the 'Maintenance and Cleaning' section for detailed instructions.
- Assemble Handle: Attach the bent handle to the top shaft of the grinder. Ensure it is securely fitted.
- Secure Catch Cup: Ensure the magnetic catch cup is properly aligned and locked onto the main body of the grinder.
Operating Instructions
1. Adjusting Grind Size
The KINGrinder K7 features a top adjustment dial for precise grind size selection. Each click represents a micro-adjustment, allowing for a wide range of grind settings suitable for various brewing methods.

Figure 3: Adjusting the grind size using the top dial.
- To adjust, hold the grinder body and rotate the top dial.
- Turning the dial clockwise results in a finer grind.
- Turning the dial counter-clockwise results in a coarser grind.
- Refer to the markings on the dial for consistent adjustments.

Figure 4: Illustration of the grind adjustment mechanism and zero-point alignment.
2. Loading Coffee Beans
- Remove the lid from the top of the grinder.
- Pour your desired amount of whole coffee beans into the bean hopper. The K7 has a capacity of up to 35g.
- Replace the lid securely.
3. Grinding Process
- Hold the grinder body firmly with one hand.
- Attach the bent handle to the top shaft.
- Rotate the handle clockwise to begin grinding. The multi-bearing stabilization ensures a smooth grinding experience.
- Continue grinding until all beans have passed through the burrs and into the catch cup.
4. Collecting Ground Coffee
Once grinding is complete, gently twist and pull the magnetic catch cup from the bottom of the grinder to access your freshly ground coffee.
Maintenance and Cleaning
Regular cleaning is crucial for maintaining the performance and longevity of your KINGrinder K7. The grinder is designed for simple disassembly.
Disassembly for Cleaning:
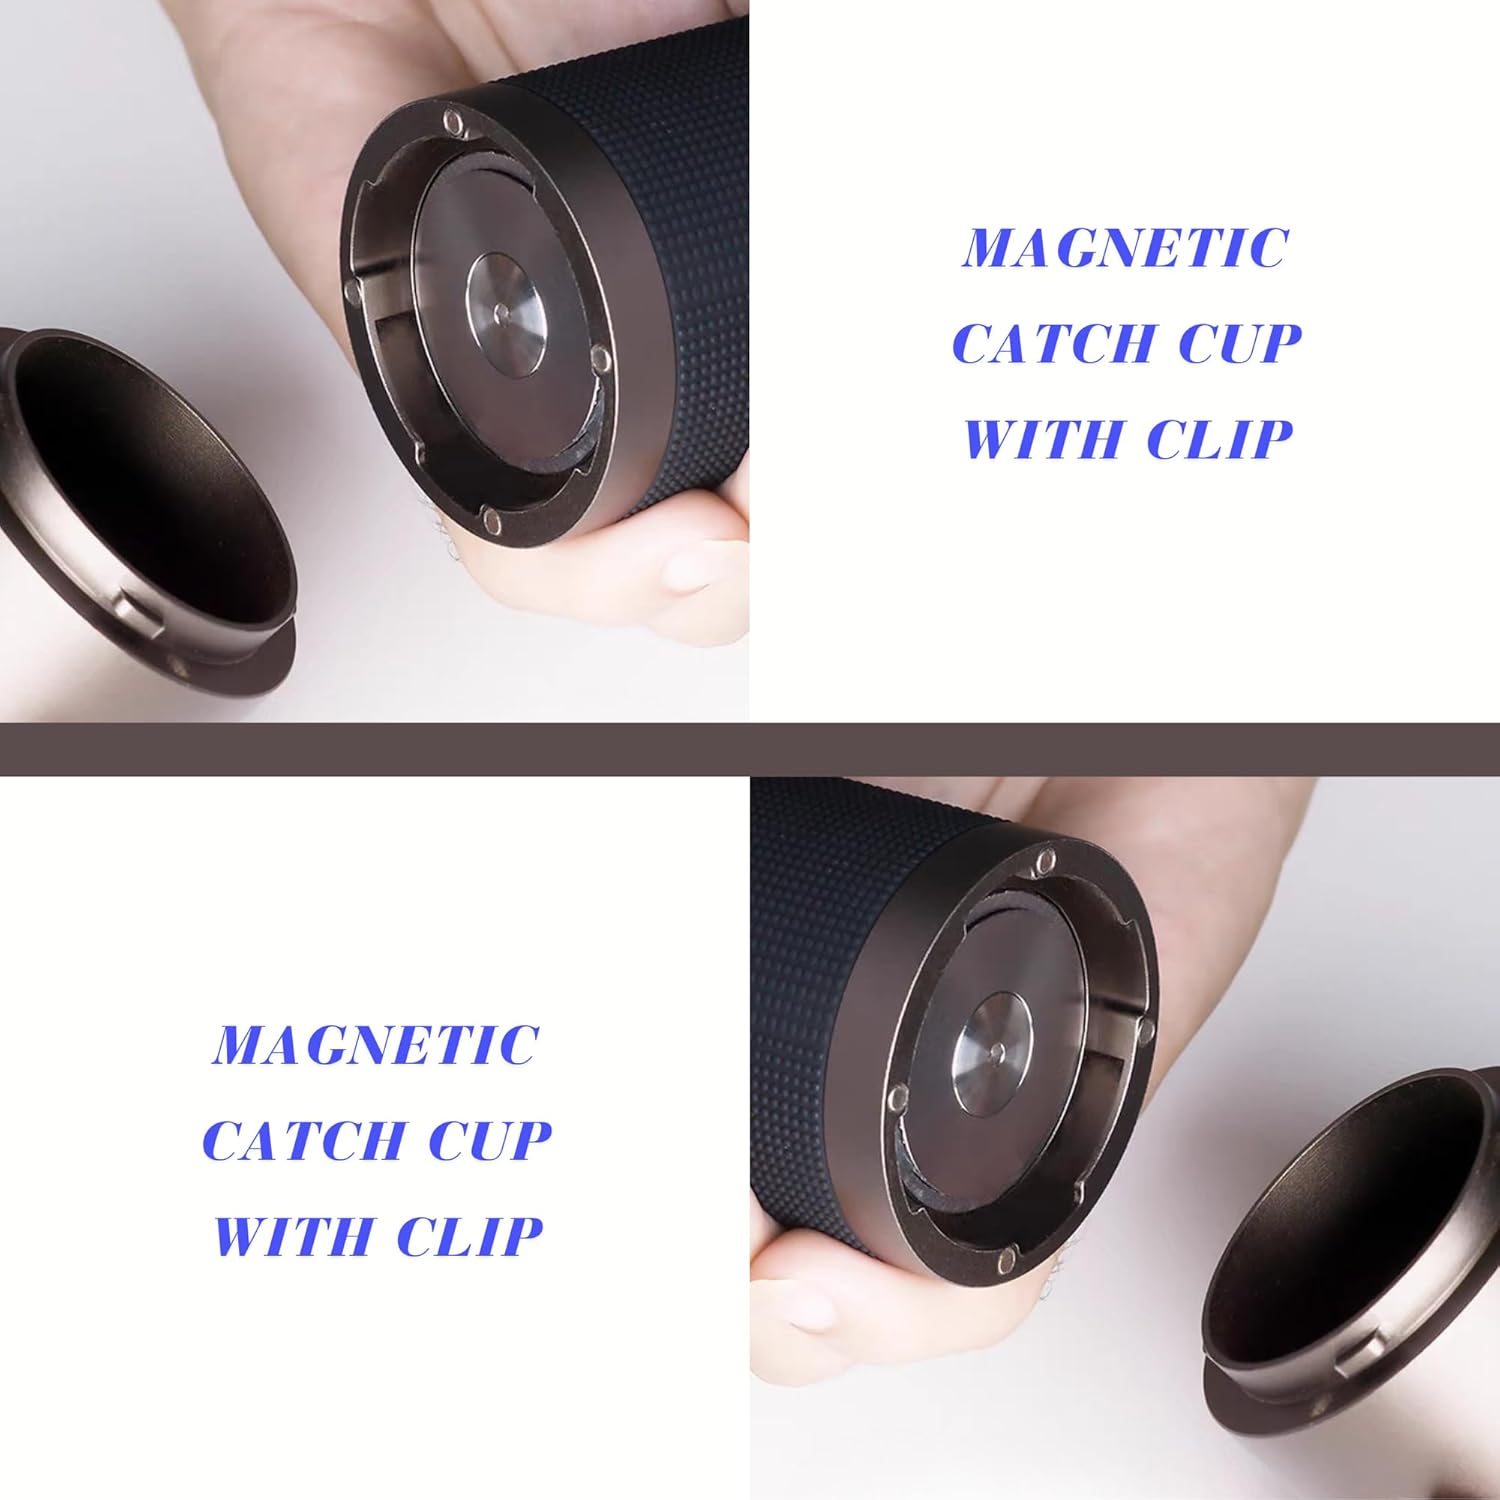
Figure 5: One-step disassembly of the KINGrinder K7.

Figure 6: Visual guide for the one-step disassembly process.
The KINGrinder K7 allows for easy one-step disassembly. Simply unscrew the bottom part of the grinder to access the burr and internal components for cleaning.
Cleaning Instructions:
- It is recommended to clean the grinder regularly using a blower and a brush.
- Use the brush to remove any residual coffee grounds from the burrs and internal parts.
- Use a blower to clear fine dust and particles.

Figure 7: Regular cleaning is essential for optimal performance.
Important Cleaning Warnings:
- Do Not Wash with Water: The grinder is not designed to be washed with water. Water can damage the internal mechanisms and burrs, leading to rust and malfunction.
- Do Not Grind Below Setting 15: Grinding at settings finer than 15 can cause excessive wear on the burrs and potentially damage the grinder.

Figure 8: Do not wash with water.

Figure 9: Do not grind below setting 15.
Troubleshooting
- Grinder feels stiff or difficult to turn: Ensure no foreign objects are in the burr chamber. Check that the grind setting is not too fine for the beans being used. Clean the burrs to remove any build-up.
- Inconsistent grind size: Verify that the grind adjustment dial is securely set and has not shifted during grinding. Ensure the burrs are clean and free from obstructions.
- Magnetic catch cup detaches during grinding: Ensure the catch cup is properly aligned and securely locked into place before starting to grind. Apply gentle pressure when attaching to ensure the locking mechanism engages.
Specifications
Detailed specifications for the KINGrinder K7 Manual Coffee Grinder:

Figure 10: Dimensions of the KINGrinder K7.
| Brand | KINGrinder |
| Model Number | K7 |
| Color | Iron Grey |
| Material | Aluminum Alloy, Stainless Steel |
| Item Weight | 1.5 pounds (approx. 680g) |
| Item Dimensions (L x W x H) | 2.17"L x 2.17"W x 7.09"H (approx. 5.5cm x 5.5cm x 18cm) |
| Capacity | 35 g |
| Burr Type | 7-Angle Stainless Steel Conical Burr |
Safety Information
- Keep the grinder out of reach of children.
- Exercise caution when handling the burrs, as they are sharp.
- Do not attempt to grind anything other than roasted coffee beans.
- Avoid disassembling the grinder beyond the recommended cleaning steps.
- Store the grinder in a dry place to prevent rust.
Warranty and Support
For warranty information or technical support, please refer to the official KINGrinder website or contact your retailer. Keep your purchase receipt as proof of purchase.


