1. Introduction
This manual provides essential information for the safe operation, assembly, and maintenance of your DYU BM26 Electric Bike. Please read it thoroughly before your first ride to ensure optimal performance and safety.
The DYU BM26 is a 26-inch electric bike designed for adults, featuring a 1000W peak motor and a removable 36V 10Ah battery. It offers a commuting range of up to 40 miles and a top speed of 20 MPH. Key features include front fork suspension and a 28-speed gear system.

Image: Two individuals riding DYU M26 electric bikes, showcasing the bike in an urban setting.
2. Safety Information
Your safety is paramount. Always adhere to the following guidelines:
- Always wear a helmet that meets safety standards.
- Perform a pre-ride inspection: check brakes, tire pressure, battery charge, and ensure all components are securely fastened.
- Familiarize yourself with local traffic laws and regulations regarding electric bikes.
- Avoid riding in adverse weather conditions, such as heavy rain, snow, or ice.
- Do not operate the bike under the influence of alcohol or drugs.
- Ensure the battery is charged using only the provided charger.
- Do not modify the bike's electrical system or motor.
3. Package Contents
Upon unpacking, verify that all the following items are present:
- DYU BM26 Electric Bike (partially assembled)
- Battery Charger
- Pedals (Left and Right)
- Front and Rear Fenders
- Kickstand
- Seat and Seat Post
- Tool Kit (including wrenches and bolts)
- User Manual

Image: The DYU M26 electric bike with its various components, including tools, pedals, seat, and fenders, laid out for assembly.
4. Assembly Instructions
The DYU BM26 Electric Bike is 85% pre-assembled. Follow these steps to complete the assembly:
4.1. Unpacking and Initial Setup
- Carefully remove the bike from its packaging. Cut any straps and remove protective foam.
- Attach the kickstand to the designated mounting point near the rear wheel using the provided wrench and bolts. Ensure it is securely tightened.
4.2. Handlebar Installation
- Loosen the bolts on the handlebar stem using the appropriate wrench.
- Position the handlebar into the stem, ensuring it is centered and aligned.
- Tighten the stem bolts evenly to secure the handlebar.
4.3. Fender and Front Wheel Installation
- Attach the front fender to the front fork using the provided hardware.
- Insert the front wheel into the front fork dropouts. Ensure the brake rotor is correctly seated within the brake caliper.
- Secure the front wheel using the quick-release skewer or axle nuts, ensuring it is firmly in place.
4.4. Pedal and Seat Installation
- Identify the left (L) and right (R) pedals. The left pedal tightens counter-clockwise, and the right pedal tightens clockwise.
- Thread each pedal into its corresponding crank arm by hand, then tighten securely with a wrench.
- Insert the seat post with the saddle into the bike's seat tube. Adjust the height to your preference and secure it with the quick-release lever.
- Attach the rear fender to the seat post or frame, ensuring it is positioned correctly over the rear wheel.
4.5. Final Adjustments
- Adjust the angle of the handlebar and tighten the stem bolts.
- Check all bolts and quick-release levers to ensure they are securely tightened before riding.
4.6. Installation Video Guide
Video: A detailed installation guide for the M26 electric bike, demonstrating each step of the assembly process from unpacking to final checks.
5. Components Overview
5.1. Multi-functional LCD Display
The bike features a smart LCD dashboard that provides real-time information such as speed, pedal assist level (PAS), and odometer readings. This display is centrally mounted on the handlebar for easy visibility.

Image: A close-up view of the multi-functional LCD display on the handlebar, showing speed, PAS level, and odometer, alongside the Shimano 28-speed derailleur.
5.2. Shimano 28-Speed Derailleur
Equipped with a Shimano 28-speed gear system, the bike allows for smooth and precise gear changes, adapting to various terrains and riding preferences.

Image: Detail of the Shimano 28-speed gear system, highlighting the wide range of speeds for a smooth ride.
5.3. Front Fork Suspension
The front fork suspension system absorbs shocks and bumps, providing a more comfortable riding experience, especially on uneven surfaces.
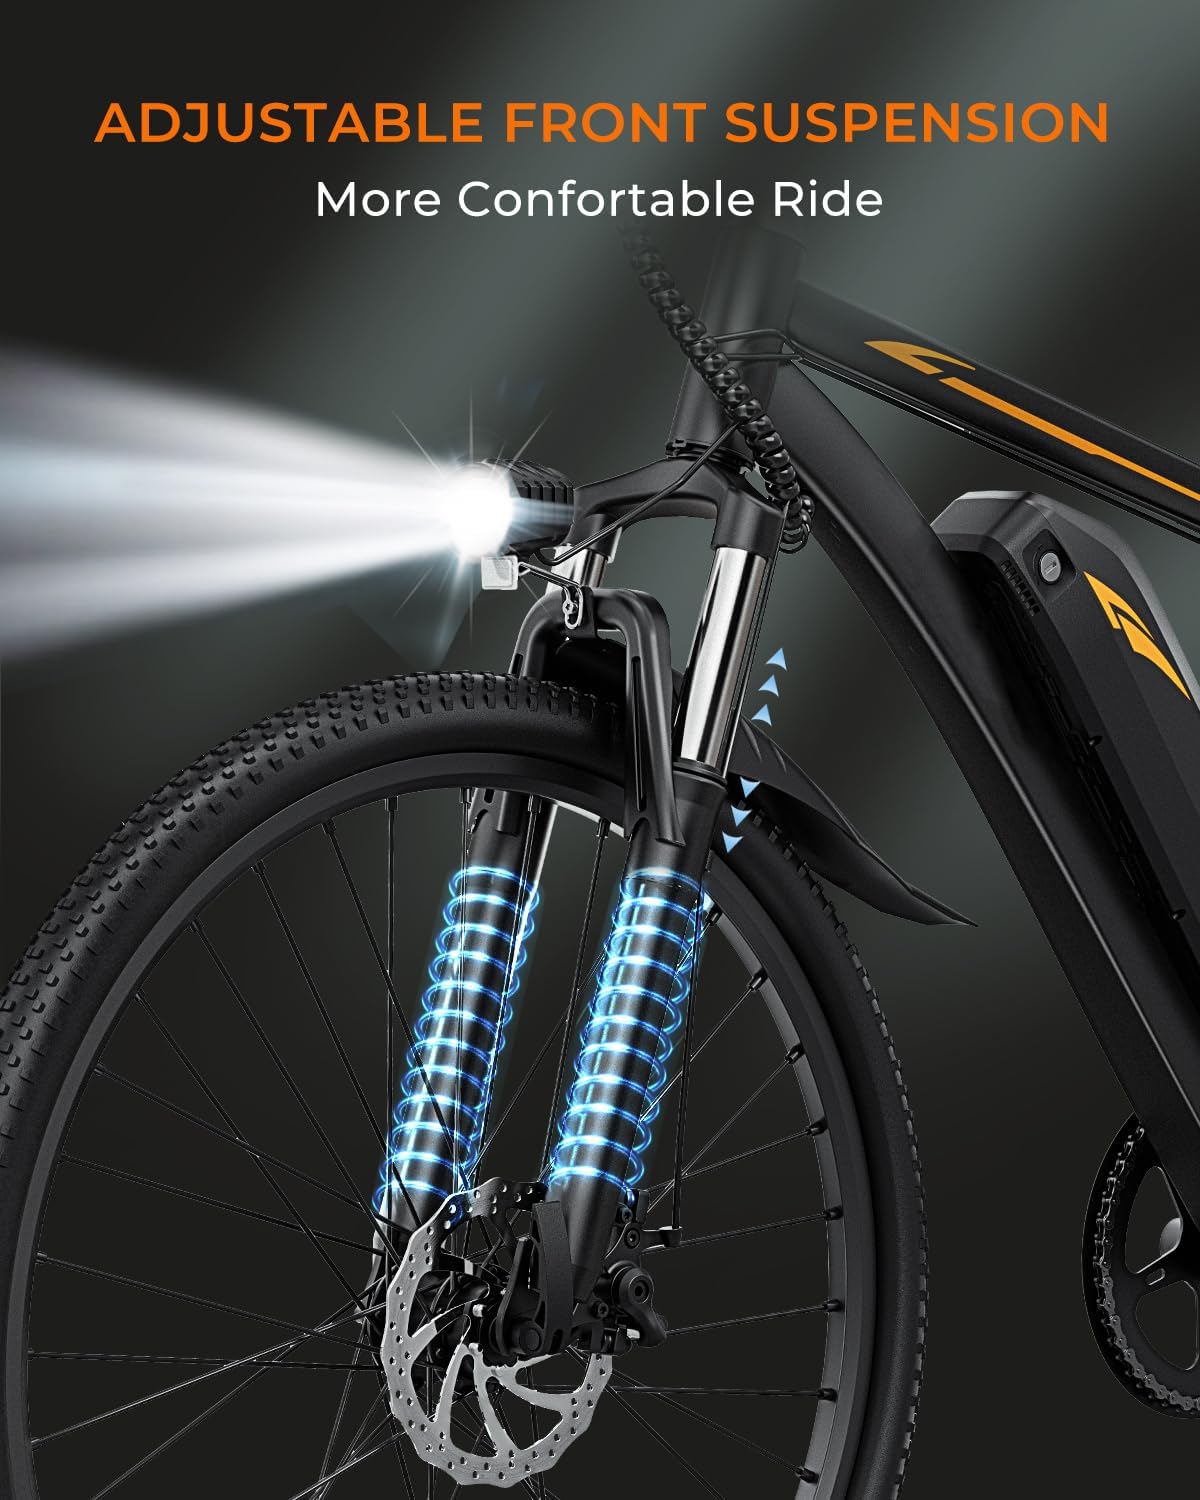
Image: A close-up of the adjustable front suspension, designed to enhance rider comfort.
5.4. Integrated Headlight
An integrated bright headlight ensures visibility and safety during low-light conditions or night riding.

Image: The integrated headlight providing illumination, emphasizing its utility in various light environments.
5.5. Removable Battery
The 36V 10Ah lithium battery is removable for convenient charging and enhanced security. It is UL2849-certified for safety.

Image: A detailed view of the 36V 10Ah removable lithium battery, highlighting its UL2849 certification and capacity.
6. Operating Instructions
6.1. Powering On/Off
- To power on the bike, ensure the battery is installed and unlocked. Press and hold the power button on the LCD display until it illuminates.
- To power off, press and hold the power button again until the display turns off.
6.2. Adjusting Pedal Assist Levels (PAS)
- Use the '+' and '-' buttons on the handlebar control panel to cycle through the pedal assist levels (typically 0-5).
- Level 0 provides no motor assistance, while higher levels offer more power.
6.3. Using the Throttle
The bike is equipped with a throttle for full electric mode. Gently twist the throttle on the right handlebar to engage the motor without pedaling. The amount of twist controls the speed.
6.4. Shifting Gears
Use the Shimano shifter on the right handlebar to change gears. Shift to lower gears for easier pedaling on inclines and higher gears for faster speeds on flat terrain. Always ease pressure on the pedals when shifting to ensure smooth transitions.
6.5. Activating the Headlight
The integrated headlight can be turned on or off via a button on the control panel or display, depending on the specific model configuration.
7. Battery Information
7.1. Charging the Battery
- The battery can be charged while installed on the bike or removed.
- Connect the charger to the battery's charging port, then plug it into a standard wall outlet.
- A full charge typically takes 4-5 hours. The charger indicator light will change color when charging is complete.

Image: The DYU M26 electric bike connected to its charger, illustrating the 4-5 hour charging duration.
7.2. Battery Removal and Installation
- To remove the battery, unlock it using the provided key and slide it out from the frame.
- To install, slide the battery back into the frame until it clicks into place, then lock it with the key.
7.3. Battery Care
- Store the battery in a cool, dry place away from direct sunlight and extreme temperatures.
- Avoid fully discharging the battery regularly. Charge it after each ride or when the charge level is low.
- If storing the bike for an extended period, charge the battery to 50-70% and check it periodically.
8. Maintenance
Regular maintenance ensures the longevity and safe operation of your electric bike.
- Tires: Check tire pressure before each ride. Maintain pressure within the recommended range printed on the tire sidewall.
- Brakes: Regularly inspect brake pads for wear and ensure brake levers engage smoothly and effectively. Adjust as needed.
- Chain: Keep the chain clean and lubricated to prevent rust and ensure smooth gear changes.
- Fasteners: Periodically check all bolts, nuts, and quick-release mechanisms for tightness.
- Cleaning: Clean the bike with a damp cloth. Avoid using high-pressure washers directly on electrical components.
9. Troubleshooting
Here are some common issues and their potential solutions:
| Problem | Possible Cause | Solution |
|---|---|---|
| Bike does not power on | Battery not charged or not properly installed/locked. | Charge the battery. Ensure battery is fully inserted and locked. Check power button on display. |
| Motor not assisting | PAS level set to 0. Loose motor cable connection. | Increase PAS level. Check motor cable connections. |
| Brakes feel weak | Worn brake pads. Loose brake cable. | Inspect and replace brake pads if worn. Adjust brake cable tension. |
| Unusual noises | Loose components. Dry chain. | Check all fasteners. Lubricate the chain. |
10. Specifications
- Bike Type: Electric Bike
- Model Name: BM26
- Brand: DYU
- Age Range: Adult
- Number of Speeds: 28
- Color: Black
- Wheel Size: 26 Inches
- Frame Material: Aluminum
- Suspension Type: Dual (Front Fork)
- Special Feature: Dual Disc Brake
- Included Components: Tool Kit
- Brake Style: Disc
- Wheel Width: 2.1 Inches
- Wattage: 1000 watts (Peak Motor)
- Recommended Height: 5.3' to 6.3'
- Maximum Load: 265 lbs
- Bicycle Weight: 52.45 lbs

Image: A diagram illustrating the physical dimensions of the bike, along with recommended rider height, maximum load capacity, and the bike's weight.
11. Warranty & Support
The DYU BM26 Electric Bike comes with a 30-day free return policy and a 1-year parts warranty. For warranty claims, technical assistance, or any other support inquiries, please contact the manufacturer or your point of purchase directly. Ensure you retain your proof of purchase for warranty validation.


