
Cuddeback CuddeLink Tracks IR Camera
Cuddeback CuddeLink Tracks IR Camera System User Manual
Model: CuddeLink Tracks IR Camera
Introduction
This manual provides instructions for the setup, operation, and maintenance of your Cuddeback CuddeLink Tracks IR Camera system. This bundle includes four CuddeLink IR Cameras, four Power Banks (Model PW-001), and four 16 GB SD Cards. The CuddeLink system allows for wireless networking of multiple cameras to streamline image collection and monitoring.
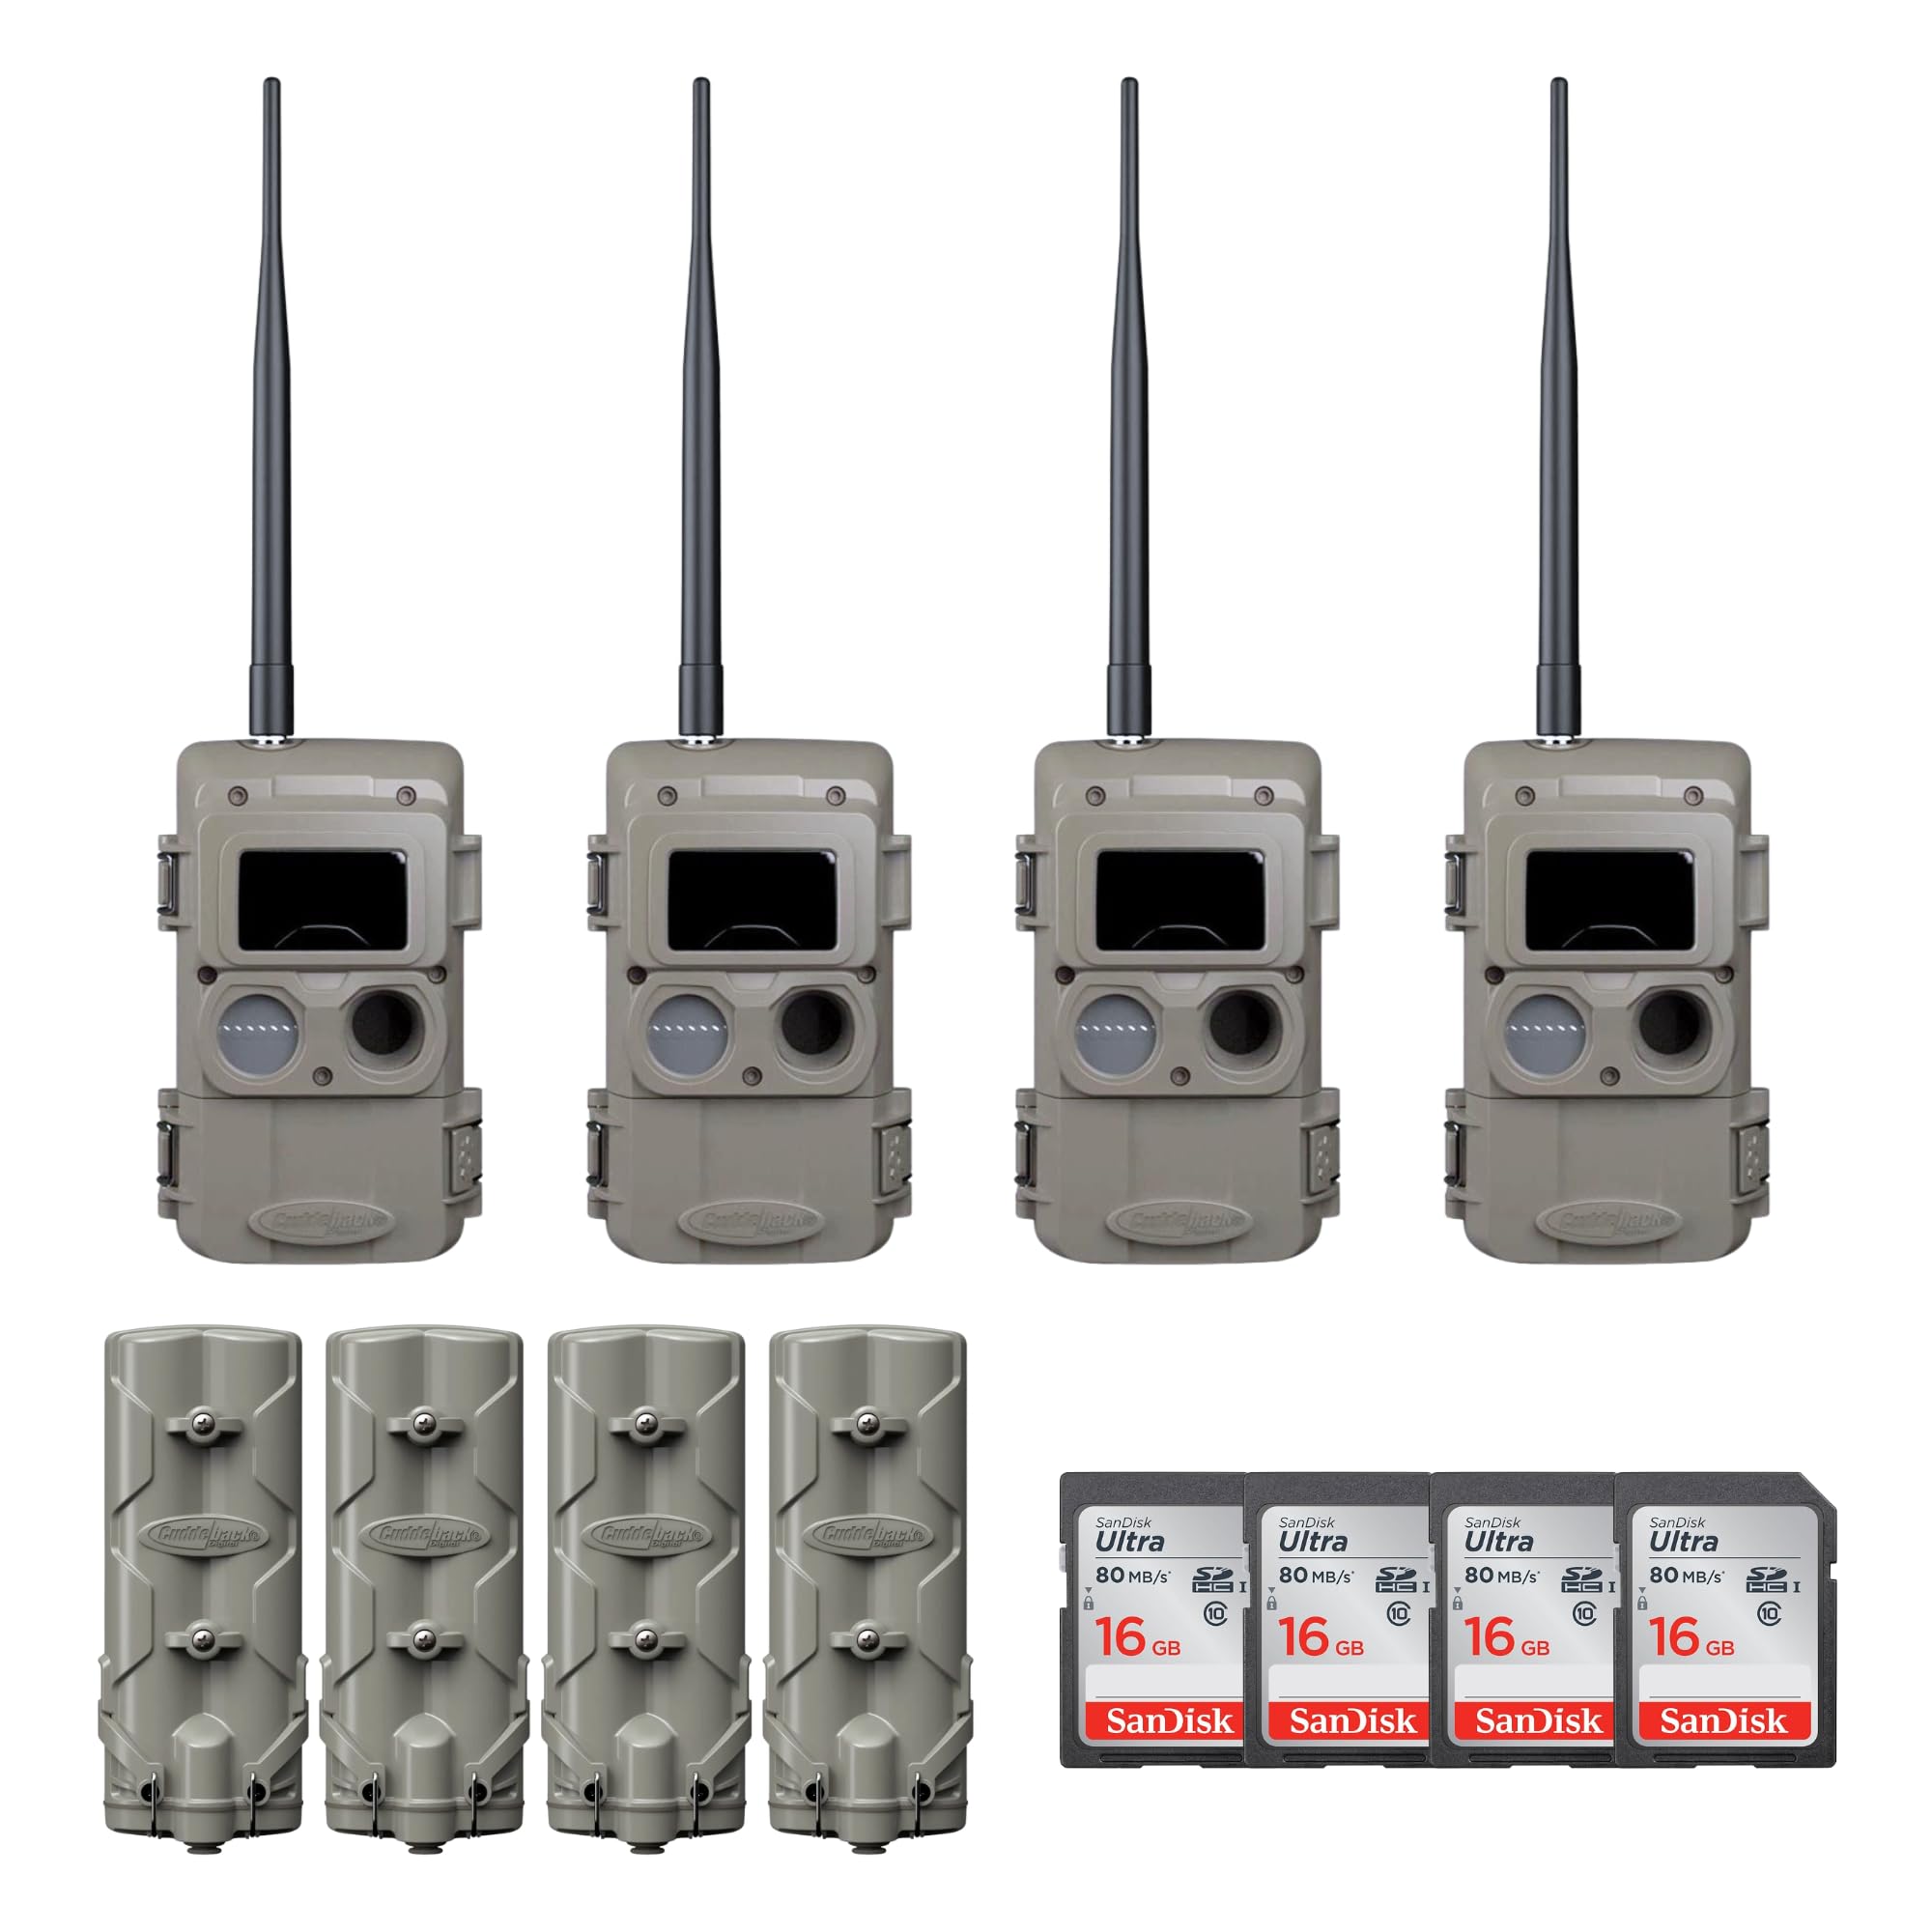
Image: The Cuddeback CuddeLink Tracks IR Camera bundle, showcasing the camera unit and its application in wildlife monitoring.
What's Included
Your Cuddeback CuddeLink Tracks IR Camera bundle includes the following components:
- 4 x Cuddeback CuddeLink Tracks IR Cameras
- 4 x Cuddeback Power Banks (Model PW-001)
- 4 x 16 GB SD Cards
- 4 x C2-C2 Power Cables (for Power Bank)
- 4 x Mounting Straps (for Power Bank)
- 4 x Mounting Brackets (for Power Bank)

Image: Contents of the Power Bank accessory kit, including the PW-001 Power Bank, C2-C2 power cable, mounting strap, and mounting bracket.
Setup Guide
1. Battery Installation (Camera)
- Open the camera's battery compartment.
- Insert 4 D-cell batteries (not included) according to the polarity indicators.
- Close the battery compartment securely to ensure weather resistance.
2. Battery Installation (Power Bank PW-001)
- Open the Power Bank's battery compartment.
- Insert 6 D-cell batteries (not included) according to the polarity indicators.
- Close the compartment securely.

Image: Illustration of the Cuddeback Power Bank and the required D-cell batteries for extended operation.
3. SD Card Insertion
- Locate the SD card slot on the camera.
- Insert the provided 16 GB SD card with the label facing up until it clicks into place.
- Ensure the weatherproof SD door is closed properly.

Image: Detailed view of the camera's features, including the weatherproof SD door, low-glow IR LEDs, and the user-friendly interface.
4. Mounting the Camera
Secure the camera to a tree or post using a compatible mounting strap or bracket (sold separately for the camera, included for the power bank). Position the camera to capture the desired area, ensuring it is stable and level.
5. Powering On and CuddeLink Network Setup
- Turn the camera's power switch to the "ON" position.
- Follow the on-screen prompts on the camera's LCD screen to configure initial settings.
- To establish a CuddeLink network, designate one camera as the "Home" unit and the others as "Remote" units. Refer to the camera's internal menu for specific instructions on linking cameras. Up to 23 cameras can be linked to a single Home unit.
Operating Instructions
1. Basic Operation and Settings
The camera features a user-friendly interface with an enhanced back-lit display. Navigate through the menu using the control buttons to adjust settings such as:
- Shooting Modes: Day, Night, Time-Lapse (two modes available).
- Trigger Speed: The camera has a 1/4 second trigger speed.
- Sensitivity Settings: 7 sensitivity settings for precise detection with the 3rd Gen animal sensor.
- Image Quality: High-definition sensor optimizes brightness and clarity.
- Auto Camera Delay: Patented auto camera delay feature.

Image: Key performance features of the Cuddeback camera, including trigger speed, auto delay, sensor quality, and time-lapse options.
2. Image and Video Capture
The camera automatically captures images or videos based on motion detection and configured settings.
- Daytime Capture: Captures color images.
- Nighttime Capture: Utilizes low-glow 850nm IR LEDs for invisible illumination up to 100 feet, capturing clear black and white images without alerting wildlife. An IR-cut sensor ensures high-definition images.

Image: Examples of high-quality daytime color images and advanced low-glow IR night vision images captured by the camera.
3. Accessing Images
Images can be accessed in two primary ways:
- Manual Retrieval: Photos can be manually pulled from a CuddeLink Home unit's SD card.
- Wireless Transmission (CuddeLink Cell Home): If a CuddeLink Cell Home unit is part of your network, images can be transmitted wirelessly via LTE directly to your phone or web interface. This requires a data plan, available starting at $10 per month.
Maintenance
- Cleaning: Periodically clean the camera lens and IR LEDs with a soft, dry cloth. Ensure no dirt or debris obstructs the sensor or lens.
- Battery Replacement: Replace D-cell batteries in both the camera and Power Bank as needed. Battery life will vary based on usage and environmental conditions.
- SD Card Management: Regularly check and format your SD cards to ensure optimal performance and prevent data corruption. The camera supports up to 256GB SD cards.
- Firmware Updates: Check the Cuddeback website (www.cuddeback.com) for any available firmware updates to ensure your camera has the latest features and bug fixes.
Troubleshooting
- Camera not powering on:
- Check battery installation and ensure batteries are fresh. Verify the power switch is in the "ON" position.
- No images captured:
- Ensure the SD card is inserted correctly and has sufficient space. Check camera settings for proper mode selection and sensitivity. Verify the camera is armed.
- Poor image quality:
- Clean the camera lens and IR LEDs. Ensure the camera is mounted stably. Check for obstructions in the camera's field of view.
- CuddeLink network issues:
- Ensure all cameras are within range of the Home unit. Verify that cameras are correctly configured as Home or Remote units. Check battery levels on all linked cameras.
- Wireless transmission failure:
- Confirm the CuddeLink Cell Home unit has a strong cellular signal. Check your data plan status and ensure it is active. Verify settings in the Cuddeback app or web interface.
Specifications
| Feature | Specification |
|---|---|
| Model | CuddeLink Tracks IR Camera |
| Trigger Speed | 1/4 second |
| Night Vision | Low-glow 850nm IR LEDs (100+ ft range) |
| Sensor Type | CMOS, Infrared (IR-cut filter) |
| Animal Sensor | 3rd Gen, 7 sensitivity settings |
| Connectivity | CuddeLink Wireless Network (up to 23 cameras) |
| Power Source (Camera) | 4 x D-cell batteries (not included) |
| Power Source (Power Bank) | 6 x D-cell batteries (not included) |
| Storage | SD Card (up to 256GB supported, 16GB included) |
| File Format | JPEG |
| Water Resistance | Water Resistant |
| Weight (Item) | 12 pounds (bundle total) |
| UPC | 700868800360 |
| ASIN | B0FS85KZ6Z |
Warranty and Support
Warranty Information
The Cuddeback CuddeLink Tracks IR Camera comes with a 2-year product warranty. To activate and register your product for warranty coverage, please visit the official Cuddeback website and complete the online registration process.
Customer Support
For technical assistance, troubleshooting, or any questions regarding your Cuddeback product, please contact Cuddeback customer support.
- Website: www.cuddeback.com
- Refer to the website for contact information and additional resources.
Ask a question about this manual
Ask about setup, troubleshooting, compatibility, parts, safety, or missing instructions. Manuals+ will review the question and use this page’s manual context to help answer it.