1. Introduction
Thank you for choosing the AECOJOY 10' x 10' Outdoor Wood Cedar Gazebo. This manual provides essential information for the safe and correct assembly, operation, and maintenance of your new gazebo. Please read all instructions carefully before beginning assembly and retain this manual for future reference.

Image 1.1: The AECOJOY 10' x 10' Outdoor Wood Cedar Gazebo, showcasing its design and potential placement on a patio.
2. Safety Information
Always prioritize safety during assembly and use. Failure to follow these instructions may result in injury or damage to the product.
- Ensure all components are present and undamaged before assembly. Do not proceed with assembly if parts are missing or damaged.
- Assembly requires at least two adults.
- Wear appropriate safety gear, including gloves and eye protection, during assembly.
- Choose a level and stable surface for installation.
- Securely anchor the gazebo to the ground or a wall as instructed to prevent wind damage. This gazebo is designed to withstand winds up to 70 mph when properly secured.
- Regularly inspect the gazebo for loose fasteners or signs of wear.
- Clear accumulated snow promptly. While designed to support up to 20 inches of snow, timely clearing is recommended to prevent excessive load.
- Keep children and pets away from the assembly area.
3. Package Contents
Before beginning assembly, verify that all parts listed in the packing list (usually found in a separate document or on the packaging) are present. If any parts are missing or damaged, contact customer support immediately.
Note: A complete hardware kit is essential for proper assembly. Ensure all screws, bolts, and connectors are accounted for.
4. Setup and Assembly
This gazebo can be installed as a freestanding unit or wall-mounted. The assembly process is designed to be straightforward, but careful attention to detail is required.
4.1 Site Selection
Choose a location that is level and provides adequate space for the 10' x 10' footprint. Consider sun exposure, wind patterns, and proximity to your home or other structures.

Image 4.1: Illustration of wall-mounted and freestanding installation options for the gazebo.
4.2 General Assembly Steps (Refer to detailed manual for specific diagrams)
- Unpack and Organize: Carefully unpack all components and lay them out. Group similar parts and hardware together.
- Assemble Frame: Begin by assembling the main wooden frame structure according to the provided diagrams. Ensure all connections are secure but do not fully tighten bolts until the entire frame is upright and aligned.
- Install Roof Supports: Attach the roof support beams to the main frame. Pay close attention to the orientation for proper water drainage.
- Attach Roof Panels: Install the hardtop roof panels. The design incorporates high-side bottom crossbeam reinforcement and a sloped design for effective waterproofing and to prevent panel bending. Ensure seamless fitment to minimize leaks.
- Secure Gazebo:
- Freestanding: Anchor the gazebo securely to the ground using appropriate anchors (not always included, check your specific package).
- Wall-Mounted: Position the gazebo against the desired wall. The hardtop panels are designed to sit flush against the wall, and the wall-side wooden frame provides stable support. No external screws for wall attachment are typically required, but ensure the structure is stable and secure.
- Final Tightening: Once the entire structure is assembled and aligned, fully tighten all bolts and fasteners.
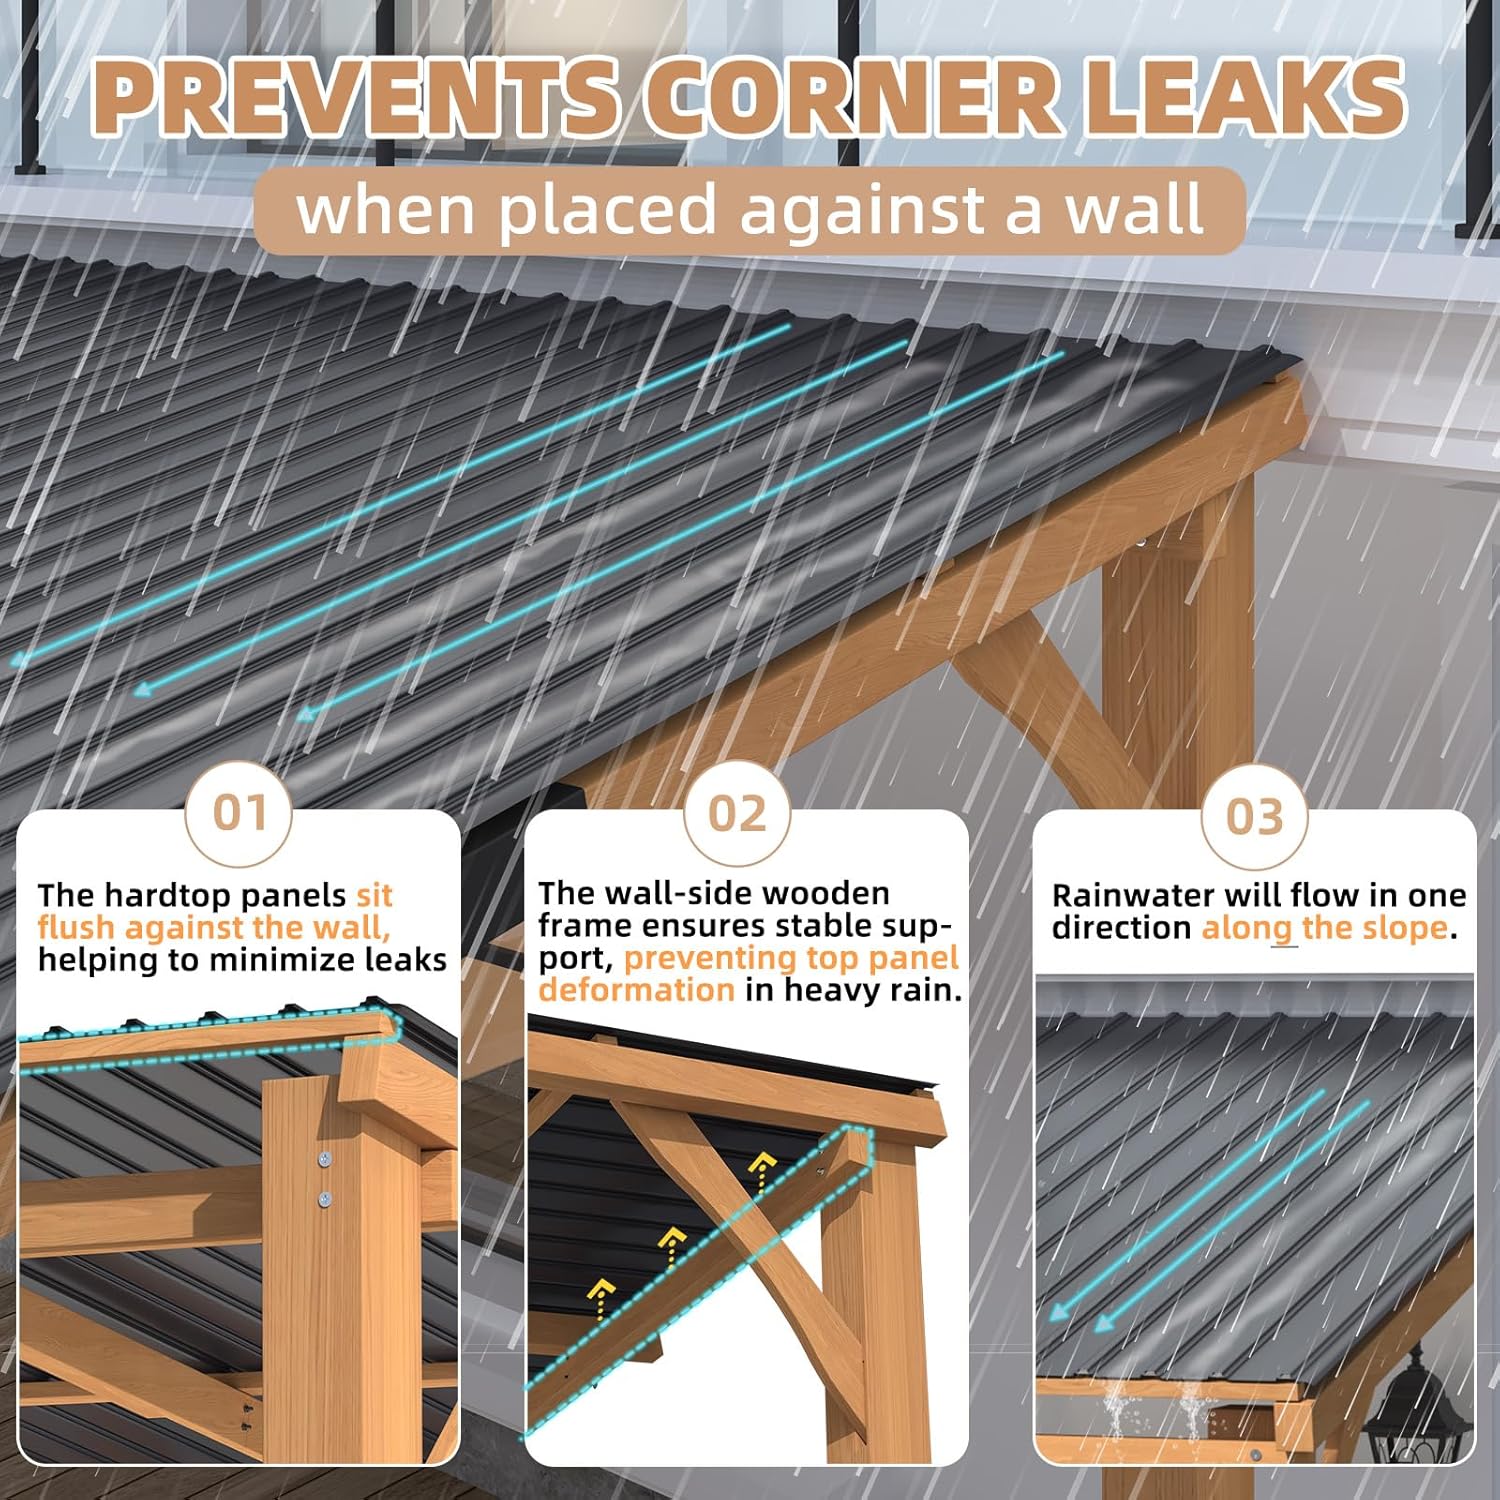
Image 4.2: Detail of the roof's design features that prevent corner leaks, including flush wall fit and sloped drainage.

Image 4.3: Dimensional diagram of the AECOJOY 10' x 10' Gazebo.
5. Operating Instructions
The AECOJOY gazebo provides a sheltered outdoor space for relaxation and entertainment. Its hardtop design offers complete UV protection and a generously shaded area, while also shielding against rain.
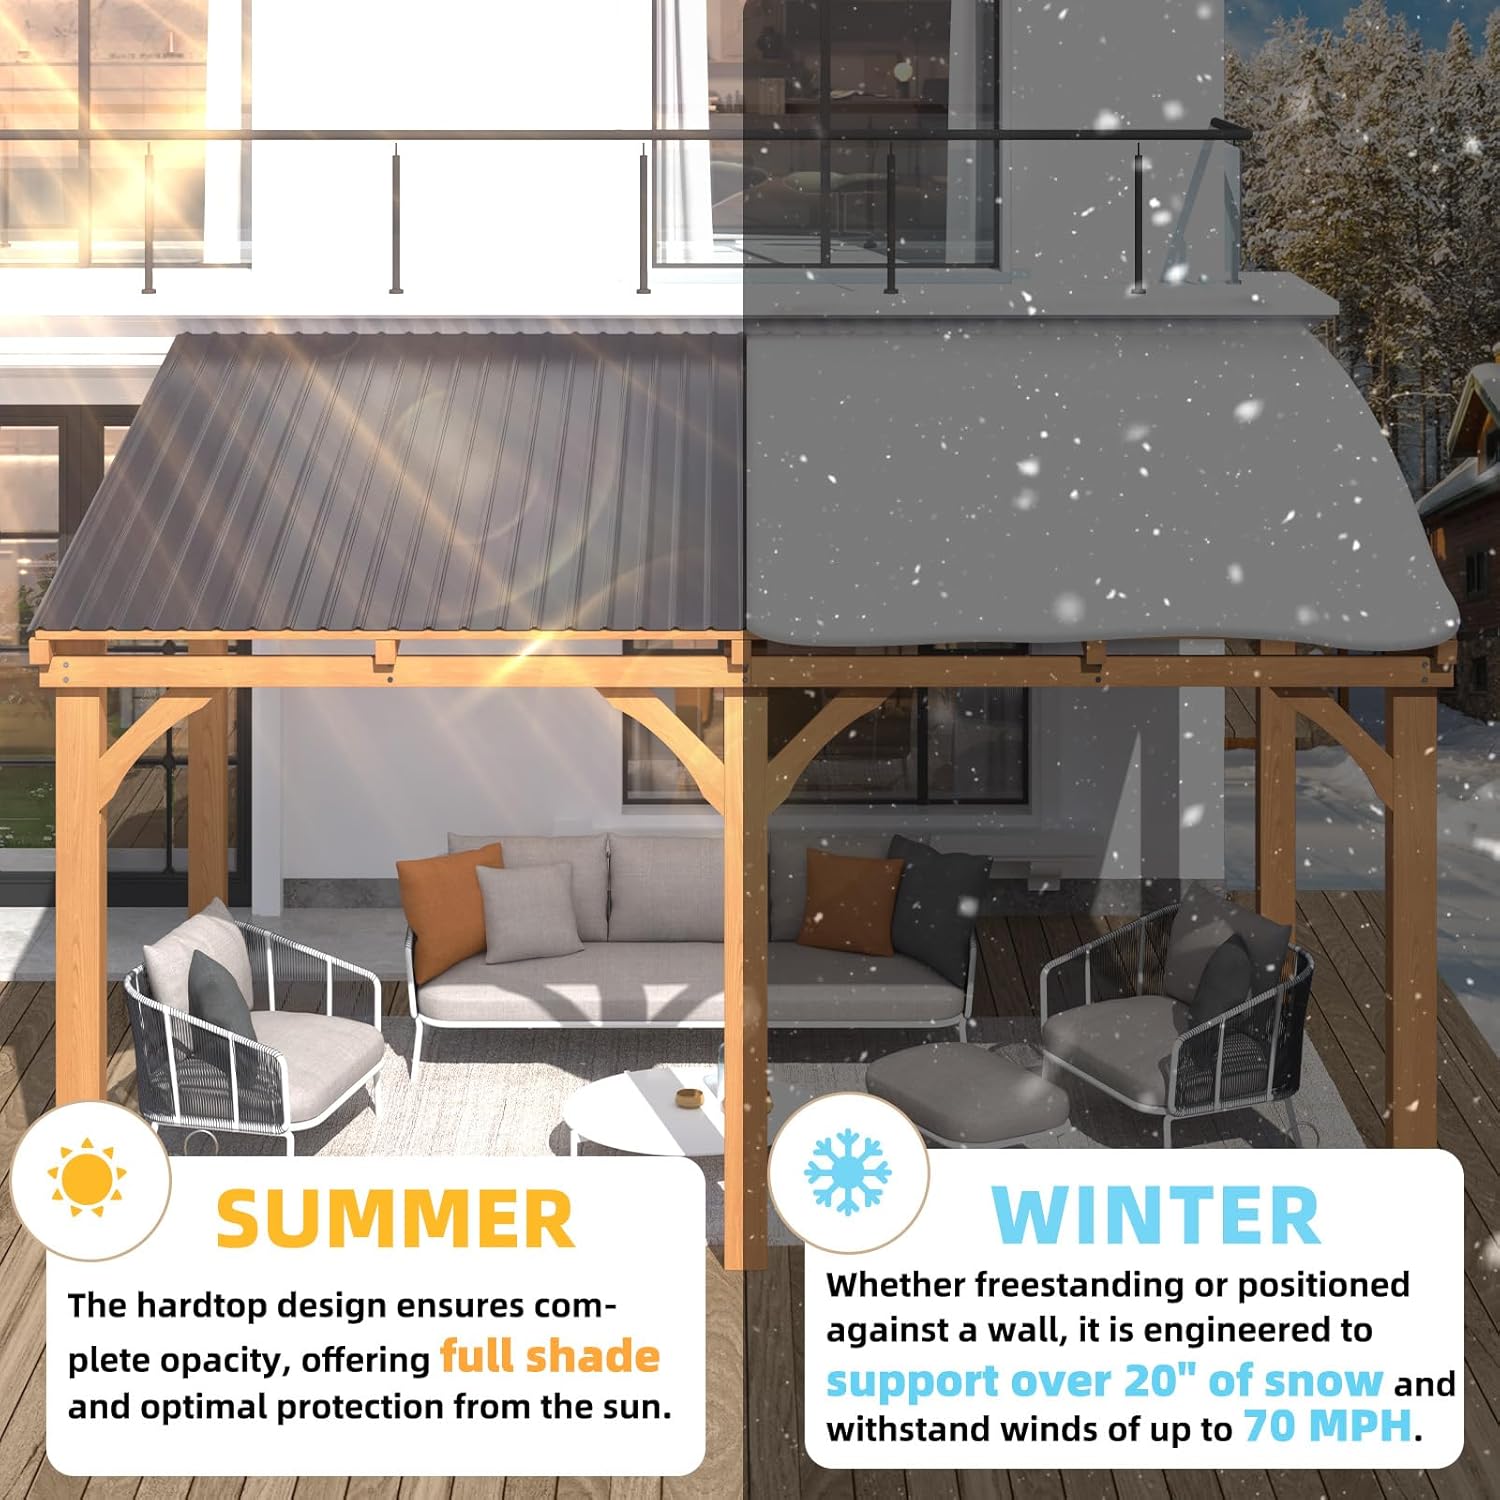
Image 5.1: The gazebo's performance in different seasons, highlighting shade in summer and snow load capacity in winter.
- Enjoy the shaded area for outdoor activities.
- The waterproof roof ensures protection during light to moderate rain.
- The structure is designed to handle significant snow loads (up to 20 inches), but regular clearing is advised to prolong product life.
6. Maintenance
Regular maintenance will extend the life and appearance of your gazebo.
- Cleaning: Clean the wooden frame and roof panels with a mild soap and water solution. Rinse thoroughly with clean water. Avoid harsh chemicals or abrasive cleaners.
- Inspection: Periodically check all bolts, screws, and connections to ensure they remain tight. Tighten any loose fasteners.
- Snow Removal: During winter, promptly remove heavy snow accumulation from the roof to prevent excessive stress on the structure.
- Wood Care: The cedar wood frame may benefit from periodic sealing or staining to maintain its appearance and protect it from weathering, depending on your local climate and preference.
7. Troubleshooting
| Problem | Possible Cause | Solution |
|---|---|---|
| Gazebo feels unstable or wobbly. | Loose fasteners; uneven ground; inadequate anchoring. | Check and tighten all bolts and screws. Ensure the gazebo is on a level surface. Verify proper anchoring to the ground or wall. |
| Water leakage from the roof. | Improper roof panel installation; damaged panels; sealant failure. | Inspect roof panels for correct overlap and secure fastening. Check for any cracks or damage to panels. Apply silicone sealant to seams if necessary. |
| Missing hardware during assembly. | Packaging error. | Immediately contact AECOJOY customer support with your purchase details and a list of missing parts. |
| Screws for roofing material are too long. | Incorrect hardware provided or improper installation. | Ensure you are using the correct screws for each step as per the assembly manual. If screws are genuinely too long, contact customer support for replacements or advice. Do not force screws that protrude excessively. |
8. Specifications
| Feature | Detail |
|---|---|
| Brand | AECOJOY |
| Model Number | 16554MS |
| Product Dimensions | 117"L x 111"W x 96.5"H (Approx. 10' x 10') |
| Item Weight | 272 Pounds |
| Material | Alloy Steel, Wood (Cedar) |
| Frame Material | Wood |
| Water Resistance Level | Waterproof |
| Ultraviolet Light Protection | UPF (Complete UV Protection) |
| Shape | Rectangular |
| Assembly Required | Yes |
| Wind Resistance | Up to 70 mph (when properly anchored) |
| Snow Load Capacity | Approximately 20 inches |
9. Warranty Information
AECOJOY stands behind the quality of its products. For specific warranty terms and conditions, please refer to the warranty card included with your product or visit the official AECOJOY website. The manufacturer offers maintenance and replacement services for eligible components.
10. Customer Support
If you have any questions, require assistance with assembly, usage, or need to report missing/damaged parts, please contact AECOJOY customer support. A professional support team is available to assist you.
Please have your model number (16554MS) and purchase information ready when contacting support.
Contact information is typically provided on the product packaging, warranty card, or the official AECOJOY website.


