1. Introduction
Thank you for choosing the Proscenic P11 Ultra Cordless Vacuum Cleaner. This manual provides essential information for the safe and efficient use, maintenance, and troubleshooting of your new appliance. Please read it thoroughly before first use and retain it for future reference.
The Proscenic P11 Ultra is designed for versatile cleaning across various surfaces, offering powerful suction and convenient features for a cleaner home environment.
2. Important Safety Instructions
Always follow basic safety precautions when using electrical appliances to reduce the risk of fire, electric shock, or injury.
- Read all instructions before using the appliance.
- Do not use outdoors or on wet surfaces.
- Do not allow to be used as a toy. Close attention is necessary when used by or near children.
- Use only as described in this manual. Use only manufacturer's recommended attachments.
- Do not use with damaged cord or plug. If appliance is not working as it should, has been dropped, damaged, left outdoors, or dropped into water, return it to a service center.
- Do not pull or carry by cord, use cord as a handle, close a door on cord, or pull cord around sharp edges or corners. Do not run appliance over cord. Keep cord away from heated surfaces.
- Do not unplug by pulling on cord. To unplug, grasp the plug, not the cord.
- Do not handle plug or appliance with wet hands.
- Do not put any object into openings. Do not use with any opening blocked; keep free of dust, lint, hair, and anything that may reduce airflow.
- Keep hair, loose clothing, fingers, and all parts of body away from openings and moving parts.
- Do not pick up anything that is burning or smoking, such as cigarettes, matches, or hot ashes.
- Use extra care when cleaning on stairs.
- Do not use to pick up flammable or combustible liquids, such as gasoline, or use in areas where they may be present.
- Do not pick up toxic material (e.g., chlorine bleach, ammonia cleaner, drain cleaner).
- Do not use in an enclosed space where vapors are present from oil base paint, paint thinner, some mothproofing substances, flammable dust, or other explosive or toxic vapors.
- Do not vacuum hard or sharp objects such as glass, nails, screws, or coins.
- Always turn off this appliance before connecting or disconnecting the motorized nozzle.
- Store the appliance indoors. Put away after use to prevent accidents.
- Use only the charger supplied by the manufacturer to recharge.
- Do not incinerate the appliance even if it is severely damaged. The batteries can explode in a fire.
- The battery should be fully charged and stored separately if the device is not used for a long time.
3. Package Contents
Carefully unpack your Proscenic P11 Ultra and check that all items are present and in good condition. If any items are missing or damaged, please contact customer support.
- Main Vacuum Unit
- Adjustable Telescopic Rod
- Motorized Floor Brush (Anti-Tangle with Green Light)
- Removable Battery
- Accessory Kit (includes Crevice Tool, Dusting Brush)
- Adapter (Charger)
- Charging Dock / Wall Mount
- User Manual (this document)
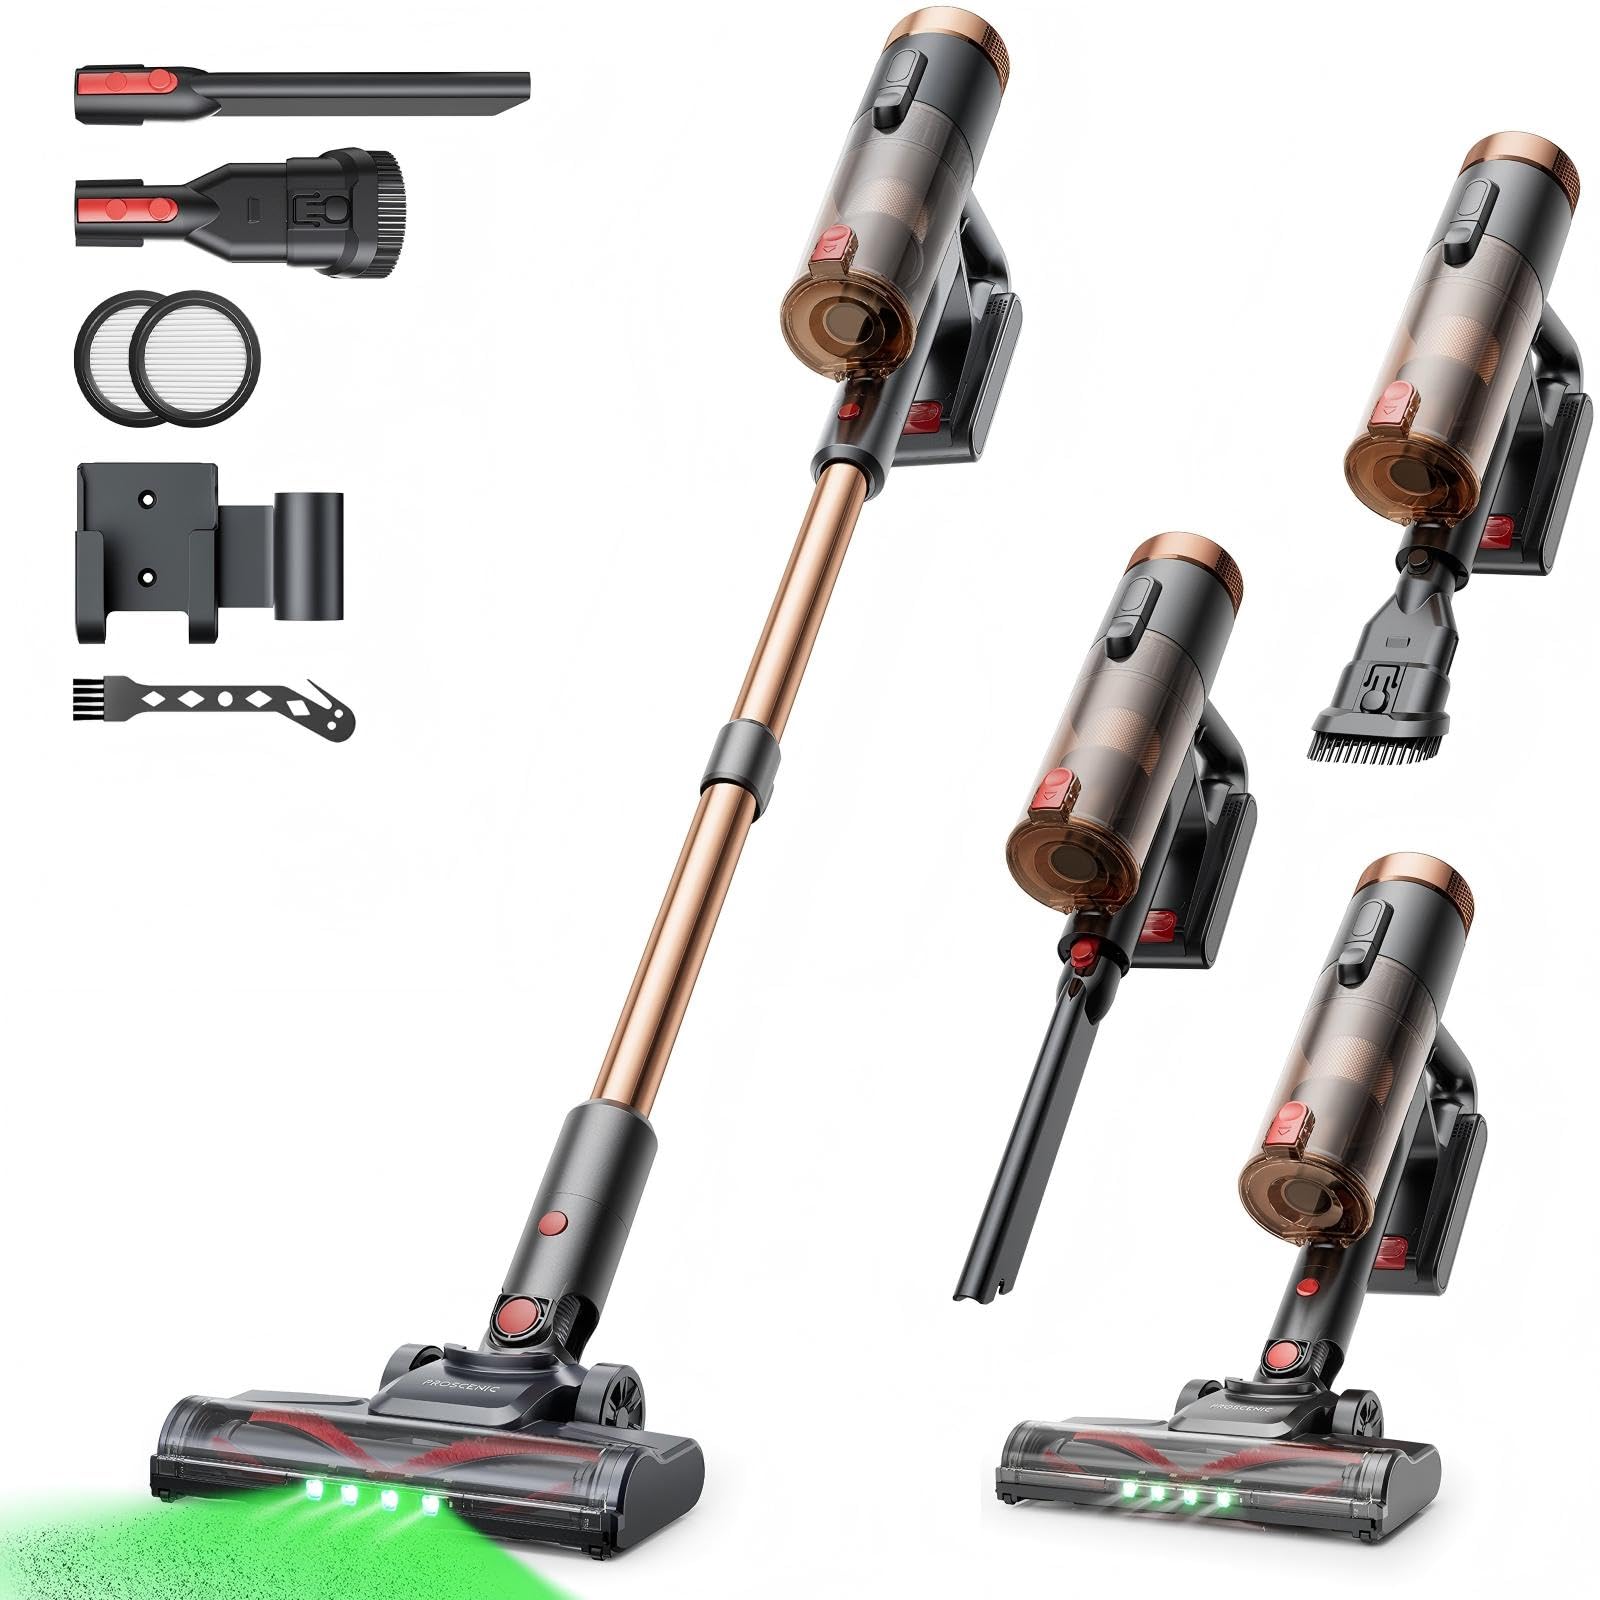
Image 1: Proscenic P11 Ultra main unit and included accessories. This image displays the vacuum cleaner's primary components, including the handheld unit, extension wand, floor brush, and various attachments.
4. Product Overview
Familiarize yourself with the key components and features of your Proscenic P11 Ultra.
Key Features:
- Freestanding Design: Allows the vacuum to stand upright independently for convenient storage and breaks during cleaning.
- 180° Rotating Floor Brush: Enhances maneuverability, allowing easy access to tight corners and under furniture.
- Adjustable Telescopic Rod: Customize the height for comfortable use by various users.
- Anti-Tangle Brush with Green Detection Light: Prevents hair tangles and illuminates hidden dust particles for thorough cleaning.
- 50 kPa Super Strong Suction Power: Provides powerful cleaning performance for stubborn dirt and debris.
- Intelligent Touchscreen: Displays real-time information on battery life, maintenance status, and suction modes.
- Two Suction Power Modes: Offers versatile cleaning options for different floor types and cleaning needs.
- Removable Battery: Allows for extended cleaning time with an optional spare battery and convenient charging.
Image 2: Close-up of the Proscenic P11 Ultra's intelligent touchscreen. The screen provides visual feedback on the vacuum's status.
5. Setup & Assembly
Follow these steps to assemble your Proscenic P11 Ultra and prepare it for first use.
5.1 Assembling the Main Unit
- Insert the adjustable telescopic rod into the main handheld vacuum unit until it clicks securely into place.
- Attach the motorized floor brush to the bottom end of the telescopic rod, ensuring it locks firmly.
- Insert the removable battery into the designated slot on the main unit until it clicks.
Image 3: Illustration of assembling the main vacuum unit, showing the connection points for the telescopic rod and floor brush.
5.2 Charging the Battery
Before first use, fully charge the battery. The battery can be charged while attached to the main unit or separately.
- Connect the adapter to the charging port on the battery or the charging dock.
- Plug the adapter into a power outlet.
- The touchscreen display will indicate charging status. A full charge typically takes approximately 4-5 hours.
Image 4: The vacuum cleaner connected to its charger, illustrating the charging process. The battery can be charged while installed or removed.
5.3 Attaching Accessories
To use the crevice tool or dusting brush, detach the telescopic rod and floor brush from the main unit. Insert the desired accessory directly into the main unit's nozzle until it clicks.
6. Operation
Learn how to effectively use your Proscenic P11 Ultra for various cleaning tasks.
6.1 Powering On/Off and Suction Modes
- Press the power button on the main unit to turn the vacuum cleaner on. It will start in the default suction mode.
- Use the mode selection button on the touchscreen to switch between the two available suction power modes: Standard and Max.
- Press the power button again to turn the vacuum cleaner off.
6.2 Cleaning Surfaces
- Hard Floors & Carpets: Use the motorized floor brush for general cleaning. The green detection light will help identify fine dust.
- Tight Spaces & Corners: Utilize the crevice tool for narrow gaps, edges, and hard-to-reach areas.
- Upholstery & Delicate Surfaces: Attach the dusting brush for cleaning sofas, curtains, and other sensitive items.
- Pet Hair: The anti-tangle brush is specifically designed to effectively pick up pet hair without tangling.
Image 5: The Proscenic P11 Ultra in use, demonstrating its maneuverability on a hard floor surface. The green light on the brush head is visible.
6.3 Freestanding Function
The P11 Ultra features a freestanding design. When you need to pause cleaning or store the vacuum temporarily, simply ensure it is balanced and stands upright on its own. This allows for convenient breaks without needing to lean the vacuum against a wall or lay it down.
7. Maintenance
Regular maintenance ensures optimal performance and extends the lifespan of your vacuum cleaner.
7.1 Emptying the Dustbin
Empty the dustbin after each use or when the MAX fill line is reached.
- Ensure the vacuum is turned off.
- Locate the dustbin release button, usually near the handle.
- Press the button to open the dustbin flap and empty contents into a waste bin.
- Close the dustbin flap securely until it clicks.
Image 6: A user demonstrating how to empty the transparent dustbin of the Proscenic P11 Ultra into a trash receptacle.
7.2 Cleaning the HEPA Filter
Clean the HEPA filter regularly (e.g., monthly, depending on usage) to maintain suction power.
- Remove the dustbin from the main unit.
- Twist and pull out the HEPA filter assembly.
- Tap the filter gently over a waste bin to remove loose dust.
- If necessary, rinse the filter under cold running water. Ensure it is completely dry (for at least 24 hours) before reinserting. Do not use detergents.
- Reassemble the filter and dustbin.
7.3 Cleaning the Brush Roll
Periodically check the brush roll for tangled hair or debris.
- Turn off the vacuum and detach the motorized floor brush.
- Locate the brush roll release mechanism (refer to the floor brush diagram).
- Remove the brush roll. Use scissors or a cleaning tool to cut and remove any tangled hair or fibers.
- Reinsert the brush roll and secure the release mechanism.
8. Troubleshooting
If you encounter issues with your Proscenic P11 Ultra, refer to the following common problems and solutions.
| Problem | Possible Cause | Solution |
|---|---|---|
| Vacuum does not turn on | Battery is not charged or not properly installed. | Ensure battery is fully charged and securely inserted. |
| Low suction power | Dustbin is full; Filter is clogged; Brush roll is blocked. | Empty dustbin. Clean or replace HEPA filter. Remove blockages from brush roll. |
| Brush roll not rotating | Brush roll is tangled with hair/debris; Floor brush is not properly attached. | Clean brush roll. Reattach floor brush securely. |
| Short battery life | Battery not fully charged; Using Max suction mode frequently; Battery degradation. | Ensure full charge. Use Standard mode for longer runtime. Consider replacing battery if significantly degraded. |
| Unusual noise | Blockage in nozzle or hose; Damaged brush roll. | Check for and remove any blockages. Inspect brush roll for damage. |
If the problem persists after attempting these solutions, please contact Proscenic customer support.
9. Specifications
Technical specifications for the Proscenic P11 Ultra Cordless Vacuum Cleaner.
- Model: P11 Ultra
- Power Source: Battery Powered
- Voltage: 22.5 Volts
- Suction Power: Up to 50 kPa
- Item Weight: 2.68 Kilograms
- Dustbin Capacity: Approximately 1.0 Liter (1000 Microliters as per data, interpreted as 1.0L)
- Filter Type: HEPA Filter
- Form Factor: Upright (Stick Vacuum)
- Cordless: Yes
- Recommended Surfaces: Carpet, Solid Wood, Upholstery
- Special Features: Freestanding Design, Touchscreen, Green Detection Light, Anti-Tangle Brush, Adjustable Telescopic Rod, Removable Battery
10. Warranty & Customer Support
Proscenic provides a 2-year warranty for the P11 Ultra Cordless Vacuum Cleaner, covering manufacturing defects from the date of purchase.
For any questions, technical assistance, or warranty claims, please contact our customer support team. We offer 7x24 hours customer support to assist you.
Email: service-de@proscenic.com
Please have your model number (P11 Ultra) and purchase information ready when contacting support.


