1. Introduction
Welcome to the user manual for your new Shark EVOPOWER SYSTEM BOOST+ LC751JLVNC Cordless Stick Vacuum Cleaner. This appliance is designed to provide efficient and thorough cleaning for your home with advanced features like 360-degree cleaning, automatic dust collection, and a flexible pipe for enhanced maneuverability. Please read these instructions carefully before using your vacuum cleaner to ensure safe and optimal performance. Keep this manual for future reference.

Image: The Shark EVOPOWER SYSTEM BOOST+ in action, demonstrating its powerful cleaning on a hard floor.
2. Product Overview and Features
The Shark EVOPOWER SYSTEM BOOST+ LC751JLVNC is engineered with several innovative features to simplify your cleaning routine:
- 360 Intelligent Nozzle: This unique nozzle design captures debris from all directions (front, back, left, and right), significantly reducing cleaning time and ensuring no dirt is left behind.
- Smart iQ Technology: Equipped with iQ, Floor, and Edge sensors, the vacuum intelligently adjusts its cleaning mode and suction power based on the amount of debris, floor type, and proximity to edges.
- Automatic Dust Collection Dock: The included dock automatically empties the vacuum's dust cup, storing approximately 30 days' worth of debris. This minimizes the frequency of manual dust disposal.
- Anti-Tangle Brushroll: Advanced brushroll technology prevents hair from tangling, making it ideal for homes with pets and long hair, and simplifying maintenance.
- Quiet Operation: A newly developed brushroll design provides a quieter cleaning experience on both hard floors and carpets, operating at up to twice the quietness of previous models.
- Flex Pipe: With a simple button press, the main pipe bends, allowing you to easily clean under low furniture without needing to bend down.
- Stylish Design: The vacuum features a sleek, light lavender design that complements various home interiors, allowing for convenient storage and quick access.
- LED Headlight: A bright blue LED headlight illuminates dust and debris on the floor, ensuring thorough cleaning even in dimly lit areas.
- Versatile Accessories: Comes with a crevice tool with brush, mini motorhead, and multi-nozzle for comprehensive cleaning of various surfaces and hard-to-reach areas.
Detailed Feature Breakdown:
360-Degree Cleaning
The innovative 360 Intelligent Nozzle ensures comprehensive cleaning by picking up dirt from all sides. This design allows for efficient cleaning with fewer passes.

Image: The vacuum head effectively collecting debris from front, back, and sides.
Smart iQ Sensors
The vacuum utilizes multiple sensors to optimize cleaning. The iQ sensor detects debris levels and adjusts suction, the floor sensor adapts to different floor types, and the edge sensor enhances cleaning along walls and corners.

Image: iQ indicator showing automatic suction adjustment based on debris amount.
Automatic Dust Collection Dock
The self-emptying dock provides convenience by automatically transferring collected dust from the vacuum into a larger container, reducing the need for frequent manual emptying.

Image: The vacuum cleaner automatically emptying its dustbin into the charging dock.
Anti-Tangle Brushroll
The specially designed brushroll actively prevents hair from wrapping around it, maintaining consistent cleaning performance and simplifying brushroll maintenance.

Image: The anti-tangle brushroll technology compared to a conventional brushroll.
Flex Pipe for Under-Furniture Cleaning
The flexible pipe allows the vacuum to bend at an angle, making it easy to reach under beds, sofas, and other low-lying furniture without straining your back.

Image: Utilizing the Flex pipe to clean under furniture while standing upright.
LED Headlight
The integrated blue LED headlight illuminates fine dust and debris on your floors, ensuring that no particle is missed during cleaning, even in poorly lit areas.

Image: The blue LED headlight revealing hidden dust and dirt.
3. Setup
3.1 Unpacking and Assembly
Carefully remove all components from the packaging. Ensure all parts listed in the packing list are present. Assemble the vacuum cleaner by connecting the main body, wand, and floor nozzle until they click into place. Refer to the diagram below for visual guidance.

Image: Exploded view of the vacuum components for assembly.
3.2 Charging the Battery
Before first use, fully charge the vacuum cleaner. Place the main unit onto the automatic dust collection dock. Ensure the dock is plugged into a power outlet. The charging indicator lights on the vacuum will show the charging status. A full charge takes approximately 3.5 hours.

Image: The vacuum cleaner correctly placed on its charging dock.
4. Operating Instructions
4.1 Powering On/Off and Mode Selection
Press the power button to turn the vacuum on. The vacuum will automatically adjust suction based on the Smart iQ sensors. You can manually switch between different power modes if desired, though the iQ mode is recommended for most cleaning tasks. Press the power button again to turn off the vacuum.

Image: Operating the vacuum cleaner on a carpeted surface.
4.2 Using the Flex Pipe
To activate the Flex pipe feature, press the dedicated button on the wand. The pipe will bend, allowing the floor nozzle to reach further under furniture. This feature enables comfortable cleaning without bending or kneeling.
Image: Demonstrating the Flex pipe for cleaning under low furniture.
4.3 Using Handheld Mode and Accessories
Detach the main unit from the wand to use it as a powerful handheld vacuum. Attach the desired accessory (crevice tool, mini motorhead, or multi-nozzle) directly to the handheld unit for specialized cleaning tasks such as upholstery, car interiors, or tight spaces.
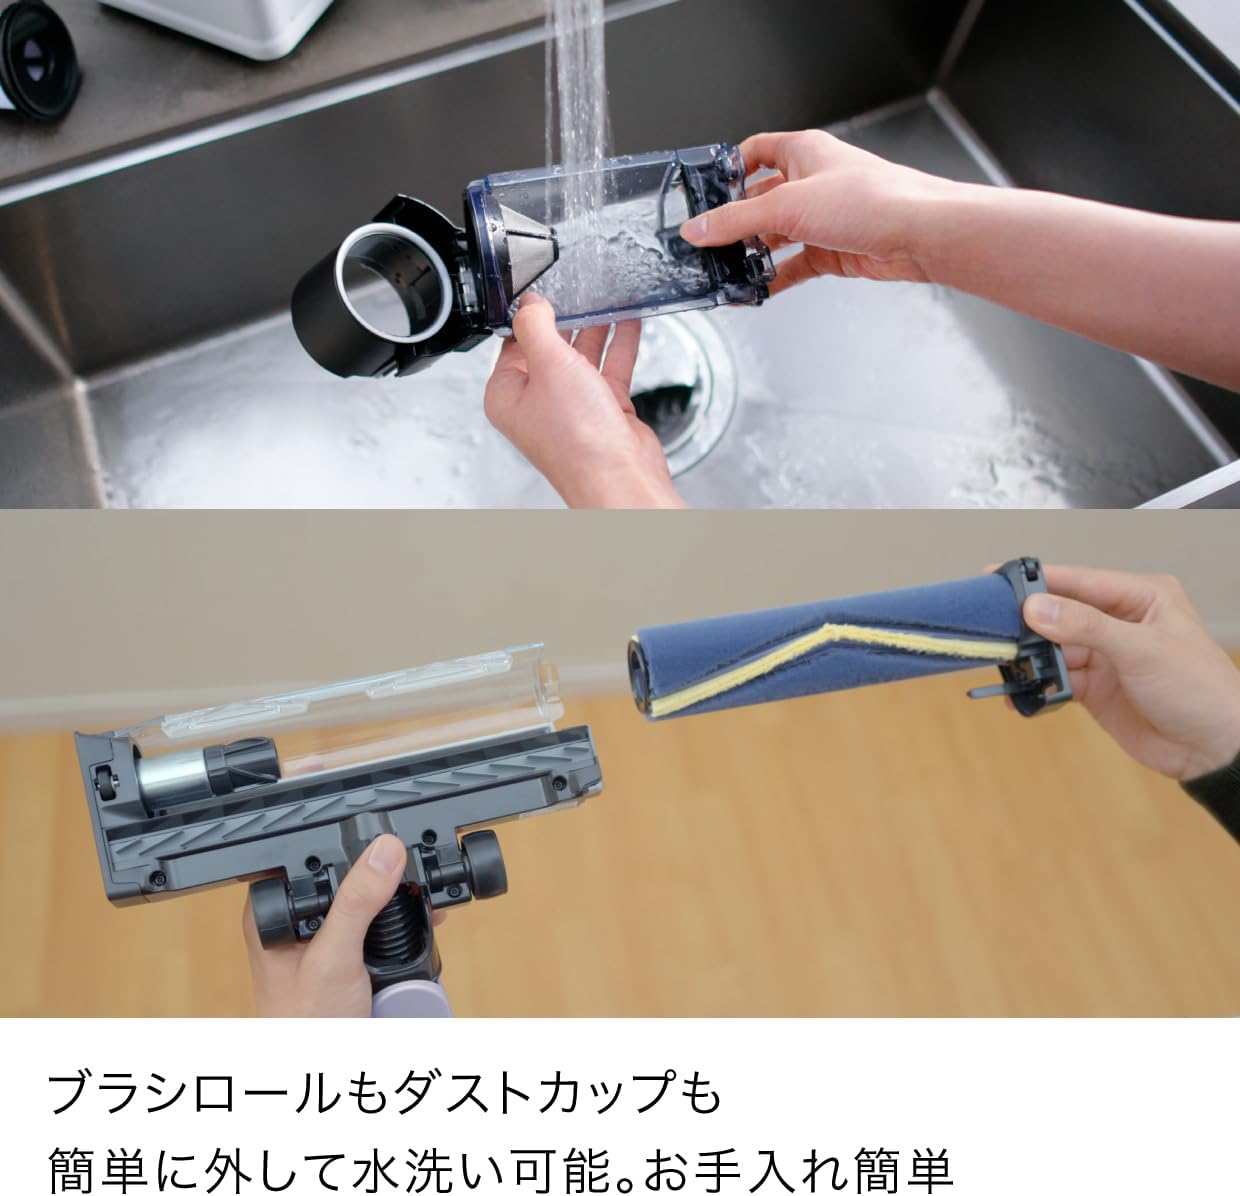
Image: The handheld unit with mini motorhead, brush crevice tool, and multi-nozzle attachments.
5. Maintenance
Regular maintenance ensures the longevity and optimal performance of your Shark vacuum cleaner.
5.1 Emptying the Dust Cup
When the vacuum is placed on the automatic dust collection dock, it will automatically empty its dust cup. For manual emptying or if the dock is not used, detach the dust cup from the handheld unit and press the release button to open the bottom flap, disposing of debris into a trash bin.

Image: Manually emptying the dust cup.
5.2 Cleaning the Brushroll and Dust Cup
The brushroll and dust cup can be easily removed for cleaning. Rinse them under running water and ensure they are completely dry before reassembling. The anti-tangle design minimizes hair buildup, but occasional cleaning may still be necessary.

Image: Detaching and washing the brushroll and dust cup.
6. Troubleshooting
If you encounter any issues with your vacuum cleaner, please refer to the following common solutions:
| Problem | Possible Cause | Solution |
|---|---|---|
| Vacuum does not turn on | Battery is not charged or improperly installed. | Ensure the battery is fully charged and correctly inserted. Check if the charging dock is powered. |
| Low suction power | Dust cup is full, filters are clogged, or there is a blockage in the nozzle/hose. | Empty the dust cup. Clean or replace filters. Check for and remove any blockages. |
| Brushroll not spinning | Brushroll is jammed or obstructed by debris. | Turn off the vacuum and remove any hair or debris wrapped around the brushroll. |
| Vacuum stops unexpectedly | Overheating due to clogged filters or blockages, or battery is depleted. | Check for blockages and clean filters. Allow the vacuum to cool down. Recharge the battery. |
7. Specifications
Here are the key specifications for the Shark EVOPOWER SYSTEM BOOST+ LC751JLVNC:
- Model Number: LC751JLVNC
- Brand: Shark
- Dimensions (L x W x H): 28 cm x 26.2 cm x 106 cm
- Product Weight: Approximately 1.7 kg
- Battery Type: Lithium Ion (internal)
- Charging Time: Approximately 3.5 hours
- Run Time: Up to 60 minutes (in Eco mode on hard flooring)
- Color: Light Lavender

Image: Product comparison table highlighting key features across different Shark models.
8. Warranty and Support
Your Shark EVOPOWER SYSTEM BOOST+ LC751JLVNC comes with a manufacturer's warranty. Please refer to the warranty card included in your product packaging for specific terms and conditions. For technical support, spare parts, or warranty claims, please contact Shark customer service through their official website or the contact information provided in your warranty documentation.
For more information, visit the official Shark website: www.sharkninja.com


